I've just updated my recipe for Easter Confetti Cake with a brand new confetti cake recipe and a new American buttercream! Plus check out a few more tips in the blog post below on how to decorate this fun and festive cake for the Easter season!
Confetti Cake Ingredients
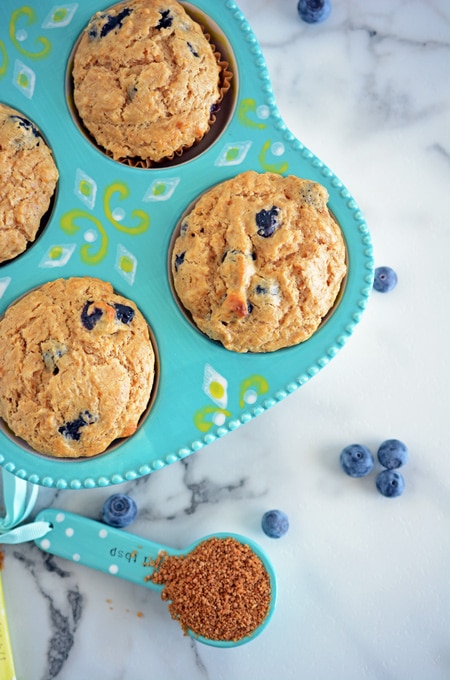
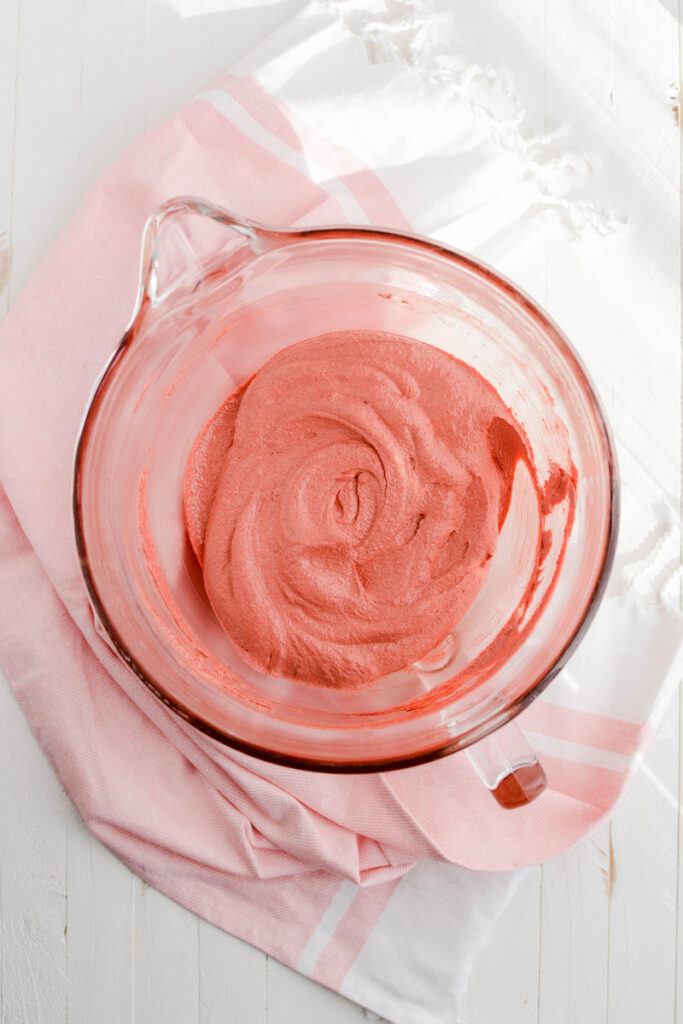
Carnival Sprinkles: I love to use multi-colored jimmies for my sprinkles. I process them in a food processor because this cake is so light that if I left them whole it would ruin the cakes tender crumb.
Whole Milk: the fat in whole milk tenderizes the cake crumb which weakens the gluten just enough for the cake to have structure.
Egg Whites: helps leaven the cake.
Vanilla Extract: flavor enhancer.
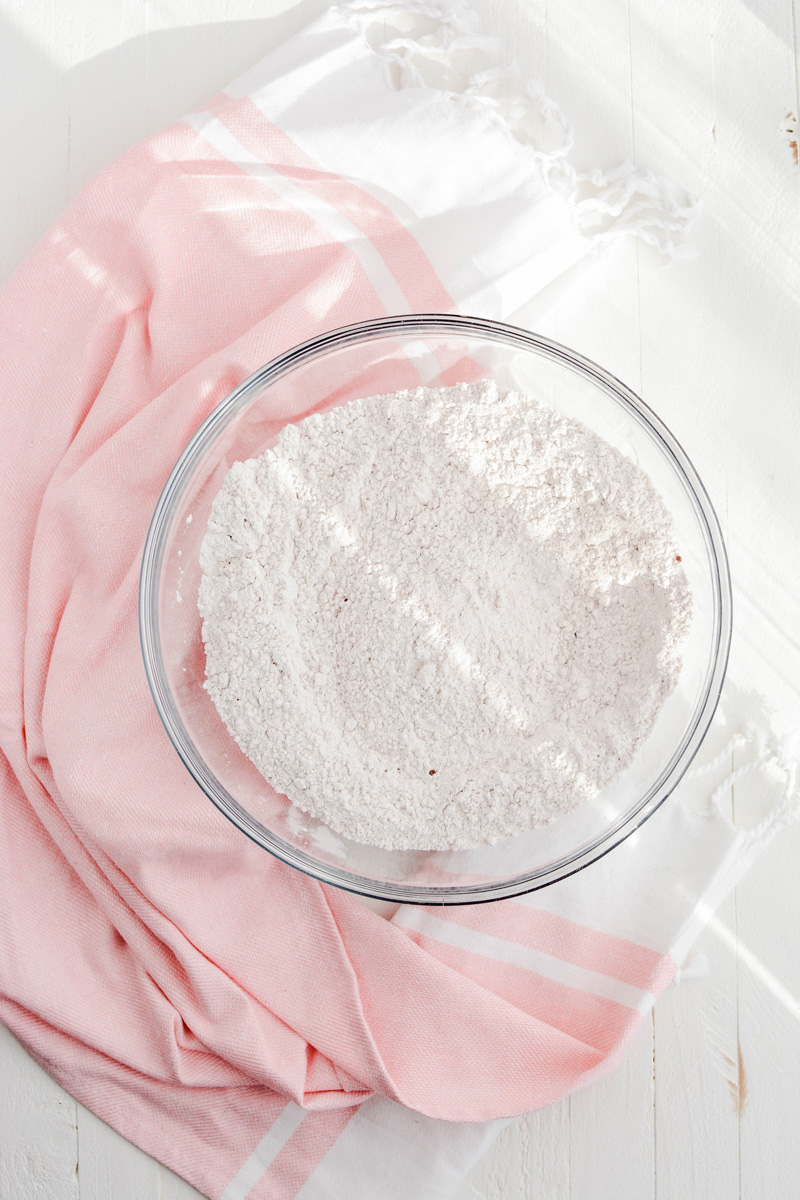
Cake Flour: lower in gluten and is bleached. The bleaching process helps cakes retain a pure white color which is ideal for white cakes and angel food cakes. It also produces a fine-crumbed cake.
Granulated Sugar: it's evenly ground and loose texture incorporates well in cake batter.
Baking Powder: is a mixture of baking soda, and cornstarch. Baking powder works when it first comes into contact with liquid, and again when it hits the heat of the oven. 📌 Baking powder loses its effectiveness after six months. 📌
Salt: enhances the flavor of the ingredients.
Unsalted Butter: helps with flavor and texture. This recipe uses the reverse creaming method where the butter coats the dry ingredients instead of creaming together with the sugar.
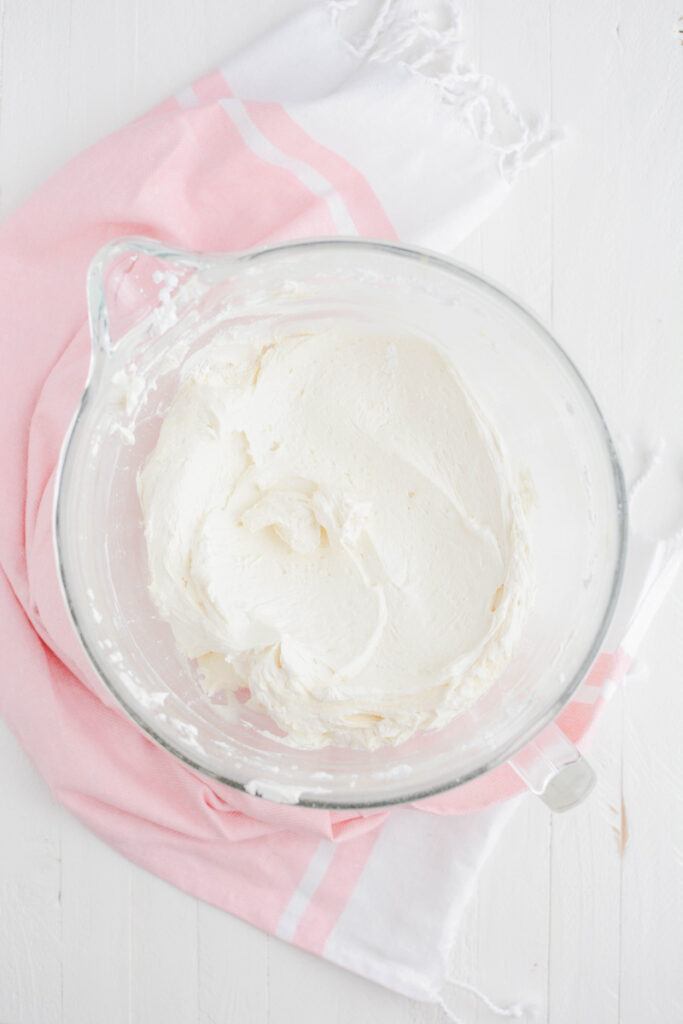
American Buttercream
- Also called Decorators buttercream, American buttercream is fluffy and sweet! I use a mix of butter and shortening in this frosting. It's easy to make and is very versatile. This buttercream is a crusting buttercream.
- If you live in a climate with high humidity, you can use all shortening or use all butter if you're located in a climate that isn't humid.
- You can add more water or milk to this frosting as needed or add more powdered sugar if you need a stiffer frosting.
- American buttercream also takes gel food coloring well.
- Feel free to have fun with this buttercream with different extract and flavored emulsions!
Crumb Coating
Crumb coating is a thin layer of frosting applied to the cake to catch crumbs and seal the cake. And just because this cake is covered with basket weave piping, doesn't mean you can skip crumb coating. Once your cake is crumb coated it needs to chill in the refrigerator for at least 15 minutes. Then you can apply another coat of frosting, giving you a solid base to pipe your basket weave on.

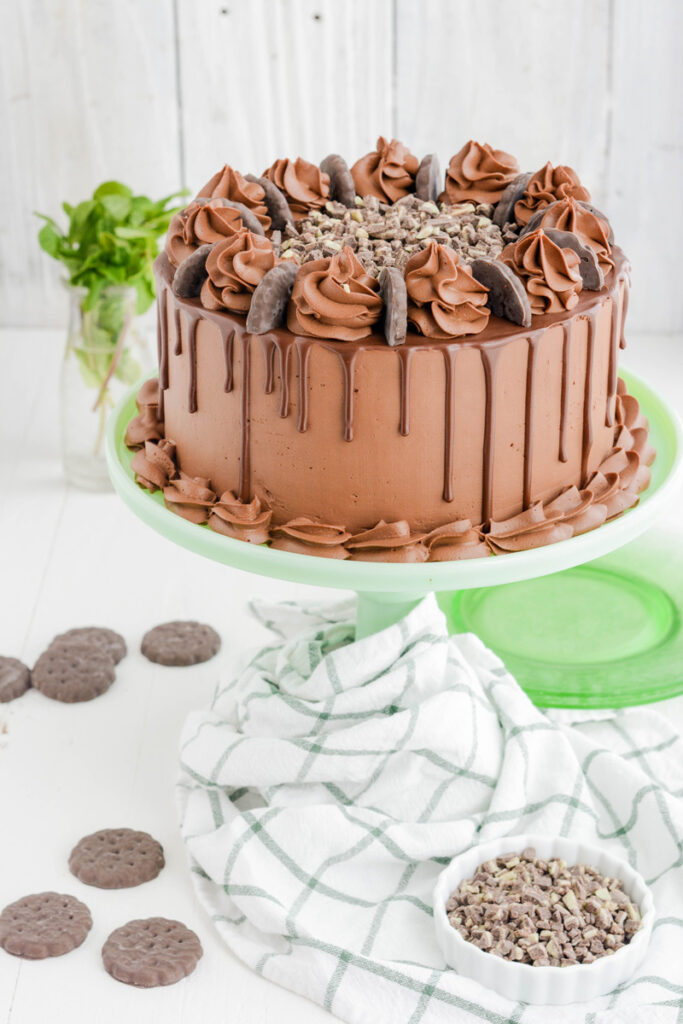
Cake Decorating
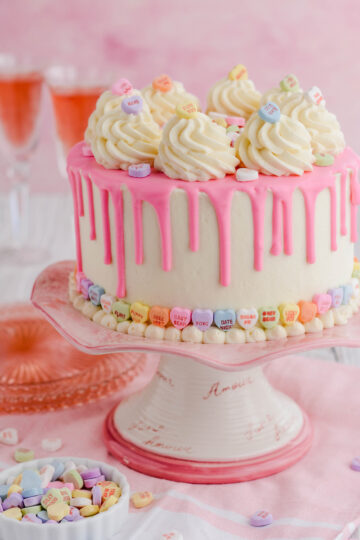
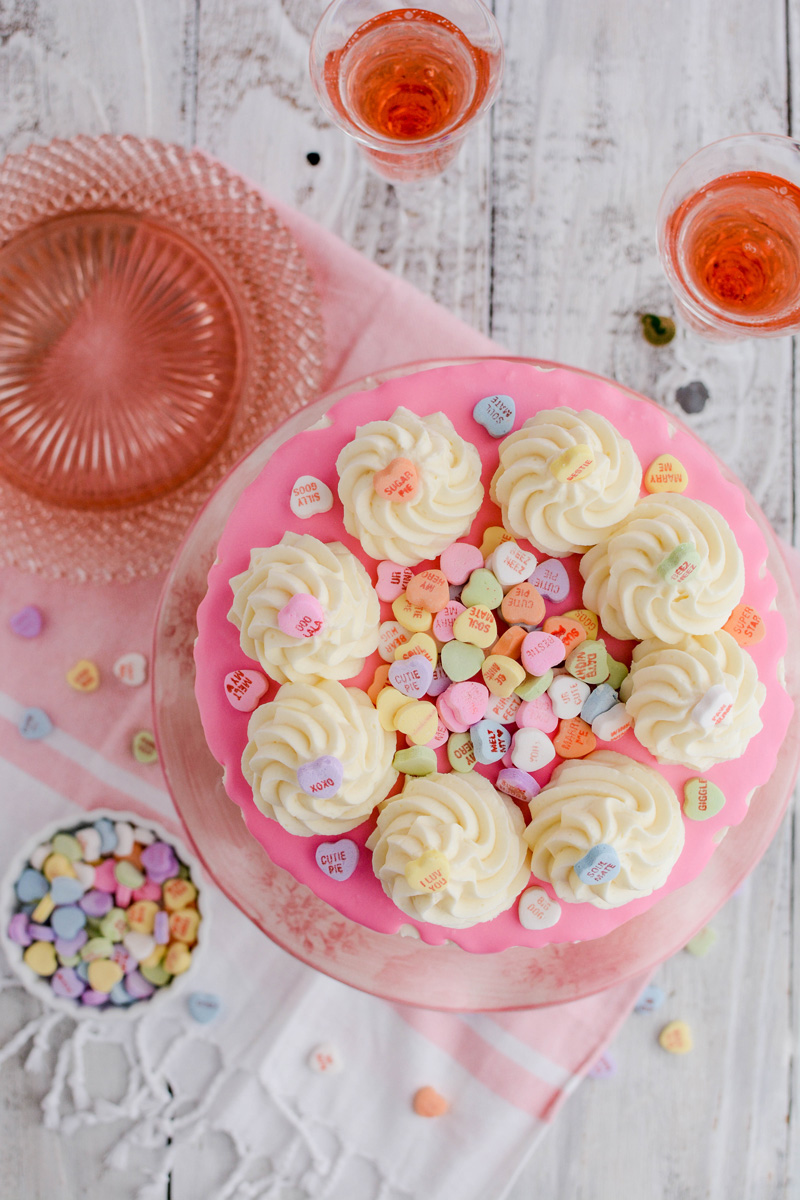
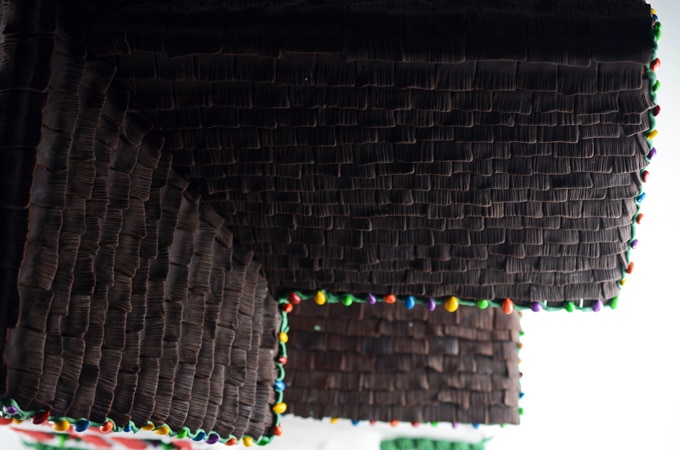
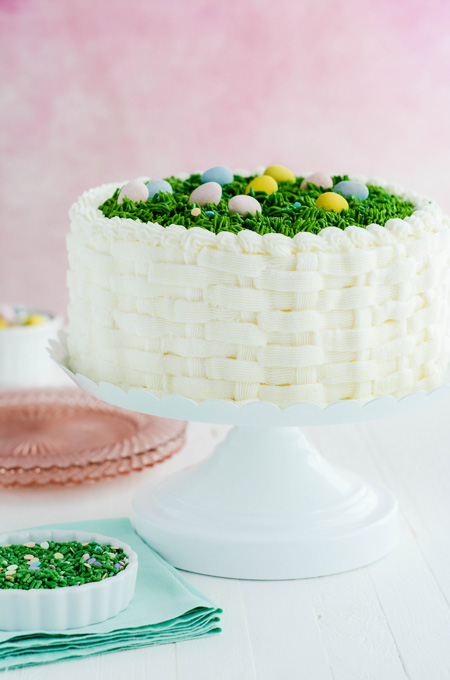
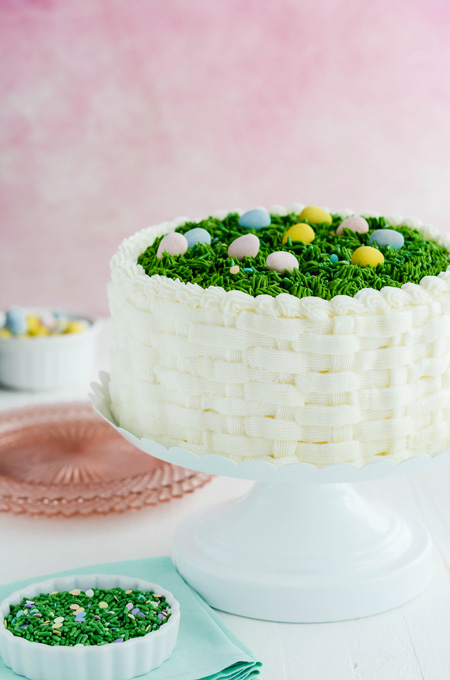
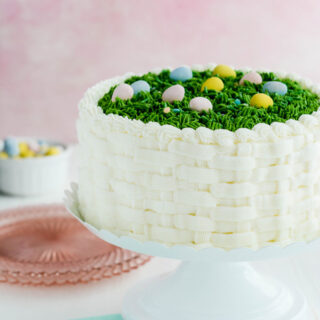
BASKETWEAVE
Spread buttercream on the top and sides of the cake with an offset cake spatula. Use a Wilton tip #48 for the basket weave effect. Position a piping bag fitted with piping tip #48 at a 90 degree angle to the top edge of the cake. Apply pressure as you pipe a vertical line down the side of the cake. Your piping tip should be just above the surface of the cake. Once you reach the bottom ease up and stop the pressure.
Reposition the piping bag at the top edge of the cake and begin piping cross strokes by starting about 1/2 inch before the downstroke of buttercream. Pipe over the downstroke of buttercream and extend the line another 1/2 inch. Pipe another downstroke over the end of the crossover strokes. Repeat this process around the entire side of the cake.
SHELL BORDER
Pipe a shell border on the top edge of the cake by fitting a piping bag with Wilton piping tip #18. Position your piping tip at a 45 degree angle touching the surface, apply a burst of pressure. Allowing a small amount of frosting to come out of the tip. Push the tip slightly forward and apply more pressure, building up the shell. Then, gently pull the tip toward you, and ease off the pressure. Stop pressure and pull toward you to exit the shell. Repeat this process all the way around the top edge of the cake. Repeat the shell border on the bottom edge as well.
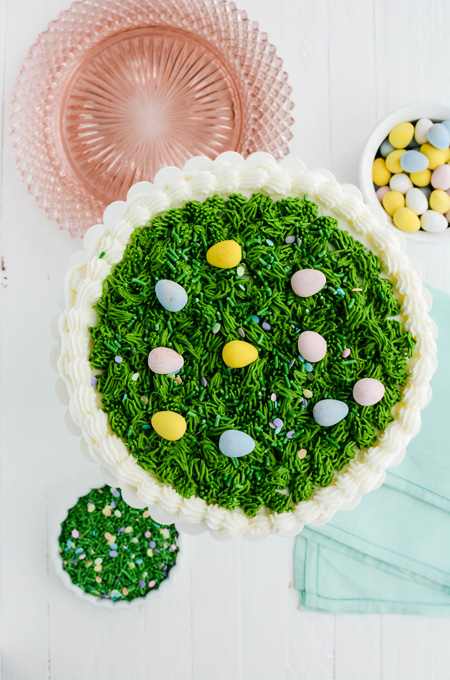
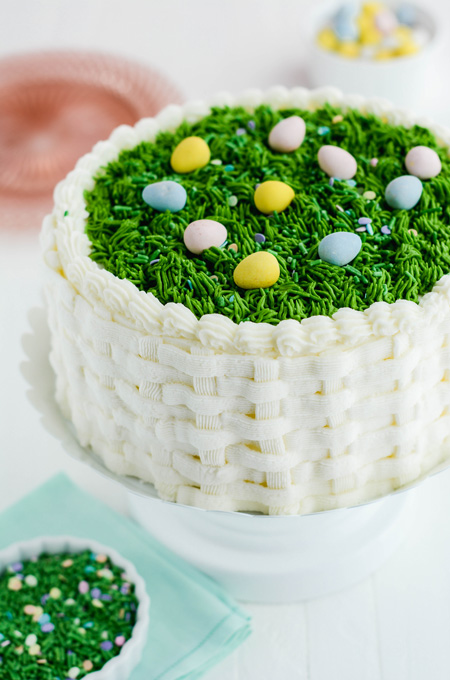
GRASS
To pipe grass, fit a piping bag with Wilton piping tip #233. Color a small amount of buttercream with green gel food coloring. Fill the piping bag with green buttercream and holding the piping bag straight up, slightly above the surface of the cake, apply pressure to form a base. Release the pressure and begin lifting the tip straight up and away from the cake. Repeat this process all over the top center of the cake.

Easter Confetti Cake Baking Schedule
- Day 1: Bake cake layers.
- Day 2: Prepare buttercream, decorate cake and serve.
Let's Connect
The Cake Chica is on Facebook sharing sneak peeks of recipes to come, Instagram for your food porn desires and Pinterest for your board pinning needs.
You May Also Like:
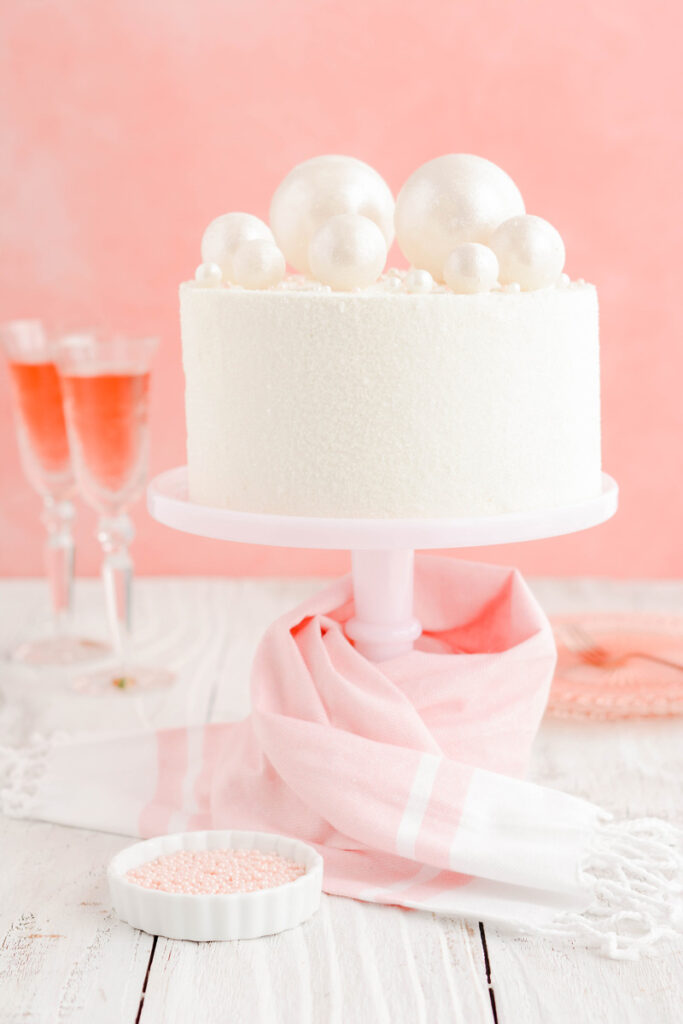
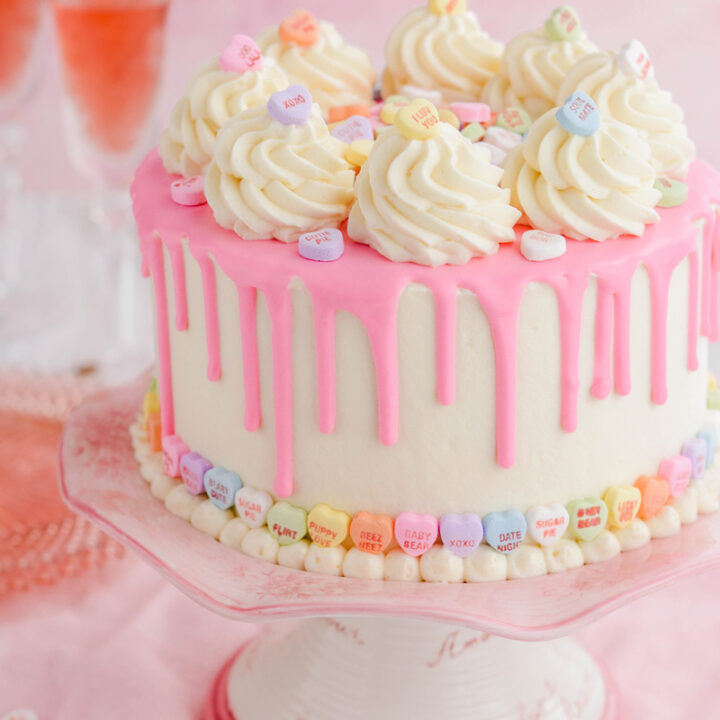
Confetti Cupcakes with Confetti Buttercream
Confetti Cake with Buttercream Frosting
Confetti Cookie Cake
Easter Confetti Cake
Homemade confetti layer cake filled and frosted with American buttercream, decorated with buttercream basket weave for a festive Easter dessert.
Ingredients
SPECIAL TOOLS
- 3 8-inch round cake pans
- Food processor
- Stand mixer
- 1 8-inch round cake board
- Cake turntable
- Piping bags
- Wilton piping tip #48
- Wilton piping tip #18
- Green gel food coloring
- Wilton Tip #233
CAKE
- Non-stick baking spray
- ½ cup rainbow sprinkles
- 1 cup whole milk, at room temperature
- 6 large egg whites, at room temperature
- 1 teaspoon vanilla extract
- 2 ¼ cups (9 ounces) cake flour
- 1 ¾ cups (12 ¼ ounces) granulated sugar
- 4 teaspoons baking powder
- 1 teaspoon salt
- 12 tablespoons unsalted butter, cut into 12 pieces, at room temperature
BUTTERCREAM
- 3 sticks unsalted butter, at room temperature
- 1 1/2 cups shortening
- 4 teaspoons butter vanilla emulsion or vanilla extract
- 6 tablespoons water or milk
- 1/2 teaspoon salt
- 12 cups (48 ounces) powdered sugar
Instructions
CAKE
- Adjust a rack to the center position in the oven and heat to 350 degrees. Spray 3 8-inch round cake pans with non-stick baking spray and set aside. In a food processor, process the rainbow sprinkles until coarsely ground, about 8 to 10 pulses. Set aside until needed.
- In a medium sized bowl, whisk together the milk, egg whites and vanilla.
- Attach the paddle attachment to a stand mixer. On low speed combine flour, sugar, baking powder and salt. Add butter one piece at a time. Continue to combine until the butter is the size of peas, about 1 minute. Reserve ½ cup of the milk mixture, and pour remaining into the dry ingredients. Increase speed to medium-high and beat until light and fluffy, about 1 minute. Reduce the mixer speed to medium-low and add the reserved milk mixture to the batter and beat until combined, about 30 seconds (the batter may look curdled at this point). Give the batter a final stir by hand and stir in ground rainbow sprinkles.
- Divide the batter evenly among the prepared cake pans and smooth the tops with an offset cake spatula or rubber spatula. Bake for about 20 to 25 minutes, or until a toothpick inserted in the center comes out with a few moist crumbs attached, rotating pans halfway through baking. Let cakes cool in their pans for 10 minutes on wire racks. Invert cakes onto the wire racks to cool completely, about 2 hours.
BUTTERCREAM
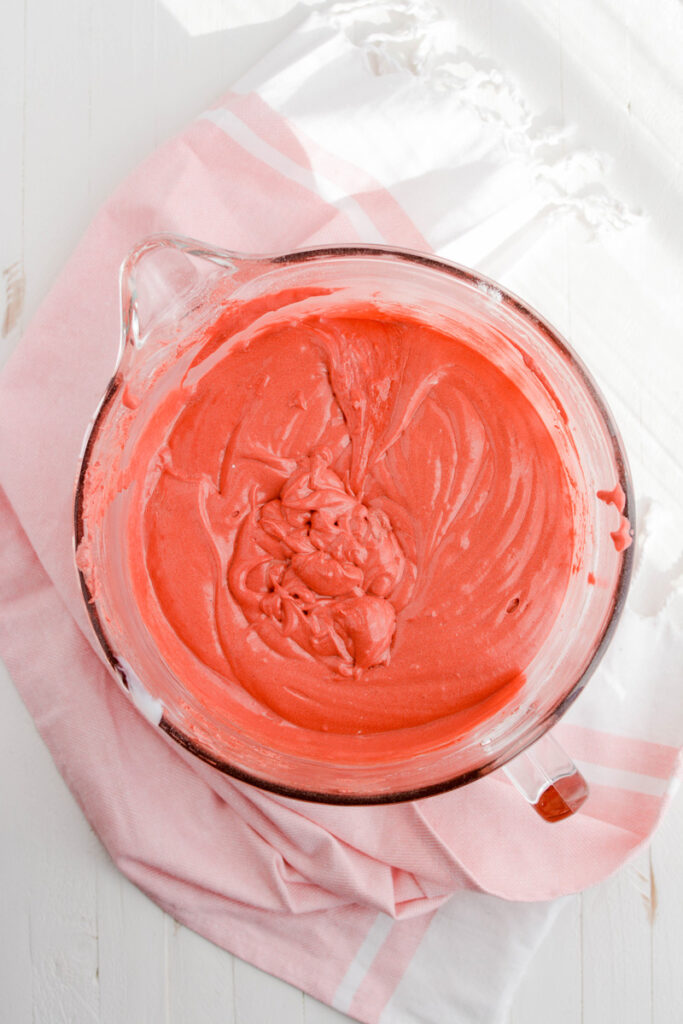
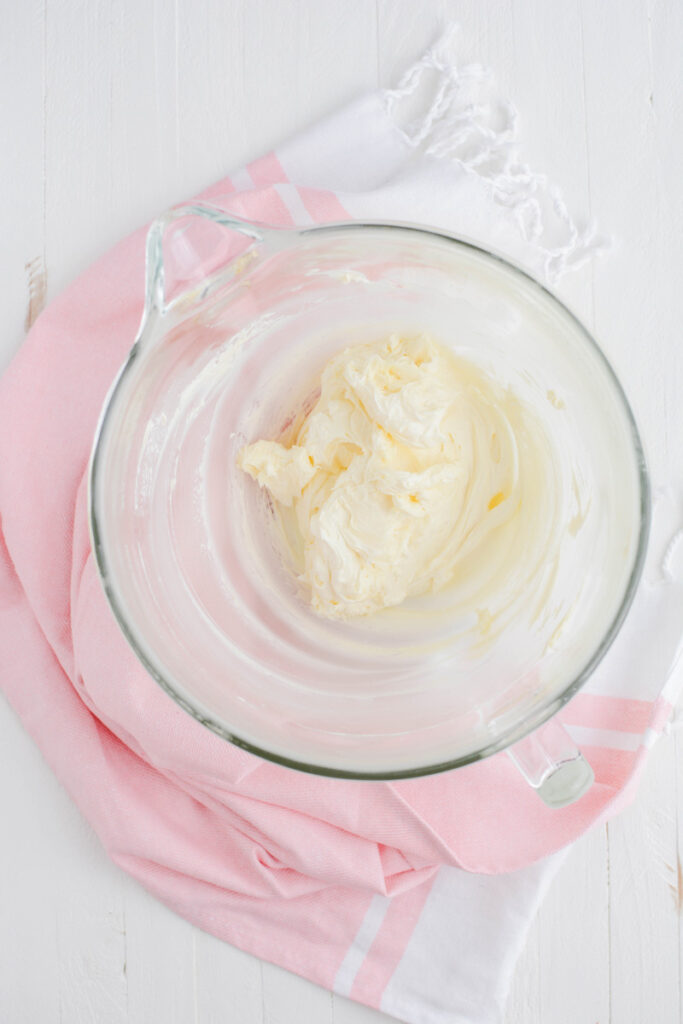
- In the bowl of an electric mixer, with the paddle attachment attached, cream together the butter, shortening and emulsion or extract until smooth.
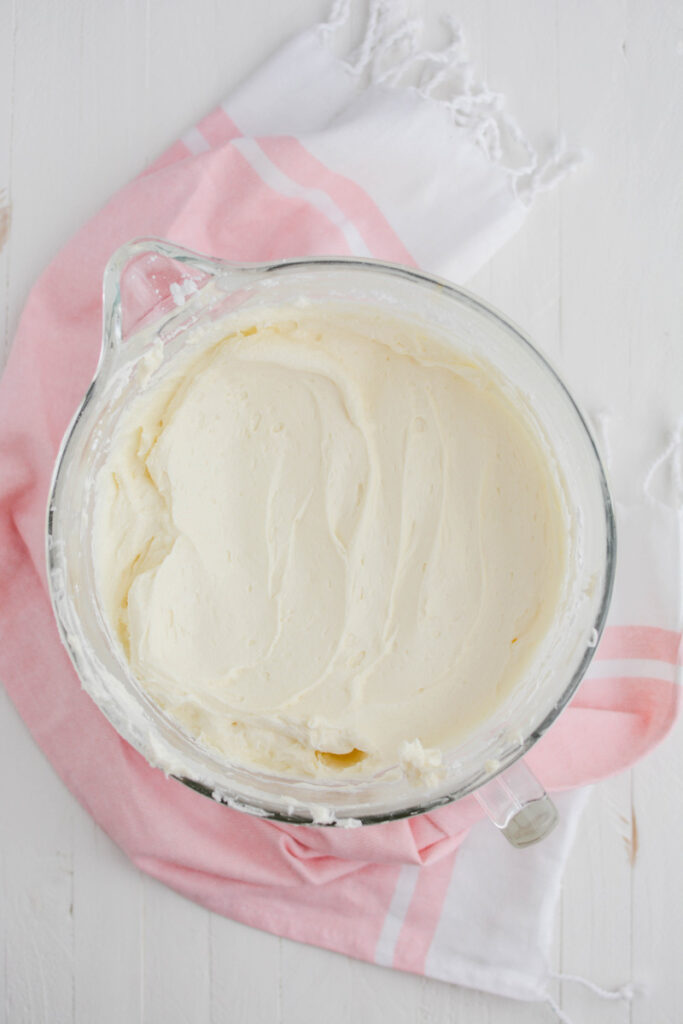
- Add 3 tablespoons of water or milk, salt, half of the powdered sugar and mix until combined.
- Scrape down the sides of the bowl and on low speed, gradually add the remaining powdered sugar. Add more water or milk if needed. Use buttercream right away or cover the a damp cloth to prevent the buttercream from crusting.
ASSEMBLE
- Place first cake layer cut side up on a cake turntable. Spread about 2/3 cup buttercream on top, spreading to the edge of the cake. Repeat this process with the second cake layer. Place the third cake layer on top, cut side down.
CRUMB COAT
- Top the cake with about 2 cups buttercream and spread a thin coating of buttercream over the top and sides of the cake. This will help keep any crumbs from getting in to your final layer of buttercream as well as seals the cake. Chill the cake in the refrigerator for 30 minutes.
BASKETWEAVE
- Spread buttercream on the top and sides of the cake with an offset cake spatula. Use a Wilton tip #48 for the basket weave effect. Position a piping bag fitted with piping tip #48 at a 90 degree angle to the top edge of the cake. Apply pressure as you pipe a vertical line down the side of the cake. Your piping tip should be just above the surface of the cake. Once you reach the bottom ease up and stop the pressure.
- Reposition the piping bag at the top edge of the cake and begin piping cross strokes by starting about 1/2 inch before the downstroke of buttercream. Pipe over the downstroke of buttercream and extend the line another 1/2 inch. Pipe another downstroke over the end of the crossover strokes. Repeat this process around the entire side of the cake.
SHELL BORDER
- Pipe a shell boarder on the top edge of the cake by fitting a piping bag with Wilton piping tip #18. Position your piping tip at a 45 degree angle touching the surface, apply a burst of pressure. Allowing a small amount of frosting to come out of the tip. Push the tip slightly forward and apply more pressure, building up the shell. Then, gently pull the tip toward you, and ease off the pressure. Stop pressure and pull toward you to exit the shell. Repeat this process all the way around the top edge of the cake. Repeat the shell border on the bottom edge as well.
GRASS
- To pipe grass, fit a piping bag with Wilton piping tip #233. Color a small amount or buttercream with green gel food coloring. Fill the piping bag with green buttercream and holding the piping bag straight up, slightly above the surface of the cake, apply pressure to form a base. Release the pressure and being lifting the tip straight up and away from the cake. Repeat this process all over the top center of the cake.
- For the finishing touch, sprinkle cake with festive sprinkles and place a few candy Easter eggs on top and serve.
Notes
This cake can be stored at room temperature for 3 days.
Nutrition Information:
Yield: 12 Serving Size: 1Amount Per Serving: Calories: 833Total Fat: 70gSaturated Fat: 34gTrans Fat: 0gUnsaturated Fat: 32gCholesterol: 134mgSodium: 564mgCarbohydrates: 46gFiber: 1gSugar: 23gProtein: 7g
*Nutrition information is an estimate and will vary.*