• Skip to primary navigation
  • Skip to main content
  • Skip to primary sidebar
  • About
  • Recipe
    • Listicle
    • Kitchen Staples
    • Drinks
      • Cocktails
      • Non-Alcoholic
      • Smoothies
    • Breakfast
      • Eggs
      • Muffins and Baking
      • Pancakes and Waffles
    • Sweet
      • Brownies and Bars
      • Cakes and Frostings
        • Beginner Cake Recipes
        • Intermediate Cake Recipes
        • Advanced Cake Recipes
      • Cheesecake
      • Cobblers & Fruit Desserts
      • Cookies and Candies
      • Custards & Trifles
      • Pies & Tarts
    • Savory
      • Appetizers
      • Easy Weeknight Meals
      • Beef and Pork
      • Chicken and Turkey
      • Fish and Shellfish
      • Grains and Beans
      • Pasta and Rice
      • Potatoes
      • Quinoa
      • Soups & Stews
      • Vegetables
    • On The Lighter Side
  • Resources
  • Contact
  • Work With Me
  • Privacy Policy

The Cake Chica

menu icon
go to homepage
  • Recipe Index
  • About
  • Work With Me
  • Contact

subscribe
search icon
Homepage link
  • Recipe Index
  • About
  • Work With Me
  • Contact

×
Home

Banana Brickle Cream Pie

January 2, 2011

Banana Brickle Cream Pie

Disclosure: As an Amazon Associate and member of other affiliate programs. I earn from qualifying purchases

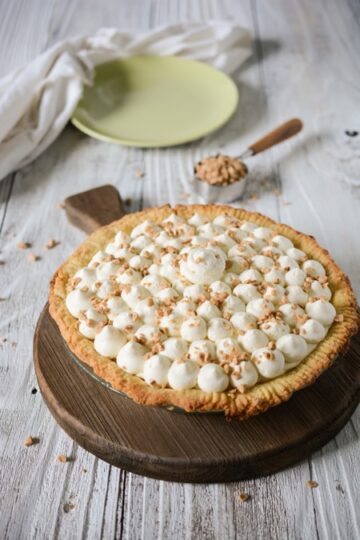
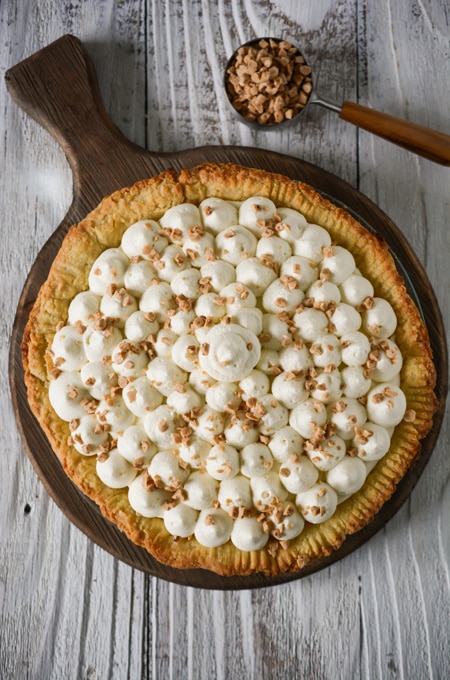
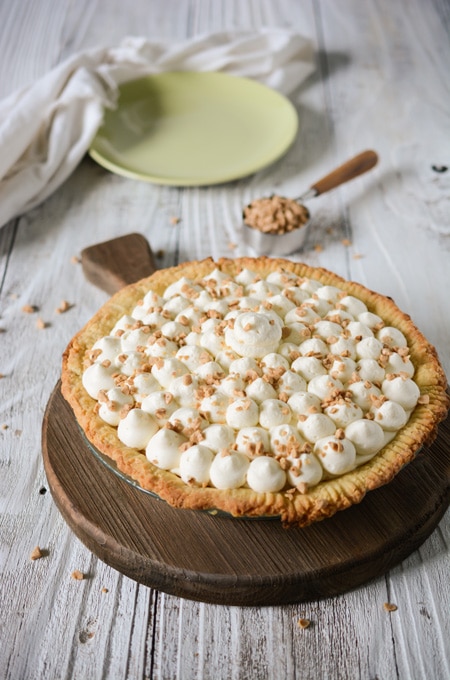
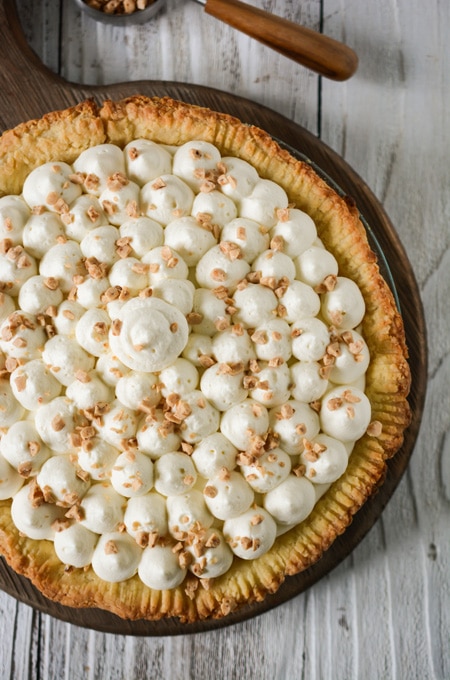
This Banana Brickle Cream Pie is a fun take on the traditional version. It's a layer of banana slices, topped with banana custard and homemade whipped cream. And for something a little different, it's then sprinkled with toffee bits!
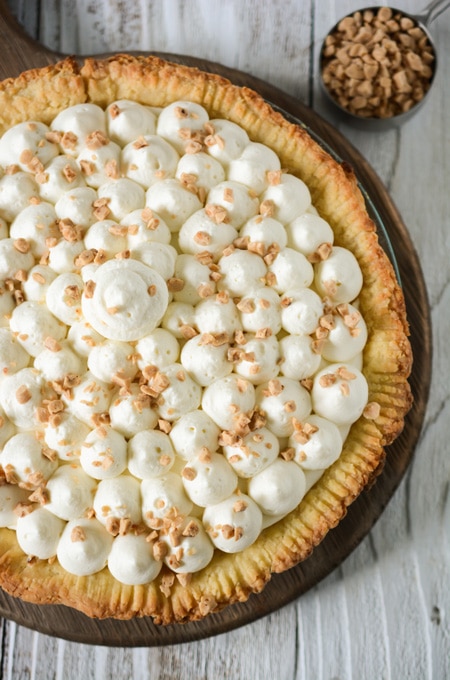
Banana Brickle Cream Pie

Diner Desserts by Tish Boyle is full of amazing cream pies like this one. And this is my slight adaptation of her version.
Banana Brickle Cream Pie

Banana Brickle Cream Pie Tips:

  1. Feel free to use your own homemade pie dough recipe or a store bought pie dough and bake fully according to package directions. 
  2. In this recipe we "temper" the egg yolks. Adding a little bit of the hot milk mixture to the eggs helps bring the eggs to temperature without cooking them.
  3. I like to add a little light corn syrup in my homemade whipped cream. It helps to stabilize the cream so it doesn't melt as quickly. Helpful but not necessary, feel free to leave it out if you'd like.
Banana Brickle Cream Pie

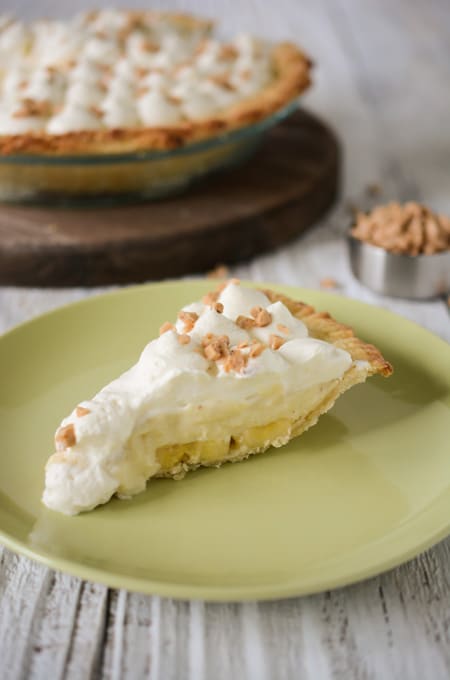
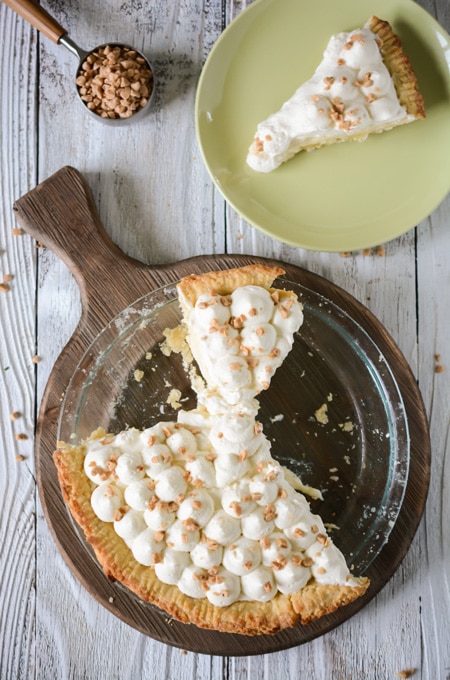
A perfectly crisp and flaky pie crust carries all those layers of flavor! Fresh banana slices, banana custard, whipped cream and toffee bits. 
Banana Brickle Cream Pie

Follow The Cake Chica on Facebook, Instagram, and Pinterest to know when a new recipe comes out!

Did you make this recipe? I'd love to see it! Tag @thecakechica1 #thecakechica1 on Instagram!
Banana Brickle Cream Pie

Banana Brickle Cream Pie

Yield: 8 slices
Prep Time: 30 minutes
Cook Time: 40 minutes
Additional Time: 3 hours 45 minutes
Total Time: 4 hours 55 minutes

Homemade banana cream pie with a crisp and flaky crust, topped with a layer of sliced bananas, topped with a banana filling and homemade whipped cream and garnished with toffee bits.

No Ratings

Ingredients

SPECIAL TOOLS

  • Food processor
  • 9-inch glass pie plate
  • Hand mixer

PIE DOUGH

  • 1 1/4 cups all-purpose flour, plus more for rolling, about 1/4 cup
  • 1 tablespoon granulated sugar
  • 1/2 teaspoon table salt
  • 6 tablespoons unsalted butter, cut into 1/4-inch pieces and chilled
  • 4 tablespoons vegetable shortening, cut into 2 pieces and chilled
  • 2 tablespoons vodka, chilled
  • 2 tablespoons ice water

PIE FILLING

  • 4 large egg yolks
  • ½ cup granulated sugar
  • 3 tablespoons cornstarch
  • ¼ teaspoon table salt
  • 2 ½ cups whole milk
  • 2 tablespoons unsalted butter, cut into tablespoons
  • 1 teaspoons vanilla extract
  • Pinch cardamom (optional)
  • 3 ripe, medium-sized bananas
  • 1 teaspoon fresh lemon juice

WHIPPED CREAM

  • 2 cups heavy cream
  • 3 tablespoons powdered sugar
  • 1 tablespoon light corn syrup
  • ½ teaspoon vanilla extract

GARNISH

  • 3 tablespoons toffee bits (garnish)

Instructions

PIE DOUGH

  1. Process 3/4 cup of the flour, sugar, and salt together in a food processor until combined, about 5 seconds. Sprinkle the butter and shortening on top and continue to process until combined and mixture begins to form uneven clumps, and no flour bits remain, about 10 seconds.
  2. Scrape down the bowl and evenly distribute the dough around the bowl. Sprinkle the remaining 1/2 cup flour over the dough and pulse until the mixture has broken up into pieces and is evenly distributed around the bowl, about 4 to 6 pulses.
  3. Transfer the mixture to a medium-sized bowl. Sprinkle vodka and ice water over the mixture. Press and stir the dough together using a rubber spatula until the dough sticks together.
  4. Turn the dough onto a piece of plastic wrap and flatten out into a 4-inch disk. Wrap the disk tightly in plastic wrap and refrigerate for 1 hour. Before rolling out the dough, let the dough sit out on the counter for about 10 minutes. (The dough can be stored in the refrigerator for up to 2 days or frozen for up to 1 month. If frozen, be sure to let the dough though completely on the counter before using.)
  5. Adjust your oven rack to the middle position and preheat your oven to 425 degrees. Roll the dough into a 12-inch circle on a floured counter. After rolling the dough out, loosely roll it around your rolling pin and gently unroll it onto your 9 inch pie plate. Gently ease the dough into the lower creases of the pan and press lightly to adhere it to the sides and bottom of the pan. Leave the excess dough hanging over the sides of the pan in place. Wrap the dough-lined pie plate loosely in plastic wrap and refrigerate until the dough it firm, about 30 minutes.
  6. Trim the overhang to about 1/2 –inch beyond the edge of the pie plate and tuck the overhang under itself. Crimp the dough around the edge using your fingers. Wrap the dough lined pie plate loosely in plastic wrap and refrigerate for about 15 minutes before using.
  7. Line the chilled pie shell with a double layer of aluminum foil, covering the edges to prevent burning and fill with pie weights or dry beans.
  8. Bake your pie shell until the pie dough looks dry and is pale in color about 15 minutes. Remove the pie weights and foil and continue to bake until the shell is golden brown, about 4 to 7 minutes. Transfer the pie crust to a wire rack and cool completely.

PIE FILLING

  1. In a medium bowl, whisk together the egg yolks, sugar, cornstarch and salt until combined and set aside. Pour milk into a medium-sized saucepan and bring to a gentle boil over medium-low heat, about 10 minutes. Remove the milk from the heat and whisk in about ½ cup of milk into the egg yolk mixture, tempering the egg yolks. Then return the egg yolk mixture back to the saucepan. Bring mixture to a gentle boil over medium-high heat and cook for 1 minute whisking constantly.  Remove from the heat and whisk in butter until melted. Add in the vanilla and cardamom if using, and whisk to combine. Strain the custard through a sieve over a medium-sized bowl.
  2. Fill a large bowl half way full with ice. Add enough cold water to cover the ice cubes and place the bowl of custard in the ice bath and allow to cool. Stir occasionally for a few minutes.
  3. Peel the bananas and slice into ¼-inch slices and place in a medium bowl. Add lemon juice over bananas and gently toss to coat. Place sliced bananas in an even layer on the bottom of the baked pie crust. Add the cooled pie filling over top and gently spread out to an even layer with a rubber spatula. Place a piece of plastic wrap on top of the filling and refrigerate the pie for at least 2 hours before adding the whipped cream and serving.

WHIPPED CREAM

  1. In a large bowl, with an electric mixer with the whisk attachment attached, whisk whipped cream on medium-low speed and gradually increase the speed to medium-high. Add the sugar, corn syrup and vanilla extract and continue to beat until soft peaks form. Add whipped cream on top of the pie filling free hand or with a piping bag and piping tip.


Notes

This pie is best eaten the day it is prepared.

Nutrition Information:
Yield: 8 Serving Size: 1
Amount Per Serving: Calories: 755Total Fat: 50gSaturated Fat: 28gTrans Fat: 1gUnsaturated Fat: 19gCholesterol: 231mgSodium: 353mgCarbohydrates: 66gFiber: 2gSugar: 38gProtein: 11g

*Nutrition information is an estimate and will vary.*

Did you make this recipe?

Tag @thecakechica1 on Instagram and hashtag #thecakechica1

© Mary | The Cake Chica
Cuisine: American / Category: Pies and Tarts

You May Also Like:

Banana Caramel Pudding
Banana Caramel Pudding

Homemade Vanilla Wafers
Homemade Vanilla Wafers

Chocolate Cream Pie
Chocolate Cream Pie
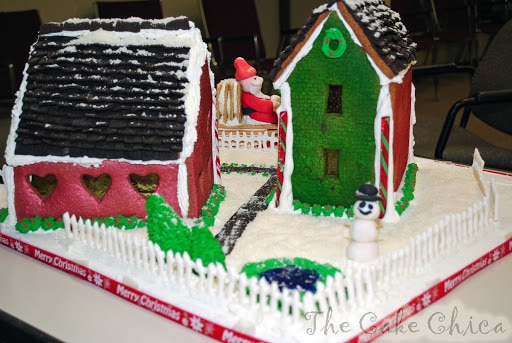
My First Gingerbread House(s)

December 10, 2010

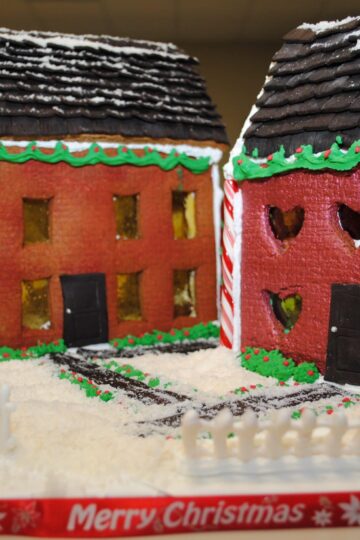
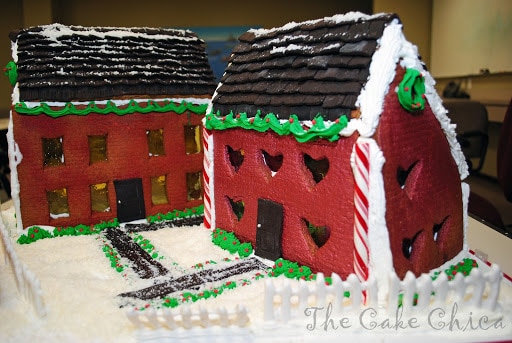
Gingerbread House

WOW! What can I say? I love how it turned out.

Our office had a Gingerbread Contest this year for the first time. I had never done one before, but was up for the challenge. I had it all planned out and had a sketch and measurements and everything. I thought I was set. Well come time to but this 18 inch long 1 foot tall gingerbread house up (which I have no experience in) things started falling apart. I had spent so much time on it once I realized this thing isn't going up. I said forget it. I told my husband I am done with this and said I'd try it again next year. That was this passed weekend. And he gave me a look and said are you sure? (He knows me all to well) I said yeah I think so. Well come Monday I had a change of heart. My creative thinking just wouldn't allow me to give up so quickly. So at last minute, just 3 days before the contest I got my creative juices flowing and this is what I came up with. I am really really happy with it. And I am so glad it's over and done with. However, I won't know who wins until tomorrow morning, but I am hoping I am the winner. I had planned a lot more details on this but time caught up with me and I could only do so much. Hands on time it took me about 15 hours. Time including drying times, 72 hours.

I found the templates online but unfortunately the site is down right now. I printed the templates out Monday and by Tuesday they just seemed to disappear.

The recipe I used for the gingerbread can be found here http://www.foodnetwork.com/recipes/gingerbread-house-recipe/index.html at Food Network. It's really a delicious recipe. This was not my plan to make homemade gingerbread. I wanted to make the box kind but I was not able to find any when I need it. And now after I don't need the box anymore I see them out in the stores now. But I am glad I did make the homemade gingerbread. This recipe is delicious.

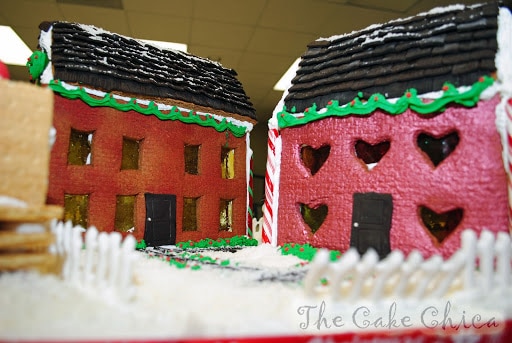
This only problem I came across was the house with the heart windows. I put the outside walls on the sides, outside of the back wall which made the house wider then the roof. So I stuck a candy cane in the inside and filled the gap with royal icing. Looks like it worked cause it didn't fall down. I also came across another problem with the template on that same house. The 2 sides of the house were printed exactly the same so I had to re bake one side of the house and flip it around. No biggie I baked it up real quick and got back on schedule. (Always good to have extra dough for times like this one.)

I ran a brick impression mat over the cookie dough before I baked it. It's now all that noticable but the spray color helped bring the texture out a little. The red spray is Wilton, which I picked up at Hobby Lobby, the red shimmery house is Luster Red by PME you can get that here. http://www.globalsugarart.com/product.php?id=20830&name=Red%20Lustre%20Spray%20by%20PME

Once the cookies were baked and cooled, on went the spray paint. Once that was dry I melted some butterscotch hard candies and jolly rancher candies in the oven on parchment paper to do the windows. Once those were dried I broke them and with the royal icing glued them on the back and let those dry.

Once the windows were done, I put the walls together with the royal icing the recipe is here http://allrecipes.com//Recipe/royal-icing-ii/Detail.aspx

Once the walls were up I decorated the yard with green royal icing bushes around the houses and some green garland. The doors and roofs were done with chocolate Satin Ice which can be found here http://www.globalsugarart.com/product.php?id=19931&name=Satin%20Ice%20Dark%20Chocolate%20Rolled%20Fondant%20Icing%20-5%20pounds
I love the roof tops on this. It took the most time but was worth it. I think it really makes the house(s). I also did the walkways in the chocolate Satin Ice, which tastes like Tootsie Rolls! I ate quite a bit making this lol.

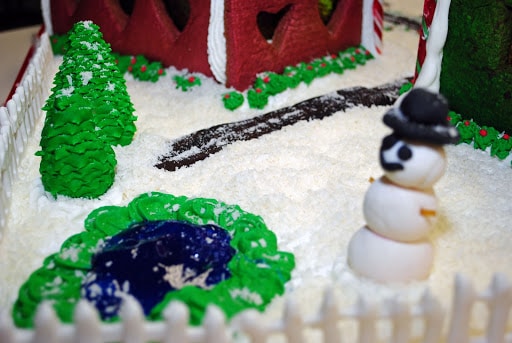
The snow I made with a mixture of coconut and a little sparkle from Wilton. I had my husband process it in the food processor to make it a little more fine. I was running out of time so I put him to work.

For the fence I used a CK mold and Satin Ice Gumpaste which you can find here http://www.globalsugarart.com/product.php?id=20110&name=Gumpaste%20%205%20pounds%20by%20Satin%20Fine%20Foods Most of them stood up fine with no help, some others I used some balled up wax paper to hold them up straight overnight to dry.

The pond was made with Wilton Piping Gel with Electric Blue color. Both you can find at Hobby Lobby.

My snow man I just came up with. I stick some pasta in for arms. (By the way everything on here is 100% edible.)

The trees I saw a You Tube tutorial which you can find here http://www.youtube.com/watch?v=lDvpQn3fUcg
I didn't have any Tylose powder so I just used fondant. They kind of droopy but that's why I needed the Tylose but it's ok. I was in a time crunch so I did the best I could with what I had.

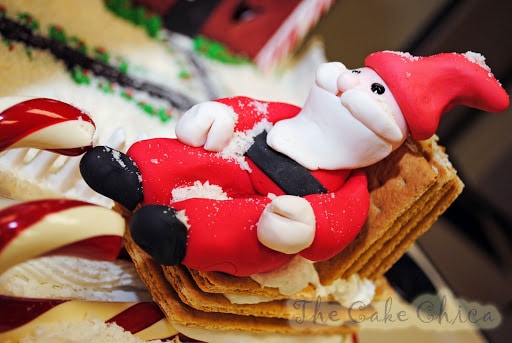
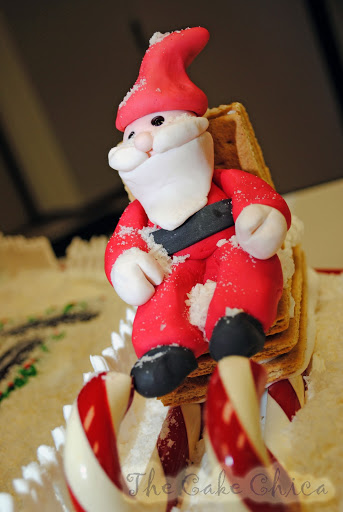
I love my santa clause. It's also my first time doing any sort of figure modeling. I learned how to do this very easily by watching this You Tube video http://www.youtube.com/watch?v=9upG-QF7G_c
I am very happy with it. Lots of "first time" things I did on here.

I had so much fun doing this. I can't wait to see what I can come up with next year. If you have any questions feel free to ask.

And I hope I am the winner tomorrow!!!!!

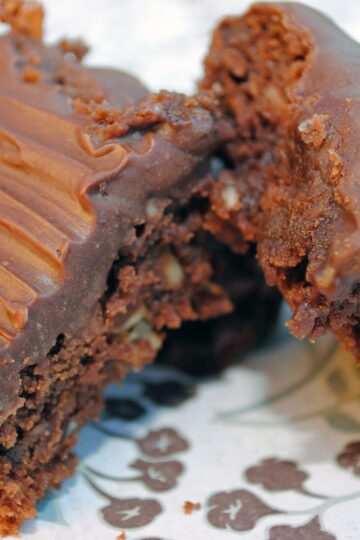
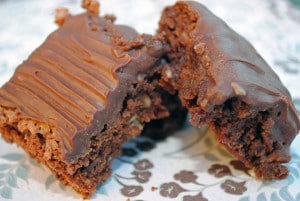
Chocolate Hazelnut Brownies with Milk Chocolate Hazelnut Frosting

November 19, 2010

Here is a new recipe I tried this week. Very delicious. Everything I have made from a Tish Boyle recipe has been great!!! Happy Baking!!!

Chocolate Hazelnut Brownies with Milk Chocolate Hazelnut Frosting

Chocolate Hazelnut Brownies with Milk Chocolate Hazelnut Frosting

Yield: 9
No Ratings

Ingredients

CHOCOLATE HAZELNUT BROWNIES

  • 3 ounces bittersweet chocolate, coarsely chopped
  • 1/2 cup unsalted butter
  • 2 large eggs
  • 3/4 cup plus 2 tablespoons granulated sugar
  • 2 tbsp Italian hazelnut liqueur, such as Frangelico
  • 1/2 cup all-purpose flour
  • 1 cup skinless hazelnuts, toasted and coarsely chopped

MILK CHOCOLATE HAZELNUT FROSTING

  • 5 ounces Lindt milk chocolate, finely chopped
  • 1 tbsp unsweetened alkalized cocoa powder
  • 1/3 cup heavy cream
  • 1 tbsp Italian hazelnut liqueur, such as Frangelico

Instructions

1. MAKE THE BROWNIES

  1. Preheat the oven to 350 F. Butter the bottom and sides of an 8 inch
  2. square baking pan. Line the bottom of the pan with parchment or waxed paper
  3. and coat the paper with butter.
  4. Place the chocolate and the butter in the top of a double broiler over
  5. hot, not simmering water. Stir the mixture until it's completely melted and
  6. smooth. Remove the top part of the double broiler from the bottom and allow
  7. the mixture to cool.
  8. In a medium bowl, whisk together the eggs and sugar. Whisk in the cooled
  9. chocolate and the hazelnut liqueur. With a rubber spatula, stir in the flour
  10. until just blended. Stir in the hazelnuts. Scrape the batter into the
  11. prepared pan. Smooth over the top with a rubber spatula. Bake the brownies
  12. for 25-30 minutes, or until a toothpick inserted in the center comes out
  13. with a few moist crumbs clinging to it. Cool the brownies on a wire rack for
  14. minutes. Run a paring knife around the edges of the pan and carefully
  15. invert the brownies onto a flat surface. Peel off the paper, and then
  16. reinvert the brownies onto a cooling rack. Cool completely.

5. MAKE THE FROSTING

  1. Place the chocolate in a medium bowl. Sift the cocoa powder over the
  2. chocolate. In a small saucepan or in the microwave, bring the cream to a
  3. boil. Pour the hot cream over the chocolate and gently whisk until smooth.
  4. Stir in the hazelnuts liqueur and allow the mixture to cool to a spreadable
  5. consistency, about 2 hours.
  6. Using a metal spatula, spread the frosting over the top of the brownies.
  7. Using a long serrated knife, trim approximately 1/4 to 1/2 inch off each
  8. side. Cut the brownies into 9 squares. Store in an airtight container.

Did you make this recipe?

Tag @thecakechica1 on Instagram and hashtag #thecakechica1

© Mary
Category: Dessert

Cassie

November 16, 2010

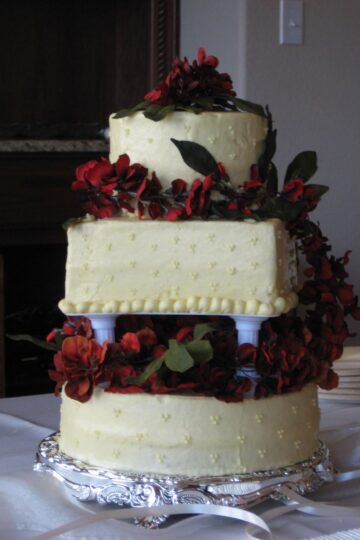
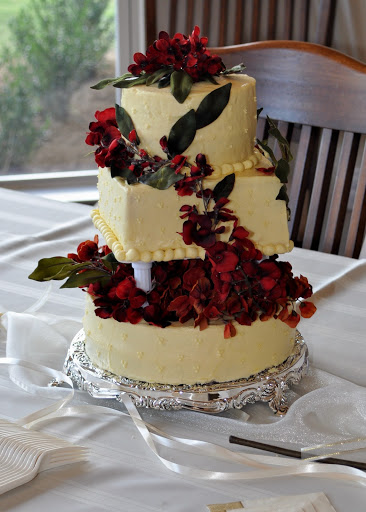
Wedding Cake

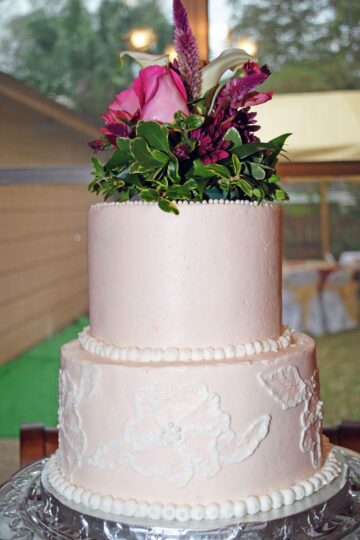
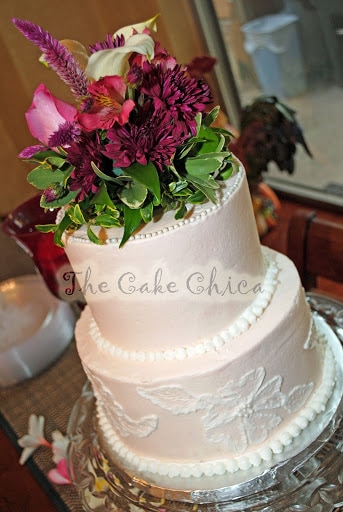
Ok, last minute cakes are getting to be my specialty. Here is another last minute cake. I think I found out 4 days before it was due. So after work for the next 3 days I worked on this cake. It was for my Father-in-Laws wedding. I went off of what the bride told me over the phone. No pictures and my best guess of simple and classy. Here is what I came up with. The colors of the wedding were dark red and cream. The plan was to make the cake a cream color and do the piping in white. So I looked at my gel colors and saw a Wilton one that was Copper, and noticed it had "(light skin color)" next to the color, perfect for a cream color, or so I thought. Yeah it came out a very light pink lol. Oh no. I diluted it as much as possible hoping the bride wouldn't notice or care. When I got the cake topper I thought PERFECT! It really goes well with the cake color. And then when I saw the bride the cake matched her dress!!! PERFECT!!! What a happy mistake.

Now, I had some problems with the bottom tier of buttercream. I kept messing it up so that's why its not as clean and straight as the top. I tried to do an even ribbon of buttercream for the base and well it looked horrible. I decided to do the round dots. And you know what those looked like?........ the brides pearl necklace!

Congratulations to Cassie and James!!!

Lacey

October 29, 2010

Wedding Cake

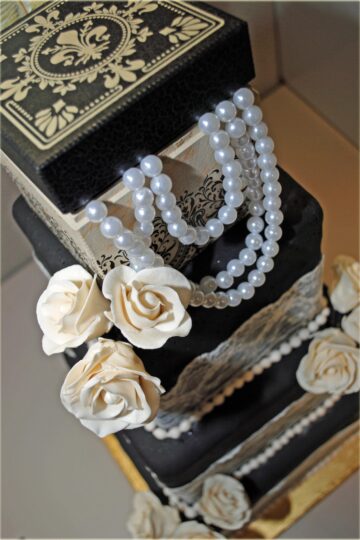
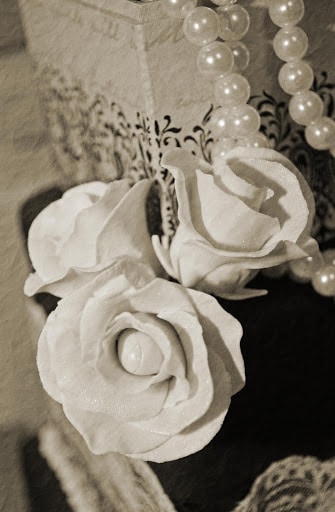
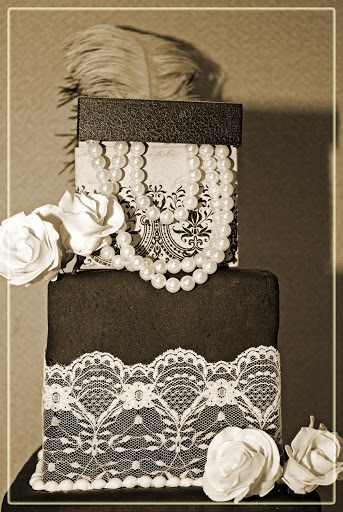
I named this cake Lacey for obvious reasons. I did this cake more as a practice cake. At work we had a Halloween Costume Contest, and thought it would be cute to go basically as myself when I am not at work. So I went as The Cake Chica. I didn't win but I am very happy with this practice cake. This was not as easy as the last few I have done in the passed months.

I usually try to use the SPS system for transporting a cake. If you have ever used the SPS you know the cakes have to reach a certain height, because the columns are already measured out. Well mine didn't bake up as I wanted, but that's ok I bought a saw to saw off what I needed. Well I was about to stack the cakes and notice the SPS plates were bigger then my cake!?!?!?! I still don't know what and how it happened, but my cakes shrunk 1/2 from the sides and couldn't use the SPS System at all. I ended up just using the bubble tea straws and the worked just fine. The fondant was also a hassle. I'm not used to rolling out big pieces of fondant, so I had to roll it out a few times, and then it starts drying out and then cracking at the corners. Ugh!!! I had a big hole on the "back" (I made it the back due to the huge hole) that I had to cut a peice of fondant just to make it less obvious.

Once I finally put it all together I was very happy with it. The scary part: Transporation. IT MADE IT!!! I put the gumpaste roses on at work (my first time making these by the way!) and did the finishing touches on it. Every one loved it. Most people thought it was fake!!! I said NO WAY!!! Someone even asked if I bought it ?!?!?!?!?!? (A little insulted). I told him "I don't buy cakes!" LOL.

The size is 10 inch, 8 inch, and 6 inch. The bottom tier is Vanilla Caramel Cake, the top two layers are Pumpkin Spice Cake. Both are new recipes and are keepers! I used black Satin Ice fondant. The topper is just a trinket box I found at Hobby Lobby. The pearls in that box or just plastic. I tried attaching the lace with crisco but it wasn't working so I used a little bit of piping gel. It worked like a charm. See more pics below. Thanks for looking. 🙂

25th Anniversary Cake

October 16, 2010

Anniversary Cake

Another last minute cake order, but I was able to get it done. It was Dark Chocolate Cake with Strawberry Filling. 8 inch and a 6 inch round cake. I didn't have much time to do much with decorating in buttercream flowers. I was able to just do what I wanted for this cake, which sometimes makes it harder to decide, but this is what I came up with. I put real ribbon around the edges. I did use wax paper to prevent the grease from the frosting from going through, but as you can see it did anyway, so I am going to have to work on another trick for that one. I did use a new buttercream recipe and I LOVE IT! It's the Sugarshack recipe. It's not as perfect as her is in the DVD but it's the smoothest my buttercream has ever been. Thanks for looking.

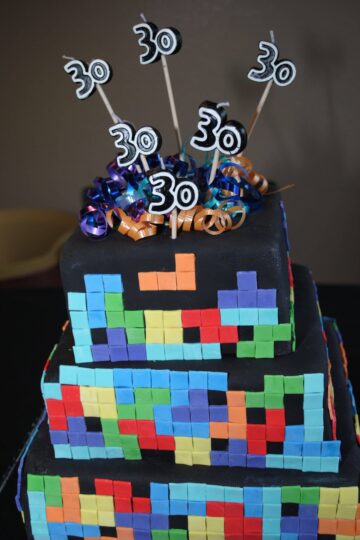
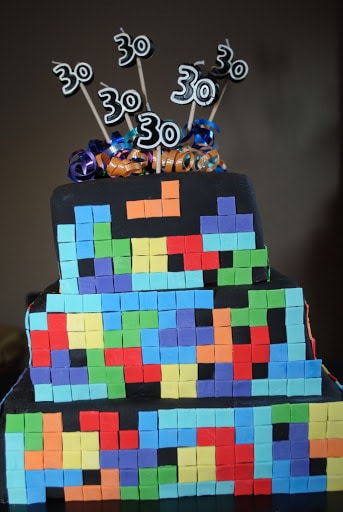
Tetris Cake

October 1, 2010

Tetris Cake

I made this cake for my husband's 30th Birthday!!! I loved this cake. I loved making this cake. It is by far my favorite so far 🙂 This cake did take the most time out of all that I have done but it was worth it. Thanks for looking.

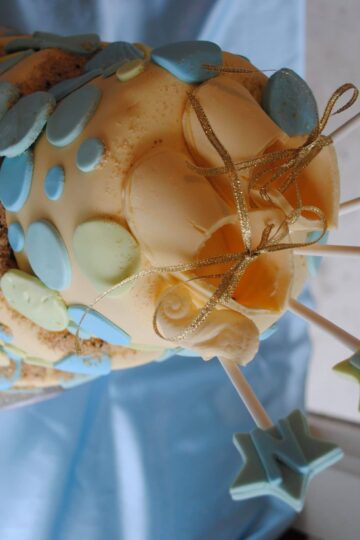
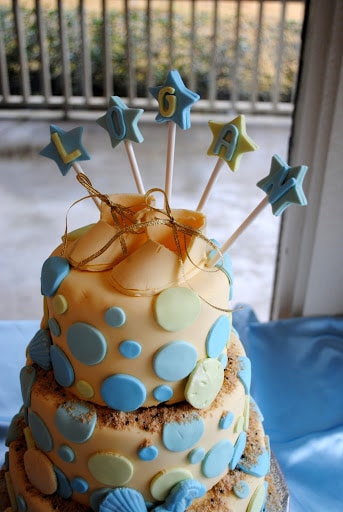
Baby Shower Cake

October 1, 2010

Baby Shower Cake

Made this cake for my Sister in Law. I liked making this one. I tried to match the cake to the invitation. 6 inch, 8 inch and 10 inch cake rounds.

My Second Wedding Cake

October 1, 2010

Wedding Cake

I made this cake for my Mother in Law. Not to bad I guess. This cake did help me decide not to use Wiltons Buttercream recipe. Every cake I do I learn something new.

Lingerie Shower Cake

October 1, 2010

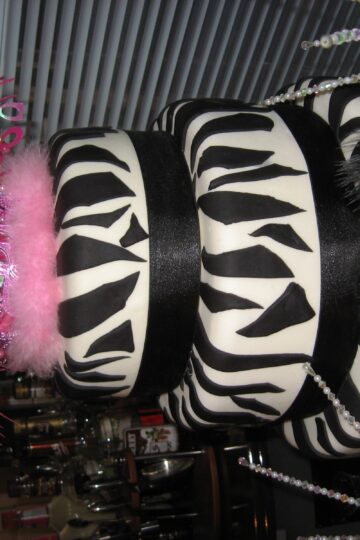
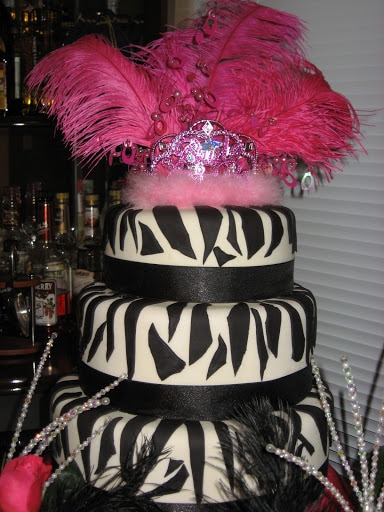
Zebra Cake

I made this cake for my Sister in Laws Lingerie shower I hosted for her. I really like this one!!! Very easy too. Thanks for looking.

My First Bridal Shower Cake

October 1, 2010

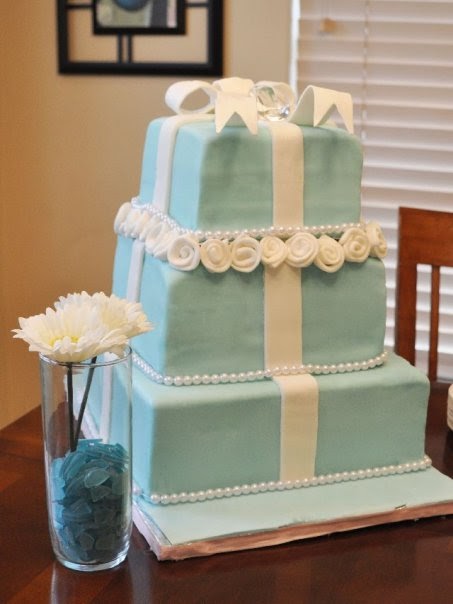
Tiffany Cake

I did this cake for my sister in law who was getting married. It was a Tiffany & Co. themed shower. The top 2 tiers were WASC Cake and the bottom tier was just a dummy. Overall I was pretty happy. It was my first time using the SPS system in the cake for the support so there happened to be a gap between the layers so I just made some fondant roses real quick to hide the problem, but I have learned from my mistakes since then (2008) so I hope in the future this won't happen. Anyway, the SPS system is awesome and I would recommend it to everyone. I had a long way to travel with this cake so I needed a good support system and I can tell you this cake didn't move at all and was very sturdy. Thanks for looking.

Creamsicle Dreamsicle Cupcakes

September 20, 2010

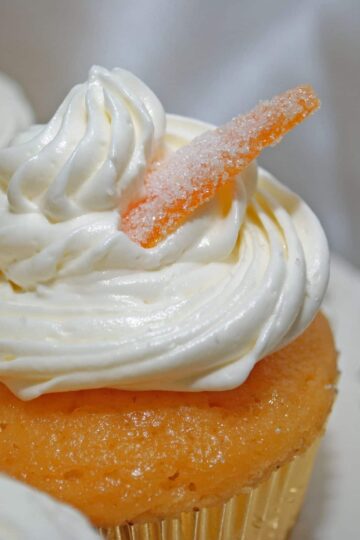
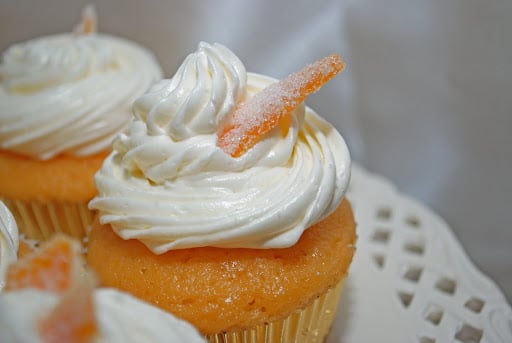
Creamsicle Cupcakes

Creamsicle Dreamsicle Cupcakes
This was an experiment and I am happy to say it turned out delicious.

Creamsicle Dreamsicle Cupcakes

Creamsicle Dreamsicle Cupcakes

Yield: 28
No Ratings

Ingredients

CAKE

  • 1 box orange cake mix
  • 1 cup all-purpose flour
  • 1 cup granulated sugar
  • 3/4 tsp salt
  • 1 cup orange juice
  • 1/3 cup water
  • 1/8 cup vegetable oil
  • 1 tsp real vanilla extract
  • 1 tsp orange extract
  • 1 cup sour cream
  • 3 large whole eggs

FILLING

  • 1 cup heavy whipping cream
  • 1 cup whole milk
  • 1 3.4 oz. vanilla instant pudding mix

GRAND MARNIER BUTTERCREAM

  • 3/4 cup granulated sugar
  • 4 large egg whites
  • 2 tbsp water
  • 1 1/2 cups unsalted butter, slightly softened
  • 1/2 tsp real vanilla extract
  • 1/2 tsp orange oil
  • 1/4 tsp Flori di Sicilia or orange extract
  • 1 tbsp Grand Marnier or other orange-flavored liqueur

CANDIED ORANGE PEEL

  • 3 oranges, scrubbed with a vegetable brush
  • 1 cup granulated sugar
  • 3/4 cup water
  • 1/4 tsp cream of tartar

SUGAR COATING

  • 1/2 cup granulated sugar

Instructions

CAKE

  1. Place all dry ingredients in a large mixing bowl and stir together with a
  2. wire whisk.
  3. Add the remaining cake ingredients and beat on medium speed for 2
  4. minutes.
  5. Pour into cupcake liners in cupcake pans, filling each pan a little over
  6. half full.
  7. Lightly tap cake pans on counter to bring air bubbles to top.
  8. Bake in preheated 325° F oven until cake tests done.
  9. Baking time is about 30 minutes. Check at 20 minutes just to be on the
  10. safe side.
  11. Cool completely.

FILLING

  1. Mix all filling ingredients in mixer.

GRAND MARINER BUTTERCREAM

  1. Pour 1/2 inch water into a large skillet and bring the water to a
  2. simmer; reduce the heat to medium-low to maintain a simmer.
  3. In the bowl of an electric mixer, combine the sugar, egg whites, and
  4. water. Place the bowl in the skillet of water and whisk gently until the
  5. mixture reaches 160 F on an instant read candy thermometer. Transfer the
  6. bowl to the mixer stand and, using the whisk attachment, beat at medium-high
  7. speed until the meringue is cool and forms stiff, shiny peaks, about 5
  8. minutes.
  9. Reduce the speed to medium and beat in the butter 1 tablespoon at a
  10. time. Beat in the vanilla extract, orange oil and orange liqueur and beat at
  11. high speed until the buttercream is smooth, about 1 minute.

CANDIED ORANGE PEEL

  1. Using a sharp paring knife, remove the peel of each orange in vertical
  2. strips, trying not to include any of the bitter white pith. If any of the
  3. pith remains, place each strip, pith side up, on a cutting board and use the
  4. paring knife, with the blade parallel to the board, to carefully slide it
  5. off. Cut the zest into fine julienne strips.
  6. Half fill a medium saucepan with water and bring it to a boil. Add the
  7. strips of zest, reduce the heat to a simmer, and simmer for about 15
  8. minutes. Drain and rinse the zest.
  9. In the same saucepan, combine the sugar, water and cream of tartar and
  10. bring to a boil, stirring constantly to dissolve the sugar. Add the zest,
  11. cover the pan, and reduce the heat to low. Let the zest simmer for another
  12. minutes. Remove the pan from the heat and cool completely.
  13. The zest can be stored in its syrup in an airtight container for up to a
  14. month. When you are ready to use it, drain well and toss it in the
  15. granulated sugar, breaking up any lumps of sugar with you hands. Spread the
  16. zest out on a baking sheet and let dry at room temperature for at least 2
  17. hours before using.

ASSEMBLY

  1. Fit a pastry bag with tip #12, fill the bag with the filling. Press tip
  2. into the middle of each cupcake and pipe desired amount of filling into
  3. each.
  4. Frost cooled cupcake tops with Grand Marnier Buttercream and garnish
  5. with Candied Orange Peel.
  6. - - - - - - - - - - - - - - - - - -

Did you make this recipe?

Tag @thecakechica1 on Instagram and hashtag #thecakechica1

© Mary
Category: Dessert


  • « Go to Previous Page
  • Page 1
  • Interim pages omitted …
  • Page 37
  • Page 38
  • Page 39
  • Page 40
  • Go to Next Page »

Primary Sidebar

Welcome!

Hi, I’m Mary. The self-taught baker, food stylist, and photographer behind The Cake Chica. If you love creating bakery-style desserts from scratch and want a peek behind the scenes of how they’re styled and captured, you’re in the right place.

More about me

Popular

  • Toasted Coconut Caramel Layer Cake on marble cake pedestal.
    Toasted Coconut Caramel Layer Cake
  • Cover image for Best Big Fat Chewy Chocolate Chip Cookies.
    Best Big Fat Chewy Chocolate Chip Cookie
  • Key Lime Pie Layer Cake cover photo.
    Key Lime Pie Layer Cake
  • White Cake with Strawberry Filling
    White Cake with Strawberry Filling

Seasonal

  • Banana Cream Pie
  • Chocolate Root Beer Float Cake
  • Cotton Candy Layer Cake
  • Strawberry Ice Cream Pop Cake

Footer

↑ back to top

About

  • The Cake Chica
  • Recipe Index
  • Work With Me

Legal

  • Privacy Policy

Contact

  • Contact

As an Amazon Associate I earn from qualifying purchases.

Copyright © 2025 The Cake Chica