
As an Amazon Associate, I earn from qualifying purchases.
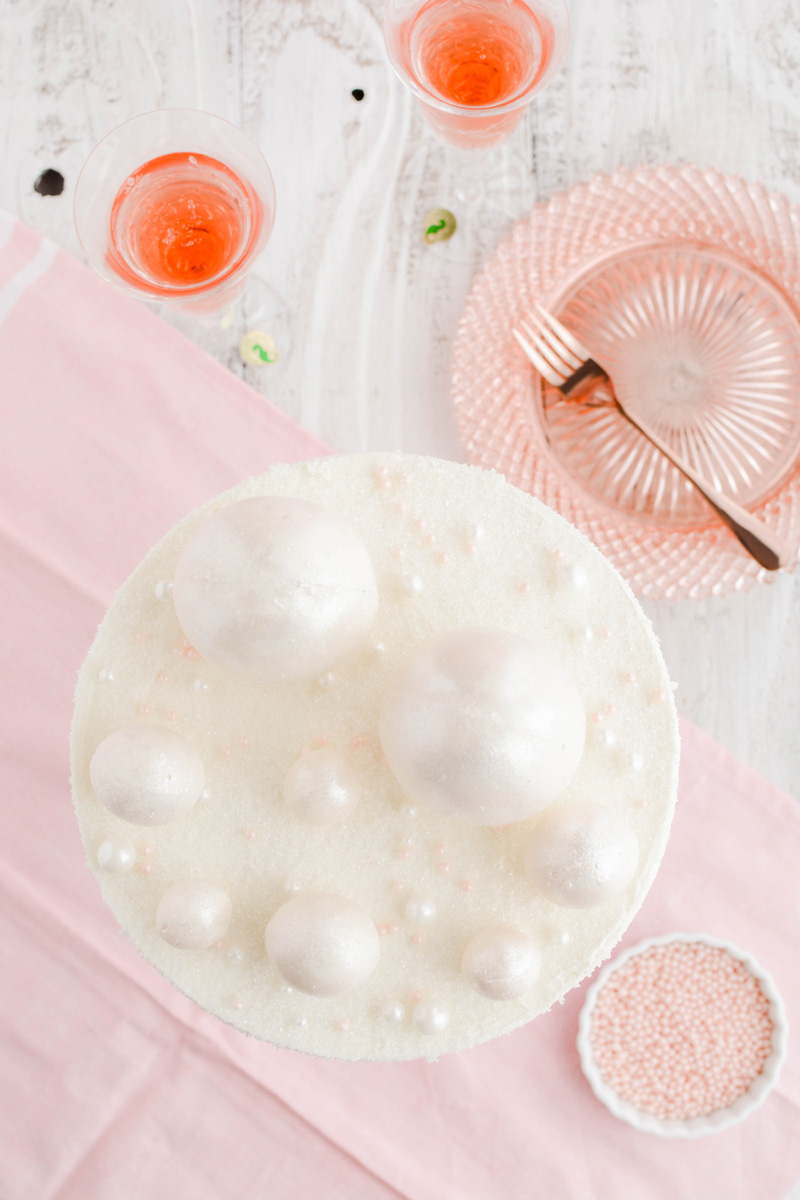
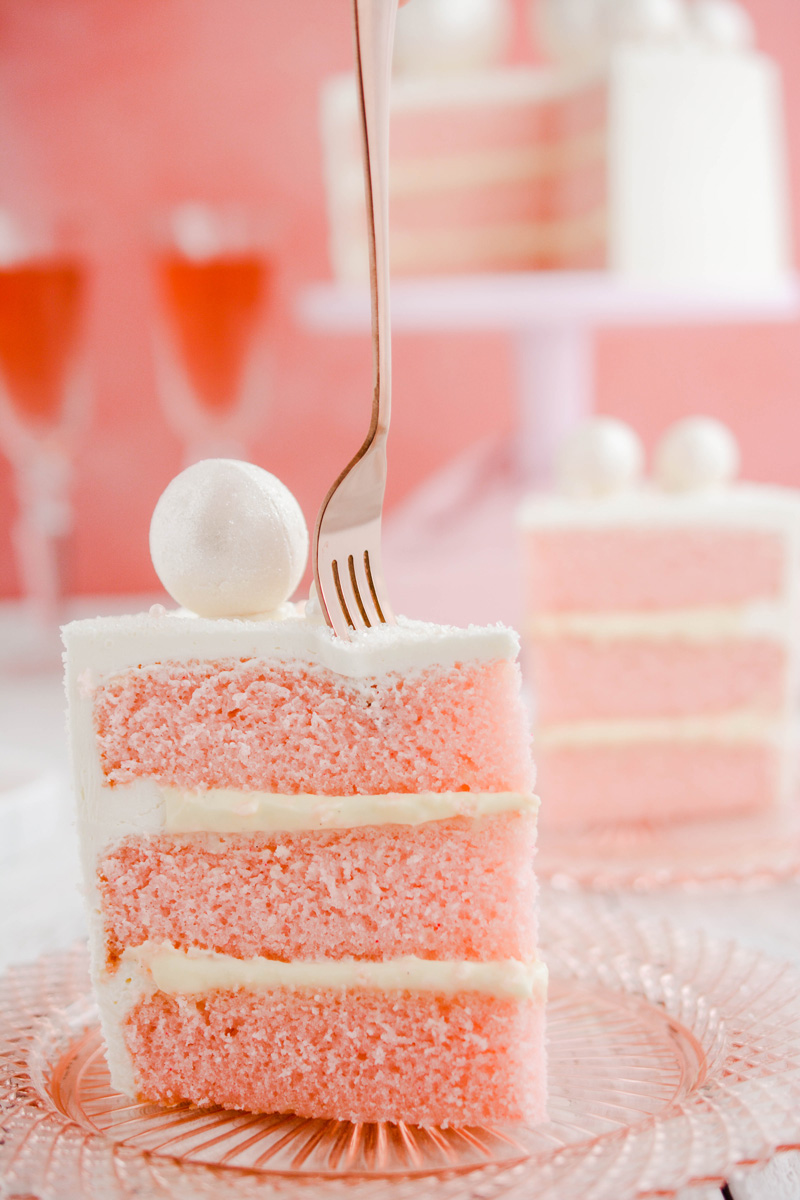
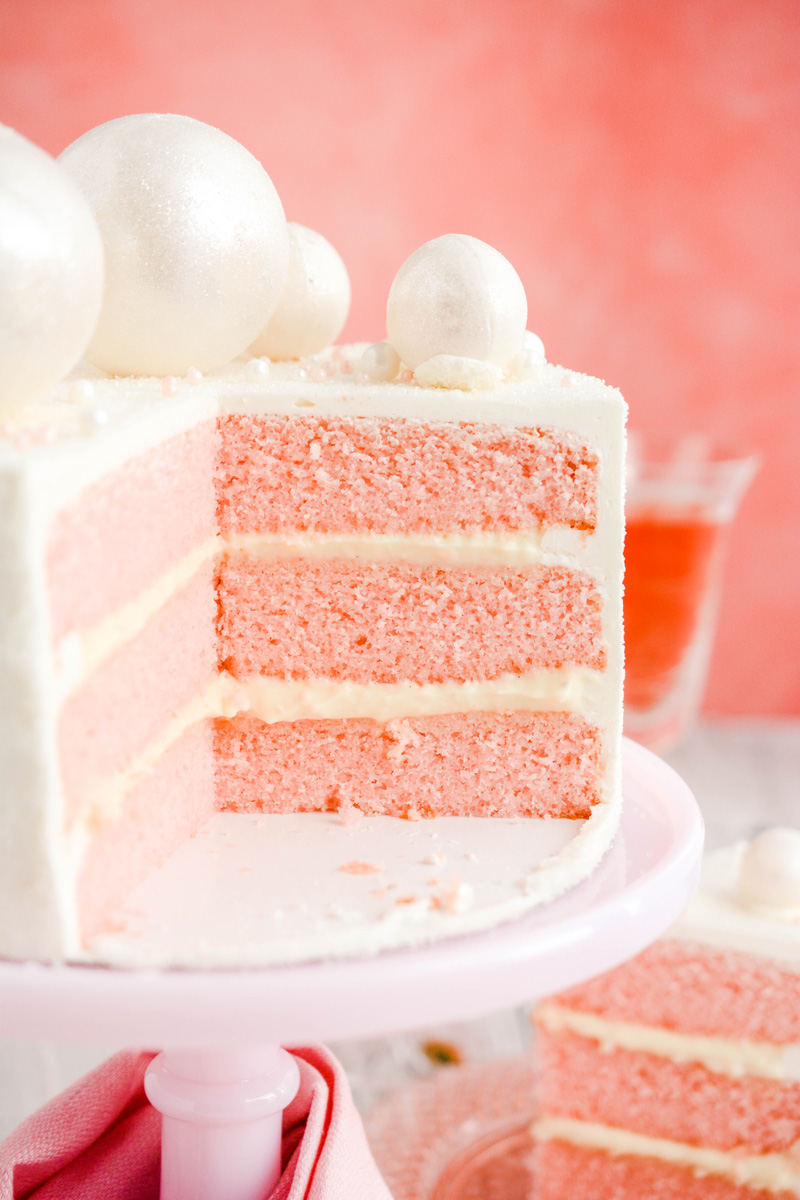
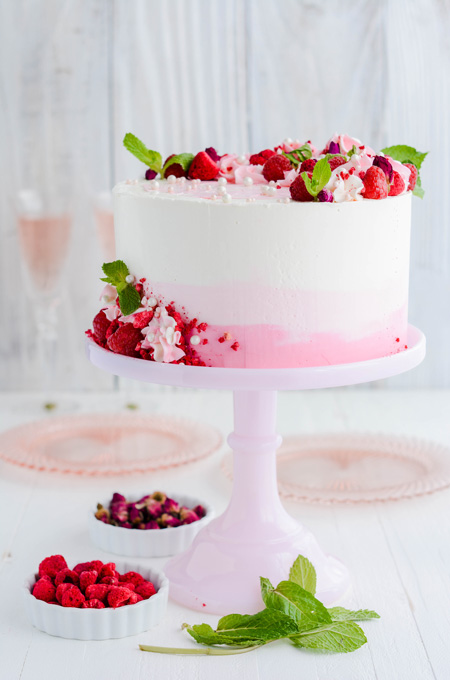
Today I'm sharing a fun and festive Pink Champagne Layer Cake that's perfect for almost any celebration, New Years, Valentine's Day, Bachelorette Parties and more!

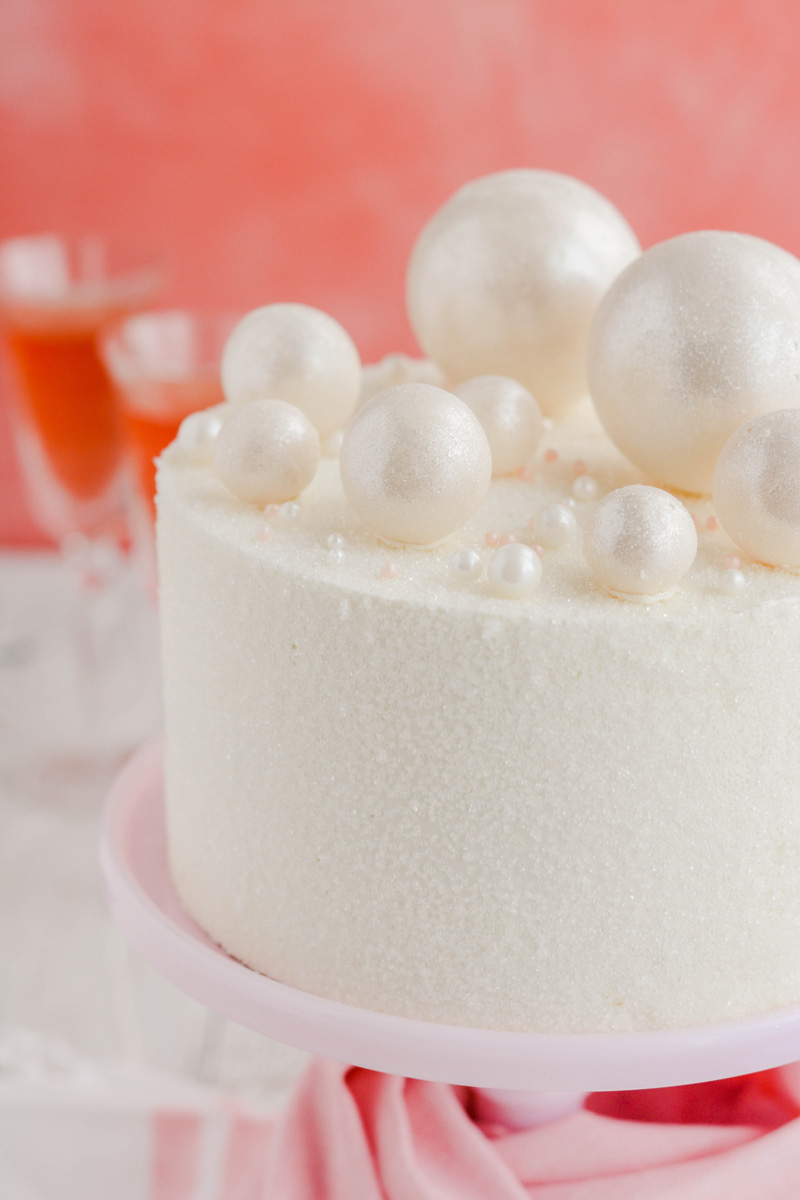
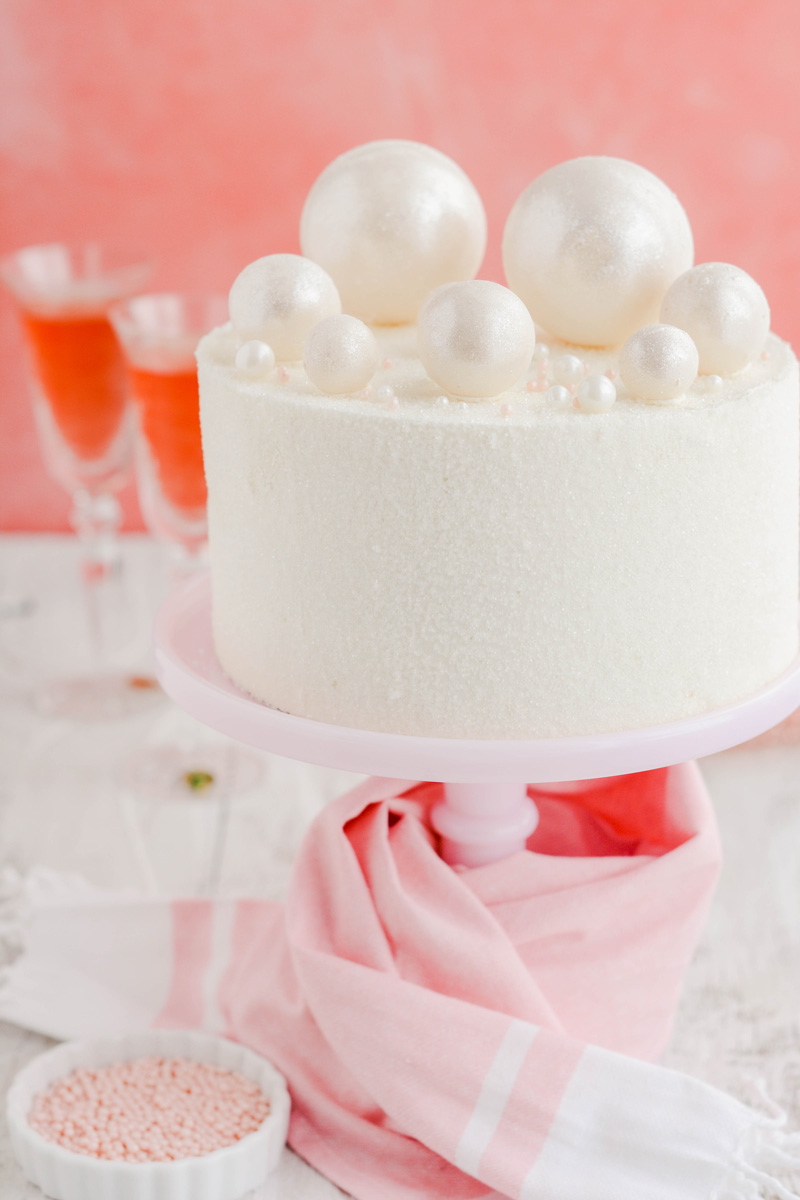
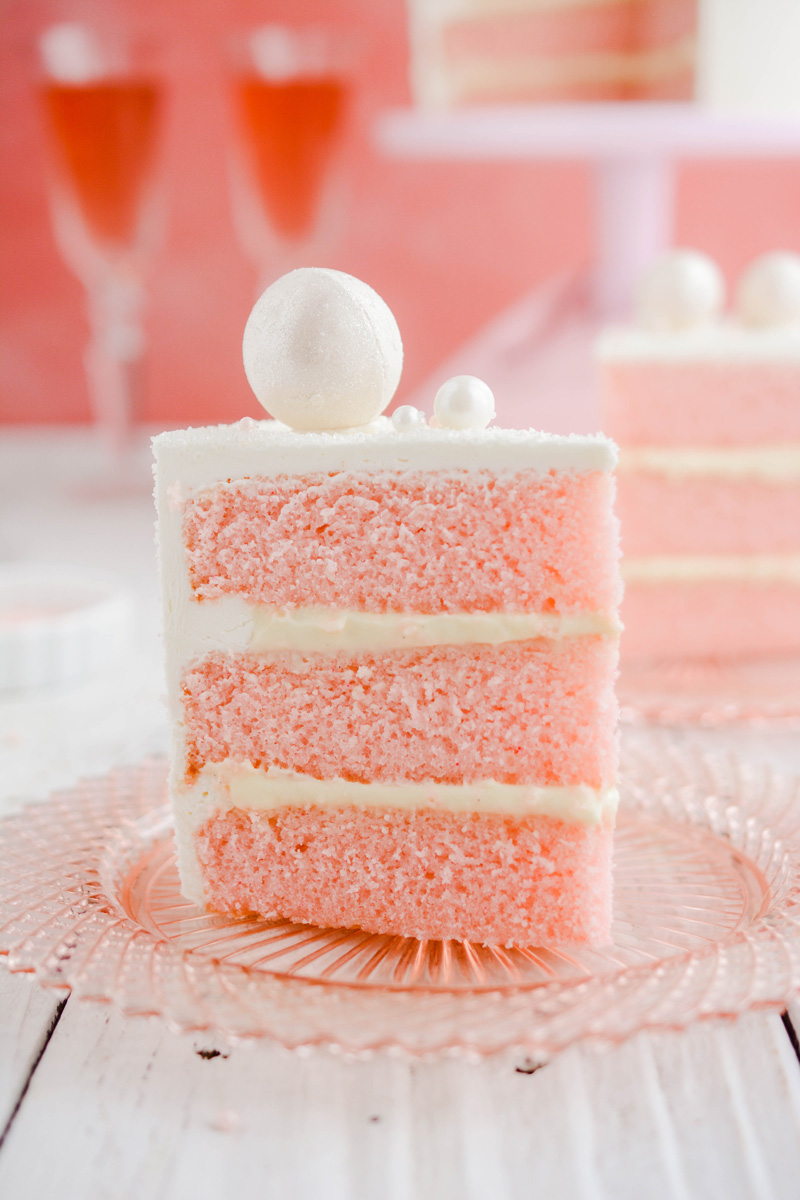
I baked up three layers of champagne cake and filled them with pastry cream filling, made with vanilla bean and frosted the cake with champagne flavored frosting. Lastly I covered the cake in sanding sugar and topped it with sparkling white chocolate spheres!
How To Make White Chocolate Spheres
Tools
- 12 ounces white chocolate melts, chopped
- Semi sphere molds 6/15/24 capacity
- Food save paint brush
- Edible White Diamond Dust
- Rimmed baking sheet
- In a microwave-safe bowl, melt chopped candy melts at 30 second intervals and stir. Continue to heat in 30 second intervals and stir until the melts are completely melted and smooth.
- Using a food safe paint brush, apply melted chocolate melts into the sphere molds in an even layer, using upward strokes to coat the mold as evenly as you can.
- Turn the molds over on a sheet of parchment paper to allow excess chocolate to drip out. The chocolate should be thick enough to hold its shape without breaking. Apply a second layer of chocolate in the molds if needed to get an even coating.
- Set the molds in the refrigerator for 10 minutes to set up. Once set, carefully remove the chocolate sphere halves from the molds by peeling away the silicone from the chocolate.
- Heat a microwave-safe plate in the microwave for 2 minutes. Carefully touch the chocolate halves to the hot plate, open side down and melt the edges until they have formed a clean edge. Don’t melt too long or the spheres will lose their shape.
- While the chocolate is still wet, gently press two halves together to form a sphere. Wipe away excess chocolate from the seams and set aside to dry and set. Repeat this process with different sized spheres and set aside to dry and set.
- Once the spheres have set, add 1 teaspoon of White Diamond Dust to a zip top bag. Place one sphere in the bag at a time to apply the edible glitter. Set aside on a rimmed baking sheet until ready to use. Repeat this process until all the spheres are covered in edible glitter. Set aside until ready to use.
Pastry Cream Filling
Pastry cream is the perfect accompaniment to this Pink Champagne Layer Cake. I used vanilla bean for this recipe but you can substitute vanilla extract for the vanilla bean. Resist the urge to over fill your cake with the pastry cream or it will start to slip and slide. You will have extra pastry cream. I suggest eating the leftover cream with a spoon! 😉

Pink Champagne Layer Cake
- Cake flour: I love baking with cake flour because of its low protein content which creates cakes that are light and gives cakes their fine crumb.
- Baking powder: is a leavener and works when it comes into contact with liquid and when it comes into contact with heat.
- Salt: helps round out the flavors in the cake.
- Eggs: bind, thicken, emulsifies and leavens.
- Granulated sugar: is perfect for cakes because it incorporates well in cake batters and dissolves easily while baking.
- Vanilla extract: helps round out the flavors.
- Vegetable oil: helps the cake remain moist even at cooler temperatures which gives the cake a softer crumb.
- Champagne: gives this cake its unique flavor.
- AmeriColor Soft Pink gel food color: the cake will not naturally be pink in color so I added 1 to 2 drops of pink food coloring to the batter.
Champagne Frosting
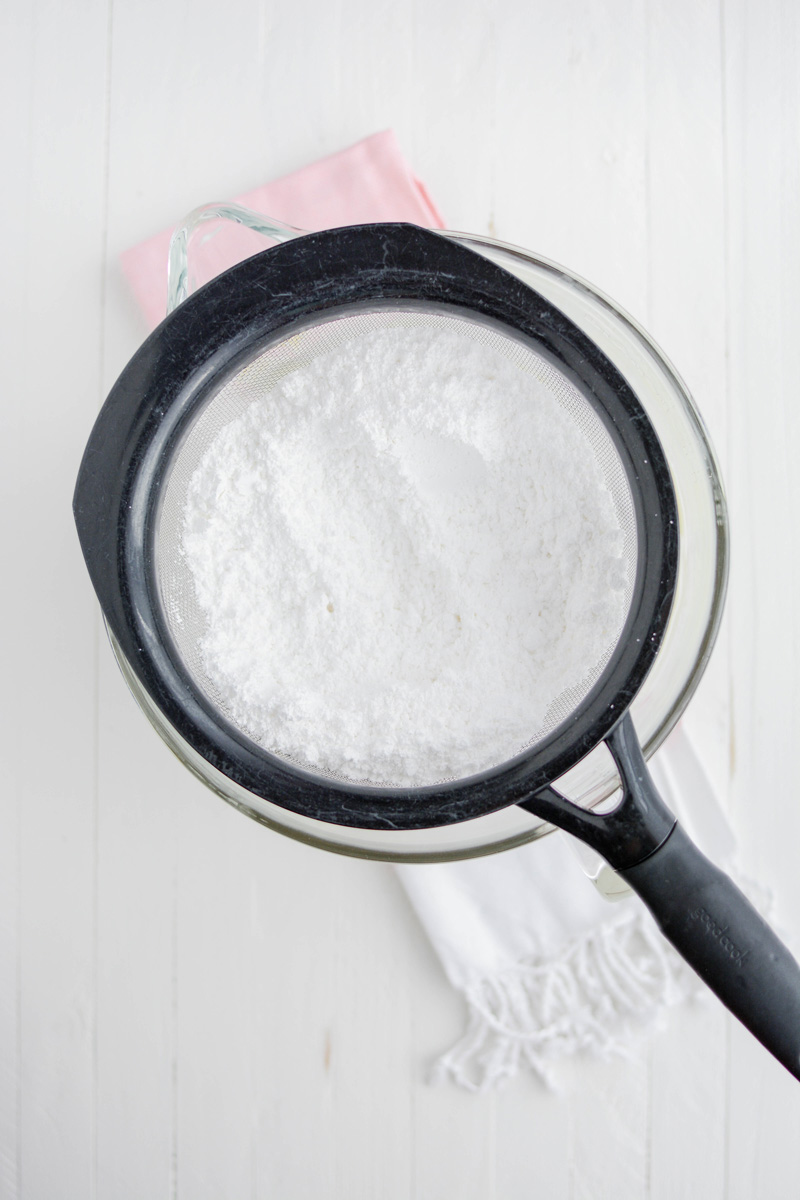
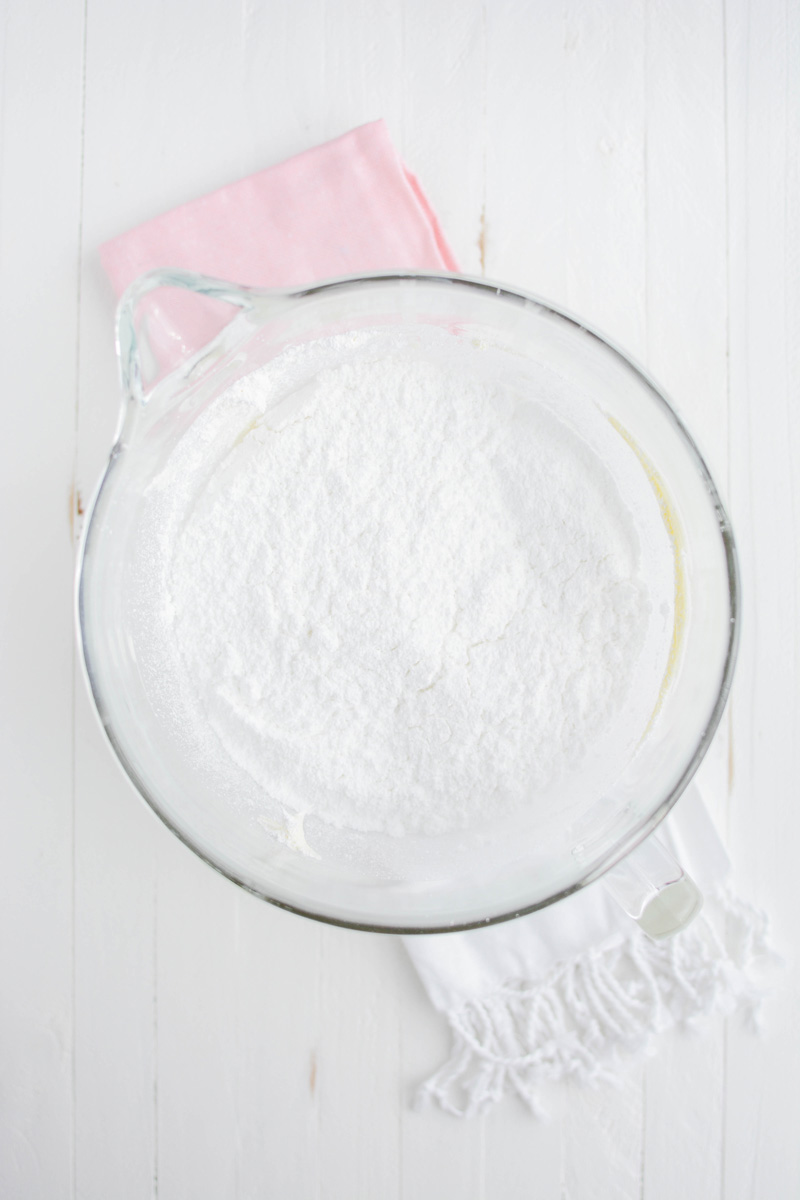
Champagne Frosting uses Sparkling Wine flavoring to add flavor to the frosting without it effecting the consistency. This is a crusting frosting which means it will harden as it sits so if you're not using it right away, cover the frosting with a damn paper towel until ready to use. TIP: An easy way to sift the powdered sugar is to place the sugar in a large sieve over the mixer bowl and use a spoon to push the sugar through the sieve and in to the mixer bowl.
Cake Assembly Tips
- Trim cake to create flat cake layers.
- Keep filling at 1/2 to 2/3 cup to prevent over filling.
- Use a crumb coat to seal in loose crumbs.
- Chill the cake before applying a final layer of frosting and decorating.
Crumb Coat
Crumb coating keeps loose crumbs from getting into your final layer of frosting, plus it helps seal the cake in for freshness and gives you a good base to start your cake decorating on.
Cake Decorating Tools
- Nonslip mat for cake turntable
- Cake turntable
- 8-inch round cake board
- Piping bags
- Coupler or round piping tip
- Small offset spatula
- 8-inch round acrylic disc
- Parchment paper
- Cake scraper
- Sanding sugar
Baking Schedule
- Day 1: Make white chocolate spheres.
- Day 2: Bake cake layers and prepare pastry filling.
- Day 3: Prepare frosting, assemble and serve cake.
Make Ahead
- White chocolate spheres can be made up to 7 days in advance.
- Cake layers can be made up to 3 days in advance.
- Pastry filling can be made up to 2 days in advance.
- Frosting is best made the day of assembly.
Let's Connect
The Cake Chica is on the following social media platforms below. Click subscribe, like and follow! We would love to have you over!
Suggested Recipes
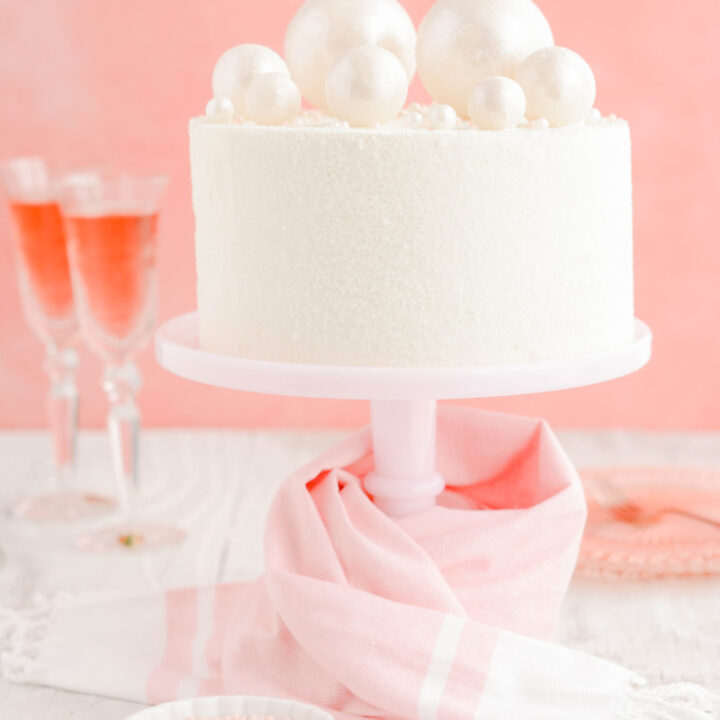
Pink Champagne Layer Cake
Three layers of homemade pink champagne cake filled with pastry cream filling and frosted with champagne flavored frosting. Lastly, the cake is covered with sanding sugar and sparkling white chocolate spheres.
Ingredients
SPECIAL TOOLS
- 3 8-inch round cake pans
- Nonstick spray
- Stand mixer
- AmeriColor Soft Pink Gel food coloring
- Sieve
- Nonslip mat for cake turntable
- Cake turntable
- 8-inch round cake board
- Piping bags
- Coupler or round piping tip
- Small offset spatula
- 8-inch round acrylic disc
- Parchment paper
- Cake scraper
- Sanding sugar
- White chocolate spheres
WHITE CHOCOLATE SPHERES
- 12 ounces white chocolate melts, chopped
- Semi sphere molds 6/15/24 capacity
- Food save paint brush
- Edible White Diamond Dust
- Rimmed baking sheet
CAKE
- 3 cups (12 ounces/339 grams) cake flour
- 2 ½ teaspoons baking powder
- ½ teaspoon table salt
- 4 large eggs, at room temperature
- 1 ¾ cups (12.25 ounces/346.5 grams) granulated sugar
- 2 teaspoons vanilla extract
- 1 cup (8 ounces/227 grams) vegetable oil
- 1 cup (8 ounces/227 grams) pink champagne
- 1 to 2 drops AmeriColor Soft Pink gel food color
PASTRY CREAM
- 2 cups (16 ounces/454 grams)half and half
- 1/2 cup (3 1/2 ounces/99 grams) granulated sugar, divided
- 1/2 vanilla bean, halved length wise, seeds removed and reserved
- 1/8 teaspoon salt
- 5 large egg yolks
- 3 tablespoons cornstarch
- 4 tablespoons (1/4 cup) unsalted butter, cut into tablespoon sized pieces
CHAMPAGNE FROSTING
- 1 cup (16 tablespoons/225 grams) unsalted butter, at room temperature
- 1/4 cup (4 tablespoons/50 grams) shortening
- Pinch of salt
- 3 1/4 cup (13 ounces/410 grams) powdered sugar, sifted
- 1/2 cup (4 ounces/113.5 grams) heavy cream
- 2 teaspoons Champagne Flavoring
Instructions
WHITE CHOCOLATE SPHERES
- In a microwave-safe bowl, melt chopped candy melts at 30 second intervals and stir. Continue to heat in 30 second intervals and stir until the melts are completely melted and smooth.
- Using a food save paint brush, apply melted chocolate melts into the sphere molds in an even layer, using upward strokes to coat the mold as evenly as you can.
- Turn the molds over on a sheet of parchment paper to allow excess chocolate to drip out. The chocolate should be thick enough to hold its shape without breaking. Apply a second layer of chocolate in the molds if needed to get an even coating.
- Set the molds in the refrigerator for 10 minutes to set up. Once set, carefully remove the chocolate sphere halves from the molds by peeling away the silicone from the chocolate.
- Heat a microwave-safe plate in the microwave for 2 minutes. Carefully touch the chocolate halves to the hot plate, open side down and melted the edges until they have formed a clean edge. Don’t melt too long our the spheres will loose their shape.
- While the chocolate is still wet, gently press two halves together to form a sphere. Wipe away excess chocolate from the seams and set aside to dry and set. Repeat this process with different sized spheres and set aside to dry and set.
- Once the spheres have set, add 1 teaspoon of White Diamond Dust to a zip top bag. Place one sphere in the bag at a time to apply the edible glitter. Set aside on a rimmed baking sheet until ready to use. Repeat this process until all the spheres are covered in edible glitter. Set aside until ready to use.
PASTRY CREAM
- In a medium saucepan, add half-and-half, 6 tablespoons of sugar, vanilla bean seeds and salt to a simmer over medium-high heat, stirring occasionally.
- Meanwhile, combined the egg yolks, cornstarch and remaining 2 tablespoons sugar in a bowl and whisk until smooth.
- Whisk in about 1 cup of the half-and-half mixture into the yolk mixture to temper. Slowly whisk in the tempered egg mixture into remaining half-and-half mixture. Reduce the heat to medium and continue to cook, whisking constantly, until the pastry cream is thick and bubbles start to pop on the surface, about 30 seconds.
- Remove from the heat and remove the vanilla bean and whisk in the butter. Transfer the pastry cream to a bowl and press plastic wrap directly on the surface of the cream. Refrigerate until set, about 3 hours or up to 2 days.
CAKE
- Spray 3 8-inch round cake pans with nonstick spray and set aside.
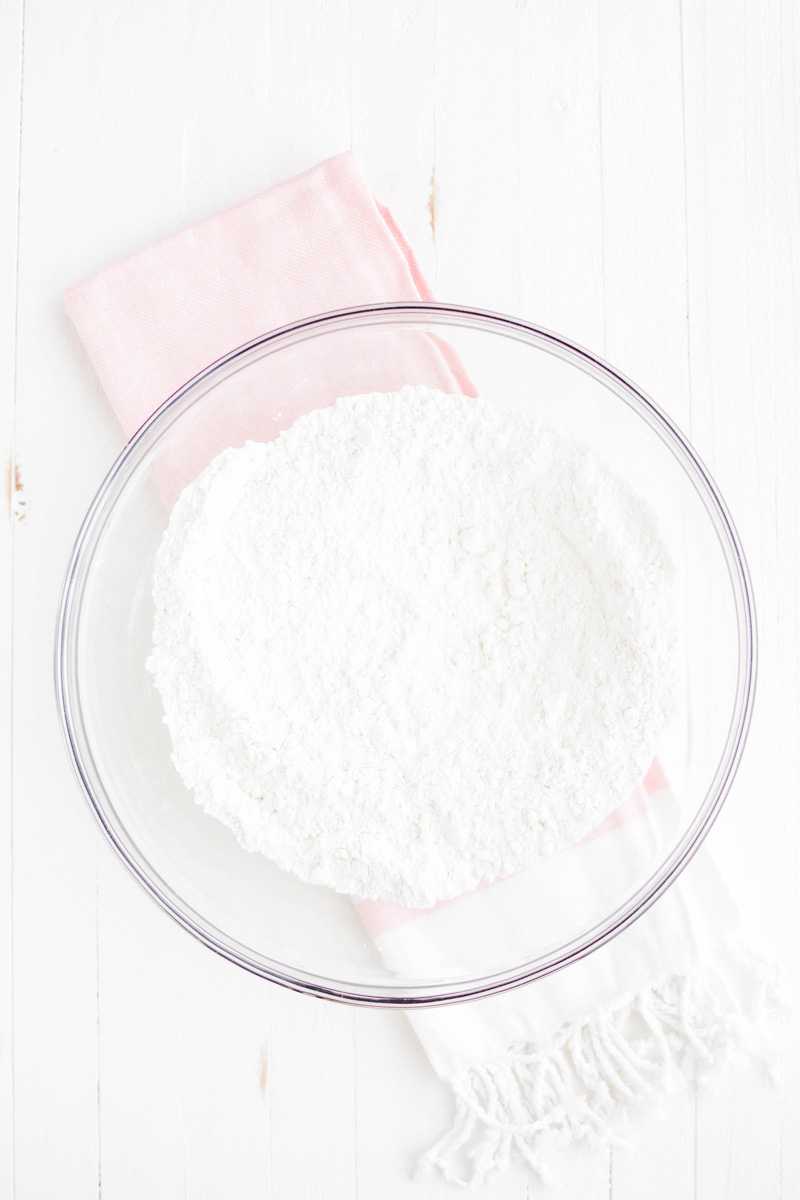
- Adjust an oven rack to the center position and heat oven to 350 degrees. In a large bowl, sift the flour, baking powder and salt. Then whisk to combine.
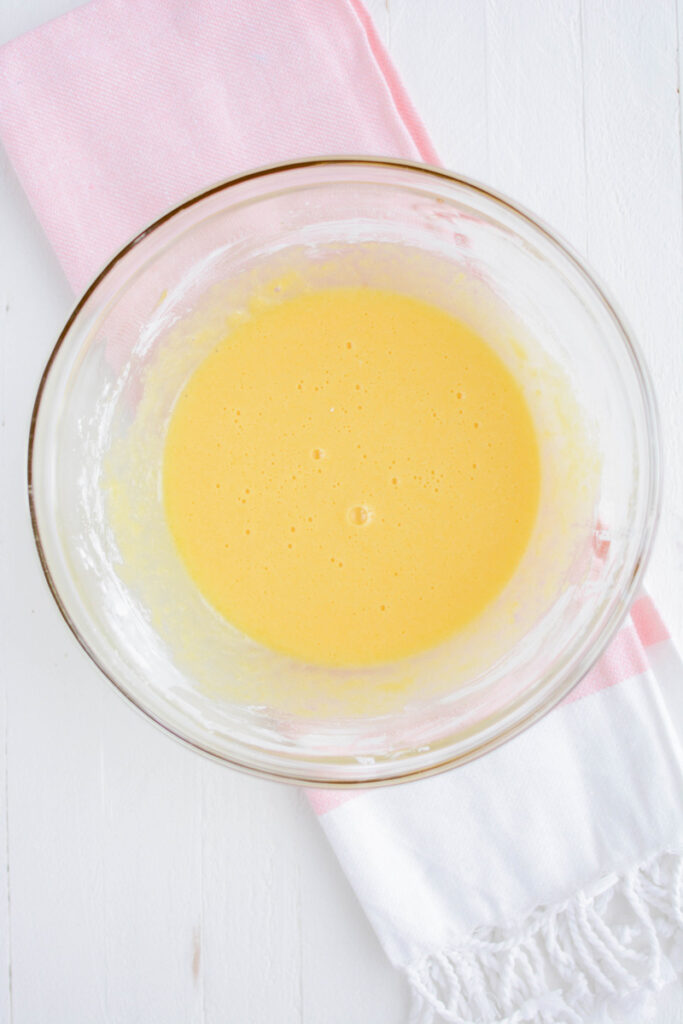
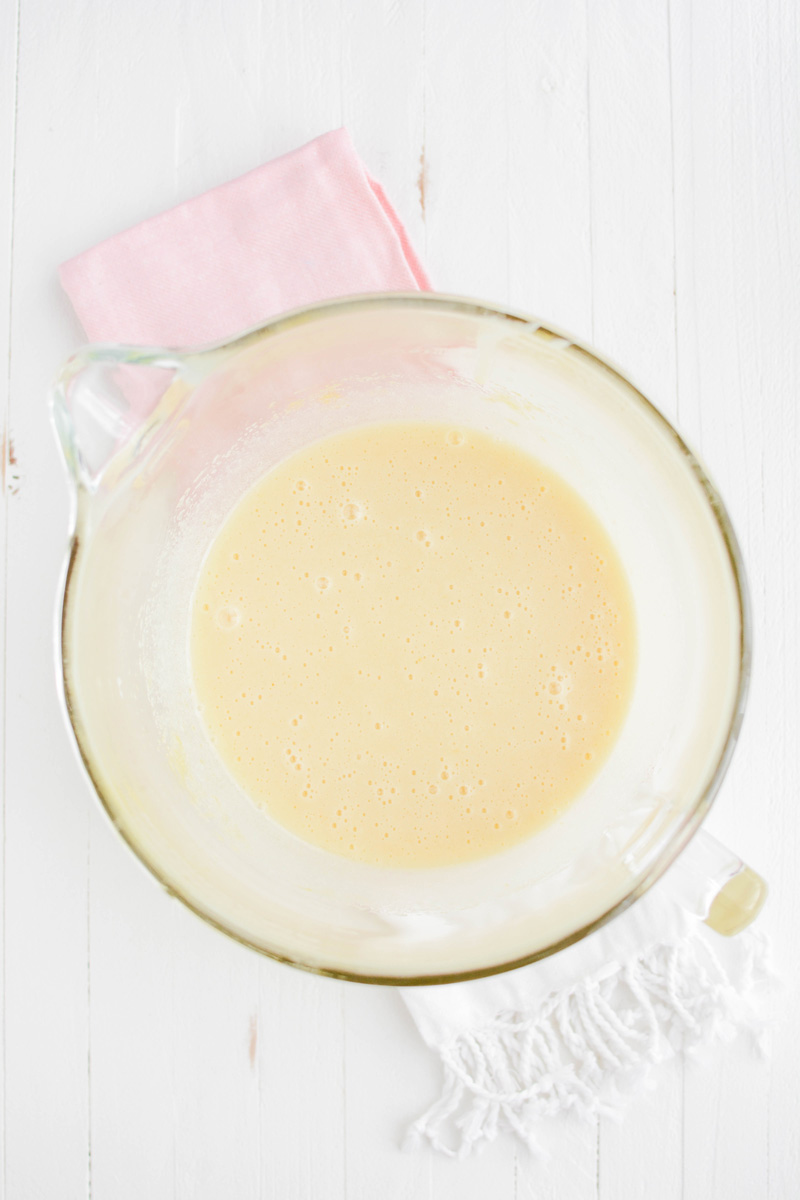
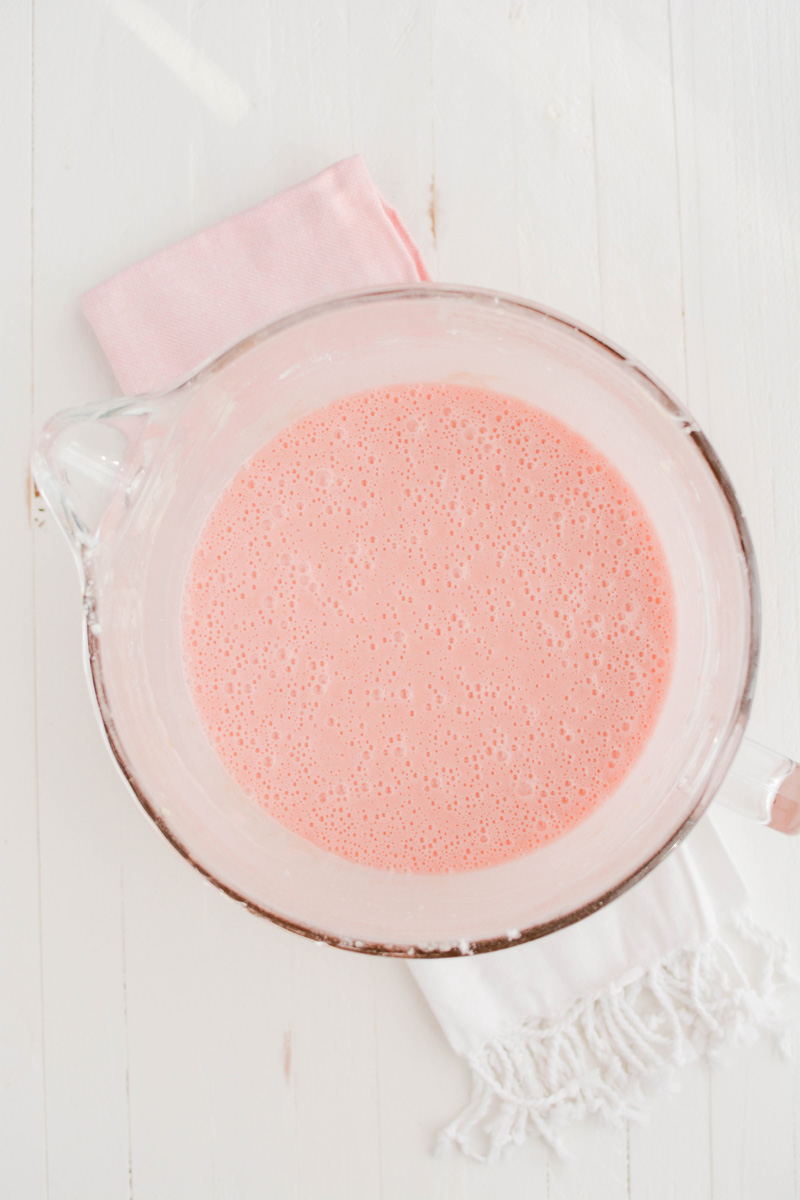
- In the bowl of a stand mixer fitted with the paddle attachment, beat the eggs, sugar and vanilla together on medium speed for 1 minute. Reduce the mixer speed to low speed and slowly pour the oil into the mixture until combined. On low speed, add the flour mixture in 3 parts, alternating with the wine in 2 parts, beginning and ending with the flour mixture, mixing until just barely blended. Scrape the sides of the bowl as necessary. The batter will be thin. Mix in pink food coloring on low speed. Use a rubber spatula to finish mixing the batter together to be sure you don’t over mix.
- Divide the cake batter between the prepared cake pans and bake for 30 to 35 minutes, or until a toothpick inserted in the center comes out with a few moist crumbs attached; rotating pans halfway through baking. The cakes will form a dome on top and be golden in color in the center. Remove the cakes from the oven and let cool in their pans on wire racks for 10 to 15 minutes. Invert the cakes onto wire racks and let cool completely.
CHAMPAGNE FROSTING
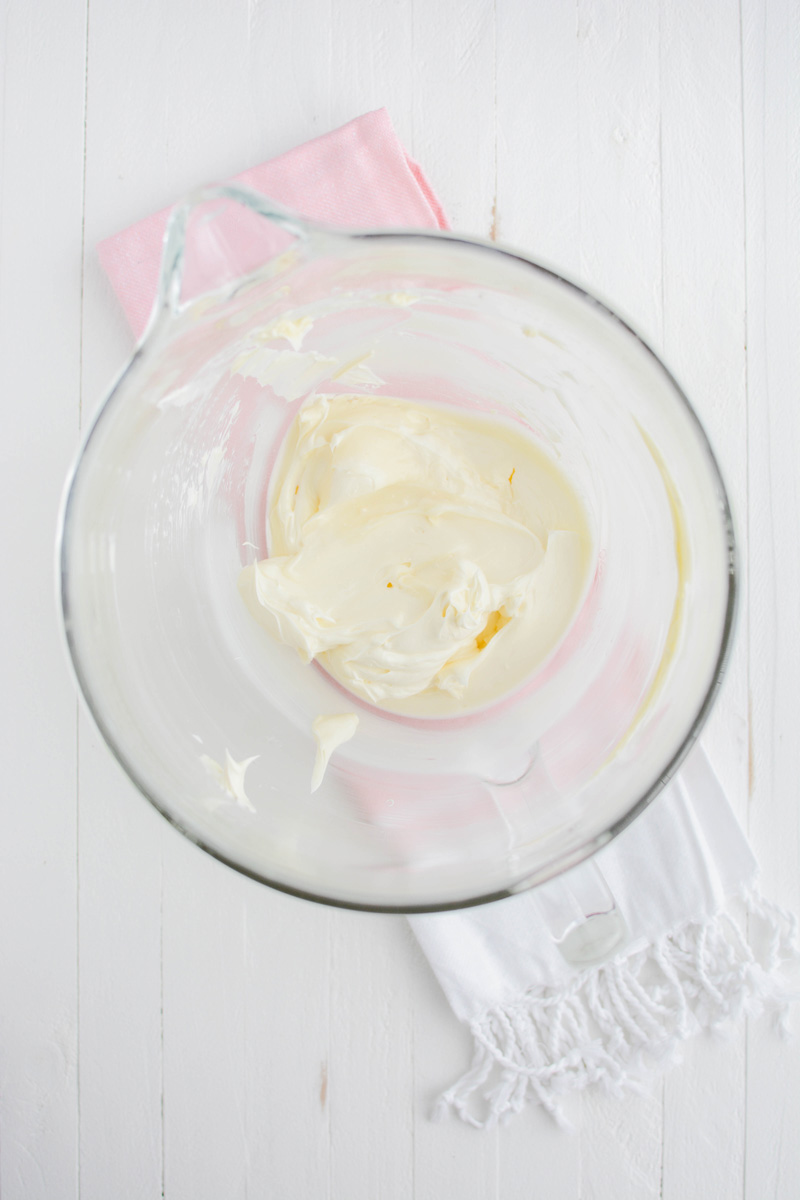
- In the bowl of a stand mixer with the paddle attachment attached, beat the butter, shortening and salt on medium speed until light and fluffy, about 8 minutes. Add the powdered sugar, heavy cream, and emulsion and slowly mix until combined, about 1 minute.
- Increase the mixer speed to medium-high and beat until light and fluffy, about 6 minutes.
ASSEMBLE
- Place a nonslip mat on top of a cake turntable and place a cake board on top. Center the first cake layer on top of the cake board, making sure there's even spacing from all around the edges. Fit a piping bag with a coupler or round piping tip and pipe a frosting dam around the cakes edge. Spread about 2/3 cup pastry cream over the top of the cake in an even layer with a small offset spatula. Don’t overfill the cake, or the cake layers will start sliding. Place the second cake layer on top and pipe another frosting dam around the edge. Spread another 2/3 cup pastry cream over the top of the cake in an even layer. Add the third and final cake layer (bottom side up) on top and gently press to adhere.
CRUMB COAT
- Apply a thin layer of frosting over the top and sides of the cake, creating a crumb coat. Chill the crumb coated cake in the freezer for 15 minutes or in the refrigerator for 30 minutes.
DECORATE
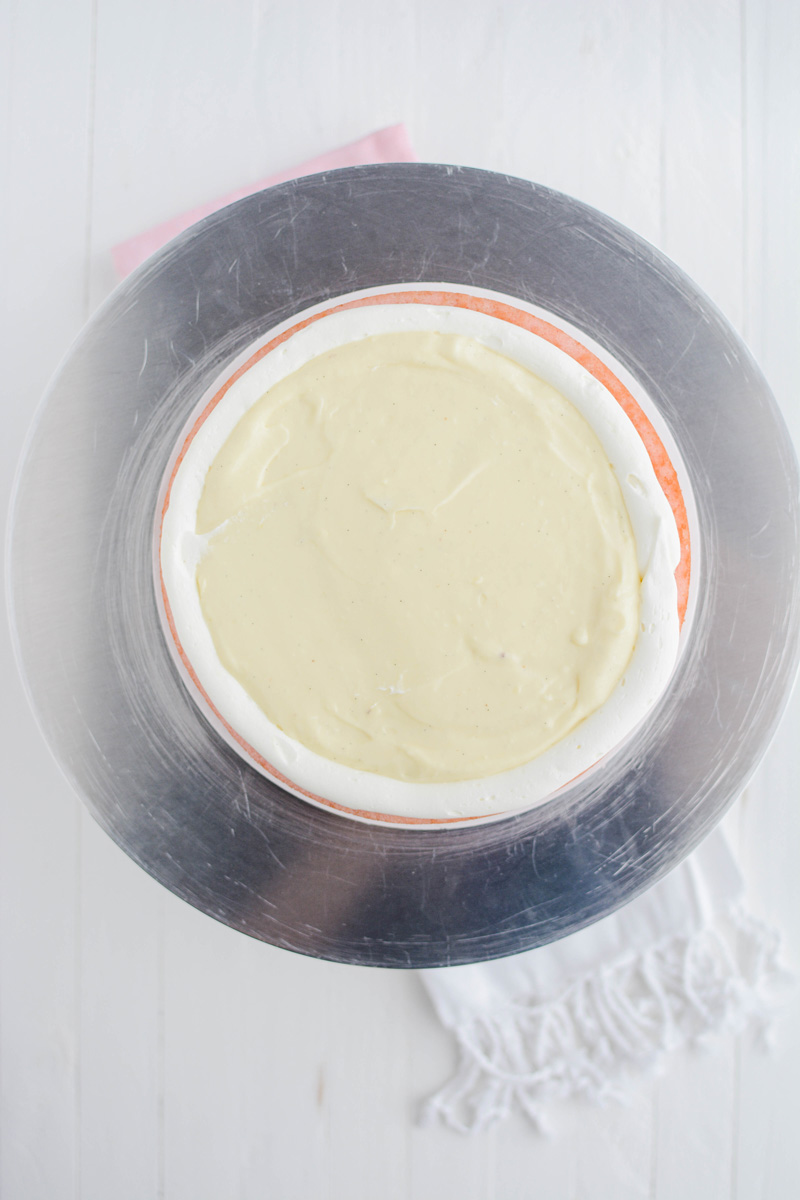
- Apply a large dollop of frosting on top of the cake and spread out evenly. Line an 8-inch round acrylic disc with parchment paper with a bit of frosting. Line up the acrylic disc with the bottom cake board and gently press on to the top of the cake to adhere. Cover the sides of the cake with more frosting and gently press a cake scraper against the acrylic disc and bottom cake board and slowly rotate the cake turntable all the way around to create a smooth finish on the side of the cake.
- Line a rimmed baking sheet with parchment paper. Carefully pick up the cake holding it in one hand by the bottom cake board over the lined rimmed baking sheet. With the other hand, apply sanding sugar to the sides of the cake. Once the sides are completely covered with sanding sugar, chill the cake in the freezer for 15 minutes.
- Insert a small offset cake spatula under the acrylic disc, but over the parchment paper and slowly rotate the turntable until the disc releases. Peel off the parchment paper.
- Apply more frosting to the top of the cake to fill in any gaps if needed and smooth the surface with a cake spatula. Sprinkle more sanding sugar to cover the top of the cake evenly. Place remaining frosting the a piping bag and snip a small hole at the tip of the bag. Use frosting to help attach white chocolate spheres to the top of the cake. Carefully transfer to a cake pedestal and serve.
Notes
MAKE AHEAD:
White chocolate spheres can be made up to 7 days in advance.
Cake layers can be made up to 3 days in advance.
Pastry filling can be made up to 2 days in advance.
Frosting is best made the day of assembly.
Assembled cake can be stored in an airtight container in the refrigerator up to 2 days.
Nutrition Information:
Yield: 12 Serving Size: 1Amount Per Serving: Calories: 602Total Fat: 29gSaturated Fat: 13gTrans Fat: 0gUnsaturated Fat: 14gCholesterol: 206mgSodium: 453mgCarbohydrates: 72gFiber: 1gSugar: 40gProtein: 12g
*Nutrition information is an estimate and will vary.*


Leave a Reply