
As an Amazon Associate, I earn from qualifying purchases.
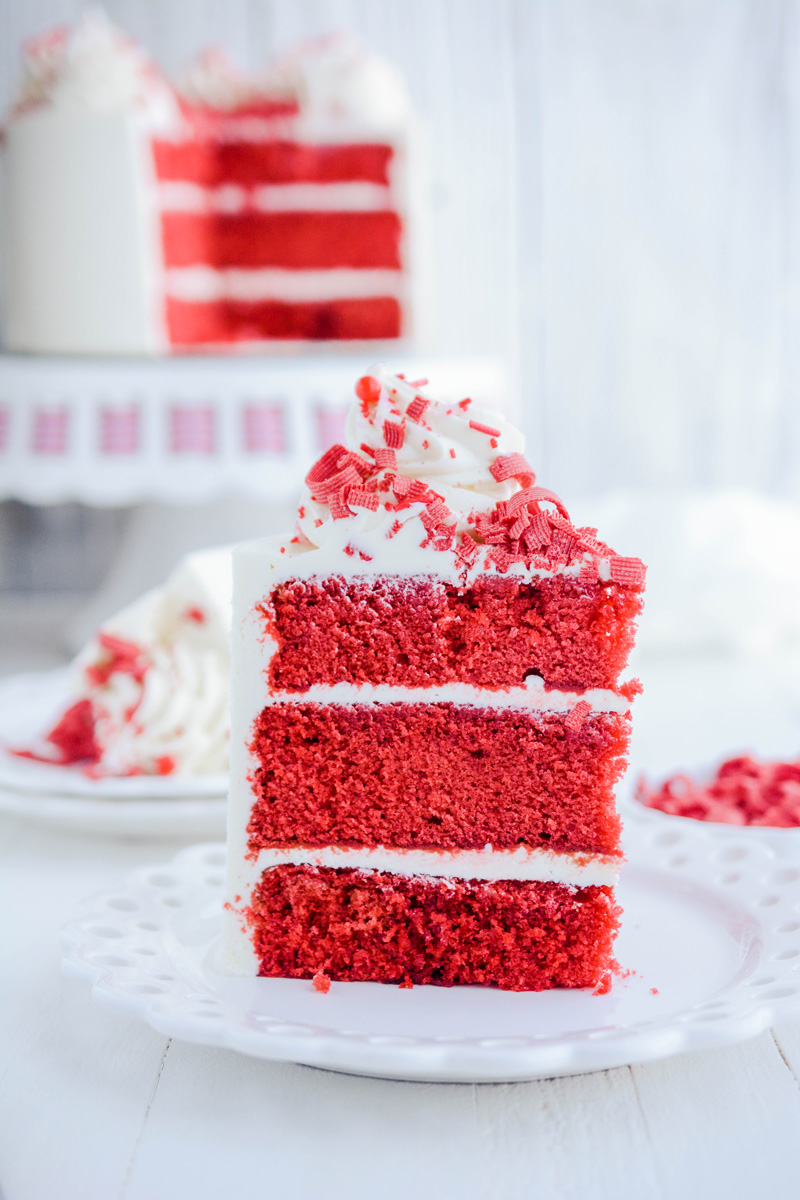
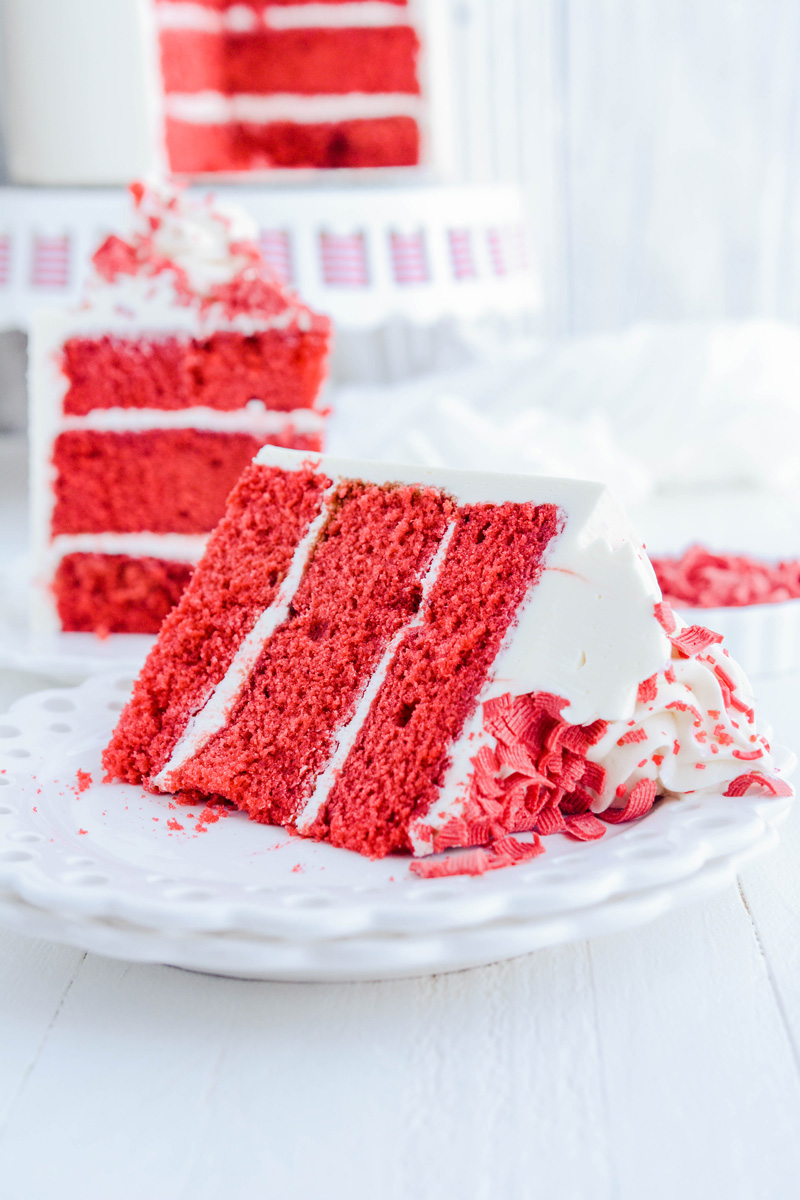
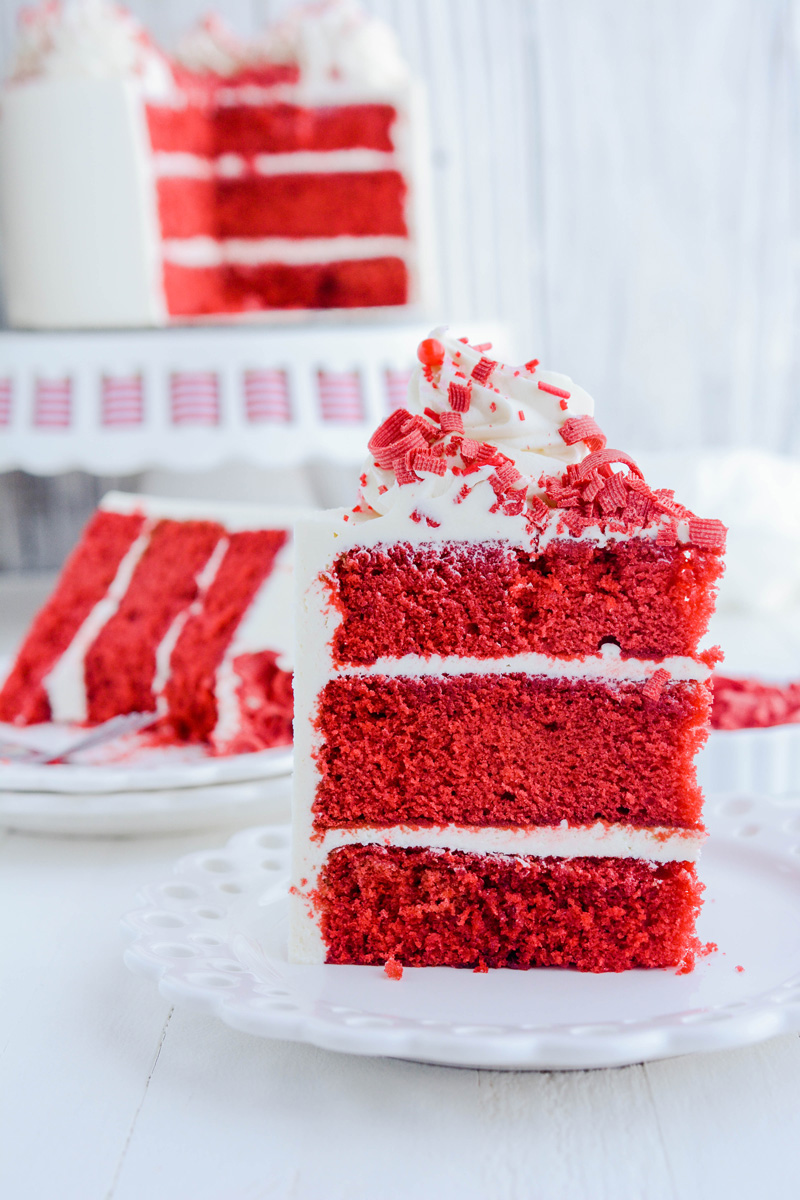
This Fluffy Red Velvet Cake is a classic. It's fluffy, tender with a bit of tanginess and has a beautiful red color!
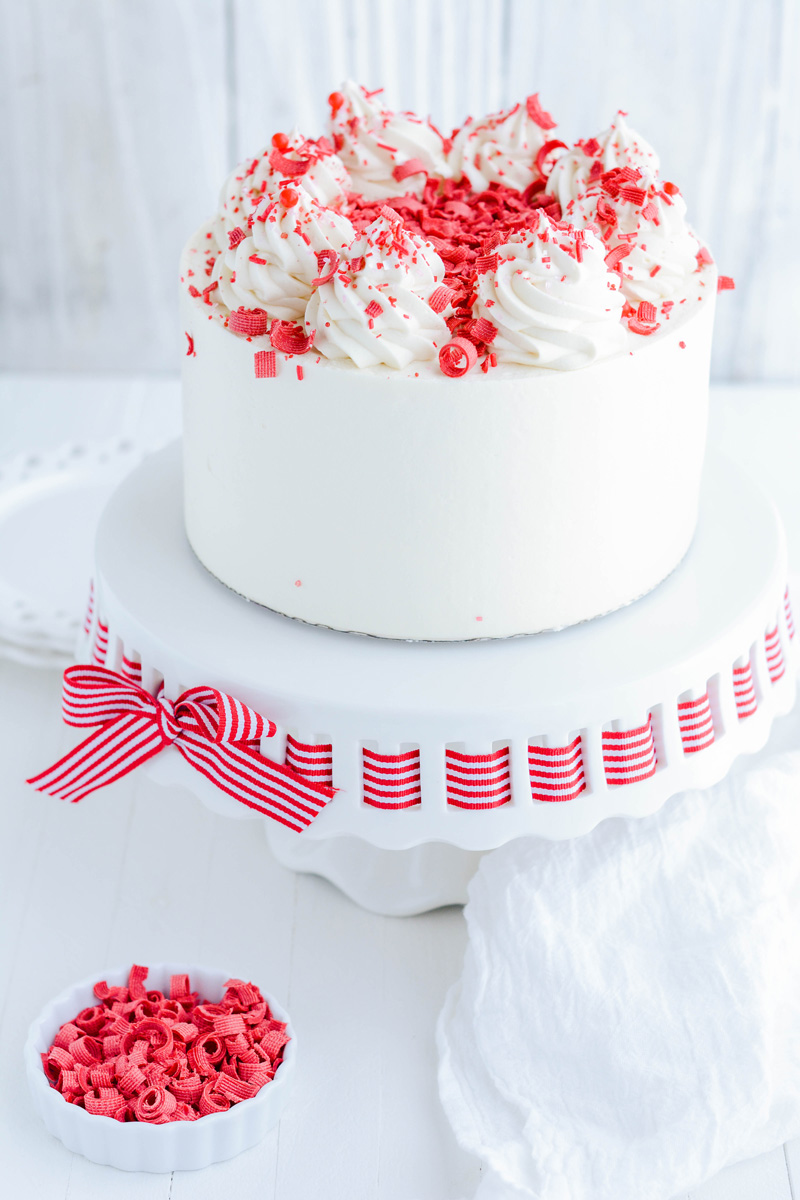
This cake has a unique flavor thanks to the addition of Red Velvet Emulsion which also helps give this cake its gorgeous red color.

Red Velvet Cake Ingredients Breakdown
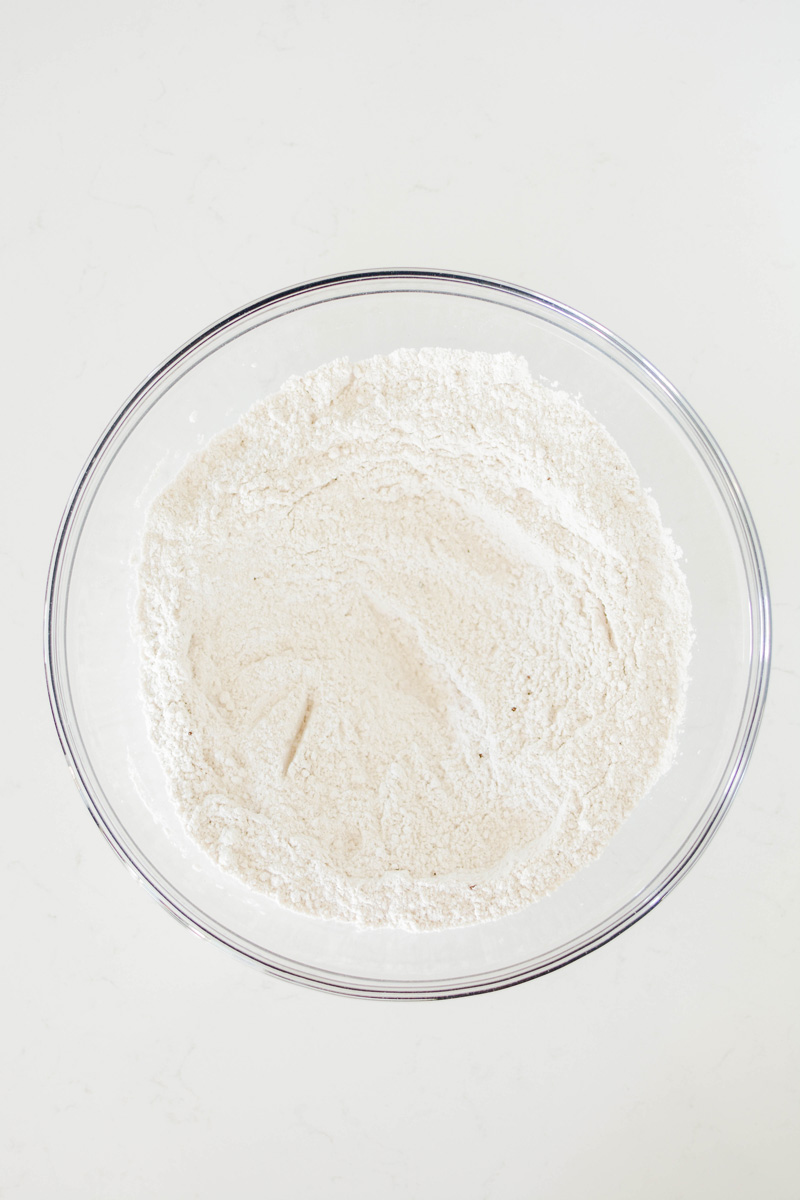
- Cake flour: is a low protein content flour that helps to deliver a cake with a fine crumb.
- Baking powder: is a mixture of baking soda and cornstarch. Baking powder works twice, first when its introduced to moisture and second when it hits the heat.
- Dutch-processed cocoa powder: has a higher pH which neutralizes the acids and helps round out the flavor. Hot liquid such as water and coffee helps dissolve the remaining cocoa butter and helps distribute the flavor.
- Salt: helps with flavor.
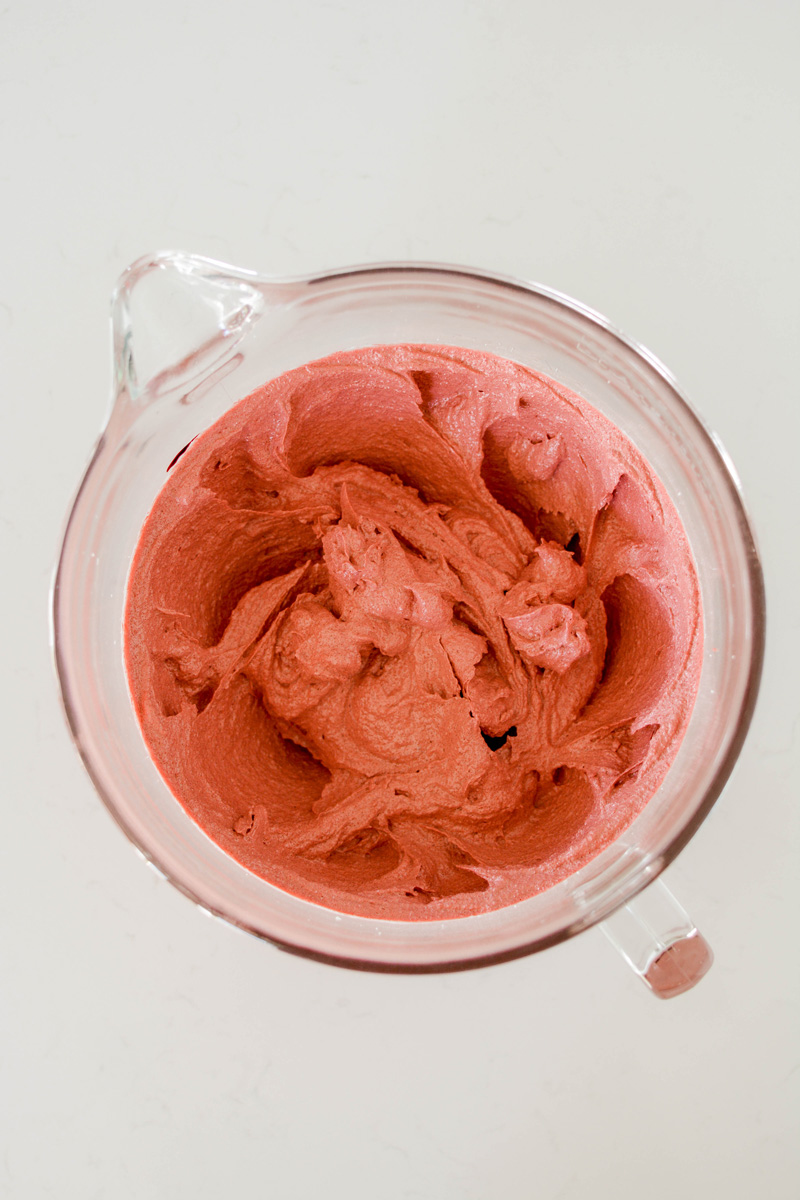
- Unsalted butter: helps add flavor and texture to the cake. Using room temperature butter is best because it is malleable enough to be whipped, but firm enough to retain air. This helps to provide structure and leavening.
- Superfine sugar: helps to create an airy cake. You can make your own superfine sugar by processing granulated sugar in a food processor. Just be sure to add a few teaspoons more sugar in addition to the amount you need for the recipe. Then measure or weigh out and continue with your recipe.
- Vegetable oil: helps with moistness and also keeps the cake tender when chilled.
- Red Velvet Emulsion: adds taste and color to the cake.
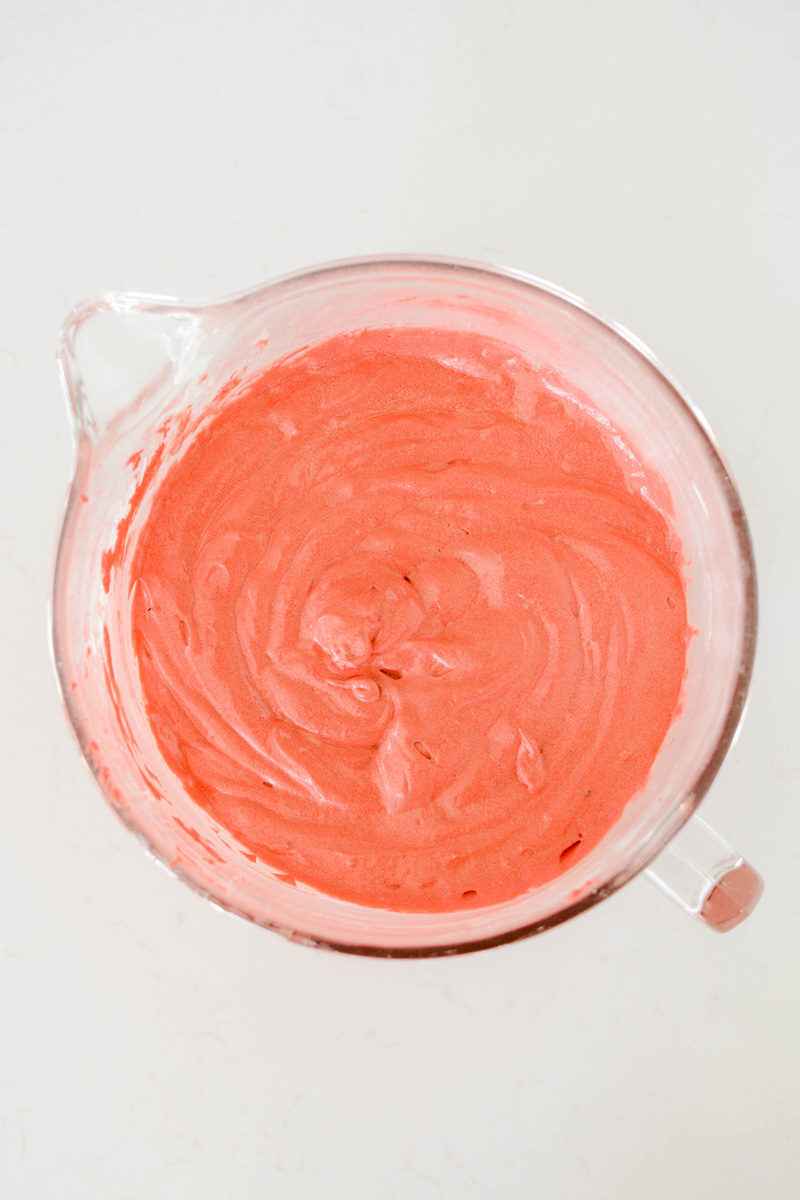
- Eggs: binds, thickens and emulsifies.
- Buttermilk: adds a tangy flavor and helps with texture. It also tenderizes and creates fluffiness in the cake.
- Baking soda: is an alkali and must be used with an acidic ingredient such as buttermilk.
- Distilled vinegar: when mixed with baking soda vinegar creates carbon dioxide which leavens the cake. Once this action happens you should get the cake in the oven right away.
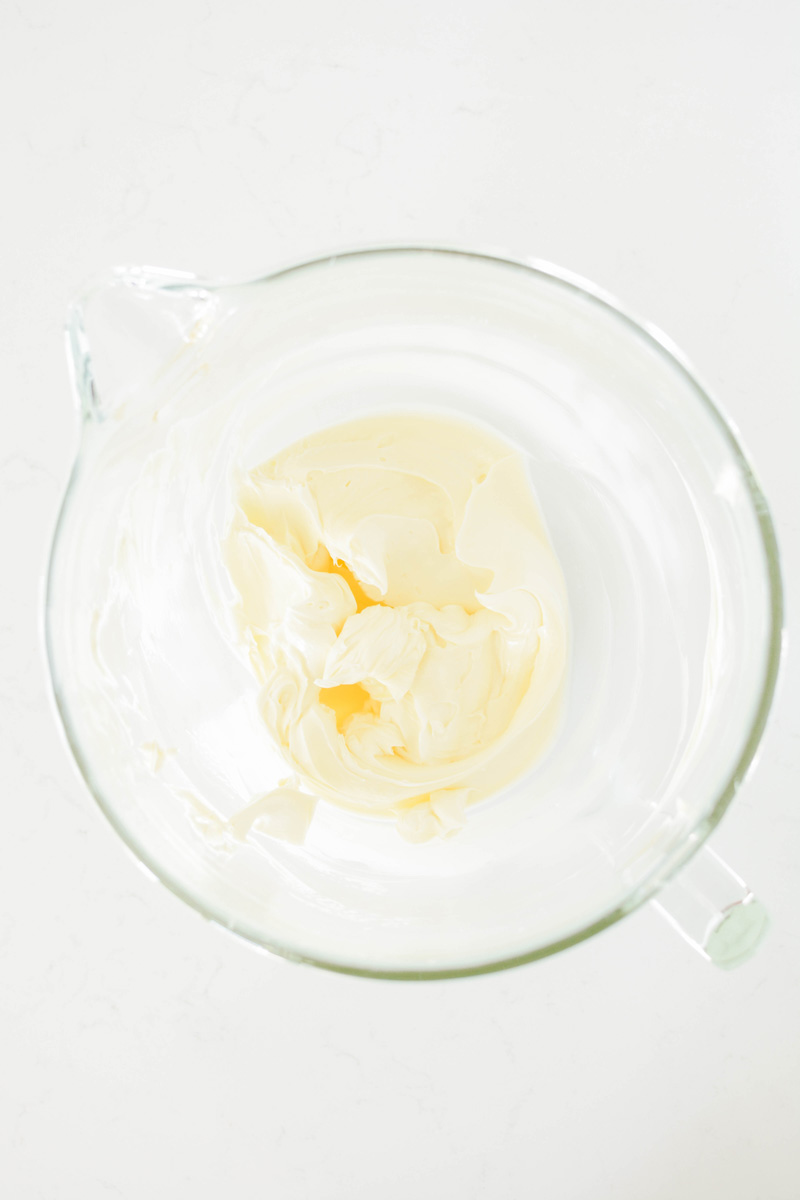
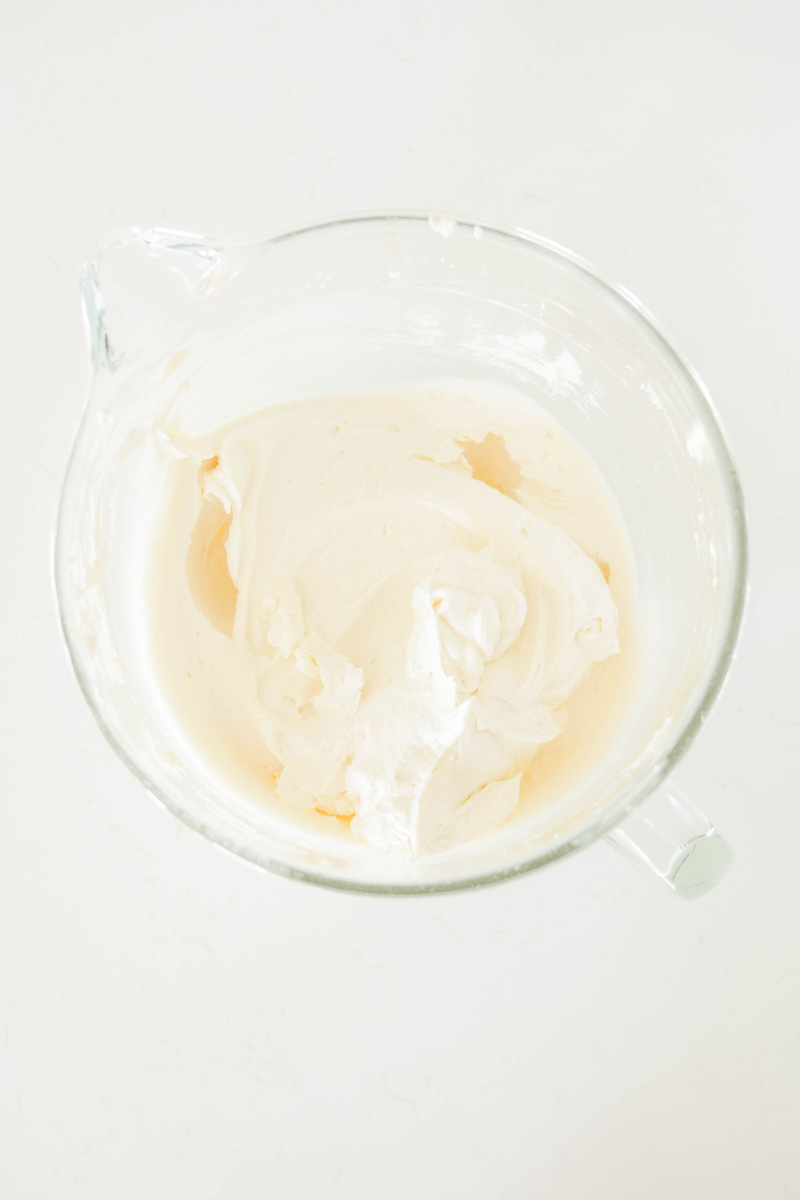
Tricks For Fluffy Cream Cheese Frosting
- Make sure your butter is soft and at room temperature.
- Beat the softened butter, powdered sugar, vanilla extract, lemon juice and salt well.
- Be sure to add your softened and cubed cream cheese in last. Make sure you don't over mix or the frosting will turn soupy.
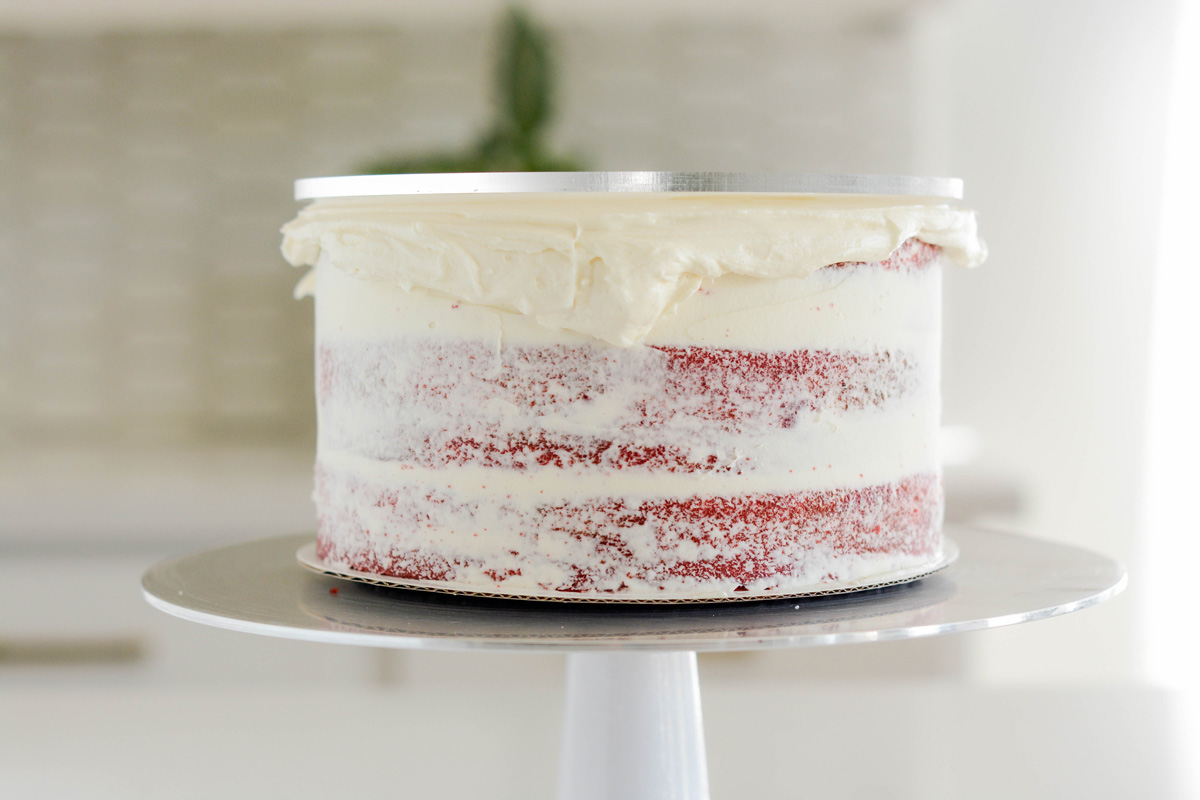
Crumb Coating
Crumb coating helps hold in the loose crumbs and prevents bits of cake from getting into the final layer of frosting. After you've applied a crumb coat, chill the cake in the refrigerator or freezer for 15 to 30 minutes.
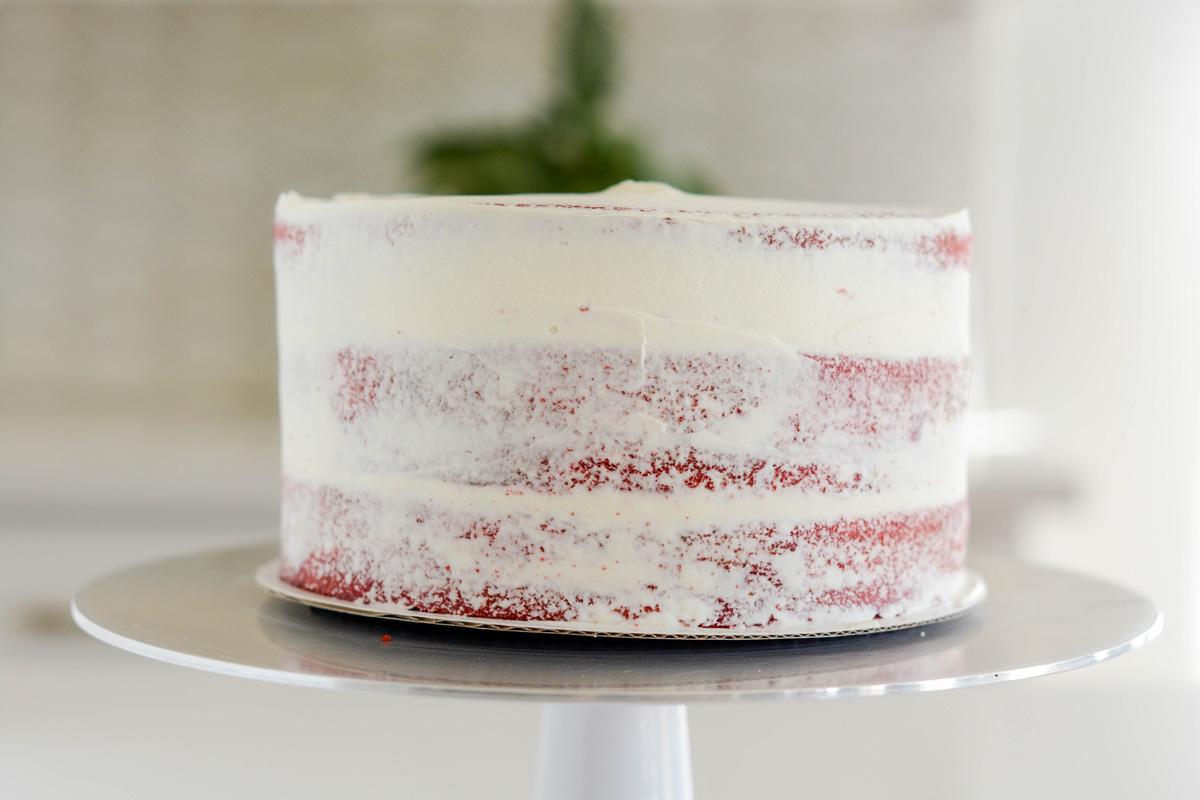
Icing The Cake
- Place a large dollop of frosting on the top of the cake and spread out with an offset cake spatula in an even layer. You should have some excess frosting hanging off the edges.
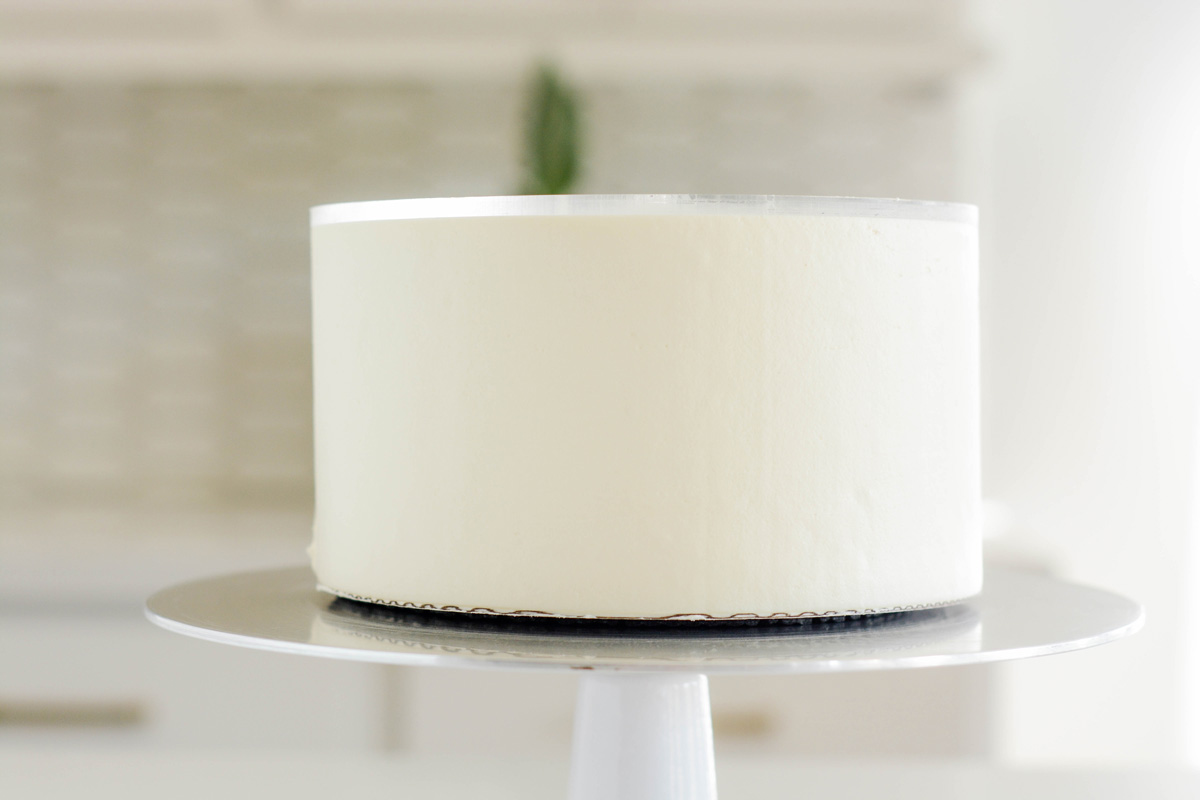
- Center a parchment lined acrylic disc on top of the cake, making sure it's lined up with the cake board on the bottom.
- Coat the entire side of the cake with frosting, making sure the bottom cake board is completely covered.
- Gently press a cake scraper against the bottom cake board and top acrylic disc and rotate the cake turntable until the sides are smooth. Add more frosting to any gaps and repeat this process until the sides of the cake are completely smooth.
- Return the cake back to the refrigerator or freezer for another 15 minutes before removing the acrylic disc.
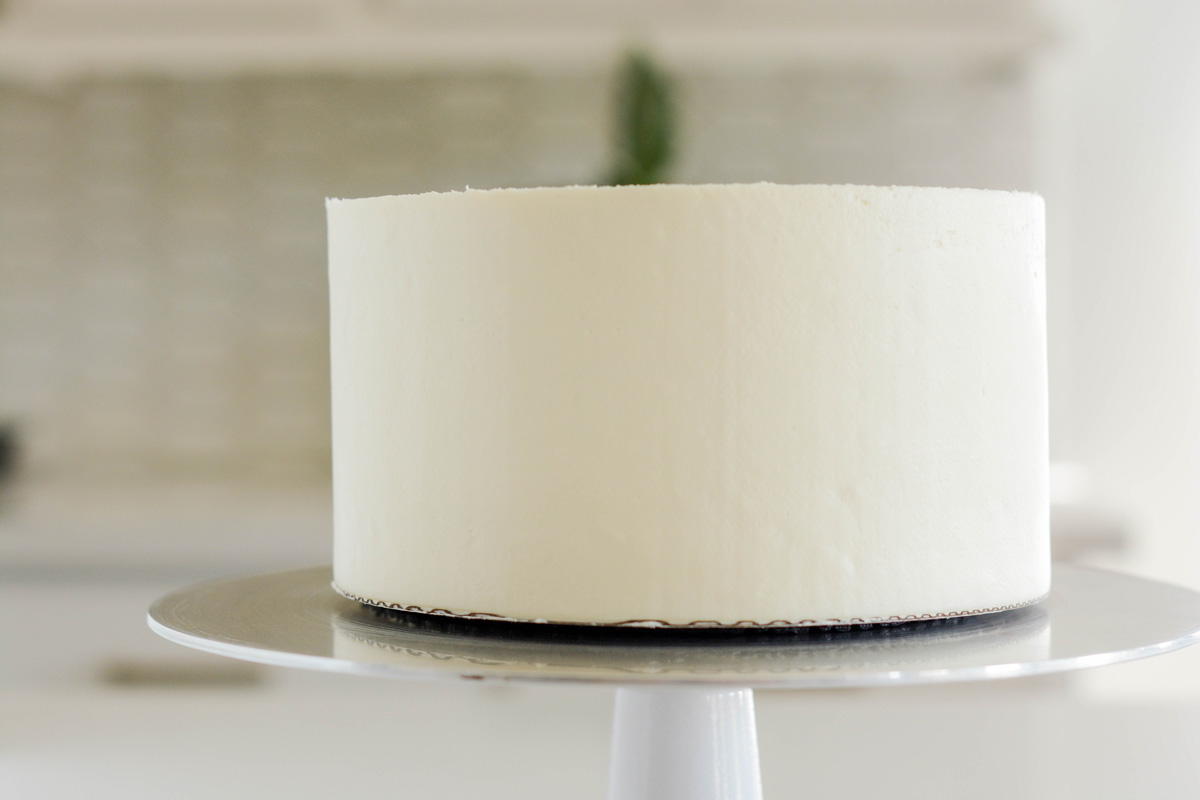
- Gently insert a small offset cake spatula under the disc and rotate the turntable until the disc releases. Peel off the parchment paper and clean the edges of the cake with a cake spatula, moving excess frosting inwards.
Cake Decorating Tools
- Cake turntable
- Small offset cake spatula
- 8-inch round acrylic disc
- Parchment paper
- Cake scraper
- Piping bag
- Ateco piping tip #828
- Sprinkles
Fluffy Red Velvet Cake Baking Schedule
- Day 1: Bake cake layers.
- Day 2: Prepare frosting, assemble and serve.
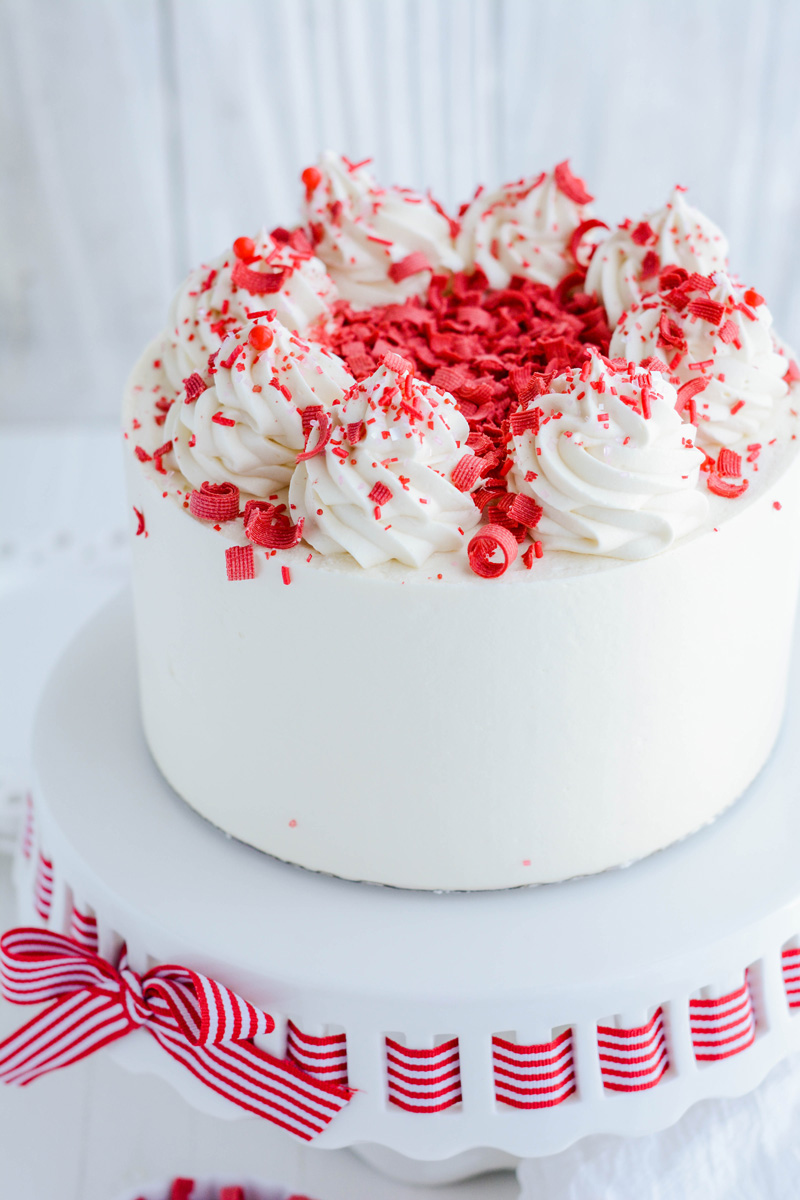
Garnish Ideas For Red Velvet Cake
- The cake layers bake up fairly evenly so you don't need to trim them.
- Bespoke sprinkles.
- I melted red candy melts and poured the melts into a chocolate bar mold and once it was set, I used a vegetable curler to sprinkle red candy melt curls on top.

Make Ahead
- Cake layers can be baked up to 3 days in advance, wrapped in plastic wrap, stored in an airtight container in the refrigerator.
- Cream cheese frosting is best used the day it is made.
- Assembled cake can be stored at room temperature for up to 1 day or stored in the refrigerator for up to 3 days.
Let's Connect
The Cake Chica is on the following social media platforms below. Click subscribe, like and follow! We would love to have you over!
Suggested Recipes

Adapted from Sweetapolita Bakebook by Rosie Alyea
Fluffy Red Velvet Cake
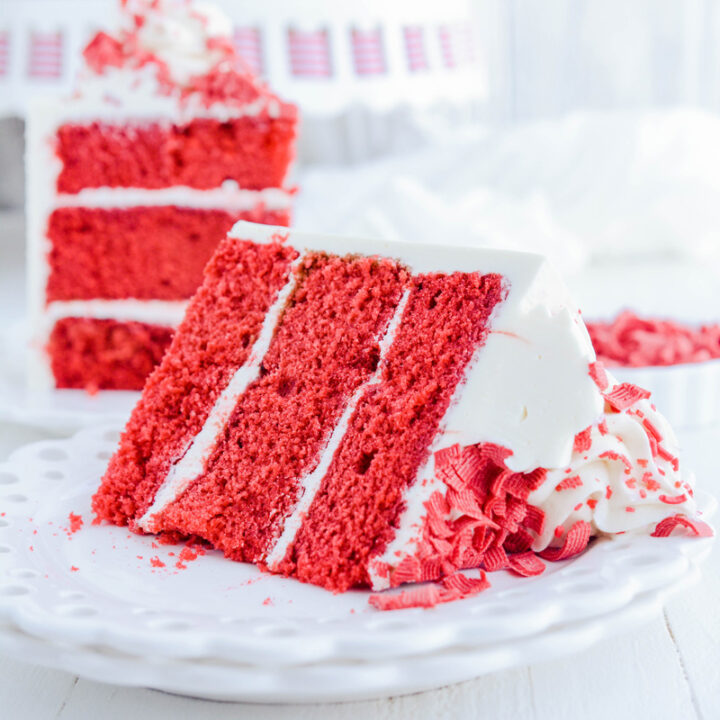
Fluffy Red Velvet Cake filled and frosted with a Fluffy Cream Cheese Frosting topped with bespoke sprinkles and red chocolate curls.
Ingredients
SPECIAL TOOLS
- 3 8-inch round cake pans
- Nonstick baking spray
- Stand mixer
- 8-inch round cake board
- Cake turntable
- Small offset cake spatula
- 8-inch round acrylic disc
- Parchment paper
- Cake scraper
- Piping bag
- Ateco piping tip #828
- Sprinkles
CAKE
- 3 cups (12 ounces/345 grams) cake flour, sifted
- 1 teaspoon baking powder
- 1 teaspoon Dutch processed cocoa powder
- 3/4 teaspoon salt
- 1/2 cup (8 tablespoons/115 grams) unsalted butter, at room temperature
- 2 cups (14.5 ounces/410 grams) superfine sugar
- 1/2 cup vegetable oil
- 2 tablespoons Red Velvet Emulsion
- 3 large eggs, at room temperature
- 1 1/2 cups buttermilk, at room temperature
- 1 teaspoon baking soda
- 2 teaspoons distilled vinegar
CREAM CHEESE FROSTING
- 1 ½ cups unsalted butter, at room temperature
- 4 1/2 cups powdered sugar, sifted
- 2 teaspoons vanilla extract
- ½ teaspoons fresh lemon juice
- Pinch of salt
- 24 ounces cream cheese, cut into cubes and softened
Instructions
CAKE
- Adjust and oven rack to the center position and heat the oven to 350 degrees. Spray 3 8-inch round cake pans with nonstick baking spray and set aside.
- In a large bowl whisk together the flour, baking powder, cocoa powder and salt and set aside.
- In the bowl of a stand mixer fitted with the paddle attachment, combine the butter, sugar, oil and emulsion on medium speed until light and fluffy, about 7 minutes. Add the eggs one at a time, mixing well after each addition. Reduce the mixer speed to low and add the flour mixture in 3 additions, alternating it with the buttermilk in 2 additions.
- In a small bowl, combine the baking soda and vinegar and quickly add it to the cake batter and mix to combine. Divide the cake batter between prepared cake pans and bake for 25 to 30 minutes, or until a toothpick inserted in the center comes out with a few moist crumbs attached, rotating a little over halfway through baking.
- Let the cake layers cool in their pans for 10 minutes. Then, invert the cakes on to cooling racks to cool completely.
FROSTING
- In the bowl of a stand mixer fitted with the paddle attachment, beat the butter on medium speed for 5 minutes. Add the powdered sugar, vanilla extract, lemon juice and salt. Reduce the speed to low and beat for 1 minute.
- Increase the speed to medium and beat until fluffy, about 4 minutes. Reduce the speed to medium-low and add the cream cheese and beat until smooth, about 1 minute. Do not over beat or the frosting will become soupy.
CRUMB COATING
- Place one cake layer on an 8-inch round cake board and place on a cake turntable. Spread about 3/4 cup frosting over the top and in an even layer with a small offset cake spatula. Place the second cake layer on top and spread about 3/4 cup frosting in an even layer all the way out to the edge. Place last cake layer on top and apply a light coating of frosting over the top and sides of the cake, trapping any loose crumbs. Chill in the refrigerator or freezer for about 15 to 30 minutes.
ASSEMBLE
- Apply a large dollop of frosting over the top of the cake and spread out to the edge in an even layer. Line an 8-inch acrylic disc with parchment paper and place the disc on top of the cake, parchment side down, being sure to line the disc up with the bottom cake board. Apply a generous amount of frosting to the sides go the cake making sure the bottom cake board is completely covered. Gently touch the cake scraper to the bottom cake board and top acrylic disc and rotate the turntable to create a smooth finish. Fill in any gaps with more frosting and rotate until the sides are completely smooth. Place the cake in the refrigerator or freezer for 15 to 30 minutes.
- Using a small offset cake spatula, carefully insert the spatula under the disc and slowly rotate the cake turntable until the disc releases. Peel off the parchment paper and smooth out the top edges of the cake if needed.
- Fit a piping bag with Ateco piping tip #828 and fill with remaining frosting. Pipe 8 swirls of frosting on the top edge of the cake. Sprinkle the cake with red sprinkles and edible glitter. Carefully transfer the cake to a cake stand and serve.
Notes
Cake layers can be baked up to 3 days in advance, wrapped in plastic wrap, stored in an airtight container in the refrigerator.
Cream cheese frosting is best used the day it is made.
Assembled cake can be stored at room temperature for up to 1 day or stored in the refrigerator for up to 3 days.
Nutrition Information:
Yield: 12 Serving Size: 1Amount Per Serving: Calories: 951Total Fat: 61gSaturated Fat: 29gTrans Fat: 0gUnsaturated Fat: 28gCholesterol: 197mgSodium: 656mgCarbohydrates: 93gFiber: 1gSugar: 61gProtein: 11g
*Nutrition information is an estimate and will vary.*


Leave a Reply