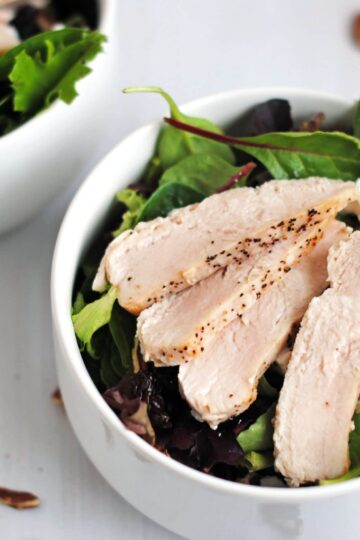
• Skip to primary navigation
  • Skip to main content
  • Skip to primary sidebar
  • About
  • Recipe
    • Listicle
    • Kitchen Staples
    • Drinks
      • Cocktails
      • Non-Alcoholic
      • Smoothies
    • Breakfast
      • Eggs
      • Muffins and Baking
      • Pancakes and Waffles
    • Sweet
      • Brownies and Bars
      • Cakes and Frostings
        • Beginner Cake Recipes
        • Intermediate Cake Recipes
        • Advanced Cake Recipes
      • Cheesecake
      • Cobblers & Fruit Desserts
      • Cookies and Candies
      • Custards & Trifles
      • Pies & Tarts
    • Savory
      • Appetizers
      • Easy Weeknight Meals
      • Beef and Pork
      • Chicken and Turkey
      • Fish and Shellfish
      • Grains and Beans
      • Pasta and Rice
      • Potatoes
      • Quinoa
      • Soups & Stews
      • Vegetables
    • On The Lighter Side
  • Resources
  • Contact
  • Work With Me
  • Privacy Policy

The Cake Chica

menu icon
go to homepage
  • Recipe Index
  • About
  • Work With Me
  • Contact

subscribe
search icon
Homepage link
  • Recipe Index
  • About
  • Work With Me
  • Contact

×
Home

Rice and Lentils with Crispy Onions

November 14, 2015

Rice and Lentils with Crispy Onions

Rice and Lentils with Crispy Onions

I never knew I could like rice and beans so much. I made this dish for the first time about a year ago, before I had an organizational system in place for my recipes. (I just completed a spreadsheet of all the recipes I have in all my cookbooks organized by meal type, protein and a main vegetable, it took a while but it’s a time saver now.)

Rice and Lentils with Crispy Onions

There have been a few times that I have craved this dish, but I couldn’t remember the name or where to find the recipe. Well just my luck I had accidently bought some leeks by mistake and went looking for a recipe in my new recipe spreadsheet that was using leeks. And what do you know; I found a recipe using leeks in my Cook's Illustrated magazine the same magazine that had this recipe for Rice and Lentils with Crispy Onions! I was so excited I had to put this on the meal plan and blog it ASAP! I hope you will enjoy this one as much as I do.

Rice and Lentils with Crispy Onions


...

Read More

Southern Style Chicken Fried Steak

October 22, 2015

Southern Style Chicken Fried Steak


Southern Style Chicken Fried Steak

Disclosure: Please note that some of the link in this post are affiliate links and I will earn a commission if you purchase through those link.

Craig has been begging me to make Chicken Fried Steak for years. His mom and Granny used to make it for him when he was a kid. Not having a real connection with Chicken Fried Steak it took me awhile to put this one on the meal plan, but I finally caved in.

Southern Style Chicken Fried Steak

As I searched my cookbook library for the best one it came down to 2 recipes. The first one was a fancied up version, my choice of course, but somehow I knew Craig wouldn’t go for it. Nope he wanted the second choice, the good old fashioned southern-style chicken fried steak with cream gravy.

Southern Style Chicken Fried Steak

Now I am a brown gravy type of girl, the white cream gravy has just never done it for me, but Craig was okay with letting my pick the gravy for this one so I chose an onion gravy, which came out brown! Score!!!

Southern Style Chicken Fried Steak

This Chicken Fried Steak definitely hit the spot for both me and Craig. Just like his mom and Granny used to make for him!

Adapted by Mary from Texas Eats by Rob Walsh


Thrive Market

Southern Style Chicken Fried Steak

Southern Style Chicken Fried Steak

Yield: 6

Ingredients

SEASONED FLOUR

  • 2 1/2 cups all-purpose flour
  • 2 tablespoons chili powder
  • 1 tablespoon kosher salt
  • 1 tablespoon black pepper
  • 1 tablespoon onion powder
  • 1 tablespoon garlic powder

CHICKEN FRIED STEAK

  • 1 quart peanut oil, for frying
  • 2 cups Seasoned Flour
  • 1 cup buttermilk
  • 1 egg, lightly beaten
  • 12 tenderized eye-of-round steaks, about 3 pounds total

ONION GRAVY

  • 1/4 cup unsalted butter
  • 1 large yellow onion, chopped
  • 5 tablespoons Seasoned Flour
  • 2 1/2 cups whole milk
  • 2 teaspoons kosher salt
  • 1 tablespoon Worcestershire sauce

Instructions

SEASONED FLOUR

  1. Stir together all the ingredients in a large bowl. Set aside 5 tablespoons of flour to use for the Onion Gravy.

CHICKEN FRIED STEAK

  1. Preheat an oven to 200 degrees. Pour enough oil in a cast iron skillet to come up about 1 inch and heat oil to 370 degrees. While the oil is heating, put 2 cups Seasoned Flour in a pie dish or shallow bowl. In a separate pie dish or shallow bowl, whisk together the buttermilk and egg. Dip each steak in the flour, shaking off the excess. Next, dip it into the buttermilk mixture, letting excess drip off and then dip again in the flour, evenly coating the batter so it is dry on the outside.
  2. Slide 2 or 3 steaks into the hot oil, but be sure not to overcrowd the pan. The temperature will fall as soon as the steaks are added to the oil so adjust your heat accordingly. As the steaks cook try to keep the temperature around 350 degrees. If the oil gets too hot the steaks will burn before they are cooked, if the oil is not hot enough the batter will be soggy. You may have to wait for the oil to come back to temperature before adding the next batch. Cook the steaks for 3 to 5 minutes, until the batter is crisp and brown and meat is cooked, flipping once while cooking. Using a wire skimmer, transfer the steaks to paper towels to drain and keep warm in a preheated oven until all the batches are done.

ONION GRAVY

  1. Meanwhile, in a heavy saucepan, melt butter over medium heat. Add the onion.  Cover and cook for about 15 minutes or until the onion is soft.  Remove the lid and continue to cook until the onion has caramelized, about 15 minutes, and most of the liquid has evaporated.
  2. Whisk the flour into the onion and continue to cook, whisking constantly, for about 3 minutes until the mixture is smooth and light brown in color. Slowly add the milk while still whisking constantly. Continue to whisk until free of lumps. Add the salt and Worcestershire sauce and simmer, stirring often for about 10 minutes, until the gravy has thickened. Serve the steaks with gravy and enjoy.

Did you make this recipe?

Tag @thecakechica1 on Instagram and hashtag #thecakechica1

© Mary
Category: Main

You May Also Like:

Homemade Bacon-Ranch Tator Tots


Beer Battered Onion Rings

Beer Battered Onion Rings


Southern Shrimp And Grits


Comfort food at it's best! #comfortfood #thecakechica #chickenfriedsteak #friedfoods #cfs


Sweet Potatoes with Crispy Rice Topping

October 5, 2015

Sweet Potatoes with Crispy Rice Topping

Sweet Potatoes with Crispy Rice Topping

These Sweet Potatoes with Crispy Rice Topping is a fun and unique way to serve your sweet potatoes at your Thanksgiving table this year!

Sweet Potatoes with Crispy Rice Topping

I started off by making a caramel sauce on the stove top. Then I poured the caramel on top of the rice cereal and quickly gave it a thorough tossing, making sure all the rice cereal is covered in tasty caramel sauce. Next, set aside to cool before breaking into pieces to serve.

While the crispy rice topping was cooling I started on the potatoes.

Sweet Potatoes with Crispy Rice Topping

Tips

Check out these helpful tips for making these Sweet Potatoes with Crispy Rice Topping:

  1. Buy small sweet potatoes so they will roast quicker in the oven.
  2. Planning is a must when prepping Thanksgiving dinner. The pureed sweet potatoes can be made 2 days ahead of time and refrigerated.
  3. The crispy rice topping can be made up to a week in advance and stored in an air tight container stored on the counter.

Sweet Potatoes with Crispy Rice Topping

Here are a few other Thanksgiving treats you might want to feature on your Thanksgiving table this year: Classic Pecan Pie, The Quintessential Pumpkin Pie, Easy Pumpkin Parfaits and maybe have some Thanksgiving breakfast with these Spiced Pumpkin Pecan Pancakes!

Be sure to follow The Cake Chica on social media: Facebook, Instagram, Twitter, Pinterest and Yummly. If you're looking for more, sign up for my weekly newsletter The Weekly Recap where I'll send one email per week to your inbox with the latest recipe link and a sneak peek at what's coming up next on The Cake Chica. And as I thank you for signing up, you'll receive my ebook The Cake Chica's Top 10 recipes of 2015 for FREE! Sign up in the form below this post!

Talk with you next week!

...

Read More

Chicken Nuggets

September 20, 2015

Chicken Nuggets

Chicken nuggets were always my favorite thing to get at the golden arches when I was younger. My grandparents would always take me to Mc Donald’s and I just thought that was the best thing ever! My grandpa also told me I would always order the most expensive thing too LOL. I wasn’t doing it on purpose I just knew what I liked. Well I haven’t stepped foot in a Mc Donald’s for at least 5 years, but some things haven’t changed. I still order the most expensive thing on the menu at restaurants; I am just with my husband when I do it now, but back to these chicken nuggets. These little guys took me back to a time when I would see grandma and grandpa for the weekend and they would take me and my sister to Mc Donald’s, a time where I didn’t care what I put in my body, I didn’t care about calories. All I knew was I was eating a tasty meal with my grandparents and even though it wasn’t the best thing for my body I was having an awesome time with my grandparents and creating memories. These chicken nuggets may not be the healthiest thing either, but made with organic chicken breast and fried in my own kitchen I know what is going into it and eating such foods on occasion I believe is good food for the soul. Enjoy.
Chicken Nuggets

 Chicken Nuggets

Adapted by Mary from Cook's Country

Chicken Nuggets

Chicken Nuggets

Yield: 4

Ingredients

HONEY-MUSTARD SAUCE

  • 1/2 cup yellow mustard
  • 1/3 cup honey
  • Salt and pepper

CHICKEN NUGGETS

  • 24 ounces skinless chicken breasts, trimmed
  • 2 cups water
  • 2 tablespoons Worcestershire sauce
  • Salt and pepper
  • 1 cup all-purpose flour
  • 1 cup panko crumbs, crushed
  • 2 teaspoons onion powder
  • 1/2 teaspoon garlic powder
  • 1/2 teaspoon baking soda
  • 3 large egg whites
  • 1 quart peanut or vegetable oil

Instructions

SAUCE

  1. Whisk mustard and honey in a medium bowl until smooth; season with salt and pepper to taste. Set aside until ready to use.

CHICKEN NUGGETS

  1. Cut each chicken breast diagonally into thirds, then cut each third diagonally into 1/2-inch pieces. Whisk water, Worcestershire sauce and 1 tablespoon salt in large bowl until salt dissolves. Add chicken pieces, cover and refrigerate 30 minutes. Do not brine chicken for longer than 30 minutes or chicken may become too salty.
  2. Remove chicken from brine and pat dry with paper towels. Combine flour, panko, onion powder, 1 teaspoon salt, 3/4 teaspoon pepper, garlic powder and baking soda in shallow dish. Whisk egg whites in second shallow dish until foamy. Coat half of chicken with egg whites and dredge in flour mixture, pressing to adhere. Transfer to plate and repeat with remaining chicken (don’t discard flour mixture). Let sit for 10 minutes.
  3. Adjust oven rack to middle position and heat oven to 200 degrees. Set wire rack in rimmed baking sheet lined with foil (for easy clean up). Add oil to large 5 quart Dutch oven until it measures 3/4 inch deep and heat over medium-high heat to 350 degrees.
  4. Return chicken pieces to reserved flour mixture and turn to coat, pressing gently to adhere. Fry half of chicken until deep golden brown, about 3 minutes, turning halfway through cooking. Transfer chicken to prepared backing sheet and place in oven. Bring oil back up to 350 degrees and repeat with remaining chicken. Serve with Honey-Mustard Dipping Sauce.

Did you make this recipe?

Tag @thecakechica1 on Instagram and hashtag #thecakechica1

© Mary
Category: Main


Margarita on the Rocks

September 6, 2015

Margarita on the Rocks

Relax! It’s almost Labor Day! Before the weather starts to cool off, why not enjoy this ice cold margarita! This is the first margarita recipe I have found that isn’t so tart and doesn’t burn my throat while going down. Maybe that has something to do with the brand of tequila used. The guy at Spec’s recommended Toro de Lidia tequila. “It has a mid shelf price with a top shelf flavor”. So he said…..and I have to agree with him. This recipe also uses super fine sugar instead of a simple syrup, which is a plus since it is one less thing I have to do to get my margarita! Just be sure to shake that cocktail shaker well (shake it like a Polaroid picture) to get that sugar mixed in. Enjoy!

Margarita on the Rocks

Margarita on the Rocks

Margarita on the Rocks

Margarita on the Rocks

Yield: 1

Ingredients

  • 1 1/2 ounces silver tequila
  • 3/4 ounce Cointreau or Triple Sec
  • 3/4 ounce fresh squeezed lime juice
  • 1 tablespoon super fine sugar
  • Lime wedge for garnish

Instructions

  1. Roll lime on hard surface to break down membranes and yield more juice. Halve lime crosswise. Spread an even layer of kosher salt or fine sea salt on plate. Using a 10 ounce glass, lightly rub lime around outside of rim. Lightly press glass rim into salt, tap off excess. Fill glass with ice and store in freezer to chill while preparing margarita.
  2. Fill cocktail shaker with ice, pour all ingredients in, except for lime garnish and shake vigorously. Strain with cocktail strainer into prepared cocktail glass. Garnish with lime.

Did you make this recipe?

Tag @thecakechica1 on Instagram and hashtag #thecakechica1

© Mary
Category: Drinks


Broccoli with Cheese Sauce

August 15, 2015

Broccoli and Cheese

Broccoli is not my favorite thing to eat, but slather some cheese on top and it becomes my favorite side dish! Pairs well with meatloaf, or anything else you can think of.

Broccoli and Cheese

Broccoli and Cheese

Broccoli with Cheese Sauce

Broccoli with Cheese Sauce

Yield: 6

Ingredients

  • 2 pound broccoli, cut into 1-inch florets with about 2 inches of stem attached
  • 3 tablespoons unsalted butter
  • 3 tablespoons all-purpose flour
  • 1 1/4 cups milk
  • 1/4 cup heavy cream
  • 1/4 teaspoon dry mustard mixed with 1/2 tablespoon water
  • 6 ounces sharp or mild white cheddar
  • Kosher salt

Instructions

  1. In large, deep saucepan bring 1 inch of water to boil. Fill steamer basket with broccoli, add to saucepan, cover, and steam over high heat until broccoli is crisp and tender, about 5 minutes. Transfer broccoli to platter.
  2. Meanwhile, in medium saucepan, melt butter. Add flour and whisk over medium-high heat for 2 minutes. Add milk and cream. Cook whisking until thickened, about 2 minutes. Add mustard and cheese and cook over low heat until the cheese is melted. Season sauce with salt and serve with broccoli.
Nutrition Information:
Serving Size: 1
Amount Per Serving: Calories: 349Total Fat: 25gSaturated Fat: 16gCholesterol: 81mgSodium: 320mgCarbohydrates: 16gFiber: 4gSugar: 5gProtein: 16g

Did you make this recipe?

Tag @thecakechica1 on Instagram and hashtag #thecakechica1

© Mary


Adapted from Food and Wine

Jamie Eason's Pumped Up Protein Pancakes

August 3, 2015

Pumped Up Protein Pancakes

I am in the process of doing Jamie Eason’s Post Pregnancy Fitness Trainer program. No, I didn't just have a baby, but I thought it would be a good training program to get me back on track with my training since recovering from my myomectomy surgery back in June.  The surgery went great! And I had a great doctor and nursing staff to care for me while I was recovering in the hospital for 3 days. And my husband Craig and his mom were by my side taking care of me at home during the 6 weeks of recovery. I am very blessed to have people that care for me so much, it made the recovery process easier to get through I think. Now I am ready to get back to my normal routine, and that means getting back to training and eating right. I am a little more conscious of what I am eating these days since after reading up on fibroids there are some foods that may help keep them away.  I have been switching to all organic meats and produce, and trying to incorporate more wild fish and greens into my diet. As well as ditching the coffee, but I couldn’t quit cold turkey. Right now I am doing half-caff in hopes of switching to decaffeinated soon.

One of the recipes I found for Jamie Eason’s Post Pregnancy Workout is these protein pancakes! They make a lot so you can easily save them and reheat them in the toaster for an easy breakfast throughout the week.  But being the foodie that I am I had to put my take on it. I used the strawberry filling from my Strawberry Shortcake recipe for the topping on these and just switched out the granulated sugar with coconut sugar. It really takes these pancakes to the next level.

Pumped Up Protein Pancakes 4

Pumped Up Protein Pancakes 6

Pumped Up Protein Pancakes 2

Jamie Eason's Pumped Up Protein Pancakes

Jamie Eason's Pumped Up Protein Pancakes

Yield: 18

Ingredients

STRAWBERRY TOPPING

  • 2 1/2 pounds organic strawberries, hulled
  • 6 tablespoons coconut sugar

PANCAKES

  • 3 cups oat flour
  • 3 scoops vanilla protein powder
  • 2 tablespoons coconut sugar
  • 2 teaspoons baking powder
  • 3/4 teaspoons baking soda
  • 1/2 teaspoons table salt
  • 2 1/2 cups unsweetened almond milk
  • 6 ounces plain Greek yogurt
  • 1/4 cup unsweetened apple sauce
  • 1/2 teaspoon vanilla extract
  • 4 egg whites

Instructions

STRAWBERRY TOPPING

  1. In a large bowl, crush 3 cups strawberries in large bowl with potato masher. Slice remaining strawberries. Stir sliced strawberries and coconut sugar into crushed berries. Set aside until sugar has dissolved and berries are juicy, at least 30 minutes or up to 2 hours.

PANCAKES

  1. In large bowl mix together oat flour, protein powder, coconut sugar, baking powder, baking soda and salt. In a medium bowl, mix almond milk, yogurt, applesauce, vanilla extract and eggs. Add wet ingredients to dry ingredients and mix until just combined. Use 1/3 cup measure and scoop out batter and pour onto preheated skillet. Cook about 2 minutes on each side.
Nutrition Information:
Serving Size: 1
Amount Per Serving: Calories: 229Total Fat: 3gSodium: 190mgCarbohydrates: 37gFiber: 6gSugar: 10gProtein: 13g

Did you make this recipe?

Tag @thecakechica1 on Instagram and hashtag #thecakechica1

© Mary
Category: Breakfast


Coca-Cola Sloppy Joes

July 27, 2015

Coca-Cola Sloppy Joes

Please note that some of the links in this post are affiliate links and I will earn a commission if you purchase through those links.

This is one of those meals that takes me back to my childhood. My mom would always make sloppy joes because they were easy and affordable. For mine, I use organic ground beef or grass-fed beef and use organic ketchup as well as organic veggies just to keep out any unnecessary additives. I usually try to make my recipes with as little processed ingredients possible, but I have a special place in my heart for Coca-Cola! 

Coca-Cola Sloppy Joes

Growing up this was my soda of choice, and now that I am all grown up I seldom drink it, but I do collect all things Coca-Cola!!! From the tin signs, the Christmas polar bear, Coca-Cola dishes (pictured here), Coca-Cola town square to my Coca-Cola Christmas tree that I put up every year.

Coca-Cola Sloppy Joes

And any time I do use or drink Coca-Cola I go for the Mexican coke from Mexico. It's made with real sugar and not high fructose corn syrup and in my opinion tastes exceptionally better. Mexican coke can usually be found in the international foods aisle in your grocery store if you want to give it a try. 

Coca-Cola Sloppy Joes

 
Thrive Market

Adapted from Coca-Cola Refreshing Recipes Cookbook

Coca-Cola Sloppy Joes

Coca-Cola Sloppy Joes

Yield: 4
Prep Time: 5 minutes
Cook Time: 40 minutes
Total Time: 45 minutes

A comfort food favorite made with ground beef, vegetables and Coca Cola!

Ingredients

  • 1 pound organic ground beef
  • 1 organic onion, finely chopped
  • 3/4 cup organic green bell pepper, finely chopped
  • 2 tablespoons all-purpose flour
  • 1 cup Mexican Coca-Cola
  • 1/2 cup organic ketchup
  • 2 tablespoons white vinegar
  • 1 tablespoon organic Worcestershire sauce
  • 2 teaspoons organic dry mustard
  • 1/2 teaspoon freshly ground black pepper
  • 1/2 teaspoon kosher salt
  • 4 Hamburger buns, toasted

Instructions

  1. In a large heavy-bottomed skillet, brown ground beef over medium-high heat until cooked through. Remove cooked beef and drain excess fat. Add onion and bell pepper to skillet and cook until onions are translucent. Add cooked beef back into skillet.
  2. Add remaining ingredients, (except buns) and stir until combined. Cover and simmer for 30 minutes, stirring occasionally.
  3. Serve meat mixture on hamburger buns.
Nutrition Information:
Yield: 4 Serving Size: 1
Amount Per Serving: Calories: 535Total Fat: 22gSaturated Fat: 8gTrans Fat: 1gUnsaturated Fat: 11gCholesterol: 101mgSodium: 912mgCarbohydrates: 46gFiber: 2gSugar: 18gProtein: 37g

*Nutrition information is an estimate and will vary.*

Did you make this recipe?

Tag @thecakechica1 on Instagram and hashtag #thecakechica1

© Mary
Cuisine: American / Category: Main

You May Also Like:

Chocolate Fudge Sheet Cake

Coca Cola Fudge Cake

Coca Cola and Kahlua Float

Coca Cola Kahlua Float

Spiked Shirley Temple

Spiked Shirley Temple

Strawberry Shortcakes

July 12, 2015

Strawberry Shortcakes

Strawberry Shortcakes

Disclosure: As an Amazon Associate and member of other affiliate programs, I earn from qualifying purchases.

Sure, it's so easy to buy the premade shortcakes at the grocery store bakery, but trust me, these Strawberry Shortcakes are with the effort of making them homemade!

Strawberry Shortcakes

And they're not as hard to make as you might think. Just mix up the biscuit dough and make the strawberry topping and whip up the cream and that's it! You can even make these a few hours in advance before guest arrive to create an impressive dessert for friends.

Strawberry Shortcakes

Check out these biscuits! I love that they have that sugary crust on top to give these strawberry shortcakes a bit of texture.

Strawberry Shortcakes

To keep up when new recipes coming out, follow The Cake Chica on social media: Facebook, Instagram and Pinterest.

Strawberry Shortcakes

Did you make this recipe? I’d love to see it! Tag The Cake Chica on Instagram @thecakechica1 #thecakechica1

Adapted from Cook's Illustrated

Strawberry Shortcakes

Strawberry Shortcakes

Yield: 6
Prep Time: 25 minutes
Cook Time: 12 minutes
Additional Time: 10 minutes
Total Time: 47 minutes

Homemade biscuits with a sugary sweet crust, filled with fresh strawberries and whipped cream.

Ingredients

SPECIAL TOOLS

  • Potato masher
  • Food processor
  • Biscuit cutter
  • Stand mixer

STRAWBERRIES

  • 2 1/2 pounds strawberries, hulled
  • 6 tablespoons granulated sugar

BISCUITS

  • 2 cups all-purpose flour
  • 5 tablespoons granulated sugar, divided
  • 1 tablespoon baking powder
  • 1/2 teaspoon table salt
  • 8 tablespoons unsalted butter, cut into 1/2-inch pieces and chilled
  • 1/2 cup plus 1 tablespoon half-and-half
  • 1 large egg, lightly beaten
  • 1 large egg white, lightly beaten

WHIPPED CREAM

  • 1 cup heavy cream, chilled
  • 1 tablespoon granulated sugar
  • 1 teaspoon vanilla extract

Instructions

STRAWBERRIES

  1. In a large bowl, with a potato masher, mash about 3 cups of the strawberries. Slice the remaining 5 cups strawberries and stir into the crushed berries and add sugar. Stir to combine and set aside until sugar has dissolved and berries are juicy, at least 30 minutes and up to 2 hours.

BISCUITS

    1. Adjust an oven rack to the lower-middle position and heat oven to 425 degrees. Line a baking sheet with parchment paper. In a food processor, process 3 tablespoons sugar, baking powder and salt until combined. Sprinkle butter over top and pulse until the mixture resembles coarse crumbs, about 15 pulses. Pour mixture into a large bowl.

    2. In another bowl whisk together the half and half, and whole egg until combined. Stir into the flour mixture until large clumps form. Invert dough onto a light flowered counter and knead lightly until the dough comes together, being sure not to overwork the dough.

    3. Form a 9 by 6 inch rectangle with ¾ inch thickness and with a 2 ¾ inch biscuit cutter, cut out 6 dough rounds. Place dough on the prepared baking sheet, leaving about 1 ½ inch space around the dough rounds. Brush top of each dough round with egg white and sprinkle remaining 1 tablespoon sugar over the tops.

    4. Bake the biscuits until they are golden brown, about 12 to 14 minutes, rotation the pan halfway through baking. Let biscuits cool on a cooling rack for 10 minutes.

    WHIPPED CREAM

    1. In the bowl of a stand mixer, with the whisk attachment attached, beat whip cream, sugar, and vanilla on medium-low speed until foamy, about 1 minute. Increase the speed to high and whip for about 1 to 3 minutes until soft peaks form. Don’t over mix or the whipped cream will start to lose its smooth and creamy texture.

    ASSEMBLE

    1. Split each biscuit in half and place bottoms on individual plates. Spoon portion of strawberries over each bottom half, dollop with whipped cream and place other half of biscuit on top. Top with more whipped cream and strawberries and serve immediately.


    Notes

    MAKE AHEAD: Unbaked biscuits can be refrigerated, covered with plastic wrap for up to 2 hours.

    STORAGE: Cooled biscuits can be stored at room temperature for up to 1 day. Before assembling, reheat in 350 degree oven for 3 to 5 minutes.

    Recommended Products

    As an Amazon Associate and member of other affiliate programs, I earn from qualifying purchases.

    • ZYLISS Potato Masher, Stainless Steel
      ZYLISS Potato Masher, Stainless Steel
    • Ateco 5357 Plain Edge Round Cutters in Graduated Sizes, Stainless Steel
      Ateco 5357 Plain Edge Round Cutters in Graduated Sizes, Stainless Steel
    • Cuisinart 14-Cup Food Processor, Brushed Stainless Steel
      Cuisinart 14-Cup Food Processor, Brushed Stainless Steel
    • KitchenAid Artisan Tilt-Head Stand Mixer with Pouring Shield, 5-Quart, Empire Red
      KitchenAid Artisan Tilt-Head Stand Mixer with Pouring Shield, 5-Quart, Empire Red
    Nutrition Information:
    Yield: 6 Serving Size: 1
    Amount Per Serving: Calories: 610Total Fat: 32gSaturated Fat: 19gTrans Fat: 1gUnsaturated Fat: 11gCholesterol: 148mgSodium: 461mgCarbohydrates: 73gFiber: 5gSugar: 36gProtein: 9g

    *Nutrition information is an estimate and will vary.*

    Did you make this recipe?

    Tag @thecakechica1 on Instagram and hashtag #thecakechica1

    © Mary | The Cake Chica
    Cuisine: American / Category: Dessert

    You May Also Like:

    Strawberry Shortcake

    Strawberry Shortcake

    Mixed Berry Sponge Cake

    Mixed Berry Sponge Cake

    Peach Shortcakes

    Peach Shortcake


    Yellow Cake with Chocolate Frosting

    July 5, 2015

    Yellow Cake with Chocolate Frosting

    This Yellow Cake with Chocolate Frosting doesn't look too fancy but one bite and you'll see why it's a family favorite. The texture of this cake is soft and fluffy. Then it's covered with an incredibly  rich and smooth chocolate frosting. Simple yet delicious!!!

    Yellow Cake with Chocolate Frosting

    Yellow Cake with Chocolate Frosting


    Yellow Cake with Chocolate Frosting

    Follow The Cake Chica on social media: Facebook, Instagram, Pinterest and Twitter.

    Adapted from Cook's Illustrated Cookbook

    Yellow Cake with Chocolate Frosting

    Yellow Cake with Chocolate Frosting

    Yield: 12 servings

    Ingredients

    CAKE

    • 2 1/2 cups cake flour
    • 1 3/4 cup granulated sugar, divided
    • 1 1/4 teaspoons baking powder
    • 1/4 teaspoon baking soda
    • 3/4 teaspoon table salt
    • 1 cup buttermilk, at room temperature
    • 10 tablespoons unsalted butter, melted and cooled
    • 3 large eggs, separated, plus 3 large egg yolks
    • 3 tablespoons vegetable oil
    • 2 teaspoons vanilla extract
    • 1/8 teaspoon cream of tartar

    FROSTING

    • 20 tablespoons unsalted butter, softened
    • 1 cup powdered sugar
    • 3/4 cup Dutch-processed cocoa powder
    • 1/8 teaspoon table salt
    • 3/4 cup light corn syrup
    • 1 teaspoon vanilla extract
    • 8 ounces bittersweet chocolate or chocolate of your choice, melted and cooled

    Instructions

    CAKE

    1. Adjust an oven rack to the middle position and heat oven to 350 degrees.  Grease two 8-inch round cake pans with 2-inch sides with non-stick baking spray. In a large bowl, add flour, 1 ½ cups sugar, baking powder, baking soda, salt and whisk to combine. In a medium bowl, whisk together buttermilk, melted butter, egg yolks (6 total), oil and vanilla.
    2. Fit a stand mixer fitted with the whisk attachment and whip egg whites and cream of tartar together on medium-low speed until foamy, about 1 minute. Increase the speed to medium-high and continue to whip until whites are fluffy, about 1 to 2 minutes. Slowly add remaining 1/4 cup sugar and whip until glossy and stiff peaks form about 2 to 3 minutes. Transfer egg whites to a bowl and set aside.
    3. In the now empty mixer bowl, add flour and mix on low speed, slowly pour buttermilk mixture into the flour mixture while the mixer is running. Whip batter for about 15 seconds. Scrape down bowl and continue to whip on medium-low speed until smooth and completely combined about 10 to 15 seconds.  
    4. Using a rubber spatula, fold one-third of egg whites into batter, then add remaining egg whites and gently fold together until no whites remain.  Divide batter evenly between prepared cake pans and smooth tops with a rubber spatula and lightly tap pans on counter to release air bubbles.
    5. Bake until toothpick inserted in the center of the cake comes out clean or with a few moist crumbs attached, about 20 to 25 minutes. Let cakes cool in pans their pans on wire racks for 10 minutes. Remove cakes from their pans and let cool at least 2 hours before frosting. 

    FROSTING

    1. While cakes cool prepare frosting. In a food processor, process butter, sugar, cocoa, and salt until smooth, about 30 seconds, scraping sides of bowl as needed. Add corn syrup and vanilla and process until combined about 5 to 10 seconds. Scrape down the sides of the bowl if necessary and continue to process until smooth, about 10 to 15 seconds.

    ASSEMBLE

    1. Place 1 cake layer on the cake platter or pedestal and place about 1 cup of frosting in the center of cake, using a large cake spatula, spread in an even layer right to the edge of the cake. Place second layer of cake on top making sure the cake layers are lined up.  Then add remaining frosting on top, and spread frosting  to the edges and onto the sides of the cake. Create billows by pressing the back of a spoon into the frosting and twirl spoon as you lift away.

    Notes

    Cooled cakes can be wrapped tightly in plastic wrap and kept at room temperature for up to 1 day. Wrapped tightly in plastic, then aluminum foil, cakes can be frozen for up to 1 month. Thaw cakes at room temperature before unwrapping and frosting.

    Frosting can be kept at room temperature for up to 3 hours before frosting cake or refrigerated for up to 3 days. If refrigerated, let stand at room temperature for 1 hour before using.

    Assembled cake can be refrigerated for up to 1 day. Bring to room temperature before serving.

    Did you make this recipe?

    Tag @thecakechica1 on Instagram and hashtag #thecakechica1

    © Mary
    Category: Dessert


    Beef, Vegetable and Barley Soup

    June 28, 2015

    Beef Vegetable and Barley Soup

    This is a perfect family meal to make on a lazy Sunday afternoon. It’s super easy. Once all the veggies are chopped it all goes into the pot and simmers for 1 hour. Add the beans last and simmer for another 30 minutes and you are ready to eat. This makes a large batch of soup so invite your friends and family over to enjoy it with you.

    Beef Vegetable and Barley Soup

    Beef Vegetable and Barley Soup

    Beef Vegetable and Barley Soup

    Beef, Vegetable and Barley Soup

    Beef, Vegetable and Barley Soup

    Yield: 8

    Ingredients

    • 1 2 3/4 pounds flat cut brisket, cut into 1 inch cubes
    • 8 cups beef stock
    • 3 8-ounce canned tomato sauce
    • 4 celery stalks, cut into 1/2-inch slices
    • 3 carrots, peeled, cut into 1/2-inch slices
    • 1 large onion, chopped
    • 1/3 cup pearl barley, rinsed
    • 6 large garlic cloves, chopped
    • 3 bay leaves
    • 1 1-ounce package dried stemmed shiitake mushrooms, broken into 1/2-inch pieces
    • 3 15-ounce canned kidney beans, not drained
    • 1 teaspoon kosher salt
    • 1/2 teaspoon ground black pepper

    Instructions

    1. Combine all ingredients except beans in a heavy large pot. Bring to a boil over high heat. Reduce heat to medium-low, cover and simmer for 1 hour, stirring occasionally about 2-3 times. Add beans with their liquid to pot and continue to simmer for 30 minutes. Season salt and pepper and serve.
    Nutrition Information:
    Serving Size: 1
    Amount Per Serving: Calories: 565Total Fat: 11gSaturated Fat: 4gCholesterol: 108mgSodium: 880mgCarbohydrates: 46gFiber: 13gSugar: 8gProtein: 67g

    Did you make this recipe?

    Tag @thecakechica1 on Instagram and hashtag #thecakechica1

    © Mary
    Category: Main

    Adapted from Bon Appetit Fast Easy Fresh Cookbook

    Old-Fashioned Beef Stew

    May 26, 2015

    Beef Stew

    So I don’t know if you have heard but Texas is getting pounded with rain right now. Here in the Houston area we had a storm come through last night and it took its sweet time blowing through as well. Thunder… lightning… hail… wind, we had it all! Thankfully I live in a suburb of Houston and didn’t experience much of the flooding that the city did. I turned on the TV this morning to hear people were stranded on freeways all night due to flooding. It’s just a little crazy right now. But in the short time it wasn’t raining this weekend I had the chance to make this amazing beef stew. It’s a pretty easy process just takes a little time to slow cook that beef to make it nice and tender. Craig said this was the best beef stew he has ever had! Give this one a try and I think you will agree!
     Beef Stew

    Beef Stew

    Old-Fashioned Beef Stew

    Old-Fashioned Beef Stew

    Yield: 6

    Ingredients

    • 1 3 pound boneless beef chuck-eye roast, pulled apart at the silver skin, trimmed and cut into 1 1/2 inch pieces
    • 1 1/2 teaspoon kosher salt
    • 1 teaspoon pepper
    • 3 tablespoons vegetable oil
    • 2 onions, roughly chopped
    • 3 garlic cloves, minced
    • 3 tablespoons all-purpose flour
    • 1 cup Cabernet Sauvignon or other full bodied red wine
    • 2 cups low sodium chicken broth
    • 2 bay leaves
    • 1 teaspoon dried thyme
    • 1 pound small red potatoes, peeled and halved
    • 4 large carrots, peeled and sliced 1/4 inch thick
    • 1 cup frozen peas, thawed
    • 1/4 cup parsley, chopped

    Instructions

    1. Preheat oven to 300 degrees. Pat beef dry and season with 1 1/2 teaspoons salt and 1 teaspoon pepper, toss to coat. Heat 2 tablespoons oil over medium-high heat in a Dutch oven. Brown meat on all sides in 2 batches , about 5 minutes per batch, add remaining 1 tablespoon oil if necessary. Remove meat and set aside. Add onions to now-empty pot and cook until almost softened about 4 to 5 minutes. Reduce heat to medium heat and add garlic, cook until fragrant about 30 seconds. Stir in flour and cook until lightly colored, about 1 to 2 minutes. Add wine, scraping up browned bits on bottom of pot. Add broth, bay leaves, and thyme and bring to simmer. Add meat and return to a simmer. Cover and place in preheated oven and simmer for 1 hour.
    2. Remove pot from oven. Add potatoes and carrots, cover pot and return to oven. Simmer until meat is just tender, about 1 hour. Remove stew from oven.
    3. Stir in peas and let stand about 5 minutes. Stir in parsley and season with salt and pepper to taste and serve.
    Nutrition Information:
    Serving Size: 1
    Amount Per Serving: Calories: 535Total Fat: 21gSaturated Fat: 7gCholesterol: 156mgSodium: 735mgCarbohydrates: 32gFiber: 6gSugar: 8gProtein: 52g

    Did you make this recipe?

    Tag @thecakechica1 on Instagram and hashtag #thecakechica1

    © Mary
    Category: Main


    Adapted from Cooks Illustrated Cookbook


    • « Go to Previous Page
    • Page 1
    • Interim pages omitted …
    • Page 25
    • Page 26
    • Page 27
    • Page 28
    • Page 29
    • Interim pages omitted …
    • Page 39
    • Go to Next Page »

    Primary Sidebar

    Welcome!

    Hi, I’m Mary. The self-taught baker, food stylist, and photographer behind The Cake Chica. If you love creating bakery-style desserts from scratch and want a peek behind the scenes of how they’re styled and captured, you’re in the right place.

    More about me

    Popular

    • Toasted Coconut Caramel Layer Cake on marble cake pedestal.
      Toasted Coconut Caramel Layer Cake
    • Best Big Fat Chewy Chocolate Chip Cookie
    • Key Lime Pie Layer Cake cover photo.
      Key Lime Pie Layer Cake
    • White Cake with Strawberry Filling
      White Cake with Strawberry Filling

    Seasonal

    • Banana Cream Pie
    • Chocolate Root Beer Float Cake
    • Cotton Candy Layer Cake
    • Strawberry Ice Cream Pop Cake

    Footer

    ↑ back to top

    About

    • The Cake Chica
    • Recipe Index
    • Work With Me

    Legal

    • Privacy Policy

    Contact

    • Contact

    As an Amazon Associate I earn from qualifying purchases.

    Copyright © 2025 The Cake Chica