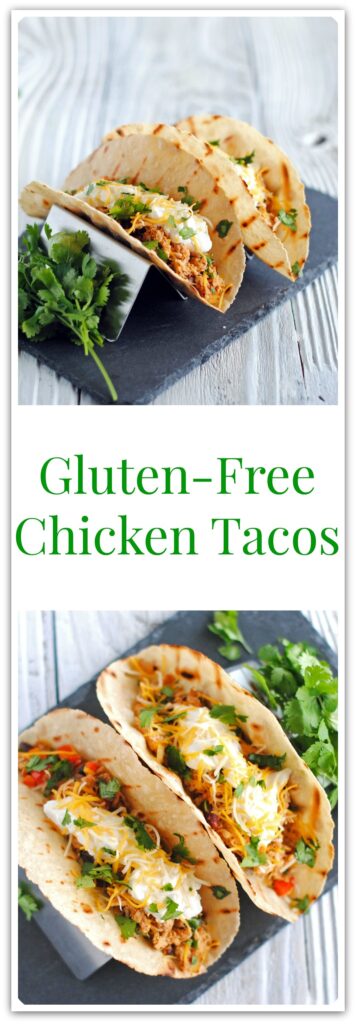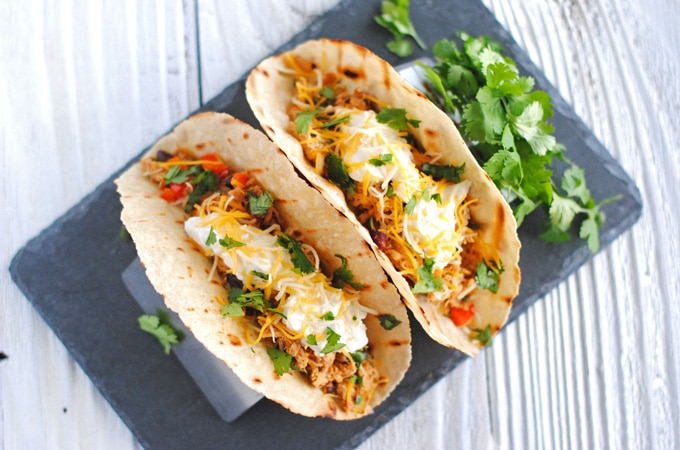
Short on time? Don’t want to go out for dinner? Want something easy, quick and tasty? Well I have the answer right here! These Gluten-Free Tacos will fit into your busy schedule. I admit, I am not someone who eats gluten-free meals. But after trying Rudis Gluten Free Tortillas tortillas, I may be eating more gluten-free meals in the future.
Even Craig, who would turn his nose up to gluten-free anything enjoyed them. I also found a new love in Whole Food’s House Smoked Whole Rotisserie Chicken! I recommend finding the best quality rotisserie for this recipe. It will make all the difference trust me! I made this recipe with 3 different brands of rotisserie chicken and the one from Whole Foods far exceeded the others.
The ingredients on the Whole Foods rotisserie chicken are as follows: chicken, garlic, sea salt, spices (black pepper, thyme, sage, ginger, bay, celery), brown sugar, onion, red bell pepper, parsley and canola oil. All these ingredients are sold at your local supermarket. Nothing that sounds like it’s made in a lab. Feeling like I won the lottery right now! Enjoy!
Follow The Cake Chica on social media: Facebook, Instagram, and Pinterest

Gluten Free Chicken Tacos
Ingredients
- 1 tablespoon coconut oil
- 2 red bell peppers, chopped
- 1 medium-size onion, chopped
- 1 15-ounce can organic black beans or beans of your choice, I like Eden Organics or Westbrae brands
- 3 teaspoons smoked paprika
- 1 teaspoon chili powder
- ½ teaspoon garlic salt
- 1-2 teaspoons chipotle sauce from canned chipotle peppers (optional)
- 1 pound cooked chicken, pulled from rotisserie chicken, I like the House Smoked Whole Chicken from Whole Foods
- ¾ cup reduced-fat sour cream, plus more for topping
- ¼ cup chopped cilantro, plus more for topping
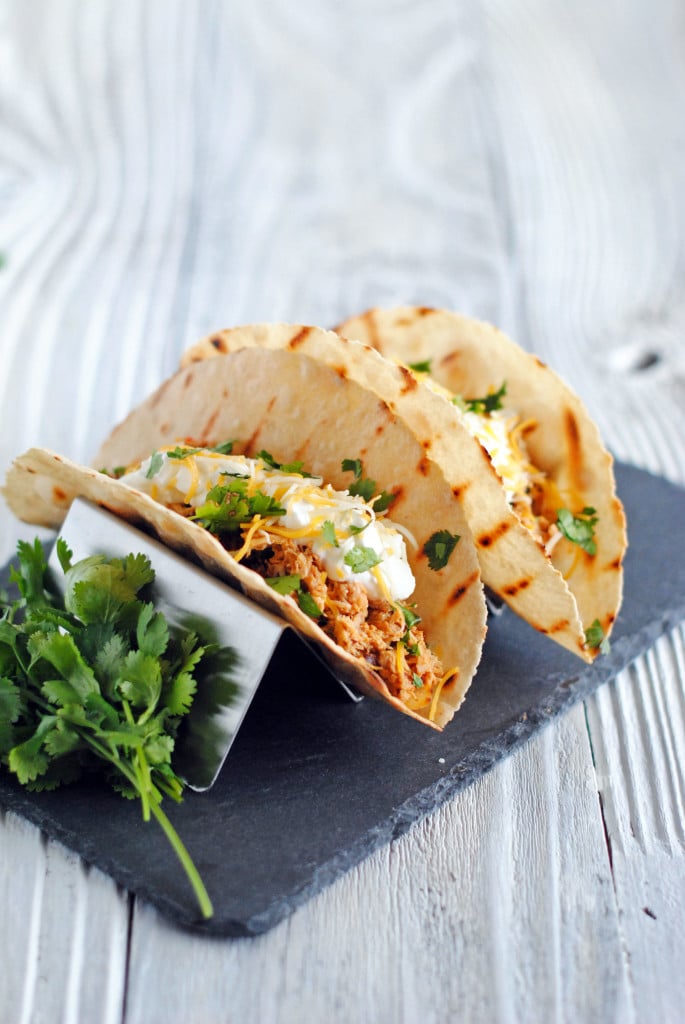
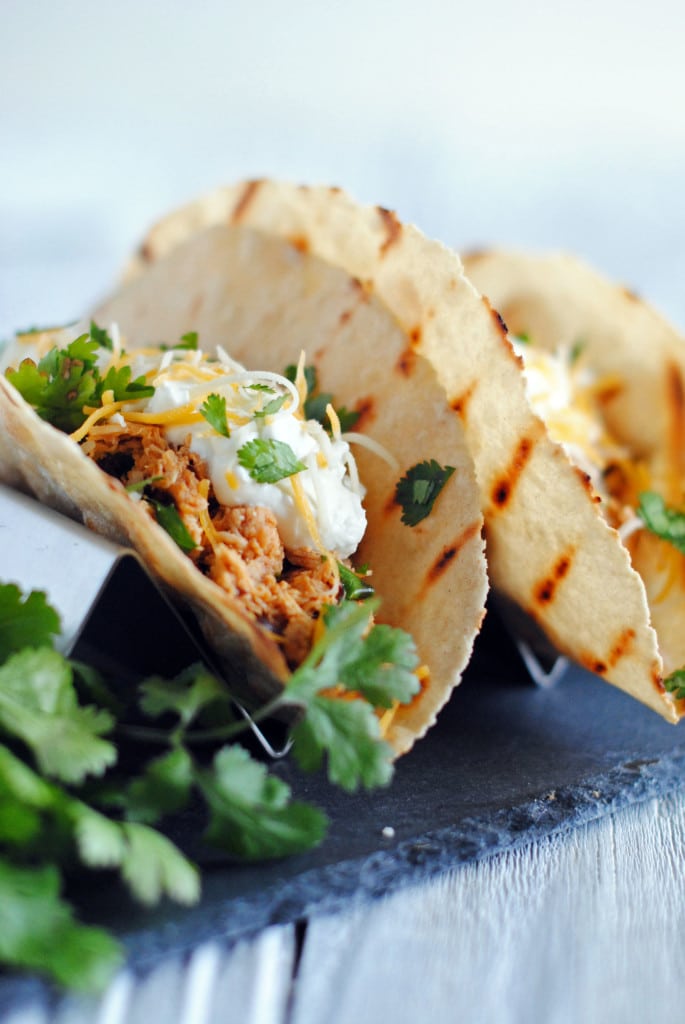
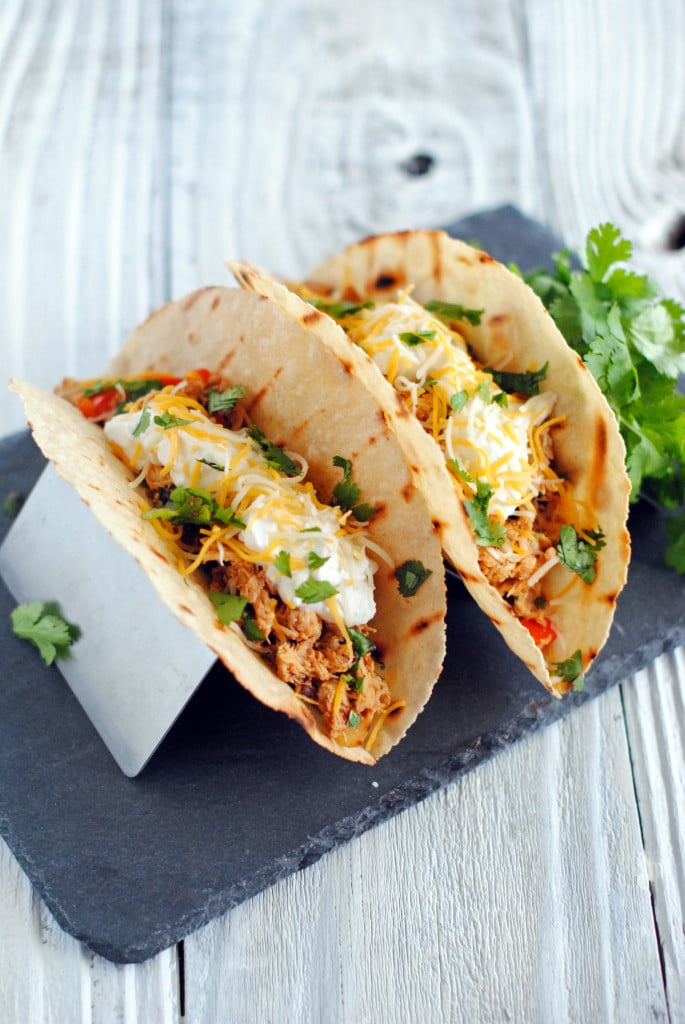
- 8 gluten-free tortillas, I like Rudi’s Gluten-Free Bakery tortillas
- 1 cup shredded Mexican blend cheese
Instructions
- Heat coconut oil over medium-high heat in a large non-stick skillet. Sauté bell peppers and onions until soft and slightly caramelized, about 8 minutes. Reduce the heat to medium-low and stir in beans, seasonings, chipotle sauce and chicken meat and continue to cook until heated through, about 5 minutes. Turn off the heat and stir in sour cream and cilantro.
- For the best flavor, grill tortillas on a hot grill pan for just a few seconds on each side until the tortillas just start to get those browned grill marks. You can also wrap tortillas in a damp paper towel and heat them in the microwave for about 30 seconds.
- Place tortillas on a plate and spoon in the chicken stuffing. Top with cheese and a little sour cream and garnish with cilantro.
Nutrition Information:
Serving Size: 2Amount Per Serving: Calories: 832Total Fat: 19gSaturated Fat: 19gCholesterol: 174mgSodium: 1435mgCarbohydrates: 65gFiber: 17gSugar: 11gProtein: 62g