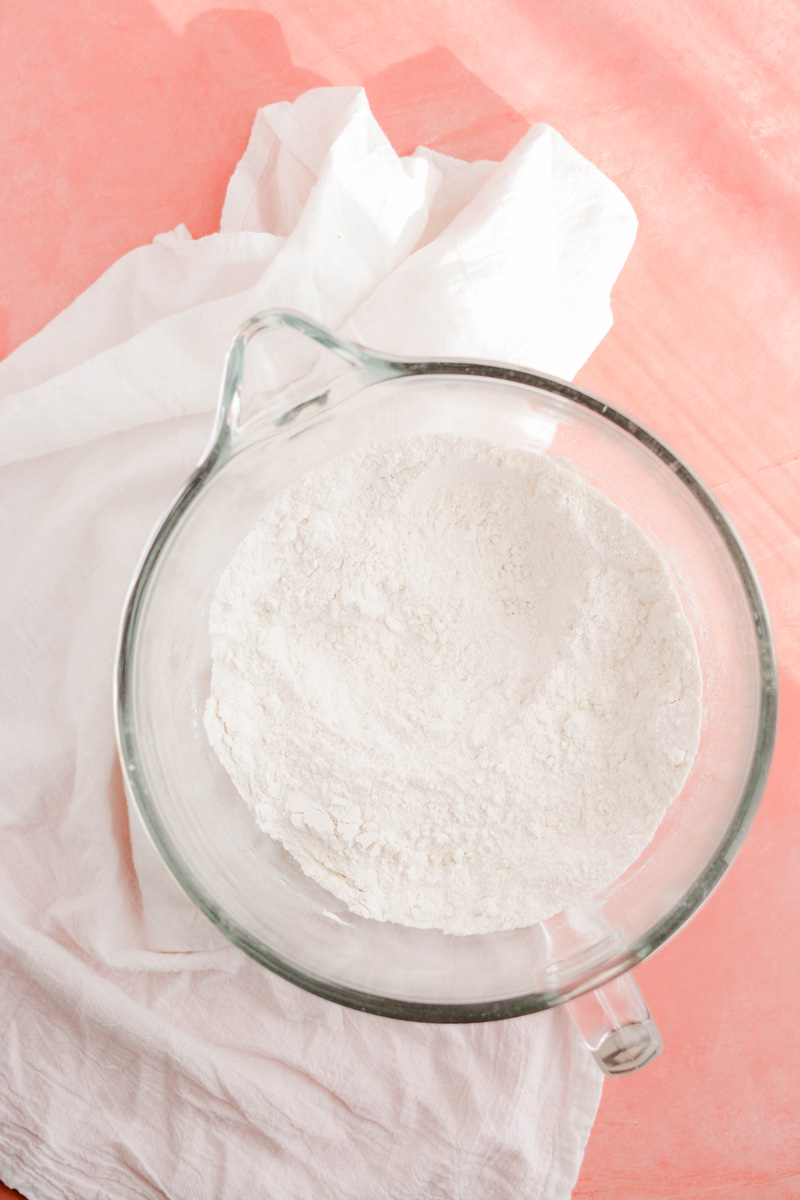
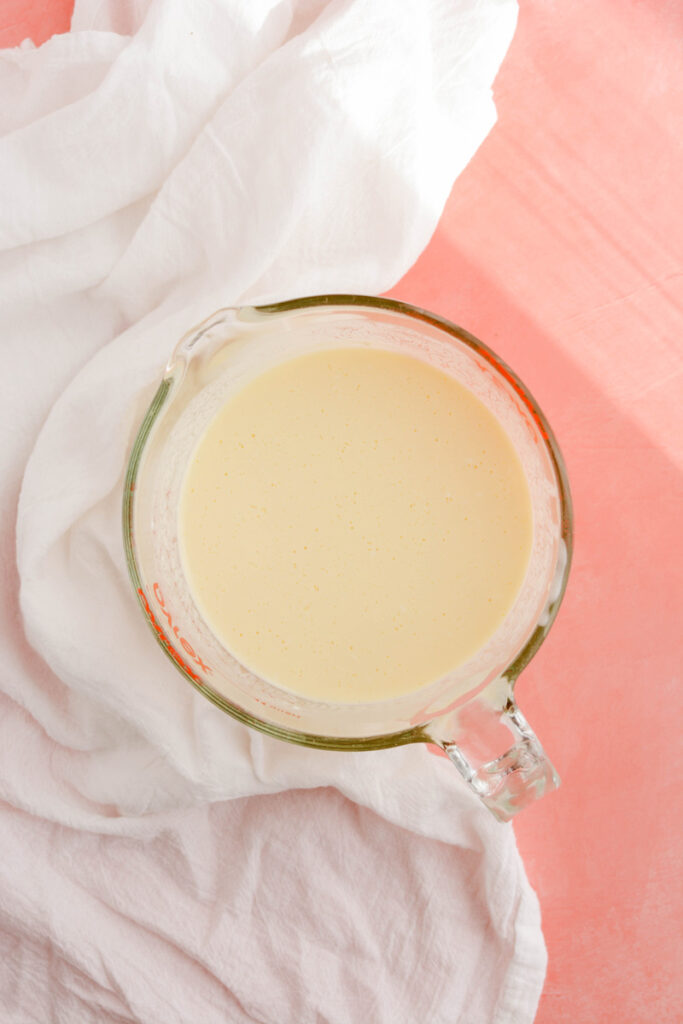
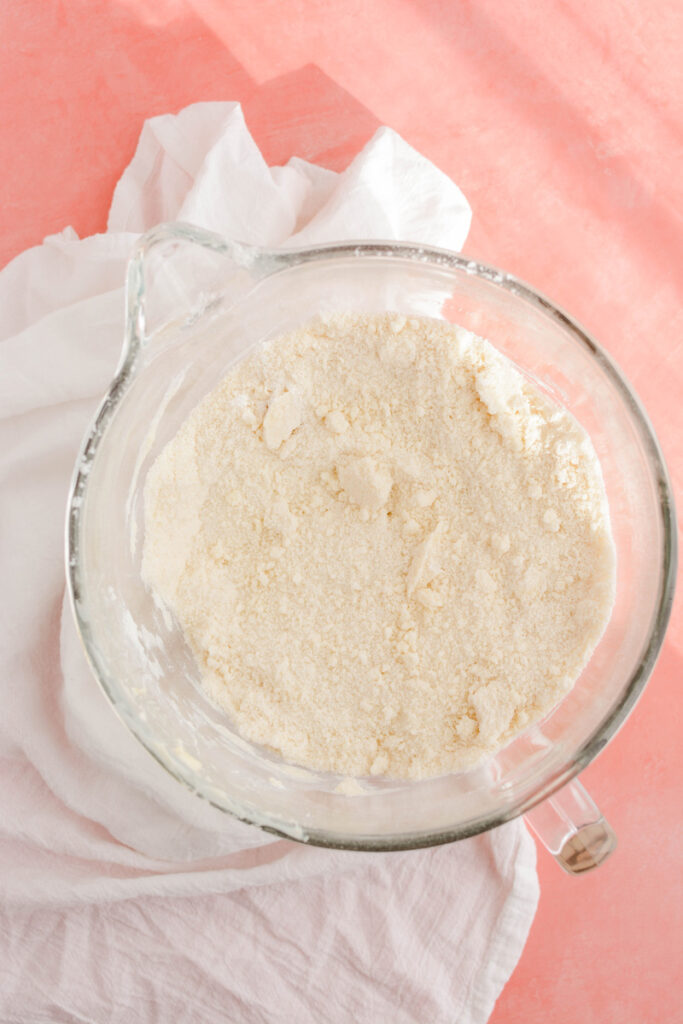
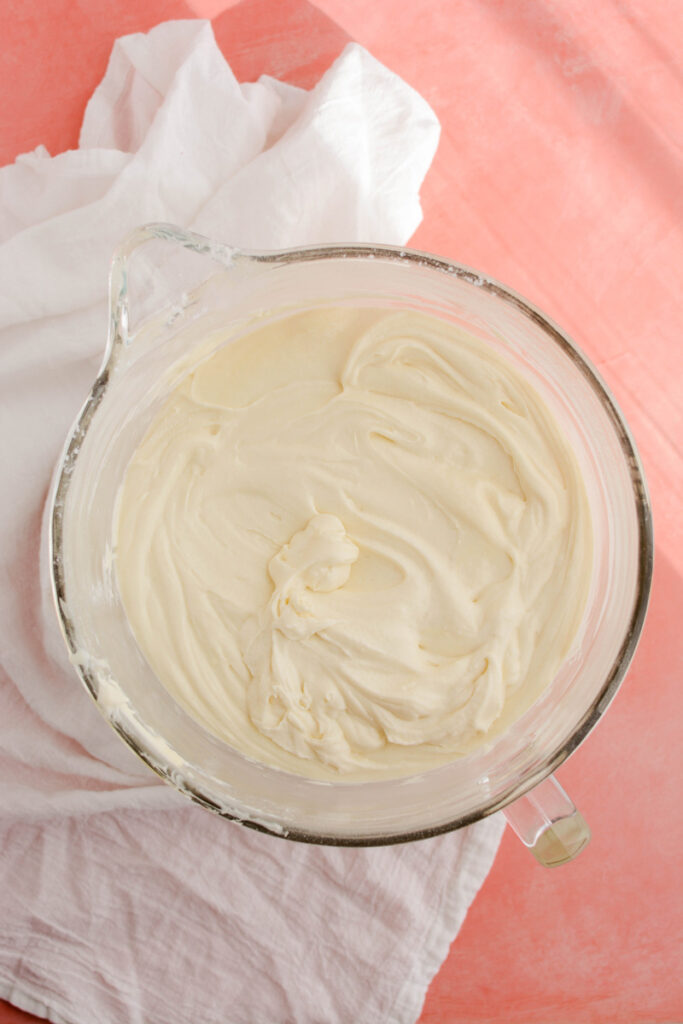
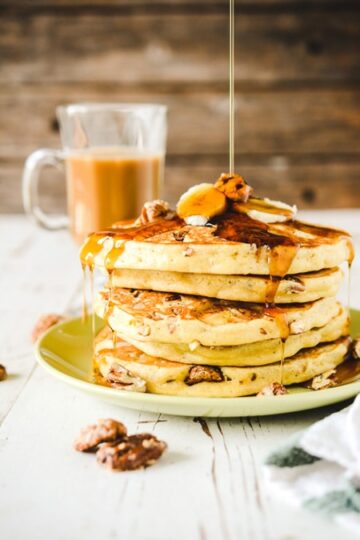
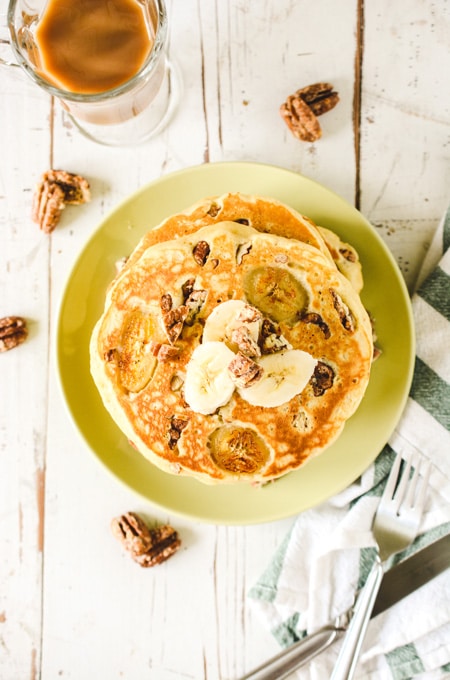
• Skip to primary navigation
  • Skip to main content
  • Skip to primary sidebar
  • About
  • Recipe
    • Listicle
    • Kitchen Staples
    • Drinks
      • Cocktails
      • Non-Alcoholic
      • Smoothies
    • Breakfast
      • Eggs
      • Muffins and Baking
      • Pancakes and Waffles
    • Sweet
      • Brownies and Bars
      • Cakes and Frostings
        • Beginner Cake Recipes
        • Intermediate Cake Recipes
        • Advanced Cake Recipes
      • Cheesecake
      • Cobblers & Fruit Desserts
      • Cookies and Candies
      • Custards & Trifles
      • Pies & Tarts
    • Savory
      • Appetizers
      • Easy Weeknight Meals
      • Beef and Pork
      • Chicken and Turkey
      • Fish and Shellfish
      • Grains and Beans
      • Pasta and Rice
      • Potatoes
      • Quinoa
      • Soups & Stews
      • Vegetables
    • On The Lighter Side
  • Resources
  • Contact
  • Work With Me
  • Privacy Policy

The Cake Chica

menu icon
go to homepage
  • Recipe Index
  • About
  • Work With Me
  • Contact

subscribe
search icon
Homepage link
  • Recipe Index
  • About
  • Work With Me
  • Contact

×
Home

Blackberry Lavender Pound Cake

June 7, 2020

Blackberry Lavender Pound Cake cover image.

Pound cakes have never been exciting to me. I typically just think of them as a vessel to carry fluffy whipped cream or a sweet fruit compote. But now my opinion has changed! And I have this Blackberry Lavender Pound Cake to thank for it! 

It's as beautiful as a layer cake and has the best of both worlds, fruit and whipped cream.

Blackberry Lavender Pound Cake

...

Read More

Sweet Tea Lemon Cupcakes

May 28, 2020

Sweet Tea Lemon Cupcakes

Here's a slightly different and fun way to have your sweet tea. How does a lemon butter cupcake, topped with a tea flavored Swiss meringue buttercream sound to you? Yup, I thought so! And for the finishing touch, a candied lemon slice adorns these Sweet Tea Lemon Cupcakes

Sweet Tea Lemon Cupcakes

...

Read More

Chocolate S'mores Pie

May 17, 2020

Chocolate S'mores Pie

When I was a kid I used to love s'mores! But as I've grown older, s'mores have gotten a little too sweet for my taste. Thankfully I was able to take a pie reminiscent of the treat I used to love as a kid and make it into more of an adult version in this Chocolate S'mores Pie. 

Chocolate S'mores Pie

...

Read More

Banana Cream Pie with Vanilla Wafer Crust

May 11, 2020

Banana Cream Pie with Vanilla Wafer Crust at three quarter angle.

As an Amazon Associate, I earn from qualifying purchases.

This Banana Cream Pie with Vanilla Wafer Crust is made completely from scratch, right down to the Vanilla Wafers in the cookie crust!

Banana Cream Pie with Vanilla Wafer Crust at three quarter angle.

Homemade Vanilla Wafer Crust

You don't have to use my Homemade Vanilla Wafer recipe for your cookies but the flavor is far superior to the store bought cookies. I encourage you to give them a try with this recipe. 

I know it's pretty simple to purchase a premade cookie crust but it's also pretty easy to make your own homemade version. It's literally cookie crumbs, a little sugar and some melted butter, then bake for about 18 minutes. That's it! Super simple.

Overhead shot of baked cookie crust for Banana Cream Pie with Vanilla Wafer Crust.

Banana Filling

The banana filling is made with a banana infused cream made from fresh bananas for the best banana flavor. Added to the filling is 3 tablespoons of cornstarch, which is just enough to firm up the filling for nice and clean pie slices but still creamy enough to not create a gelatinous filling.

Close up shot of sliced Banana Cream Pie with Vanilla Wafer Crust in pie plate.

Whipped Cream

Don't be intimidated by homemade whipped cream, especially this one. Just pour sugar, pinch of salt, heavy cream and vanilla extract in a mixer bowl and whisk together until light, smooth and fluffy, about 4 minutes. 

Close up of piped whipped cream for Banana Cream Pie with Vanilla Wafer Crust.

Banana Cream Pie Layers

  • Give the filling a quick whisk then spread half of the filling on top of the cooled vanilla wafer crust.
  • Arrange the sliced bananas on top of the filling.
  • Spread the remaining filling on top of the bananas. Refrigerate until the pie has set, about 5 hours and up to 24 hours.
Bottom layer of banana pudding for Banana Cream Pie with Vanilla Wafer Crust.
Bottom layer
Banana layer on top of bottom layer of banana pudding for Banana Cream Pie with Vanilla Wafer Crust.
Banana layer
Top layer of banana filling for Banana Cream Pie with Vanilla Wafer Crust.
Top layer

Whipped Cream Decoration

You don't have to do anything fancy on top, but if you would like to, I used Wilton piping tips #1M and #32 and divided the whipped cream between two piping bags and piped simple rosettes and stars. To finish the look I also used pearl dragees in multiple sizes.

Overhead shot of whipped cream decoration step 1 for Banana Cream Pie with Vanilla Wafer Crust.
Overhead shot of step 2 of whipped cream decoration for Banana Cream Pie with Vanilla Wafer Crust.
Overhead shot of the completed whipped cream decoration for Banana Cream Pie with Vanilla Wafer Crust.

Banana Cream Pie with Vanilla Wafer Crust Baking Schedule

  • Day 1: Prepare the cookie crust, prepare filling and layer.
  • Day 2: Prepare the whipped cream, decorate and serve.
Overhead shot of sliced Banana Cream Pie with Vanilla Wafer Crust.

Baking and Decorating Tools

  • Food processor
  • 9 inch pie plate
  • Sieve
  • Candy thermometer
  • Stand mixer
  • Piping bags (optional)
  • Piping tips #1M and #32 (optional)
  • Pearl dragees (optional)
Shop my favorite baking and cake decorating tools here!
10-Beginner-Cakes-to-Bake-NowDownload
Close up of sliced Banana Cream Pie with Vanilla Wafer Crust.

Lets Connect

The Cake Chica is on the following social media platforms below. Click subscribe, like and follow! We would love to have you over!

  • Facebook
  • Instagram
  • Pinterest
  • YouTube
  • Mail
Close up shot of eaten slice of Banana Cream Pie with Vanilla Wafer Crust.

Suggested Recipes

Close up of Homemade Vanilla Wafers stacked.
Homemade Vanilla Wafers
Banana Caramel Pudding
Chocolate Cream Cupcakes close up shot of eaten cupcake.
Chocolate Cream Cupcakes

Adapted from The Perfect Pie by America's Test Kitchen

Banana Cream Pie with Vanilla Wafer Crust at three quarter angle.

Banana Cream Pie with Vanilla Wafer Crust

Yield: 8
Prep Time: 20 minutes
Cook Time: 18 minutes
Additional Time: 5 hours 40 minutes
Total Time: 6 hours 18 minutes

This Banana Cream Pie is made with a homemade vanilla wafer crust, then topped with a banana filling and topped with homemade whipped cream.

Ingredients

SPECIAL TOOLS

  • Food processor
  • 9 inch pie plate
  • Sieve
  • Candy thermometer
  • Stand mixer
  • Piping bags (optional)
  • Piping tips #1M and #32 (optional)
  • Pearl dragees (optional)

VANILLA WAFER CRUST

  • 40 Homemade Vanilla Wafer cookies or store bought, (about 2 cups crumbs)
  • 3 tablespoons granulated sugar
  • 3 tablespoons unsalted butter, melted and cooled

BANANA CREAM

  • 4 ripe bananas
  • 4 tablespoons unsalted butter, divided
  • 2 ½ cups half and half
  • ½ cup (3.5 ounces) plus 2 tablespoons granulated sugar
  • 6 large egg yolks
  • ¼ teaspoon table salt
  • 3 tablespoons cornstarch
  • 1 teaspoon vanilla extract
  • 2 tablespoons orange juice

WHIPPED CREAM

  • ½ cup (4 ounces) granulated sugar
  • Pinch of salt
  • 1 ½ cups (12 ounces) heavy cream
  • 2 teaspoons vanilla extract

Instructions

VANILLA WAFER CRUST

  1. Adjust an oven rack to the center position and heat oven to 325 degrees. In a food processor, process vanilla wafers and sugar for about 30 seconds until they have formed fine crumbs. Sprinkled melted butter over top and pulse about 5 times to combine.
  2. Pour out mixture on to a 9-inch pie plate and using the bottom of a measuring cup, press the crumbs into an even layer on the bottom and sides of the pie plate. Bake for about 18 minutes or until the crumbs start to brown. Let pie crust cool on a wire rack.

BANANA CREAM

  1. Peel and slice 2 bananas about ½ inch thick. In a medium saucepan, melt 1 tablespoon butter over medium-high heat. Add sliced bananas and cook until they begin to soften, about 2 minutes. Add half and half and bring to a boil for about 30 seconds. Remove from the heat and let sit for 40 minutes.
  2. In a large bowl, whisk together the sugar, egg yolks and salt until combined. Add in cornstarch and whisk. Pour the cooled half and half mixture through a sieve over the egg yolk mixture, being sure not to press on the bananas. Whisk to combined and toss out cooked bananas.
  3. Transfer mixture to a medium saucepan and attach a candy thermometer to the saucepan. Cook mixture over medium heat, whisking constantly until the mixture reaches 180 degrees, about 4 to 6 minutes. Remove from the heat and whisk in vanilla and the remaining 3 tablespoons butter. Set a sieve over a bowl and pour the filling through it to remove any clumps that may have formed. Place a piece of plastic wrap directly on top of the filling and chill in the refrigerator for about 1 hour.
  4. Peel and slice 2 bananas about ¼ inch thick and toss with orange juice. Give the filling a quick whisk then spread half of the filling on top of the cooled vanilla wafer crust. Arrange the sliced bananas on top of the filling and spread the remaining filling on top of the bananas. Place a piece of plastic wrap on top and refrigerate until the pie has set, about 5 hours and up to 24 hours.

WHIPPED CREAM

  1. Right before serving, prepare the whipped cream. In the bowl of a stand mixer, with the whisk attachment attached combine the sugar, salt, cream and vanilla extract. Beat on medium speed for 1 minute, then increase speed to medium-high and whip until the cream is thick enough to hold firm peaks, about 3 minutes.
  2. For piping the whipped cream, fit 2 piping bags with piping tip #1M and #32 and fill bags with whipped cream. Pipe rosettes and stars around the edge of the pie. Sprinkle pearl dragees over the top and serve. If you don’t have piping tips, you can spread the whipped cream on top instead.

Notes

Storage: This pie is best served the day it is made but can be stored up to 2 days in the refrigerator in an air tight container. Note, the bananas will start to brown, but the pie will still taste great!

Nutrition Information:
Yield: 8 Serving Size: 1
Amount Per Serving: Calories: 490Total Fat: 29gSaturated Fat: 16gTrans Fat: 0gUnsaturated Fat: 12gCholesterol: 222mgSodium: 294mgCarbohydrates: 49gFiber: 2gSugar: 28gProtein: 9g

*Nutrition information is an estimate and will vary.*

Did you make this recipe?

Tag @thecakechica1 on Instagram and hashtag #thecakechica1

© Mary | The Cake Chica
Cuisine: American / Category: Pies and Tarts

Peanut Butter Chocolate Chip Cookies

May 5, 2020

Peanut Butter Chocolate Chip Cookies

Get the best of both worlds in these Peanut Butter Chocolate Chip Cookies. With a cookie base that is full of peanut butter flavor from the freshly chopped peanuts and peanut butter, plus, the addition of sweet chocolate chips added, there'll be no need to decide on which cookie recipe to make when you can make two in one!

Peanut Butter Chocolate Chip Cookies

...

Read More

Strawberry Buttermilk Pancakes with Cream Cheese Icing

April 21, 2020

Strawberry Buttermilk Pancakes with Cream Cheese Icing

What's better than Buttermilk Pancakes? Maybe Strawberry Buttermilk Pancakes with Cream Cheese Icing that's what! These pancakes are tangy, fluffy and easy to make. And are made with freshly diced strawberries and topped with cream cheese icing. Pancake heaven that's what this recipe is for!

Strawberry Buttermilk Pancakes with Cream Cheese Icing

...

Read More

Ramen Noodle Bowls

March 24, 2020

Ramen Noodle Bowls

Replace those seasoning packets with fresh broccoli and fresh ginger and you've got flavorful Ramen Noodle bowls in about 30 minutes. And best of all, this meal is made using one skillet. So clean up is a breeze!

Ramen Noodle Bowls

...

Read More

Coffee Layer Cake

March 17, 2020

Coffee Layer Cake

Coffee...doughnuts...cake! What!!! Your gonna love this coffee layer cake that's soaked in a coffee soaking syrup, then frosted with a coffee flavored Swiss meringue buttercream that's light and fluffy. To take this cake to the next level, I added a coffee flavored glaze on top, and finished this Coffee Layer Cake with doughnut holes! 

Coffee Layer Cake

...

Read More

White Chocolate Raspberry Cake

February 12, 2020

White Chocolate Raspberry Cake on pink cake pedestal.

This White Chocolate Raspberry Cake is rich and decadent, but it will be hard not to keep going back for seconds!

As an Amazon Associate, I earn from qualifying purchases. 

White Chocolate Raspberry Cake on pink cake pedestal.

With three layers of rich white chocolate cake, filled with raspberry fruit filling and frosted with a sweet white chocolate frosting, this cake will quickly become a favorite. Plus, it's a fairly easy one to bake and assemble.

Overhead shot of White Chocolate Raspberry Cake on pink cake pedestal.

White Chocolate Raspberry Cake

  • Cake flour: cake flour has a lower protein content than all-purpose flour, which produces delicate and fine crumbed cakes like this one.
  • Baking powder: leavens the cake.
  • Granulated sugar: flavors the cake batter and incorporates and dissolves easily into the cake batter.
  • Salt: helps enhance flavor.
  • Eggs: bind, thicken, emulsify and leavens.
  • Raspberry emulsion: enhances the cake flavor. Bakers Tip: Strawberry extract can be used as a substitute in equal parts.
  • Buttermilk: adds a tangy flavor, as well as tenderizes and creates a fluffy crumb. Bakers Tip: Sour cream or yogurt can be substituted for buttermilk. Both are acidic and produce similar results.
  • Unsalted butter: is rich in flavor and also helps determine the cakes crumb. Fat coats the flour stopping its ability to form too much gluten. Bakers Tip: Always use unsalted butter since different brands of butter have different amounts of salt in them.
  • Melted white chocolate: adds flavor to the white chocolate raspberry cake layers.
Overhead shot of dry ingredients for White Chocolate Raspberry Cake.
Dry ingredients
Overhead shot of wet ingredients for White Chocolate Raspberry Cake.
Wet ingredients
Overhead shot of dry ingredients with butter for White Chocolate Raspberry Cake.
Dry ingredients with butter
Overhead shot of completed cake batter for White Chocolate Raspberry Cake.
Completed cake batter

Raspberry Filling

Place thawed raspberries in a blender or food processor and puree until smooth. Over a bowl pour raspberry puree over a sieve to remove the solids. The puree will be thick. Use a spoon to stir and press the puree through the strainer.

Place raspberry puree in a small saucepan over medium-low heat. Add sugar and cornstarch mixture and bring to a simmer, stirring constantly to keep lumps from forming. Once the puree thickens, remove from the heat. Cool for 5 minutes and then add fresh lemon juice and Chambord if using. Chill for about 2-3 hours in the refrigerator until ready to use.

TIP: The frozen raspberries can be substituted with any frozen fruit of your choice.

Overhead shot of completed raspberry filling for White Chocolate Raspberry Cake.

White Chocolate Frosting

In the bowl of a stand mixer with the paddle attachment attached, beat the butter, shortening and melted chocolate and salt on medium speed until light and fluffy, about 8 minutes. Add the powdered sugar, heavy cream, and emulsion and slowly mix until combined, about 1 minute.

Increase the mixer speed to medium-high and beat until light and fluffy, about 6 minutes. 

Overhead shot of beaten butter, shortening and melted chocolate for White Chocolate Raspberry Cake.
Beaten butter, shortening and chocolate
Overhead shot of powdered sugar in a sieve for White Chocolate Raspberry Cake.
Powdered sugar in sieve
Overhead shot of sifted powdered sugar in mixer bowl for White Chocolate Raspberry Cake.
Sifted powdered sugar
Overhead shot of completed white chocolate frosting for White Chocolate Raspberry Cake.
Completed white chocolate frosting

Crumb Coating

Pipe the remaining frosting in the piping bag on to the top of the cake and with an offset cake spatula, spread a thin layer of frosting over the top and sides of the cake, catching any loose crumbs and sealing them in. Refrigerate or freeze the cake for 15 to 30 minutes.

Crumb coating cakes is great for keeping loose crumbs out of your final layer of frosting and for helping seal in your cake and giving you a great foundation to start decorating on.

Close up at three quarter angle of White Chocolate Raspberry Cake on pink cake pedestal.

Assembly Tips

  • Trim cake to create flat cake layers if needed.
  • Keep filling at 1/2 cup to prevent over filling.
  • Use a crumb coat to seal in loose crumbs.
  • Chill the cake before applying a final layer of frosting and decorating.
Close up of cake fresh raspberries, mint and frosting swirls on White Chocolate Raspberry Cake.

Cake Decorating Tools

  • 3 8-inch round cake pans
  • Nonstick baking spray
  • Stand mixer
  • 4 cup liquid measuring cup (or bowl)
  • Food processor
  • Sieve
  • Nonslip mat
  • Cake turntable
  • 8-inch round cake board
  • Piping bags
  • Coupler or round piping tip
  • Offset cake spatula
  • 8-inch round acrylic disc
  • Parchment paper
  • Cake scraper
  • Wilton piping tip #1M
  • White chocolate shavings, for garnish
  • Fresh raspberries, for garnish
  • Fresh mint, for garnish
Shop my favorite baking and cake decorating tools here!
Close up of fresh raspberry, mint and frosting swirls for White Chocolate Raspberry Cake.

Cake Decorating Garnishes

  • Fresh raspberries: Obviously the best fresh fruit to serve with this cake. Wash and dry the raspberries well before topping them on the cake.
  • Fresh mint: Green brings out the colors of this cake as well as a bit of flavor. Be sure to top with fresh mint right before serving for the best color.
  • White chocolate shavings: I felt this cake needed another layer of decoration so I used a vegetable peeler and shaved a white chocolate bar for some simple texture on the edge and top of the cake.
Wide open shot of cake slices on plates for White Chocolate Raspberry Cake.

White Chocolate Raspberry Cake Baking Schedule

  • Day 1: Bake cake layers and prepare raspberry filling.
  • Day 2: Make frosting, assemble and serve.
Close up of cake slice for White Chocolate Raspberry Cake.

Make Ahead

  • Raspberry filling can be made up to 5 days in advance, stored in an airtight container in the refrigerator.
  • Cake layers can be made up to 3 days in advance, wrapped in plastic wrap in an airtight container in the refrigerator.
  • Frosting is best prepared the day of assembly.
Close up of White Chocolate Raspberry Cake Layers.

Let's Connect

The Cake Chica is on the following social media platforms below. Click subscribe, like and follow! We would love to have you over!

  • Facebook
  • Instagram
  • Pinterest
  • YouTube
  • Mail
Close up shot of eaten cake slice of White Chocolate Raspberry Cake.

White Chocolate Raspberry Drip Cake
White Chocolate Pumpkin Cake on pedestal at three quarter angle.
White Chocolate Pumpkin Cake
Raspberry Wine Cake
Raspberry Wine Cake
White Chocolate Raspberry Cake on pink cake pedestal.

White Chocolate Raspberry Cake

Yield: 12
Prep Time: 1 hour
Cook Time: 30 minutes
Additional Time: 1 hour
Total Time: 1 hour

Rich and decadent White Chocolate Raspberry Cake has three layers of white chocolate cake filled with raspberry filling and frosted with white chocolate frosting. Lastly it's decorated with fresh raspberries and mint leaves and a few white chocolate shavings.

Ingredients

SPECIAL TOOLS

  • 3 8-inch round cake pans
  • Nonstick baking spray
  • Stand mixer
  • 4 cup liquid measuring cup (or bowl)
  • Food processor
  • Sieve
  • Nonslip mat
  • Cake turntable
  • 8-inch round cake board
  • Piping bags
  • Coupler or round piping tip
  • Offset cake spatula
  • 8-inch round acrylic disc
  • Parchment paper
  • Cake scraper
  • Wilton piping tip #1M
  • White chocolate shavings, for garnish
  • Fresh raspberries, for garnish
  • Fresh mint, for garnish

WHITE CHOCOLATE CAKE

  • 3 cups (12 ounces) cake flour
  • 1 tablespoon baking powder
  • 1 1/2 cups (10.5 ounces) granulated sugar
  • 3/4 teaspoons salt
  • 4 large eggs
  • 1 teaspoon raspberry emulsion
  • 1 cup buttermilk
  • 1/2 cup sour cream
  • 1 cup (2 sticks) unsalted butter, cut into tablespoon sized pieces, at room temperature
  • 1 cup (8 ounces) white chocolate, melted

RASPBERRY FILLING

  • 12 ounces frozen raspberries, thawed
  • 1/4 cup (1.75 ounces) granulated sugar
  • 3 tablespoons cornstarch mixed with 3 tablespoons water
  • Fresh lemon juice to taste
  • 3 tablespoons Chambord, optional

WHITE CHOCOLATE BAKERY FROSTING

  • 1 cup (16 tablespoons/225 grams) unsalted butter, at room temperature
  • 1/4 cup (50 grams) shortening
  • 6 ounces white chocolate, melted and slightly cooled
  • Pinch of salt
  • 3 1/4 cup (13 ounces/410 grams) powdered sugar, sifted
  • 1/2 cup heavy cream, plus more if needed
  • 2 teaspoons raspberry emulsion

Instructions

WHITE CHOCOLATE CAKE

  1. Adjust and oven rack to the center position and heat oven to 325 degrees. Spray 3 8-inch round cake pans with nonstick baking spray and set aside.
  2. Place white chocolate in a microwave safe bowl and heat on 30 second intervals, stirring between each interval until the chocolate is smooth. Set aside to cool slightly.
  3. In the bowl of a stand mixer, add the flour, baking powder, sugar and salt and mix on medium speed until combined.
  4. In a 4 cup measuring cup, add the eggs, raspberry emulsion, buttermilk and sour cream and whisk to combine.
  5. Slowly add the butter to the mixer bowl with the dry ingredients, one tablespoon at a time. Mix until the mixture resembles pea sized balls of flour.
  6. Reserve 1/2 cup of the wet ingredients and add the remaining into the dry ingredients. Mix on medium-high speed for 2 to 3 minutes, until combined. Add the reserved 1/2 cup wet ingredients to the batter and mix until combined on medium speed, about 30 seconds. Add the melted chocolate and mix on medium speed until combined.
  7. Divide the cake batter into the prepared cake pans and bake for 25 to 30 minutes or until a toothpick inserted in the center comes out with a few moist crumbs attached, rotating pans halfway through baking.
  8. Let cakes cool in their pans for 15 minutes, then invert them on to cooling racks to cool completely.

RASPBERRY FILLING

  1. Place thawed raspberries in a blender or food processor and puree until smooth. Over a bowl pour raspberry puree over a sieve to remove the solids. The puree will be thick. Use a spoon to stir and press the puree through the strainer.
  2. Place raspberry puree in a small saucepan over medium-low heat. Add sugar and cornstarch mixture and bring to a simmer, stirring constantly to keep lumps from forming. Once the puree thickens, remove from the heat. Cool for 5 minutes and then add fresh lemon juice and Chambord if using. Chill for about 2-3 hours in the refrigerator until ready to use.

WHITE CHOCOLATE FROSTING

  1. In the bowl of a stand mixer with the paddle attachment attached, beat the butter, shortening and melted chocolate and salt on medium speed until light and fluffy, about 8 minutes. Add the powdered sugar, heavy cream, and emulsion and slowly mix until combined, about 1 minute.
  2. Increase the mixer speed to medium-high and beat until light and fluffy, about 6 minutes.

ASSEMBLE CAKE

  1. Place a nonslip mat on top of your cake turntable. Place an 8-inch cake board on top. Spread a small amount of frosting in the center of the cake board to act as glue for the cake. Center one cake layer on the cake board. Fit a piping bag with a round tip or coupler and fill the piping bag with about 1 cup frosting. Pipe a frosting dam around the edge of the cake. Spread about 1/2 cup raspberry filling over the top with an offset cake spatula, smoothing the filling out all the way to the frosting dam.
  2. Place the second cake layer on top and pipe another frosting dam around the edge. Spread another 1/2 cup filling on top in an even layer, spreading it all the way to the frosting dam. Place the last cake layer on top (bottom side up) and gently press down to adhere.

CRUMB COATING

  1. Pipe the remaining frosting in the piping bag on to the top of the cake and with an offset cake spatula, spread a thin layer of frosting over the top and sides of the cake, catching any loose crumbs and sealing them in. Refrigerate or freeze the cake for 15 to 30 minutes.

FROSTING THE CAKE

  1. Apply a large dollop of frosting on top of the cake and spread out evenly. Line an 8-inch round acrylic disc with parchment paper with a bit of frosting. Line up the acrylic disc with the bottom cake board and gently press on to the top of the cake to adhere. Add more frosting to the sides of the cake, making sure to cover the bottom cake board completely, and gently press a cake scraper against the acrylic disc and bottom cake board. Slowly rotate the cake turntable all the way around to create a smooth finish on the side of the cake. Chill the cake in the refrigerator or freezer for 15 to 30 minutes.
  2. Line a rimmed baking sheet with parchment paper. Carefully pick up the cake by the bottom cake board with one hand and with the other hand, apply the white chocolate shavings to the bottom edge of the cake over the rimmed baking sheet.
  3. Insert a small offset spatula under the acrylic disc and rotate the turntable until the disc releases. Peel off the parchment paper. Add more frosting to the top of the cake to fill in any gaps if needed. Smooth out the top of the cake with an offset cake spatula while rotating the turntable.

DECORATING

  1. Fit a piping bag with Wilton piping tip #1M and fill remaining frosting. Pipe 8 swirls on the edge of the cake and top each swirls with a fresh raspberry, mint and a white chocolate shavings. Carefully transfer to a cake pedestal and serve.

Notes

Raspberry filling can be made up to 5 days in advance, stored in an airtight container in the refrigerator.

Cake layers can be made up to 3 days in advance, wrapped in plastic wrap in an airtight container in the refrigerator.

Frosting is best prepared the day of assembly.

Assembled cake can be stored in an airtight container in the refrigerator for up to 3 days. Bring to room temperature before serving.

Nutrition Information:
Yield: 12 Serving Size: 1
Amount Per Serving: Calories: 530Total Fat: 24gSaturated Fat: 11gTrans Fat: 0gUnsaturated Fat: 11gCholesterol: 119mgSodium: 475mgCarbohydrates: 71gFiber: 3gSugar: 36gProtein: 9g

*Nutrition information is an estimate and will vary.*

Did you make this recipe?

Tag @thecakechica1 on Instagram and hashtag #thecakechica1

© Mary | The Cake Chica
Cuisine: American / Category: Cakes and Frostings


Strawberry Cake From Scratch

February 5, 2020

Strawberry Cake From Scratch

There's no need to pick up a pack of strawberry flavored gelatin for this recipe. This cake gets its flavor from real frozen strawberries! Plus, this Strawberry Cake From Scratch is tender and fluffy, thanks to the use of cake flour and the reverse creaming method.

Strawberry Cake From Scratch


...

Read More

Spaghetti with Sausage and Peppers

January 21, 2020

Spaghetti with Sausage and Peppers

Spaghetti with Sausage and Peppers is one of my favorite pasta dishes to make. It's one my husband also enjoys making because it is super tasty and so easy to prepare. Seriously, dinner will be ready in about 30 minutes with this one!

Spaghetti with Sausage and Peppers

...

Read More

Chocolate Cola Cupcakes

January 14, 2020

Here is a fun take on chocolate cupcakes. These Chocolate Cola Cupcakes are light and moist and made with your favorite cola! Next, I lightly brushed on a cola simple syrup and frosted the tops with a Swiss meringue cola buttercream! And let's just get this out of the way now, I am from Texas where all soda is called "Coke" (unless you're Dr. Pepper, but that is another blog post) and yes Coca Cola is my favorite! 

Chocolate Cola Cupcakes

...

Read More

  • « Go to Previous Page
  • Page 1
  • Interim pages omitted …
  • Page 12
  • Page 13
  • Page 14
  • Page 15
  • Page 16
  • Interim pages omitted …
  • Page 39
  • Go to Next Page »

Primary Sidebar

Welcome!

Hi, I’m Mary. The self-taught baker, food stylist, and photographer behind The Cake Chica. If you love creating bakery-style desserts from scratch and want a peek behind the scenes of how they’re styled and captured, you’re in the right place.

More about me

Popular

  • Toasted Coconut Caramel Layer Cake on marble cake pedestal.
    Toasted Coconut Caramel Layer Cake
  • Best Big Fat Chewy Chocolate Chip Cookie
  • Key Lime Pie Layer Cake cover photo.
    Key Lime Pie Layer Cake
  • White Cake with Strawberry Filling
    White Cake with Strawberry Filling

Seasonal

  • Banana Cream Pie
  • Chocolate Root Beer Float Cake
  • Cotton Candy Layer Cake
  • Strawberry Ice Cream Pop Cake

Footer

↑ back to top

About

  • The Cake Chica
  • Recipe Index
  • Work With Me

Legal

  • Privacy Policy

Contact

  • Contact

As an Amazon Associate I earn from qualifying purchases.

Copyright © 2025 The Cake Chica