
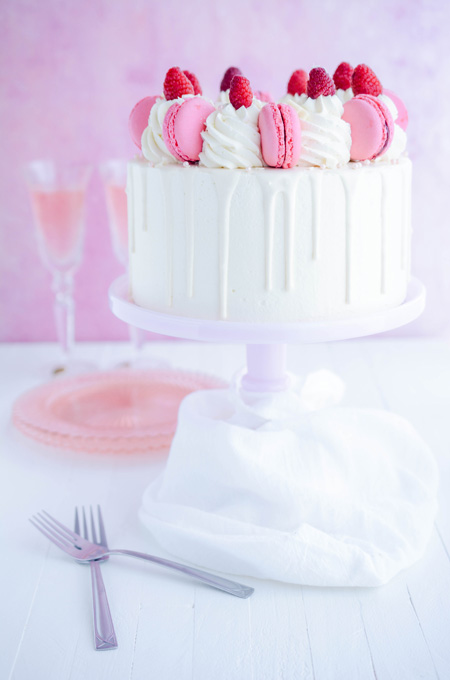
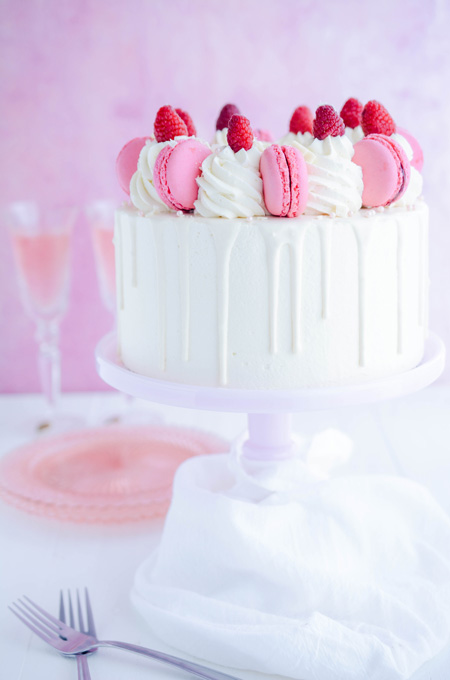
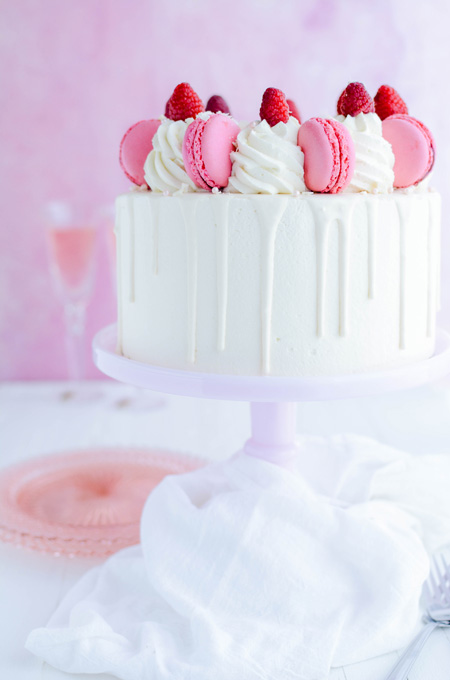
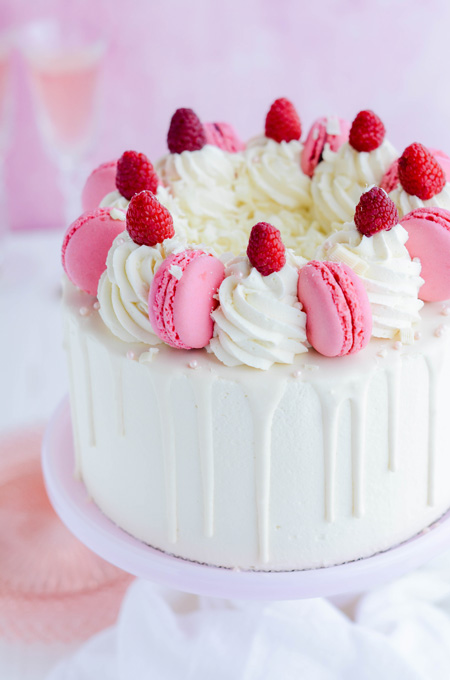
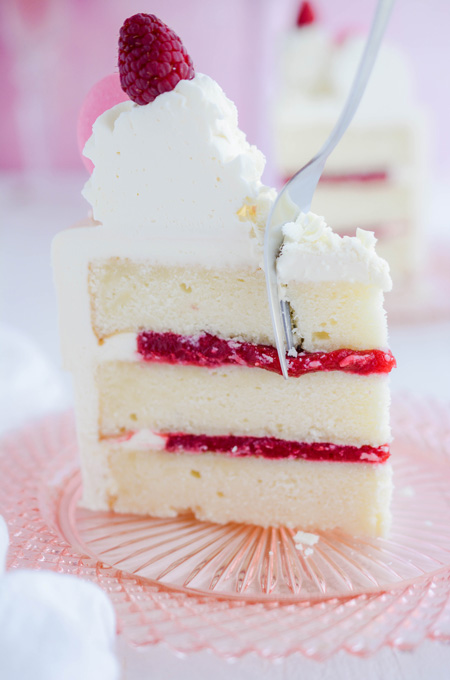
I'm in love with this White Chocolate Raspberry Drip Cake! Let me tell you why.
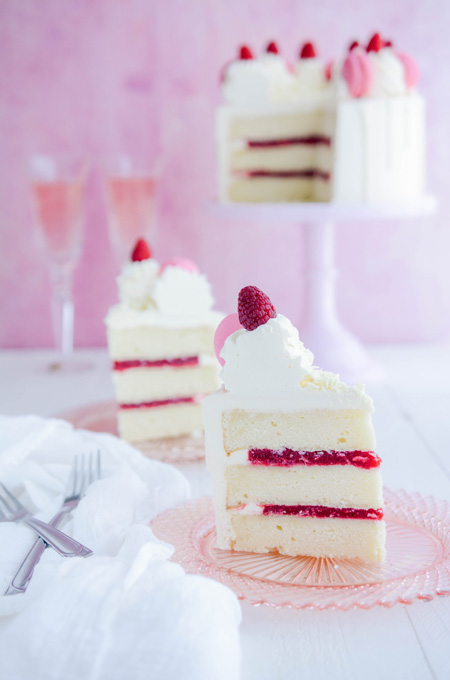
- The white chocolate raspberry cake layers literally melt in your mouth.
- Raspberry is my favorite berry and this cake is full of raspberry flavor.
- It is filled with my favorite raspberry filling.
- The frosting is super easy to make.
- That white chocolate drip though!
Why I Prefer The Reverse Creaming Method
- It creates a cake crumb that is tender, sturdy and ultra fine.
- During reverse creaming the butter coats the flour particles, minimizing gluten development for a tender and fine crumb.
- Since the butter isn't beaten with the sugar, less air gets incorporated into the batter which creates a sturdier cake with less rise.
- Reverse creaming also produces a flat top. No cake domes when using this method.
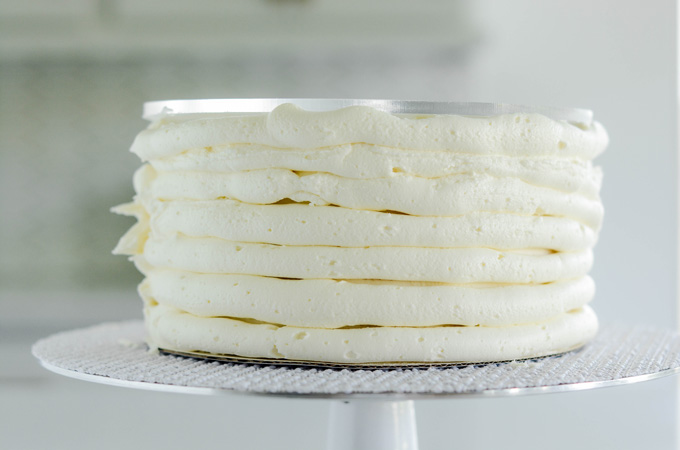
Check out the images below to see the process of reverse creaming

Cake Ingredients
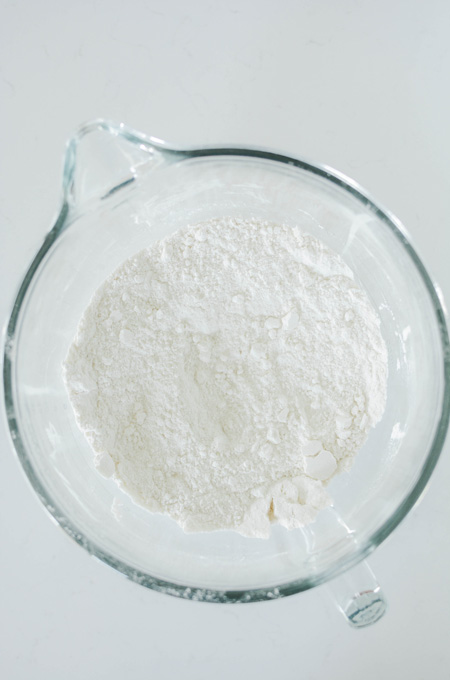
- Cake flour: cake flour has a lower protein content than all-purpose flour, which produces delicate and fine crumbed cakes like this one.
- Baking powder: leavens the cake.
- Granulated sugar: flavors the cake batter and incorporates and dissolves easily into the cake batter.
- Salt: helps enhance flavor.
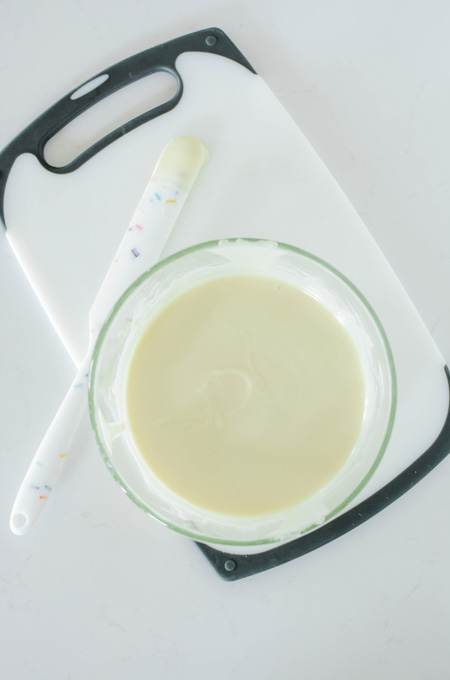
- Eggs: bind, thicken, emulsify and leavens.
- Raspberry emulsion: enhances the cake flavor. Bakers Tip: Strawberry extract can be used as a substitute in equal parts.
- Buttermilk: adds a tangy flavor, as well as tenderizes and creates a fluffy crumb. Bakers Tip: Sour cream or yogurt can be substituted for buttermilk. Both are acidic and produce similar results.
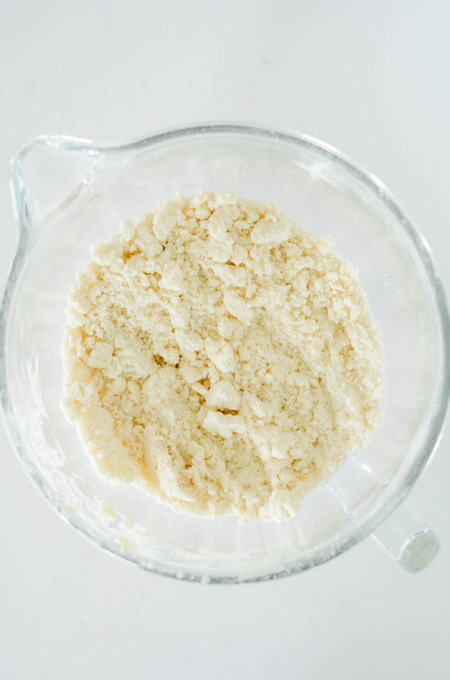
- Unsalted butter: is rich in flavor and also helps determine the cakes crumb. Fat coats the flour stopping their ability to form too much gluten. Bakers Tip: Always use unsalted butter since different brands of butter have different amounts of salt in them.
- Melted white chocolate: adds flavor to the white chocolate raspberry cake layers.
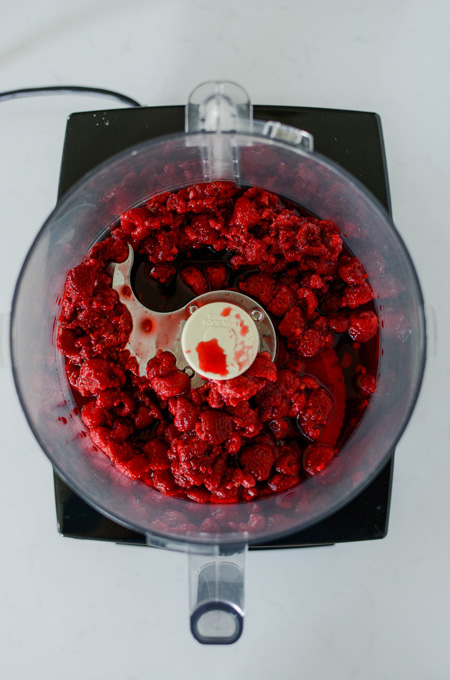
How To Make Raspberry Filling
My raspberry filling is super easy to make and easy to make substitutions to. Simply switch out frozen raspberries for any frozen fruit of your choice and proceed with the recipe as written.
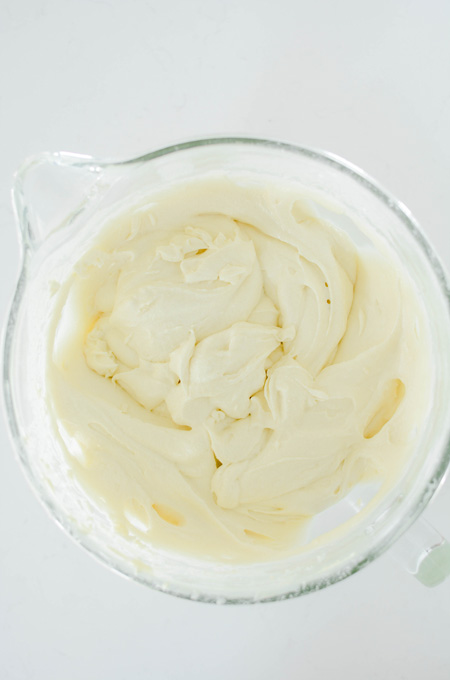
How To Make White Chocolate Raspberry Buttercream
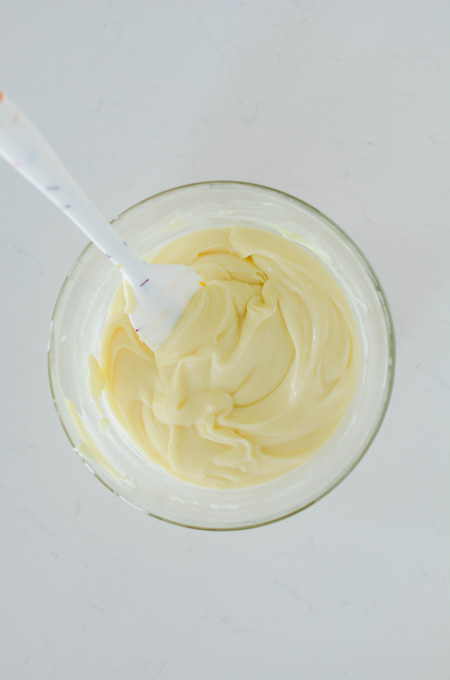
- Heat cream in a microwave safe bowl for 1 minute. Pour hot cream over the white chocolate chips and stir until smooth and combined. Heat the mixture for another 20 to 30 seconds in 10 second intervals if needed. Set aside to cool slightly.
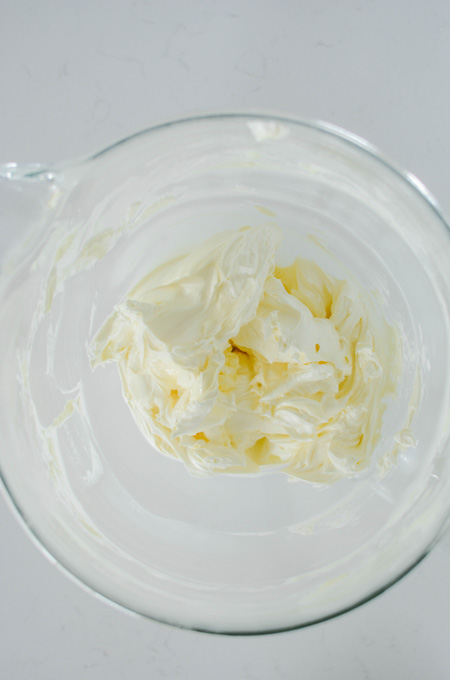
- In the bowl of a stand mixer, fitted with the paddle attachment, beat the butter on medium-high speed for 5 minutes, scraping down the sides of the bowl as needed.
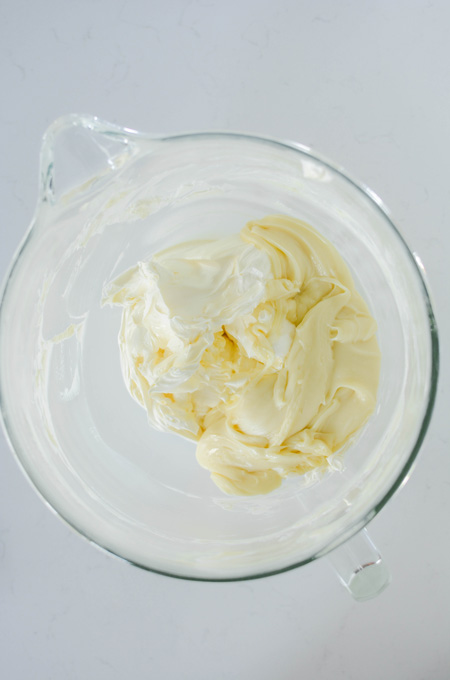
- Reduce the mixer speed to medium and gradually add the melted white chocolate and mix until smooth and combined, about 30 seconds. Scrape down the sides of the bowl as needed.
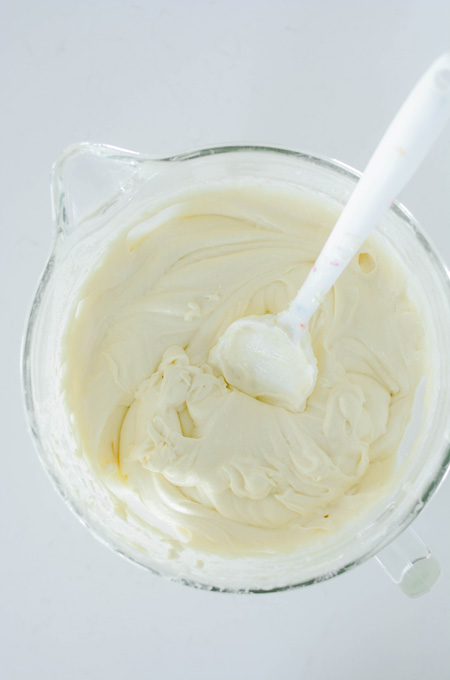
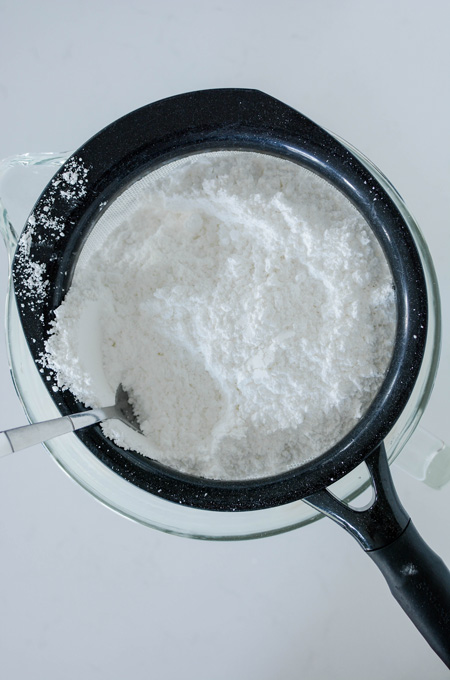
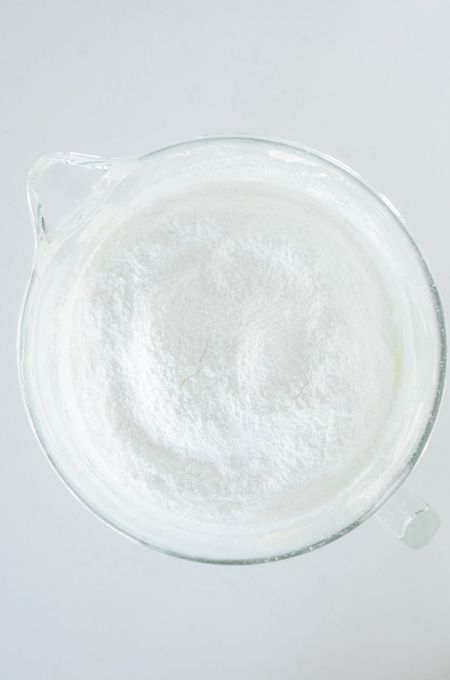
- Remove the mixer bowl from the mixer stand and place a sieve on top. Pour the powdered sugar over the sieve and with a spoon, stir the powdered sugar until it is all in the mixer bowl. This method helps reduce the powdered sugar cloud. Place the mixer bowl back on the stand.
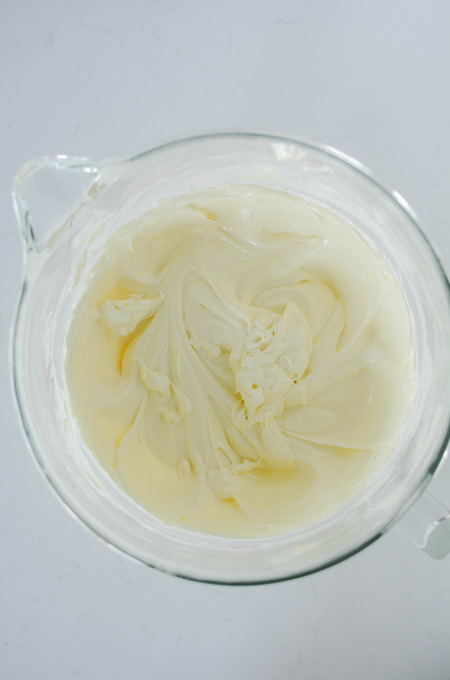
- Reduce the mixer speed to low, and mix until smooth and combined. Add raspberry emulsion and salt and stir to combine.
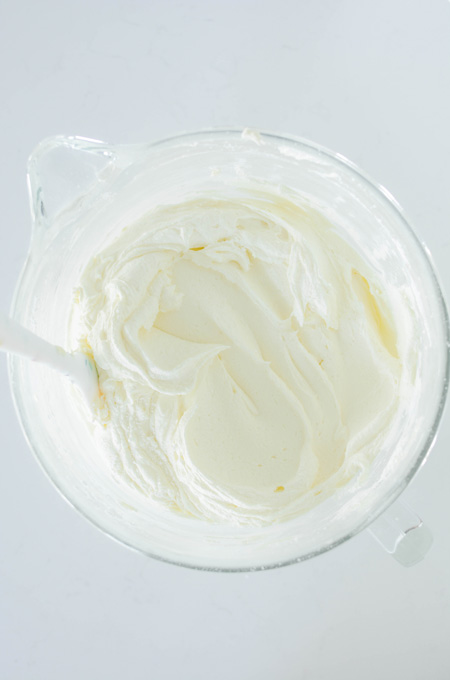
- Increase the mixer speed to medium-high and beat for 3 to 5 minutes until the buttercream is smooth and light in color. Scrape down the sides of the bowl as needed.
Cake Assembly
- Place a nonslip mat on top of a cake turntable and place a cake board on top.
- Center the first cake layer on top of the cake board, making sure there's even spacing from all around the edges.
- Fit a piping bag with a round piping tip or coupler and fill the piping bag with about 1 1/2 cup buttercream.
- Pipe a buttercream dam around the outer edge of the cake.
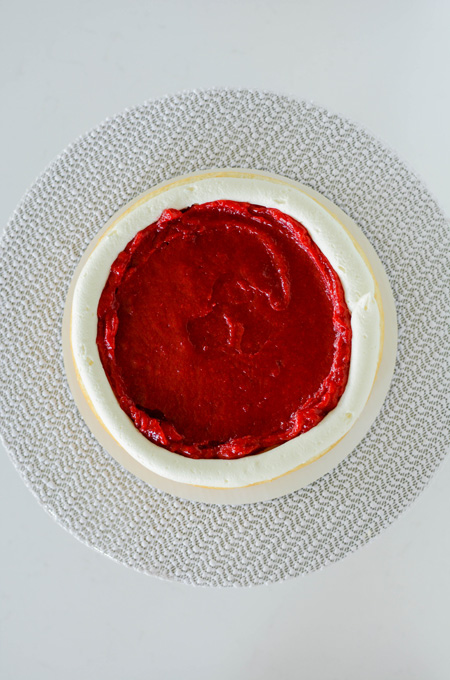
- Fill the center with half of the filling and spread out in an even layer with a small offset cake spatula.
- Place the second cake layer on top and gently press to adhere to the bottom cake layer.
- Pipe a buttercream dam around the outer edge and spread the remaining filling out in an even layer until it reaches the buttercream dam.
- Add the third and final cake layer (bottom side up) on top and gently press to adhere.
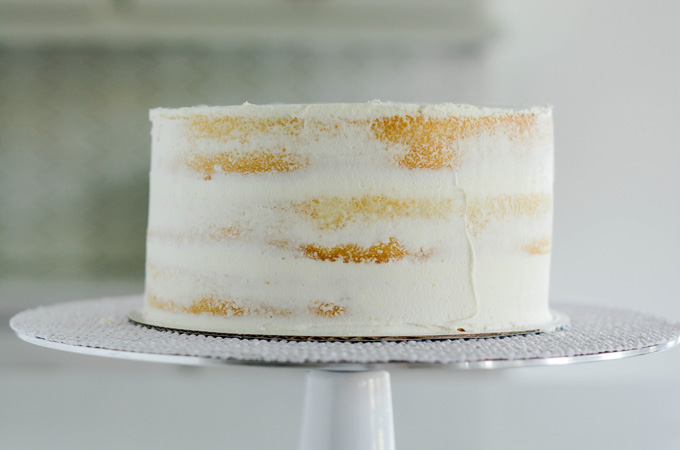
- Apply a thin layer of buttercream over the top and sides of the cake, creating a crumb coat.
- Chill the crumb coated cake in the refrigerator for 30 minutes.
How To Crumb Coat
- Place a medium dollop of buttercream on top of the cake.
- Using a small offset spatula, start spreading the buttercream out.
- Continue to spread buttercream on the sides of the cake. The buttercream does not have to be perfectly smooth.
- Refrigerate the cake uncovered for at least 15 minutes to set before adding the final coat of buttercream.
Frosting The Cake
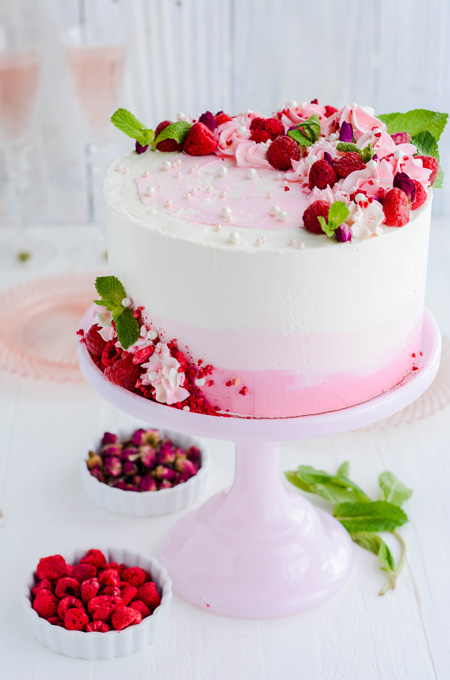
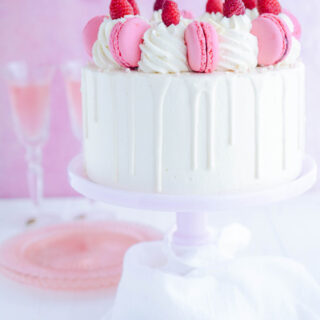
I've decorated a few of my most recent cakes with the ombre effect, such as my Raspberry Wine Layer Cake, which takes me back to my early days of cake decorating. The method that I use to create the ombre effect is an easy way to apply frosting to a cake as well.
After I apply the buttercream I take a cake scraper and scrape the sides of the cake to create a smooth finish.
White Chocolate Drip
I know I'm in the minority when I say I prefer white chocolate melts for my white chocolate drip. But I've never been a huge fan of white chocolate on it's own. And I actually prefer the flavor of white chocolate melts versus real white chocolate. However, when I'm working with dark chocolate I will always choose the real deal for my chocolate drip.
Why I Prefer White Chocolate Melts:
- I prefer the flavor over real white chocolate.
- It's easier to work with.
- Real white chocolate will have a yellow tint to it that you would have to color white with food coloring. White chocolate melts are already white so no coloring is necessary.
Having said that, you can use real white chocolate in place of candy melts in this recipe, just be sure to keep a close eye on it while it's melting in the microwave. White chocolate can burn quickly.
Tips For Achieving Perfect Chocolate Drips
- Chill your cake before adding the drips. The chilled cake will help slow down the drips, giving you more control.
- Make sure the chocolate is the right temperature. It should be fluid but not warm.
- Find the spot on your cake that will be the back and run a test drip on it. If the drip slips off the cake it's too hot. If the drips clump, it's too cold.
- For more controlled drips, use a spoon or a squeeze bottle and add the drips to the sides of the cake first. I prefer using a spoon for my drips.
- Once you have your side drips done, gently pour the remaining chocolate on the top and spread out until it meets the edges. Reheat the chocolate if needed.
Cake Decorating Tools
- 8-inch round cake board
- Cake turntable
- Piping bags
- Couplers
- Small offset cake spatula
- 8-inch round acrylic disc
- Cake scraper
- Ateco piping tip #828
White Chocolate Raspberry Drip Cake Baking Schedule
Day 1: Prepare raspberry filling
Day 2: Bake cake layers.
Day 3: Make buttercream, assemble, decorate and serve.
Cake Storage
- Raspberry filling can be made up to 5 days in advance.
- Cake layers can be made up to 3 days in advance.
- Assembled cake can be stored in an airtight cake container for up to 3 days in the refrigerator. Bring to room temperature before serving.
Let's Connect
The Cake Chica is on the following social media platforms below. Click subscribe, like and follow! We would love to have you over!
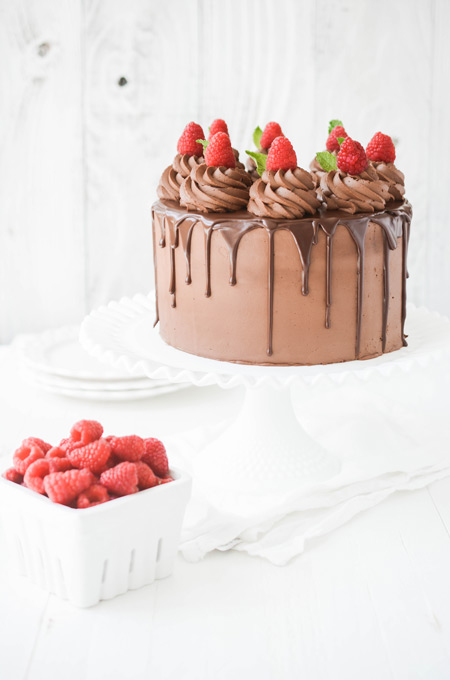
Recommended Post
White Chocolate Raspberry Drip Cake
Three layers of melt-in-your-mouth white chocolate raspberry cake layers, filled with raspberry filling, frosted with white chocolate raspberry buttercream, drizzled with white chocolate drip.
Ingredients
SPECIAL TOOLS
- 3 8-inch round cake pans
- Nonstick baking spray
- Stand mixer
- 4 cup liquid measuring cup
- Fine mesh sieve
- 1 8-inch round cake board
- Cake turntable
- Piping bags
- Round piping tip or coupler
- Small offset cake spatula
- 8-inch acrylic disc
- Cake scraper
- Ateco piping tip #828
- 8 raspberry French macarons
WHITE CHOCOLATE CAKE
- 3 cups (12 ounces) cake flour
- 1 tablespoon baking powder
- 1 1/2 cups (10.5 ounces) granulated sugar
- 3/4 teaspoons salt
- 4 large eggs
- 1 teaspoon raspberry emulsion
- 1 cup buttermilk
- 1/2 cup sour cream
- 1 cup (2 sticks) unsalted butter, cut into tablespoon sized pieces, at room temperature
- 1 cup (8 ounces) white chocolate, melted
RASPBERRY FILLING
- 12 ounces frozen raspberries, thawed
- 1/4 cup (1.75 ounces) granulated sugar
- 3 tablespoons cornstarch mixed with 3 tablespoons water
- Fresh lemon juice to taste
- 3 tablespoons Chambord, optional
WHITE CHOCOLATE BUTTERCREAM
- 1/4 cup (2 ounces) heavy whipping cream
- 1 cup (8 ounces) white chocolate chips
- 2 cups (4 sticks) unsalted butter, slightly cold (around 65 degrees)
- 6 cups (24 ounces) powdered sugar, measured then sifted
- 1 teaspoon raspberry emulsion
- 1/8 teaspoon salt
WHITE CHOCOLATE DRIP
- 1 cup (180 grams/8 ounces) Wilton Very White chocolate candy melts
- 1/4 cup (2 ounces) heavy cream
Instructions
WHITE CHOCOLATE CAKE
- Adjust and oven rack to the center position and heat oven to 325 degrees. Spray 3 8-inch round cake pans with nonstick baking spray and set aside.
- Place white chocolate in a microwave safe bowl and heat on 30 second intervals, stirring between each interval until the chocolate is smooth. Set aside to cool slightly.
- In the bowl of a stand mixer, add the flour, baking powder, sugar and salt and mix on medium speed until combined.
- In a 4 cup measuring cup, add the eggs, emulsion, buttermilk and sour cream and whisk to combine.
- Slowly add the butter to the mixer bowl with the dry ingredients, one tablespoon at a time. Mix until the mixture resembles pea sized balls of flour.
- Reserve 1/2 cup of the wet ingredients and add the remaining into the dry ingredients. Mix on medium-high speed for 2 to 3 minutes, until combined. Add the reserved 1/2 cup wet ingredients to the batter and mix until combined on medium speed, about 30 seconds. Add the melted chocolate and mix on medium speed until combined.
- Divide the cake batter into the prepared cake pans and bake for 25 to 30 minutes or until a toothpick inserted in the center comes out with a few moist crumbs attached, rotating pans halfway through baking.
- Let cakes cool in their pans for 15 minutes, then invert them on to cooling racks to cool completely.
RASPBERRY FILLING
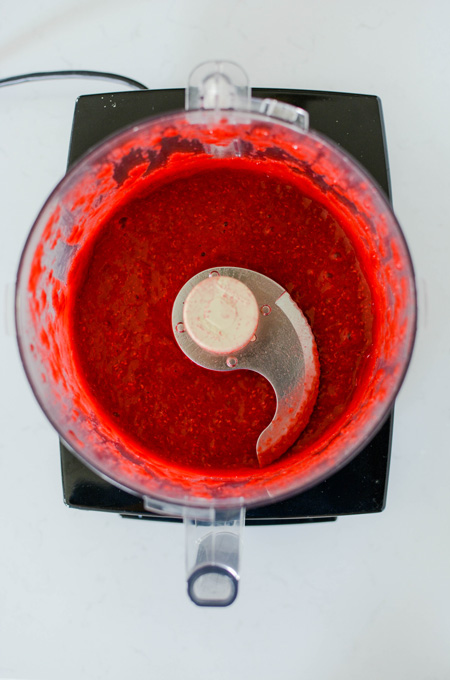
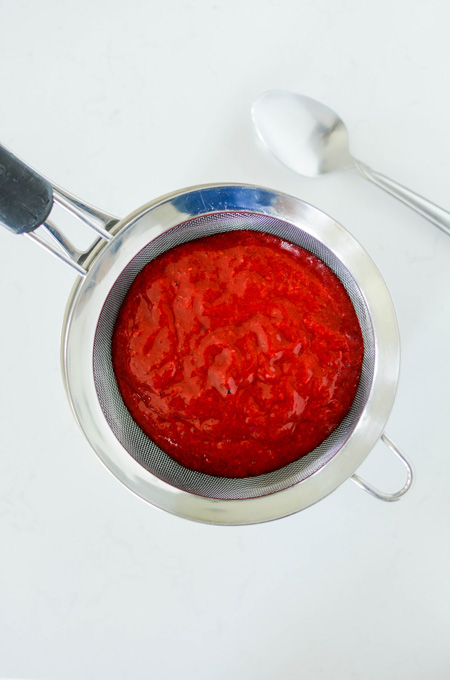
- Place thawed raspberries in a blender or food processor and puree until smooth. Over a bowl pour raspberry puree over a sieve to remove the solids. The puree will be thick. Use a spoon to stir and press the puree through the strainer.
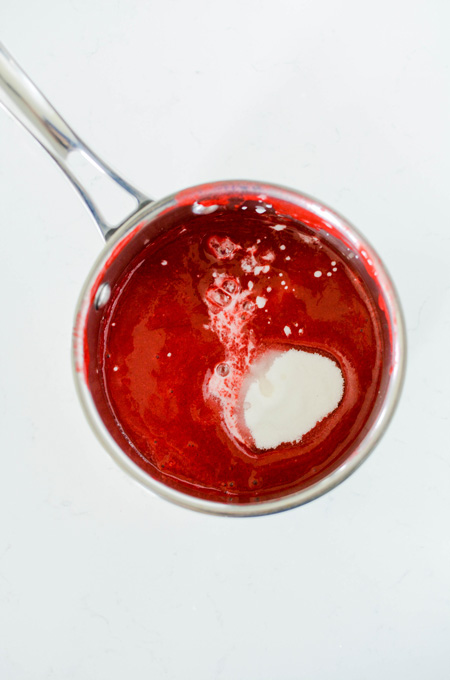
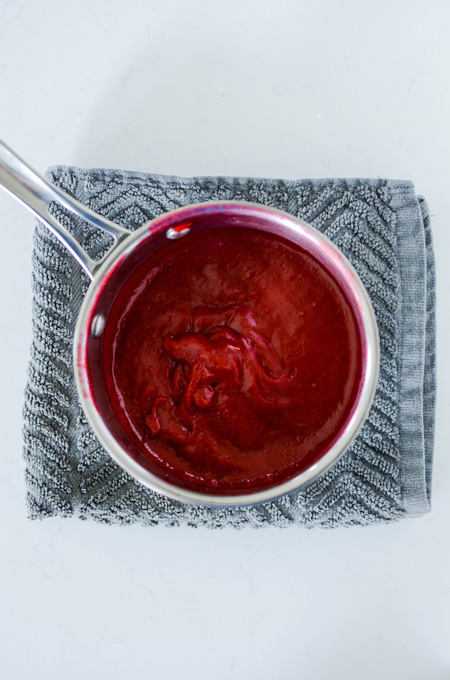
- Place raspberry puree in a small saucepan over medium-low heat. Add sugar and cornstarch mixture and bring to a simmer, stirring constantly to keep lumps from forming. Once the puree thickens, remove from the heat. Cool for 5 minutes and then add fresh lemon juice and Chambord if using. Chill for about 2-3 hours in the refrigerator until ready to use.
WHITE CHOCOLATE BUTTERCREAM
- Heat cream in a microwave safe bowl for 1 minute. Pour hot cream over the white chocolate chips and stir until smooth and combined. Heat the mixture for another 20 to 30 seconds in 10 second intervals if needed. Set aside to cool slightly.
- In the bowl of a stand mixer, fitted with the paddle attachment, beat the butter on medium-high speed for 5 minutes, scrapping down the sides of the bowl as needed.
- Reduce the mixer speed to medium and gradually add the melted white chocolate and mix until smooth and combined, about 30 seconds. Scrape down the sides of the bowl as needed.
- Remove the mixer bowl from the mixer stand and place a sieve on top. Pour the powdered sugar over the sieve and with a spoon, stir the powdered sugar until it is all in the mixer bowl. This method helps reduce the powdered sugar cloud. Place the mixer bowl back on the stand.
- Reduce the mixer speed to low, and mix until smooth and combined. Add raspberry emulsion and salt and stir to combine.
- Increase the mixer speed to medium-high and beat for 3 to 5 minutes until the buttercream is smooth and light in color. Scrape down the sides of the bowl as needed.
ASSEMBLE CAKE
- Place a nonslip mat on top of your cake turntable. Center one cake layer on a cake board and place the cake board on a cake turntable. Fit a piping bag with a round piping tip or coupler and filled with about 1 1/2 cups buttercream. Pipe a buttercream dam around the edge of the cake.
- Place half of the raspberry filling in the center and spread out in an even layer with a small offset cake spatula. Place the second cake layer on top and pipe a buttercream dam on the edge. Spread the remaining raspberry filling on top in an even layer until it reaches the buttercream dam.Place the third cake layer on top (bottom side up).
CRUMB COATING
- Place about 1 1/2 cups buttercream on top and using your offset cake spatula, spread a thin layer of frosting over the top and sides of the cake catching any loose crumbs and sealing them in. Refrigerate the cake for 30 minutes.
- Apply a second and final coat of frosting on the cake by lining an 8-inch acrylic disc with parchment paper. Apply a generous amount of frosting on top and spread out in an even layer. You should have excess frosting hanging off the sides of the cake. Place lined acrylic disc on top of the cake, parchment paper side down and gently press down on to the top of the cake, Making sure the disc is level and lines up with the bottom cake board. Apply more frosting to the sides of the cake. Gently press a cake scraper against the top disc and bottom cake board and smooth out the sides of the cake by rotating the cake turntable. Fill in any gaps in the buttercream and rotate the cake turntable with the cake scraper again. Once the sides of the cake are smooth, chill the cake in the refrigerator for 30 minutes.
- Gently remove the acrylic disc from the top of the cake with your offset cake spatula, by inserting the spatula under the disc and gently turning the cake turntable until the disc releases. Peel off the parchment paper from the cake and fill in any holes in the buttercream. Chill the cake in the refrigerator while you prepare the white chocolate drip.
WHITE CHOCOLATE DRIP
- In a microwavable bowl combined candy melts and heavy cream and microwave for 20 second intervals, stirring between each interval until melted.
- Let chocolate cool at room temperature for about 15 to 20 minutes.
Add chocolate drip to a squeeze bottle, piping bag or use a spoon to apply to the sides of the cake. Pour remaining white chocolate drip in the center of the cake and spread to meet the edges of the dripped chocolate. - Chill the cake in the refrigerator for 1 hour so the chocolate drip can set before adding additional decoration.
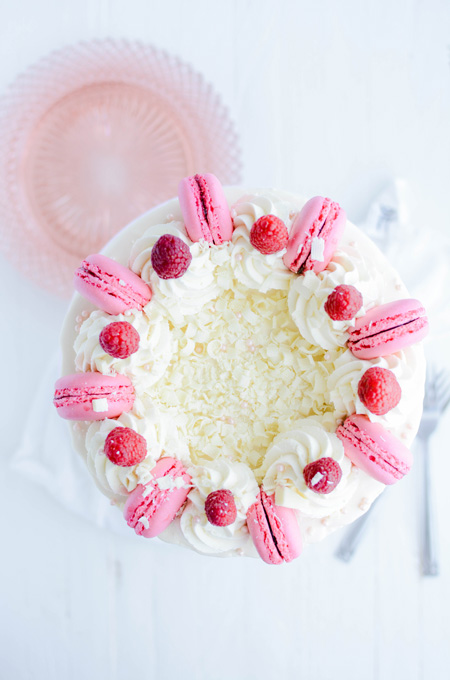
- Fit a piping bag with piping tip #828 and fill with remaining buttercream. Pipe 8 buttercream swirls on the top edge of the cake. Place a fresh raspberry on top of each swirl and a raspberry French macaron between each swirl and serve.
Notes
Raspberry filling can be made up to 5 days in advance.
Cake layers can be made up to 3 days in advance.
Assembled cake can be stored in an airtight cake container for up to 3 days in the refrigerator. Bring to room temperature before serving.
Nutrition Information:
Yield: 12 Serving Size: 1Amount Per Serving: Calories: 459Total Fat: 18gSaturated Fat: 7gTrans Fat: 0gUnsaturated Fat: 9gCholesterol: 109mgSodium: 479mgCarbohydrates: 66gFiber: 3gSugar: 31gProtein: 9g
*Nutrition information is an estimate and will vary.*


Leave a Reply