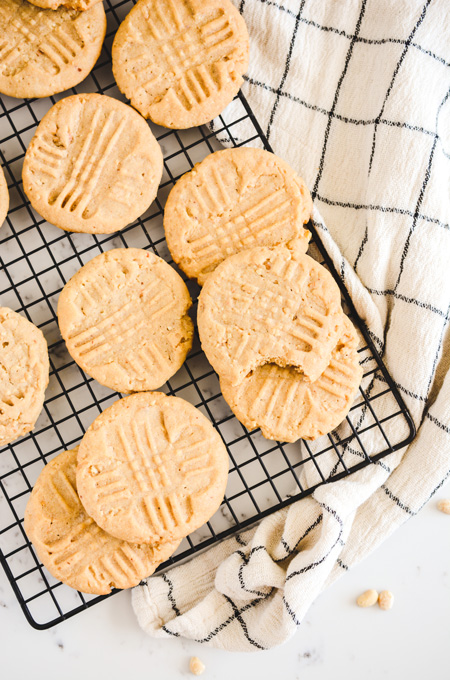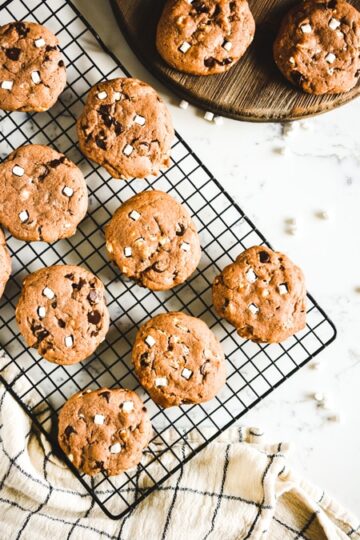
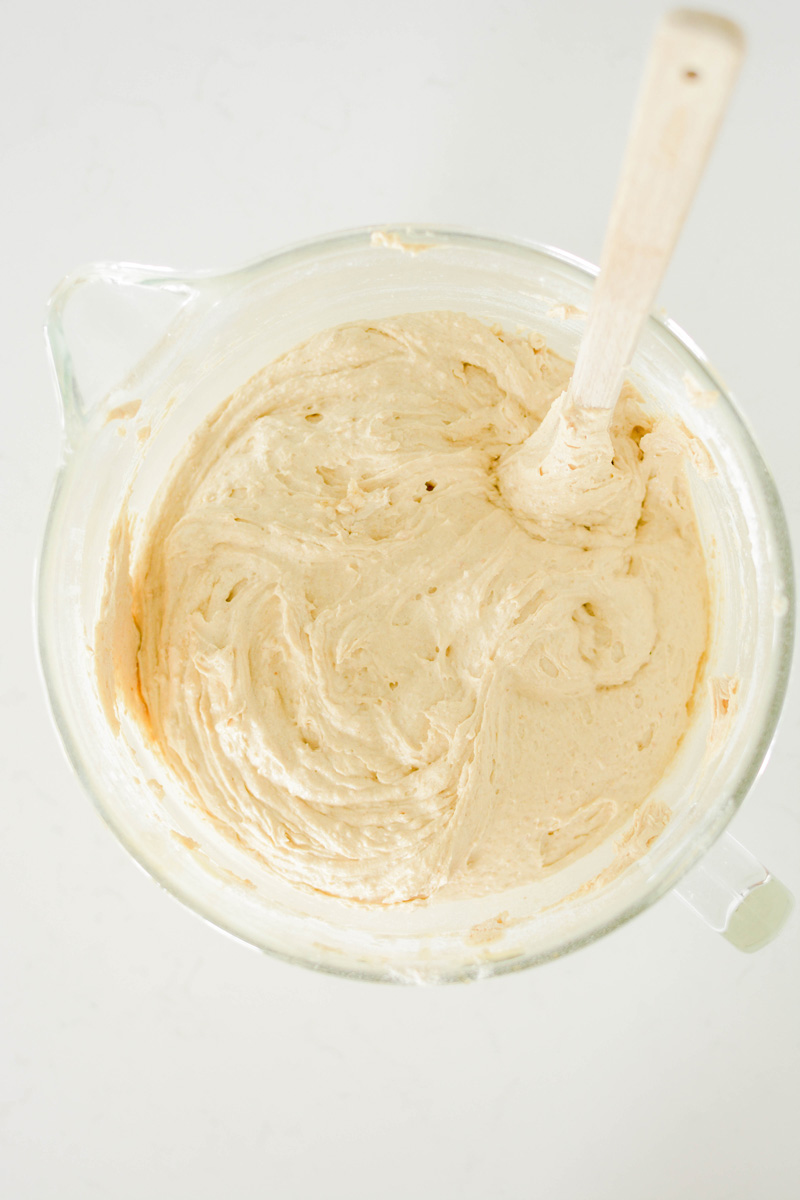
These Chocolaty Hot Cocoa Cookies are perfect for Santa! Hot chocolate mix, chocolate chips and dehydrated marshmallows create these chocolaty cookies that have chewy centers with crisp edges.
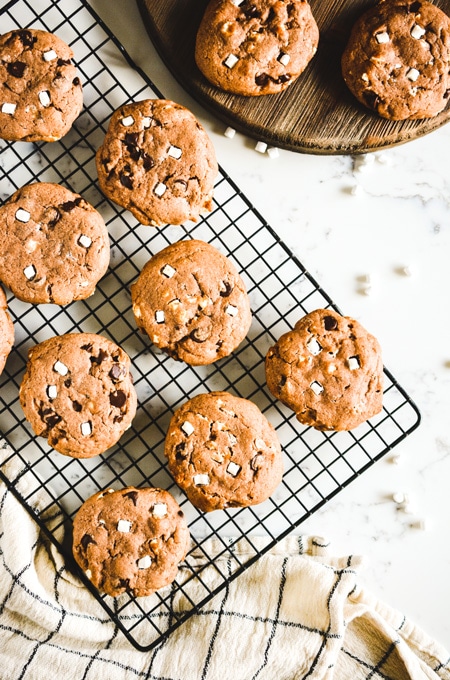

These Chocolaty Hot Cocoa Cookies are perfect for Santa! Hot chocolate mix, chocolate chips and dehydrated marshmallows create these chocolaty cookies that have chewy centers with crisp edges.
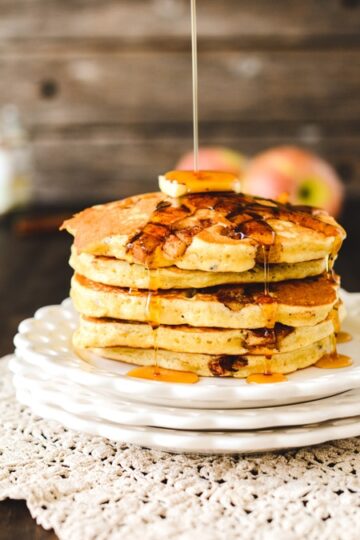
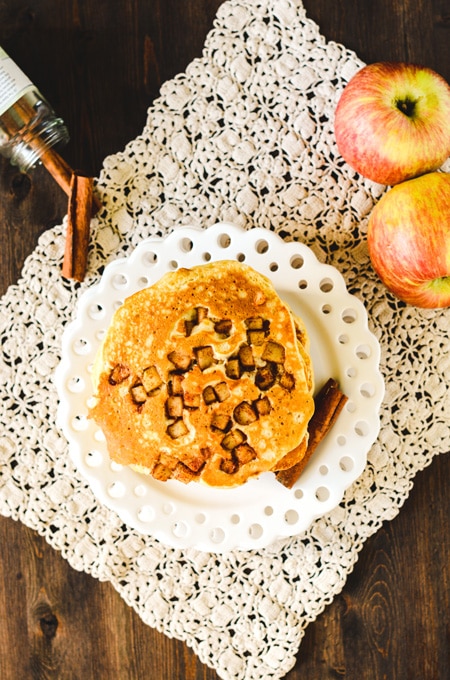
I'll be honest, I can be a bit of a pancake snob. It's usually the first thing I order when going out for breakfast. Those pancakes better be light and fluffy with a fun mixin' or topping. If it's got all those things I'll be a happy girl for the rest of the day!
My Multigrain Cinnamon Apple Pancakes have all that and more! It's a good feeling to know you're also getting in some healthy nutrients in your morning breakfast, especially when most pancake recipes can be looked at as a treat, and only to be eaten occasionally.
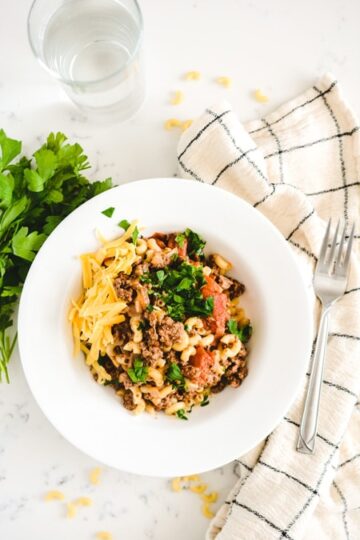
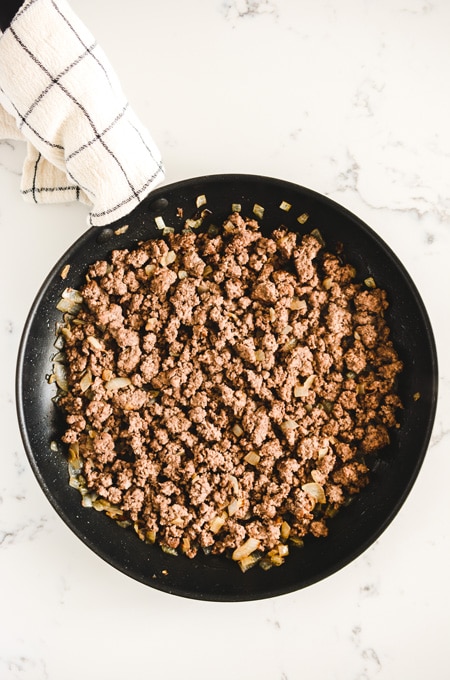
I've got a no nonsense recipe perfect for those nights you just don't feel like cooking anything complicated. My Easy Chili Mac comes together in just about 30 minutes and feeds a family of 4.
As an Amazon Associate, I earn from qualifying purchases.
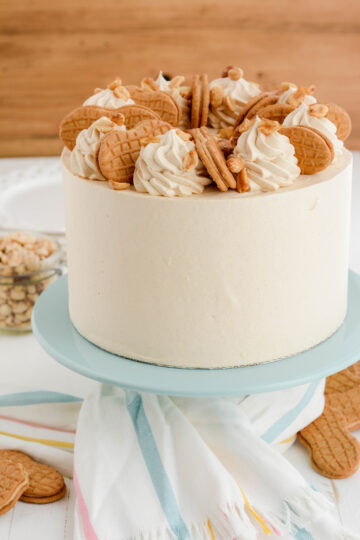
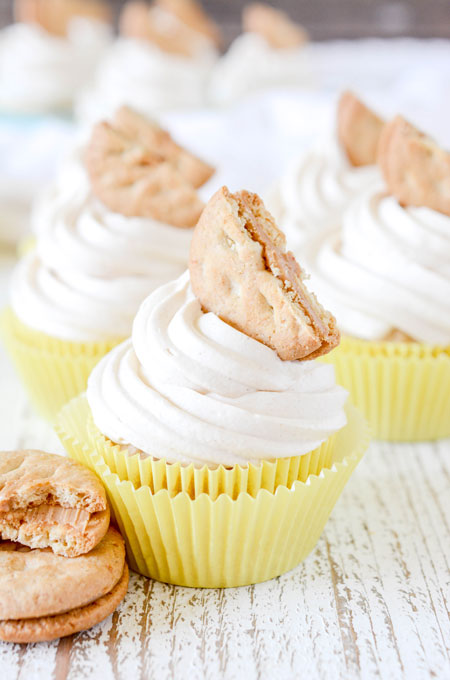
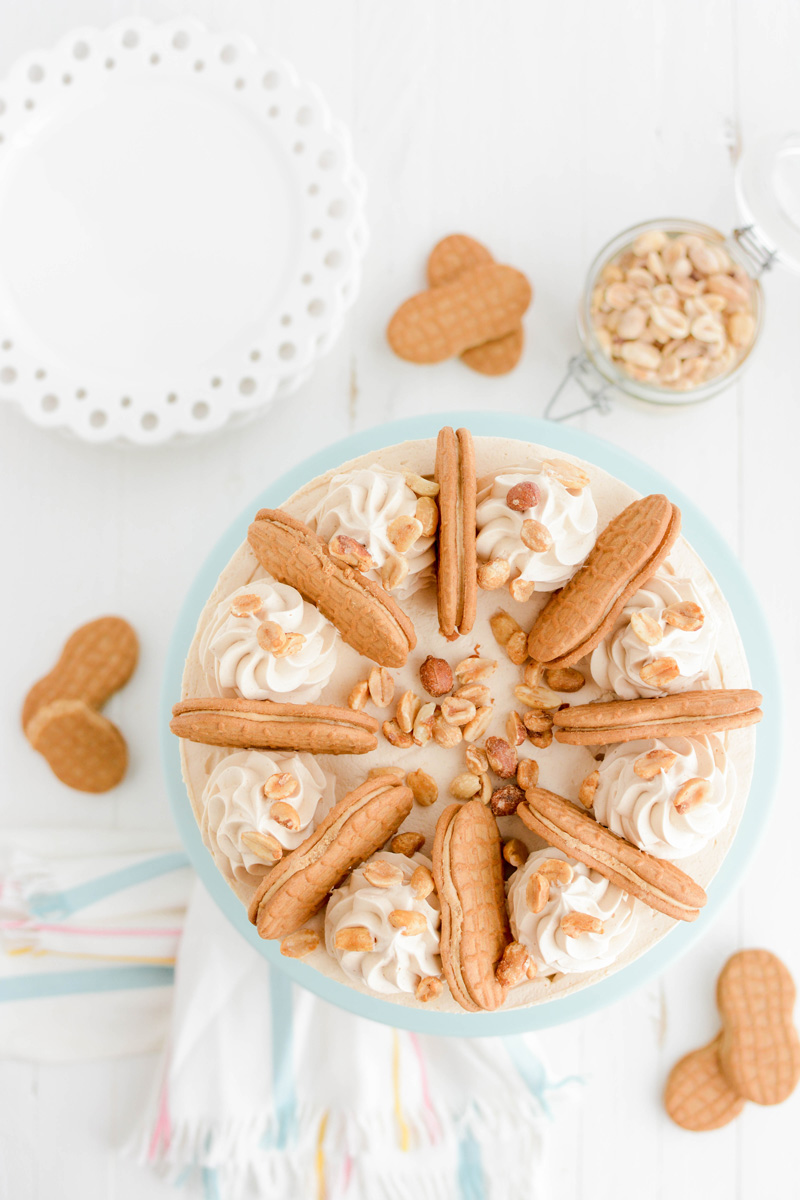
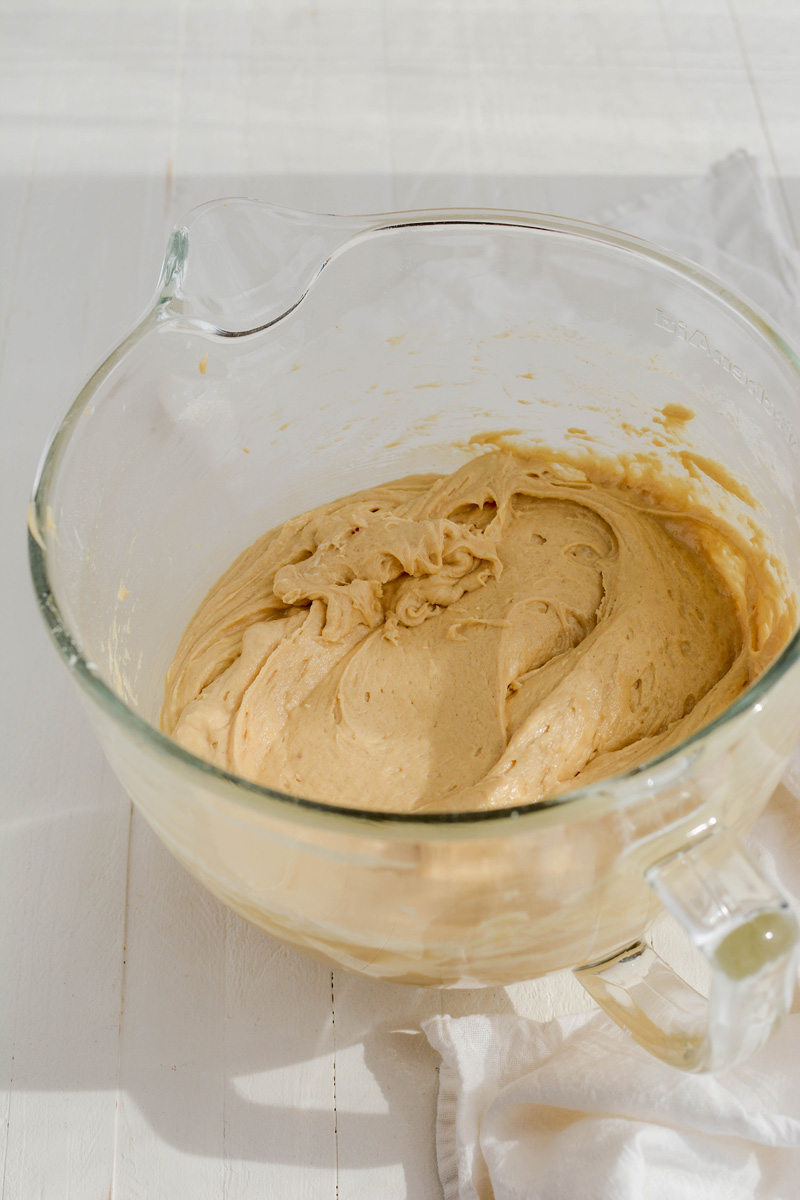
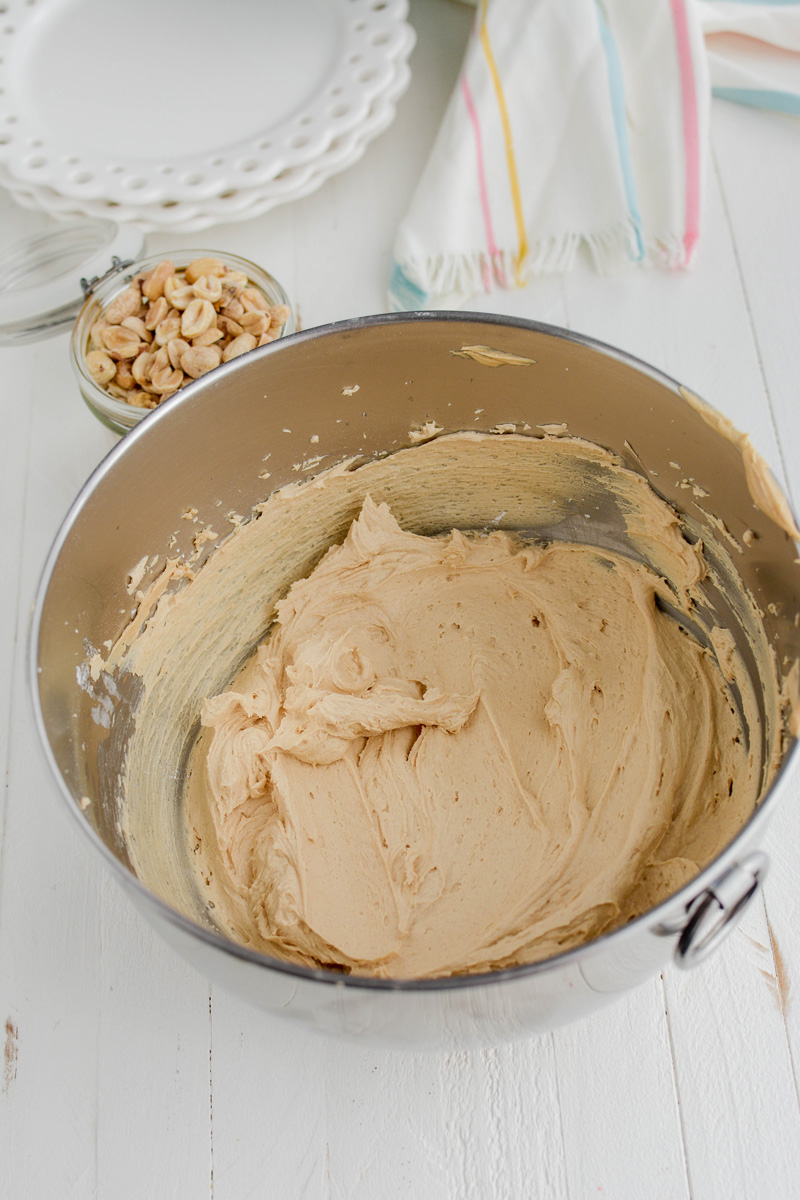
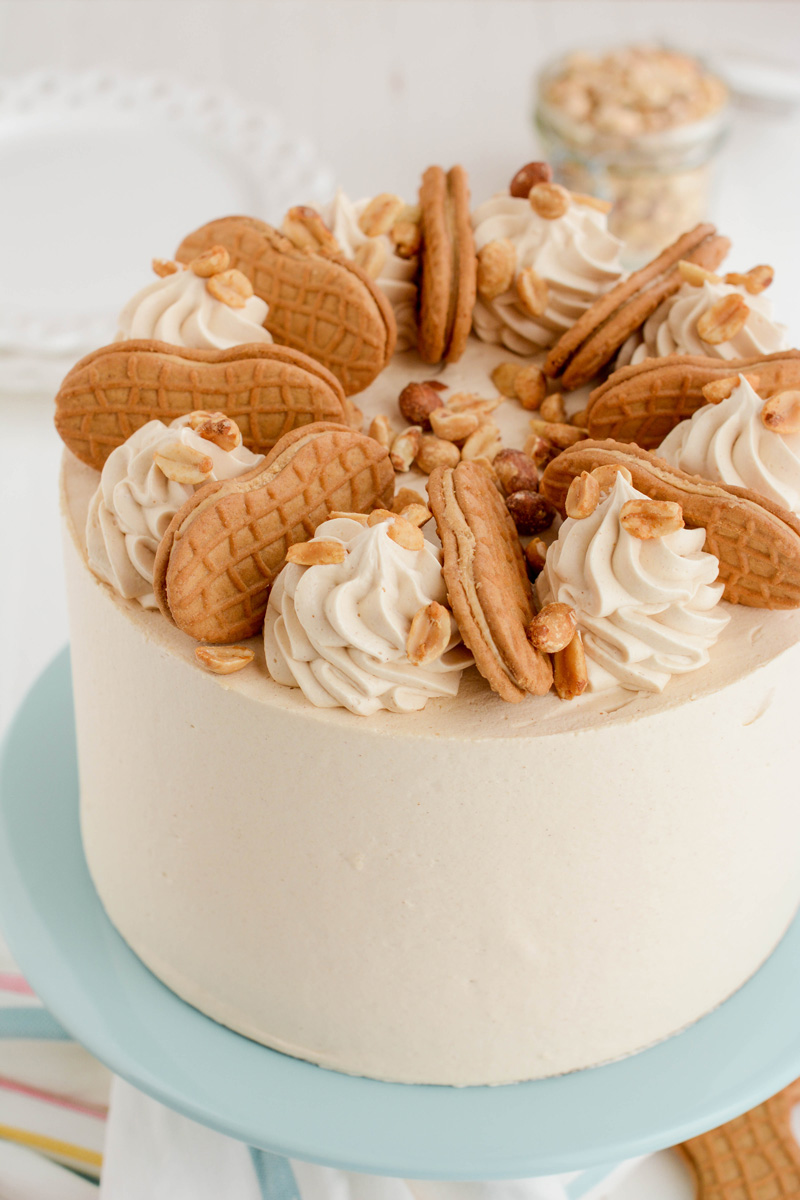
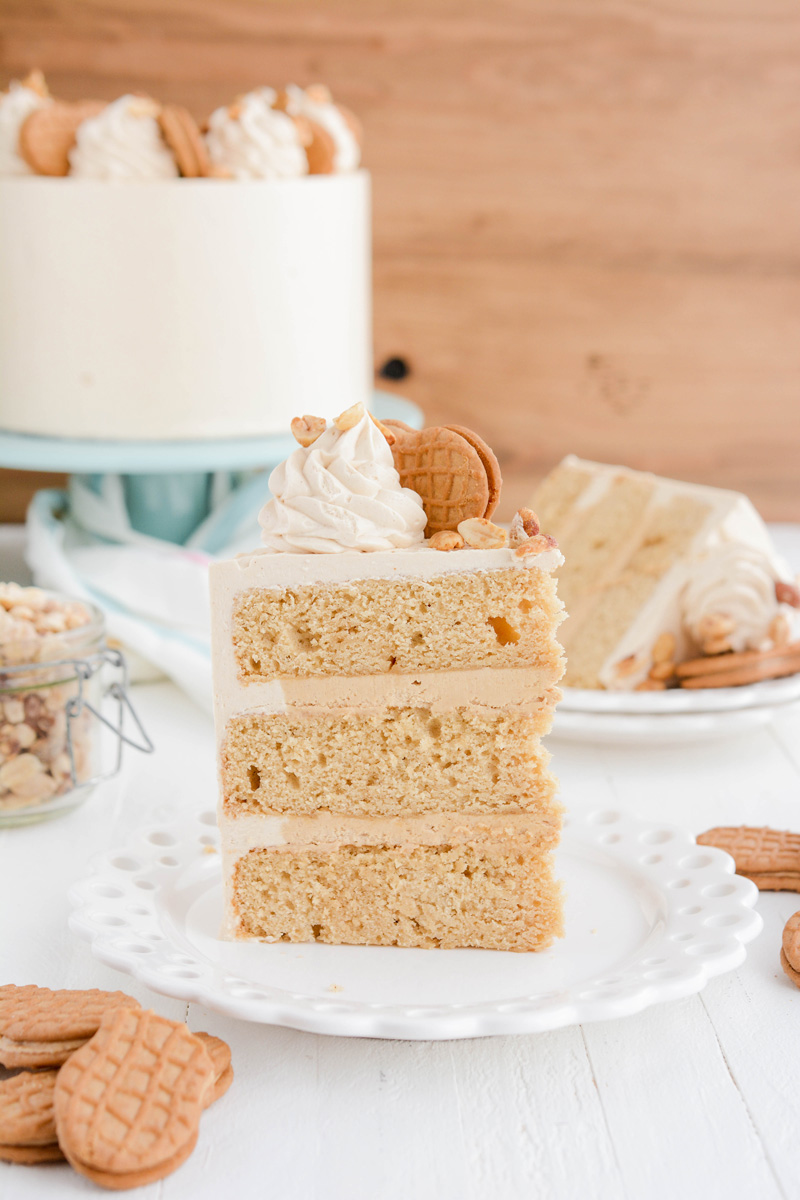
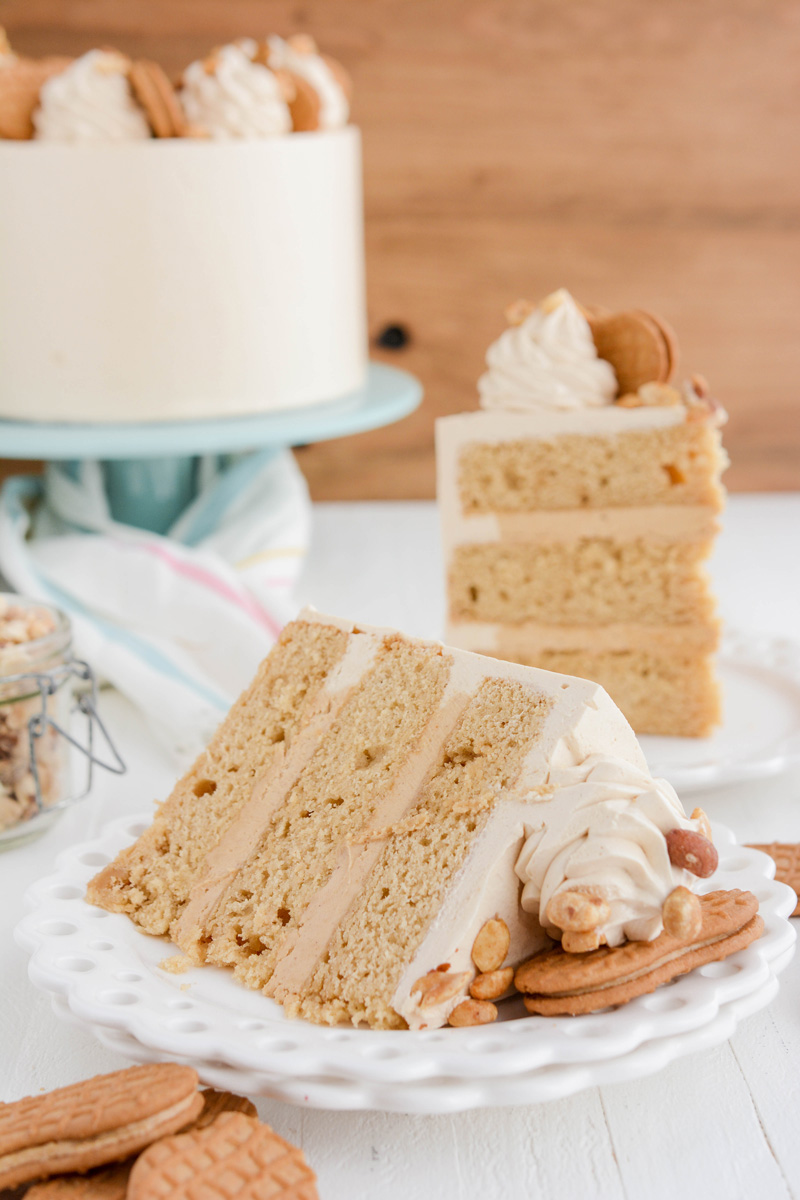
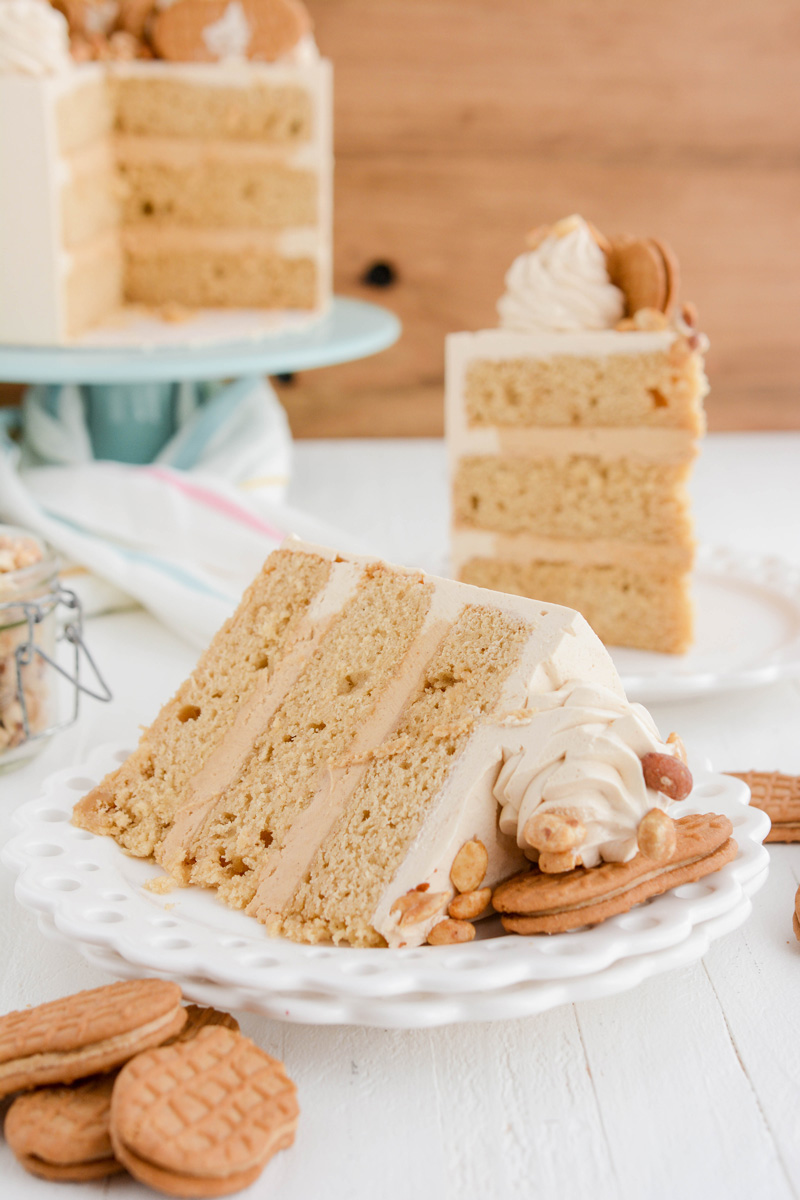
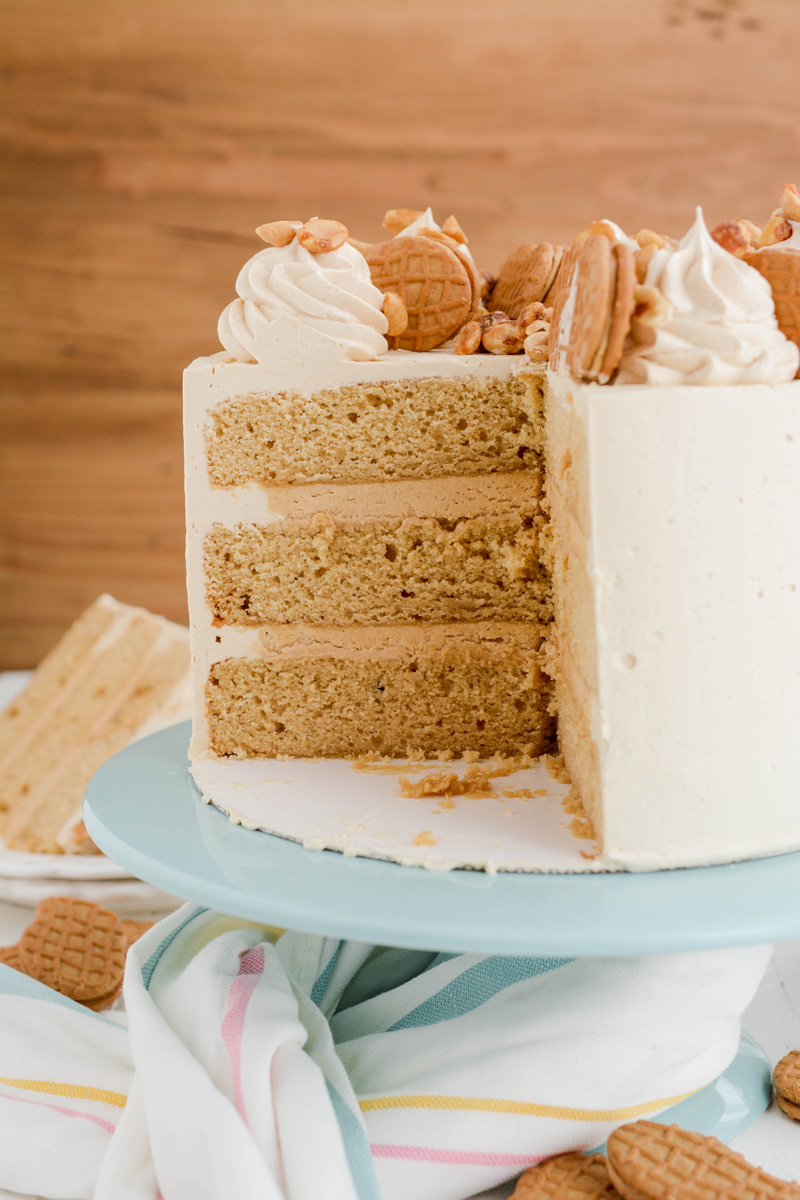
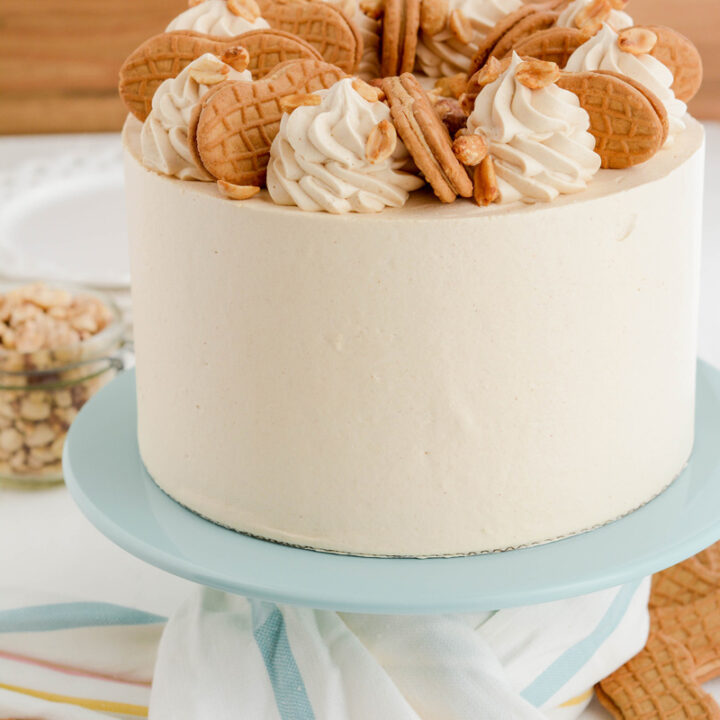
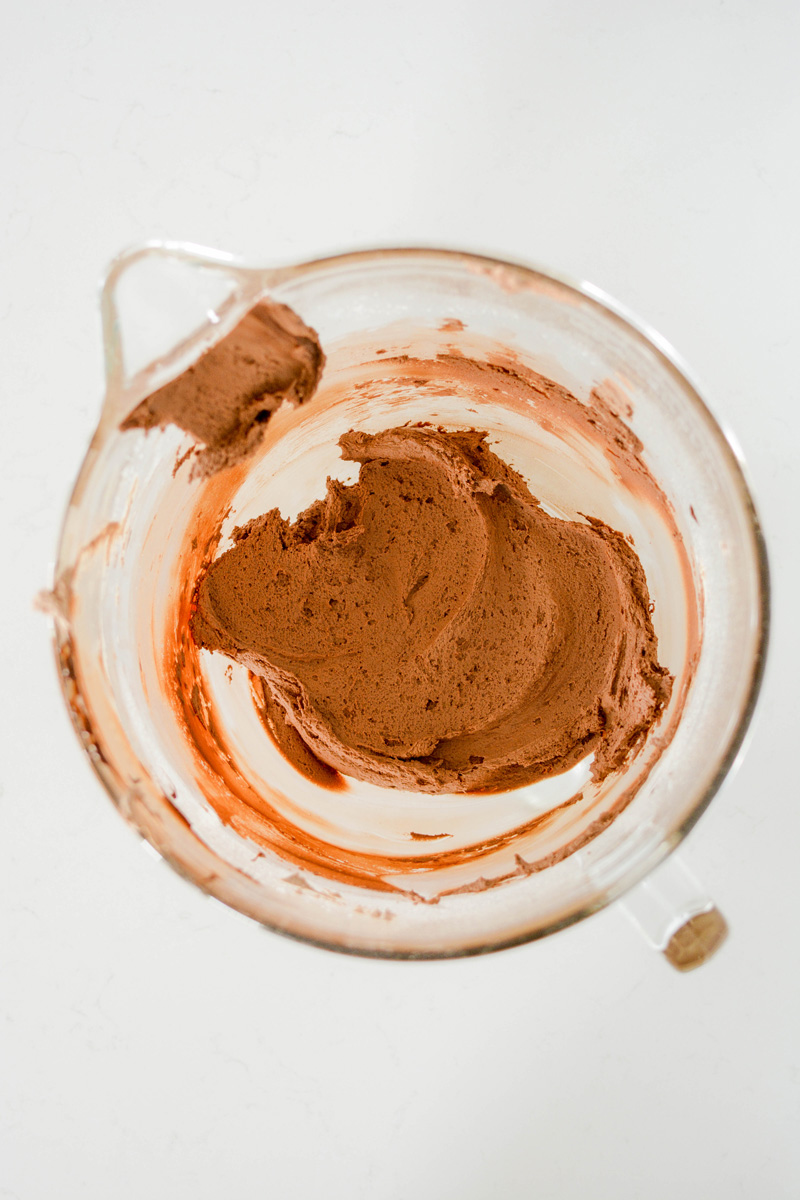
Where are my peanut butter lovers at? If that's you then this Nutter Butter Layer Cake is for you!
Three layers of rich peanut butter layer cake, filled with a fluffy peanut butter filling, reminiscent of those Nutter Butter cookies you might have in your pantry if you're a fan of cookies and peanut butter.
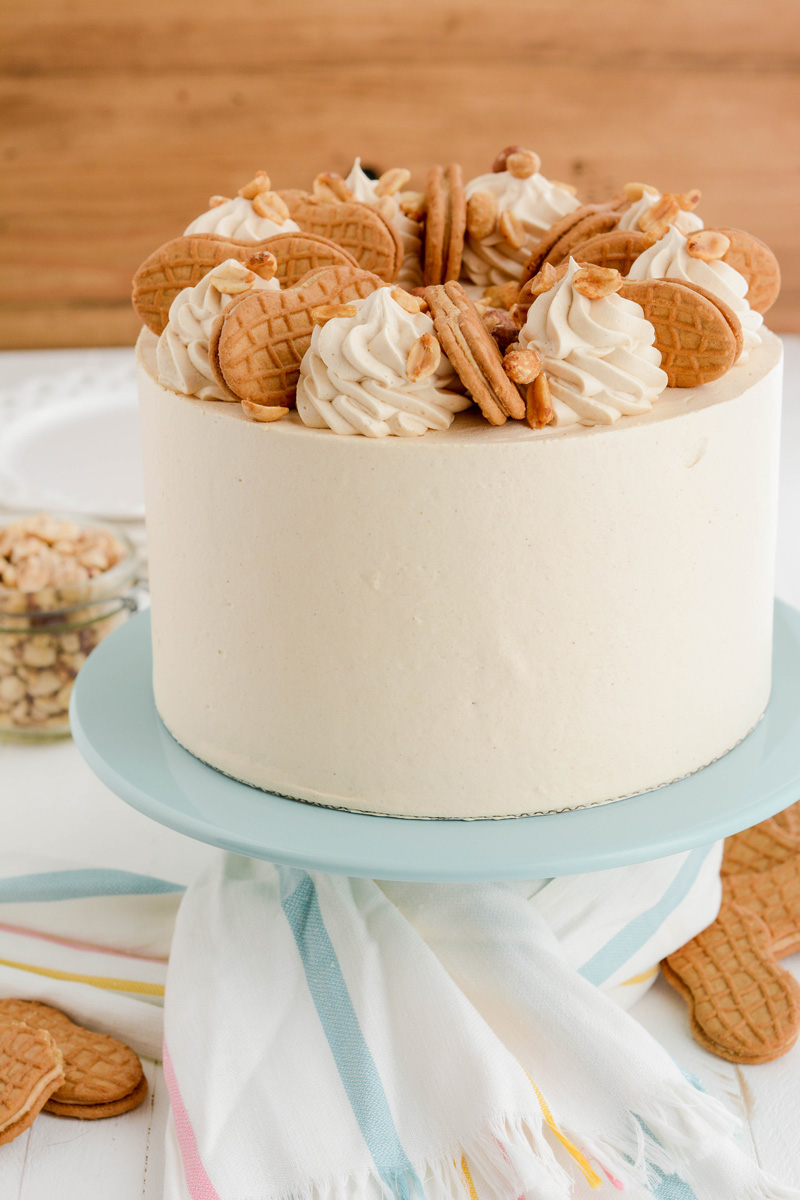
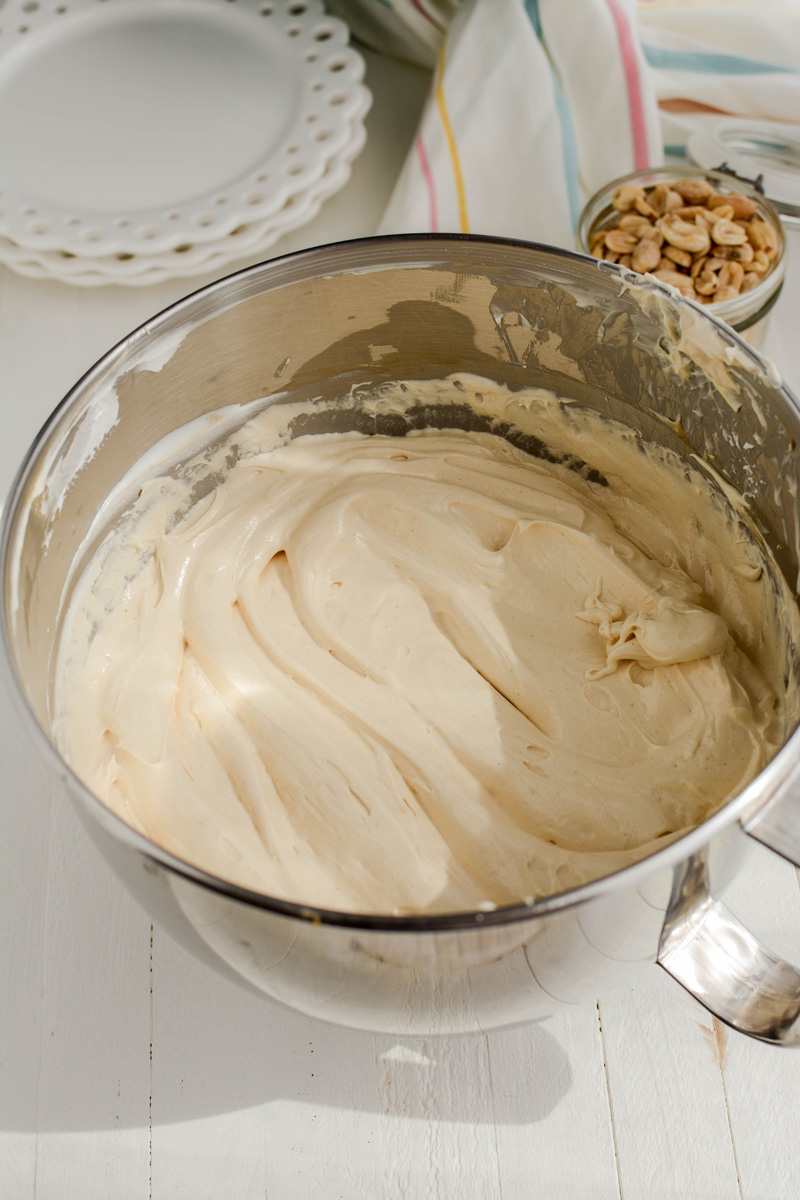
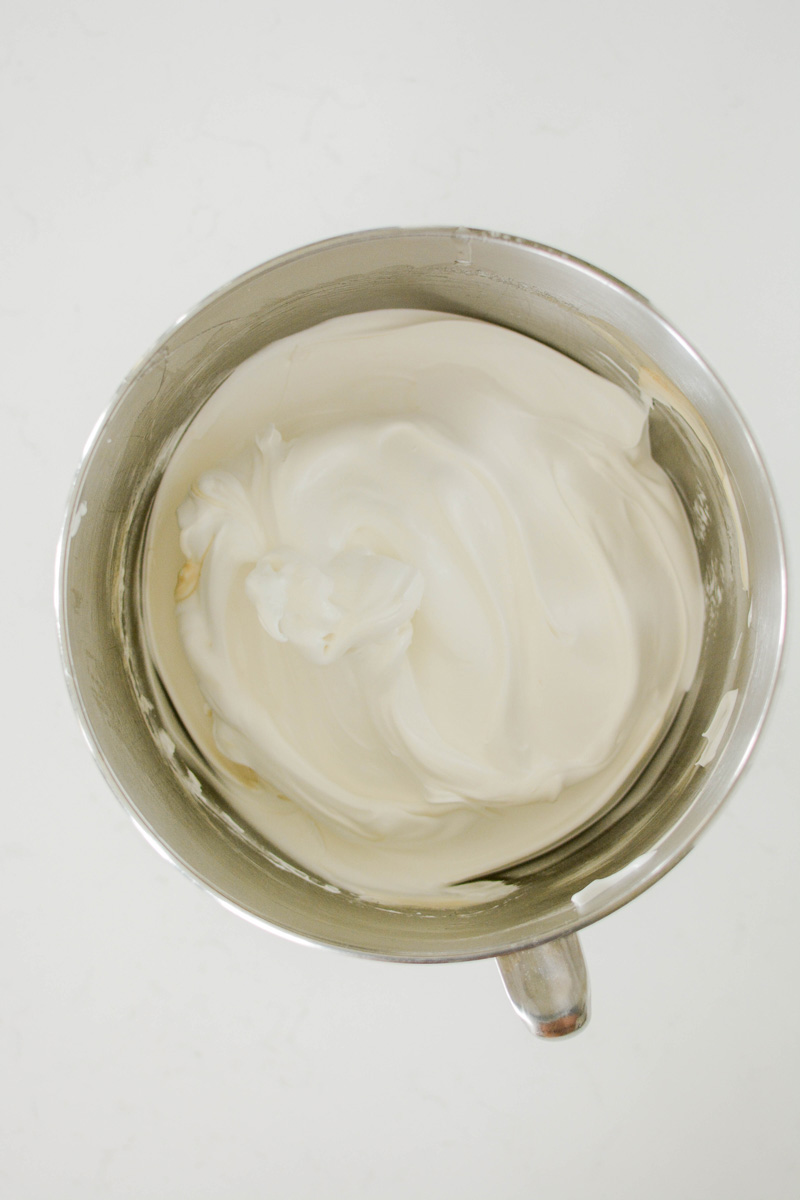
And for the icing on top, I bet you're going to love this Italian meringue peanut butter buttercream. It's light and airy and full of peanut butter flavor you'll probably want to eat it by the spoon full.
These rich peanut butter cake layers can be made 3 days in advance. Bake the cake layers, let them cool completely and wrap in plastic wrap and seal in a cake container. You can leave the cakes on the counter at room temperature or in the refrigerator. TIP: I prefer to store them in the refrigerator because a chilled cake is easier to decorate.
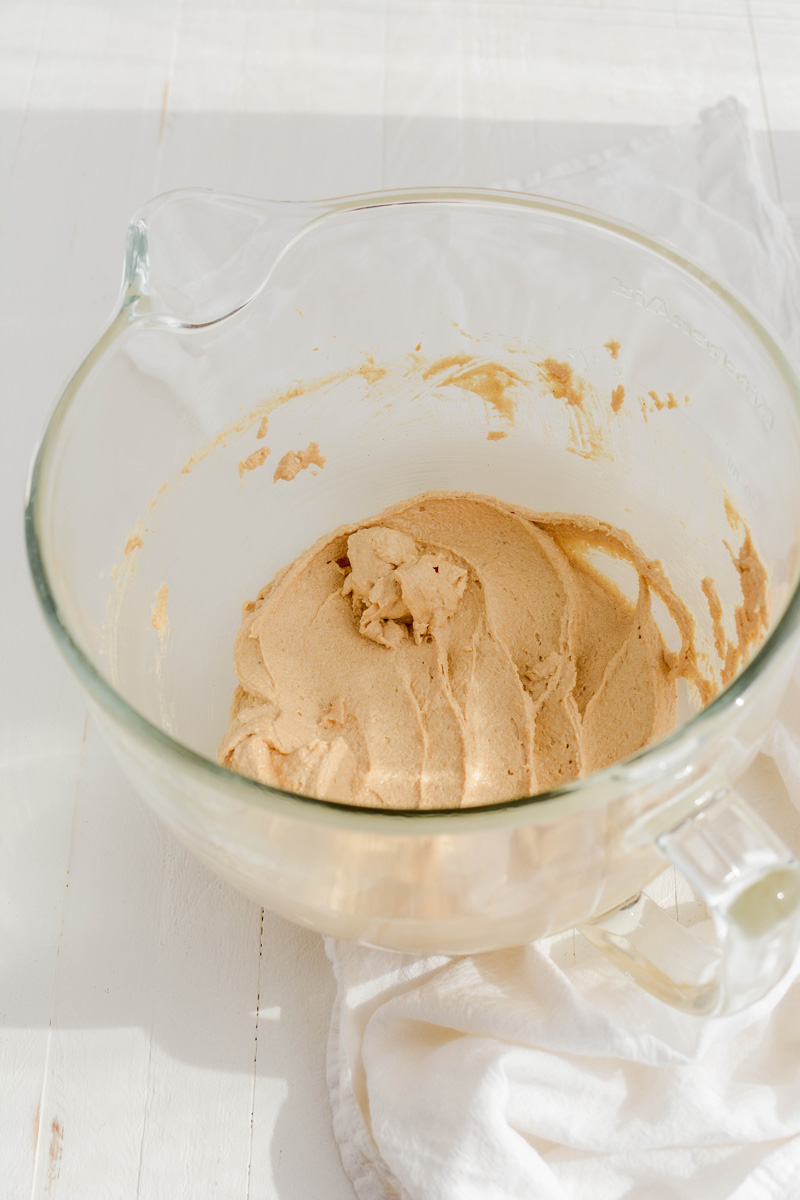
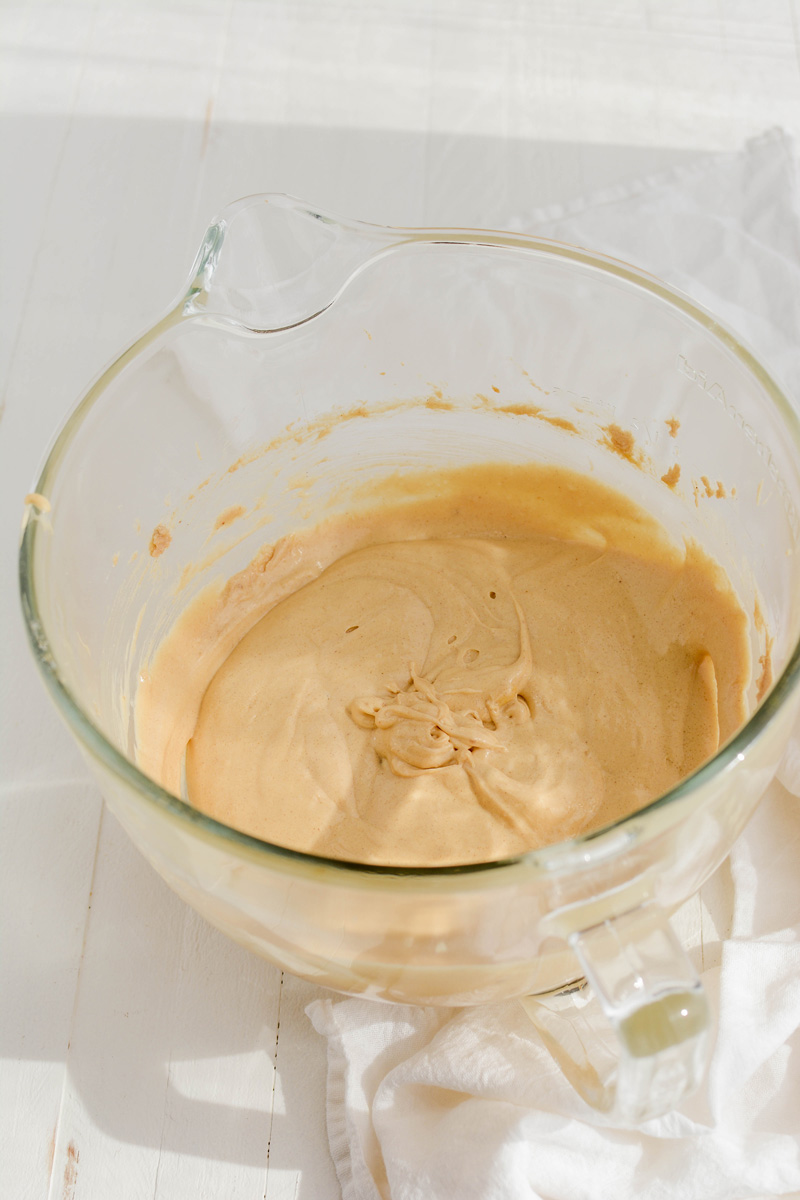
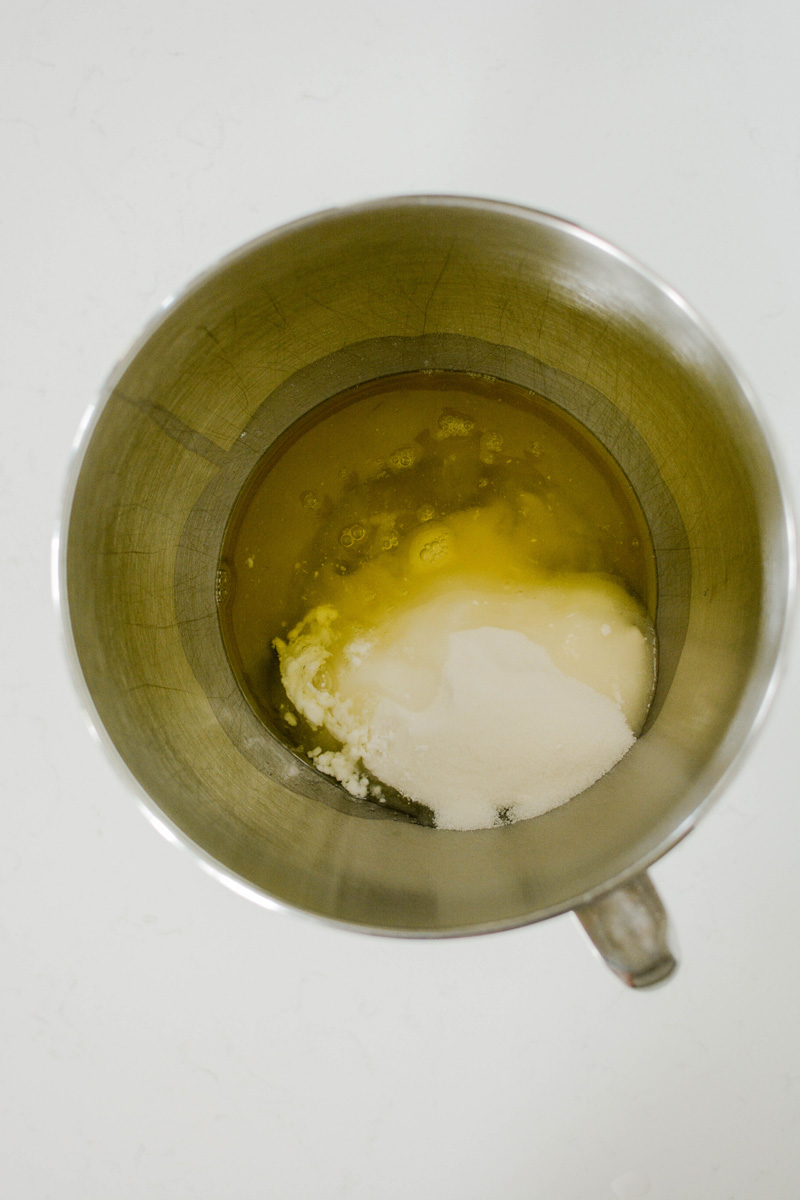
What I love about this filling is that not only is it super tasty, it's also easy to prepare. Just a bowl and a hand mixer is all you need to mix up this tasty filling for your Nutter Butter Layer Cake.
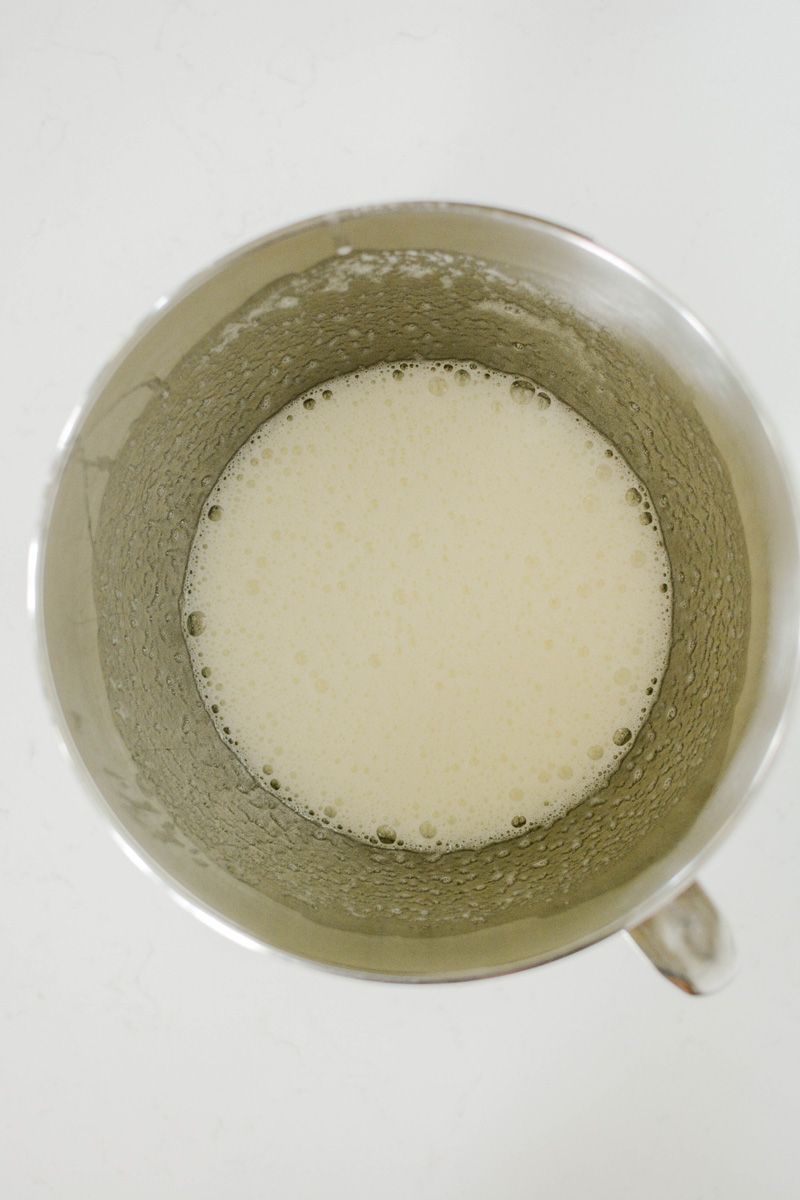
Italian meringue buttercream isn't difficult to make, but it does take some patience and planning. Here are a few tips and tools that I find very helpful:
A crumb coat is a thin layer for buttercream that catches loose crumbs and seals in the cakes moisture. It also creates a great base to start cake decorating from.

Cake layers can be made up to 3 days in advance, wrapped in plastic wrap, stored in the refrigerator or at room temperature.
Peanut butter filling is best made the day of assembly.
Peanut butter buttercream is best made the day of assembly.
The Cake Chica is on the following social media platforms below. Click subscribe, like and follow! We would love to have you over!
Adapted from Life Love and Sugar by Lindsay Conchar
Three layers of peanut butter cake filled with a fluffy peanut butter filling and frosted with a light and airy Italian meringue peanut butter buttercream.
Assembled cake can be stored at room temperature for up to 1 day in an airtight cake container. Or stored in the refrigerator for up to 3 days. Bring to room temperature before serving.
*Nutrition information is an estimate and will vary.*
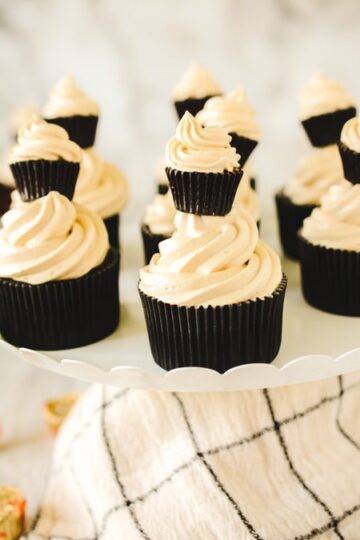
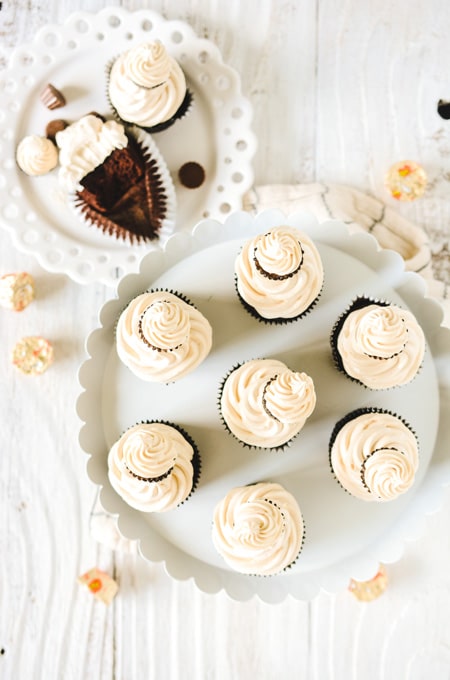
Do you love the flavor combination of chocolate and peanut butter? If so, I've got a real treat for you this week! These Chocolate Peanut Butter Cupcakes are what dreams are made of! The dark cocoa powder provides a rich and dark chocolate cupcake that surely packs a lot of chocolate flavor in every bite. Balanced with an incredibly light and airy peanut butter Italian meringue buttercream will make you want to eat this buttercream by the spoonful!
Oh and last but not least, the cutest little cupcake topper you ever did see...a mini Reese's peanut buttercup decorated to look like a mini cupcake on top.
...
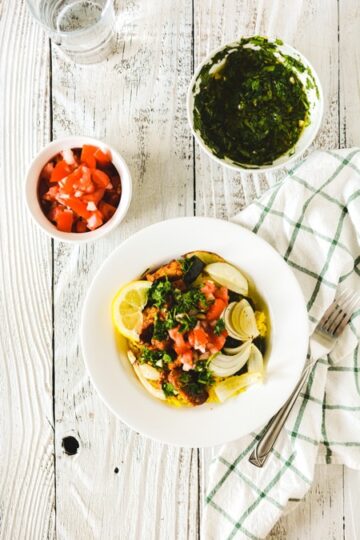
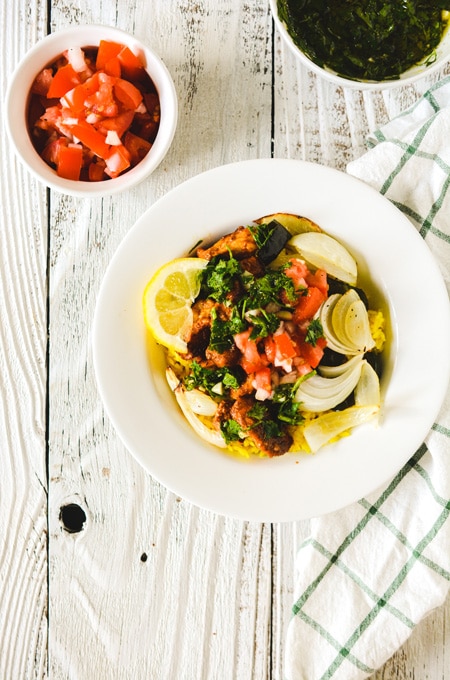
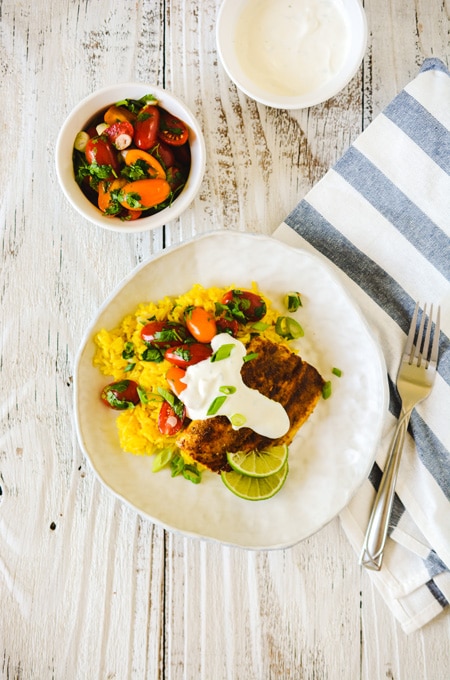
Talk about a bright and flavorful meal, this one has it all. Taco seasoned chicken breast, roasted onions and poblano peppers sitting on a colorful bed of rice and topped with an easy tomato salsa and chimichurri.
But don't let the long list of ingredients fool you. This recipe comes together in under 1 hour and while that might sound like a lot of time to make dinner, the flavors in this dish are definitely worth the little bit of time this meal takes to prepare.
...
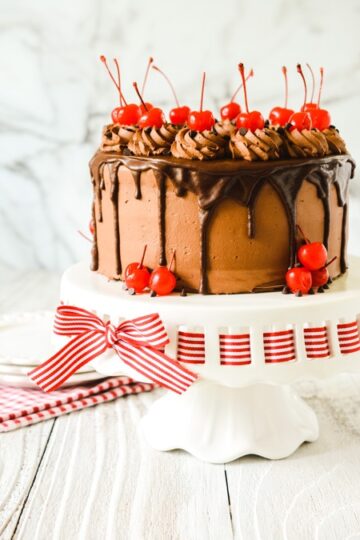
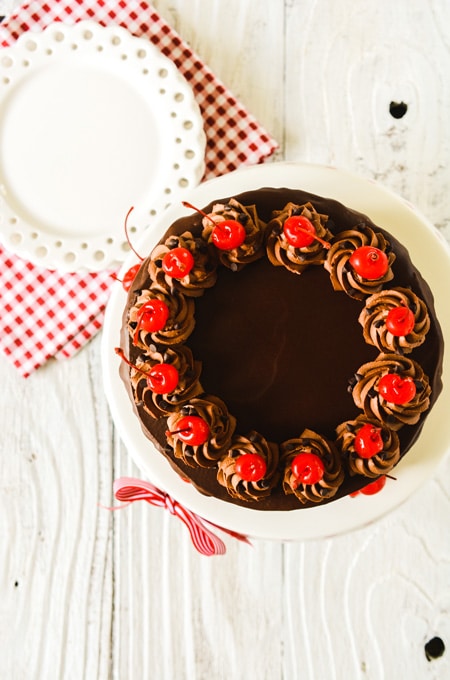
This super fun Cherry Chocolate Chip Cake has 3 layers of fluffy white cake, baked with cherries and mini chocolate chips inside. Next I covered and filled the cake with a rich but light chocolate whipped ganache. As an added bonus I topped the frosted cake with a chocolate drip that adds more chocolate impact to the overall cake. For the final touch I added some bright and sweet maraschino cherries and a few sprinkles of mini chocolate chips.
...
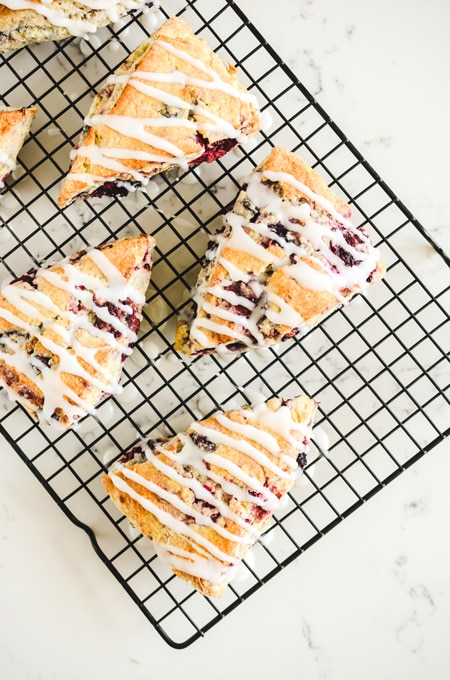
Breakfast or dessert whatever you choose, these tender Mixed Berry Scones with Sugar Drizzle are the perfect accompaniment with your morning coffee or for late night snacking.
...
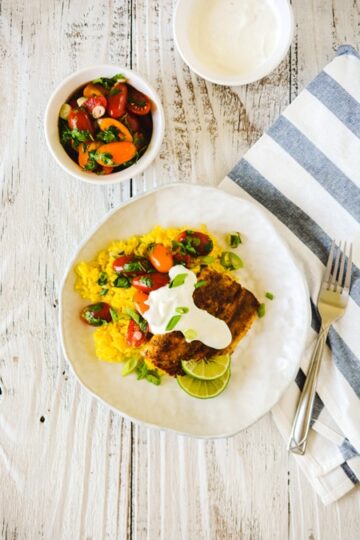
This recipe will have dinner on your table in about 30-45 minutes. I've been trying to add a little more fish and fresh veggies in my diet lately. And I love that fish cooks pretty quickly. I seasoned the mahi mahi with a simple spice blend of turmeric and cumin, and a salsa made with just tomatoes, cilantro, scallions and lime juice. Served along side an easy to make and beautiful jasmine rice and topped with crema, I think this Baja Mahi Mahi definitely deserves a spot on your weeknight meal rotation!
...
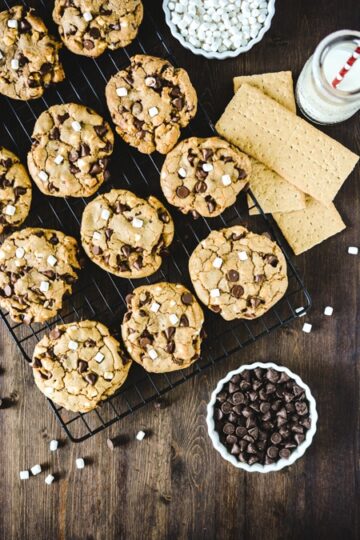
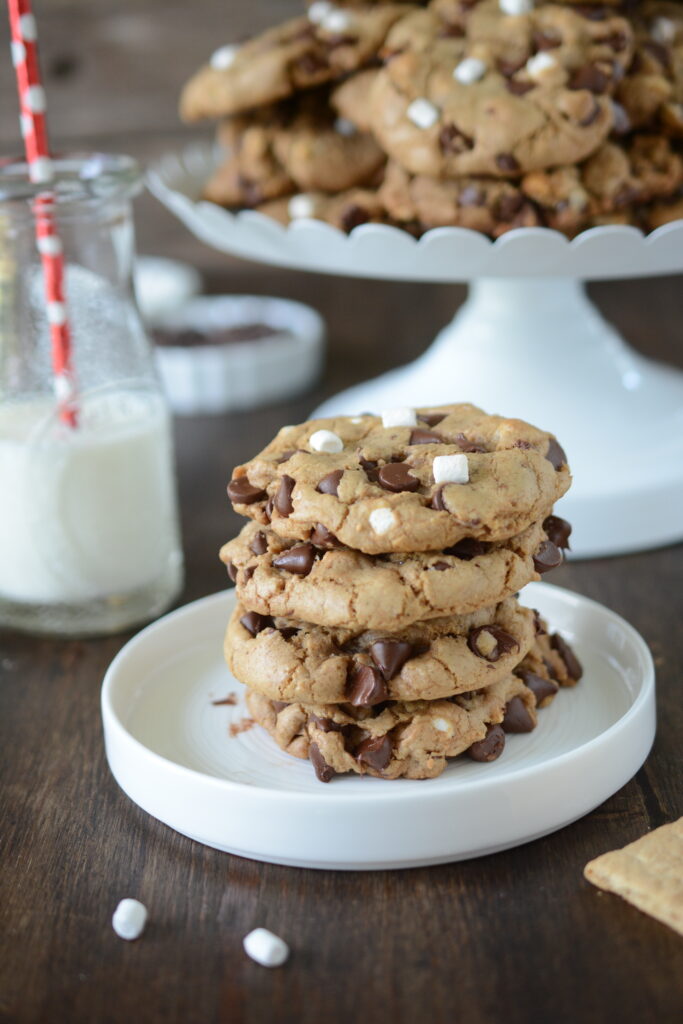
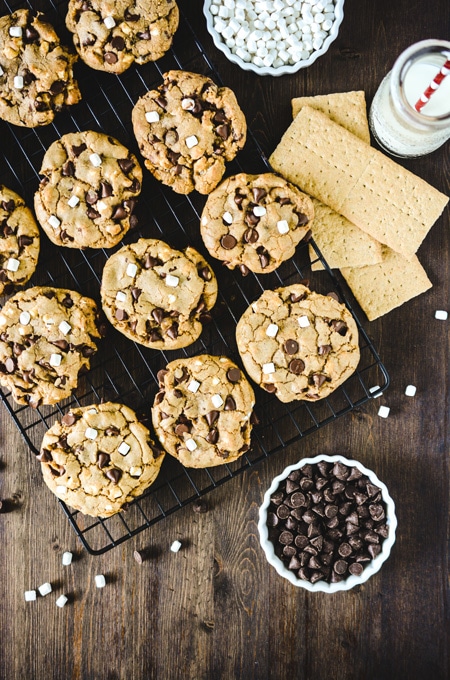
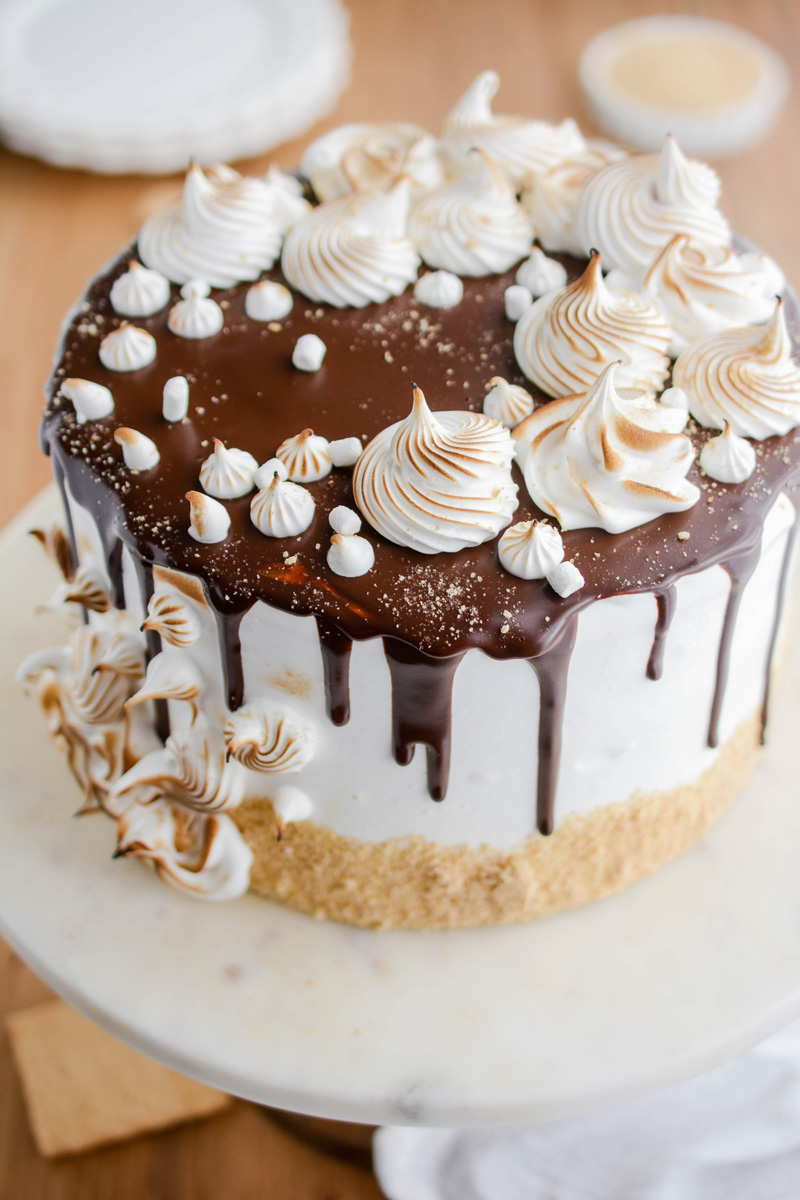
S'mores just makes me think of summer. I've already made a S'mores Layer Cake so why not S'mores Chocolate Chip Cookies! I took my favorite classic...the chocolate chip cookie, and added browned butter, graham cracker crumbs, chocolate chips and of course mini marshmallows! I'm making this cookie the official cookie of summer!
...
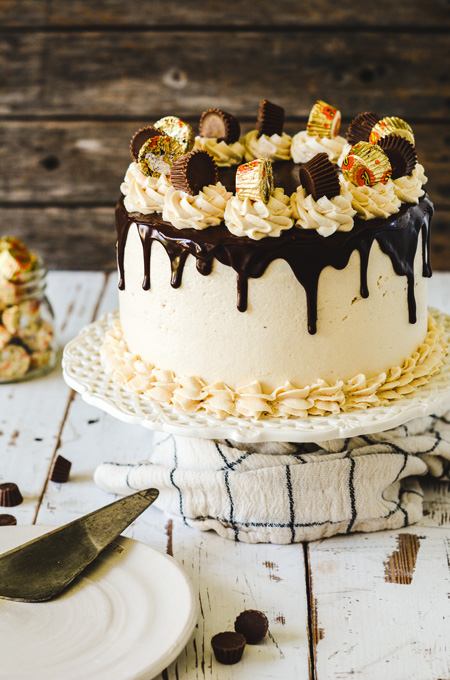
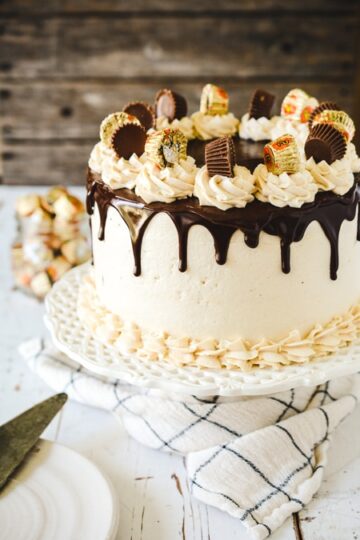
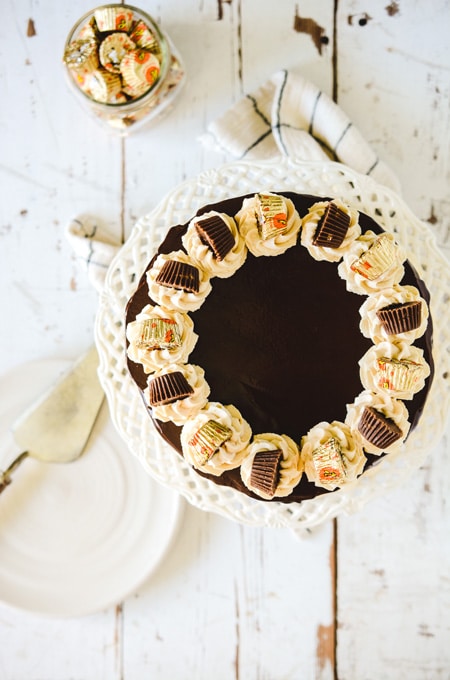
Here's what your getting yourself into with this Chocolate Peanut Butter Layer Cake! I'm talking about 4 layers of homemade moist chocolate cake, filled and frosted with peanut butter buttercream, topped with a chocolate drip and garnished with chocolate peanut butter candy. Yum right? Check out the details below!
...
Recipe updated 8/12/2022
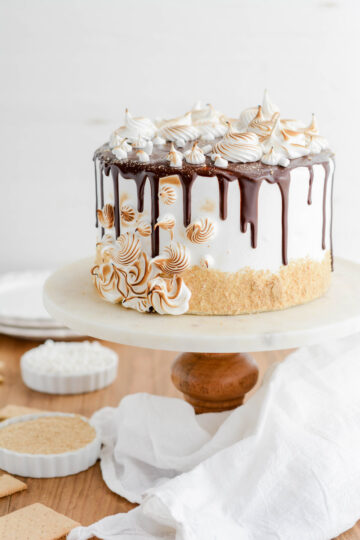
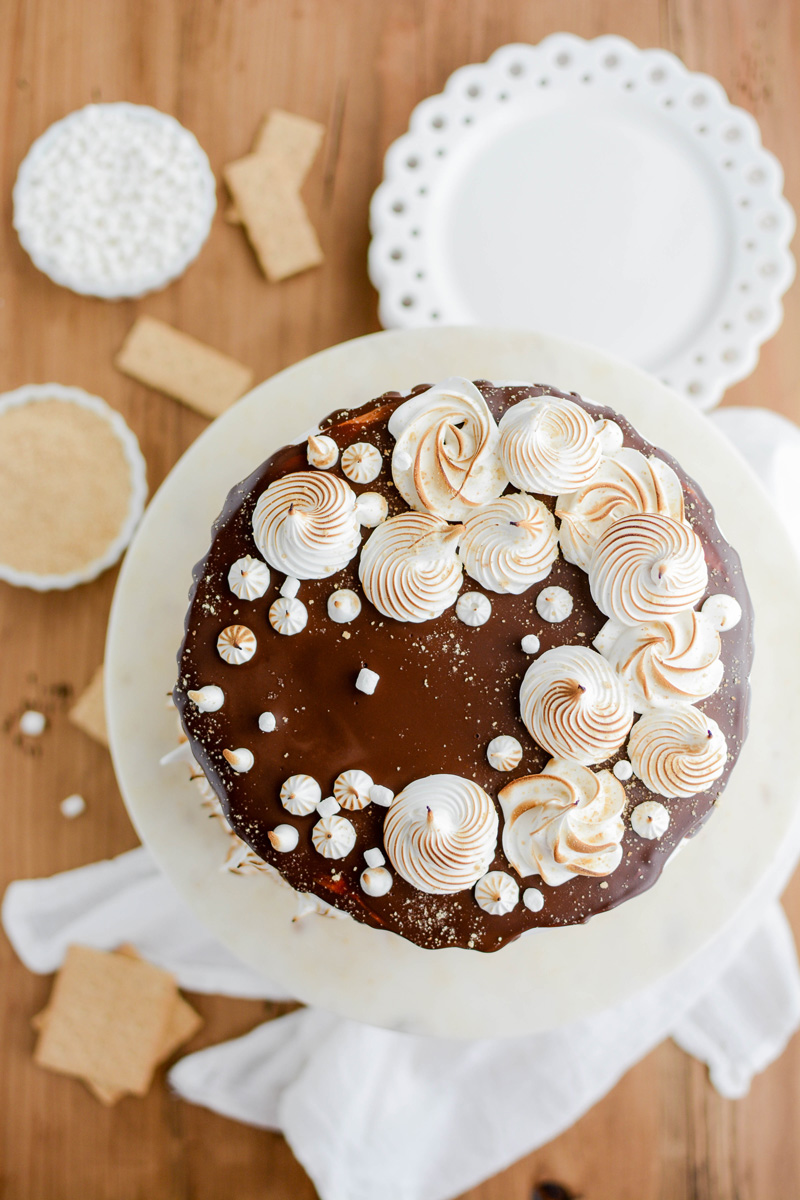
This S'mores Layer Cake is ridiculously good, with three tall layers of graham cracker cake that's filled with chocolate fudge filling and frosted with marshmallow frosting you really can't go wrong.

This cake is truly a tribute to summertime campfires in cake form!
This Fudge Filling comes together quickly and adds a punch of chocolate sweetness.
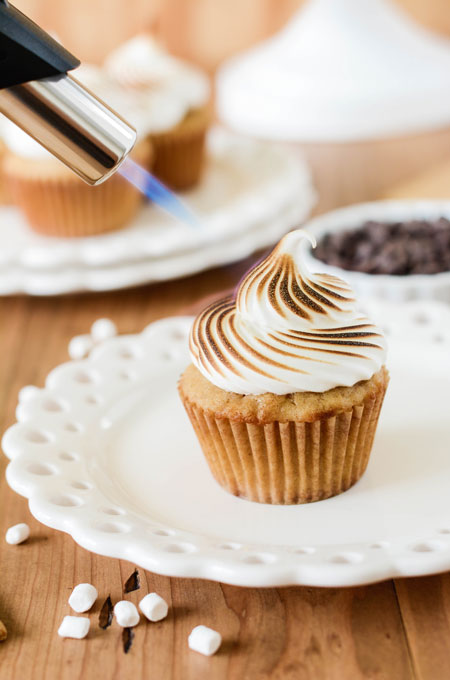
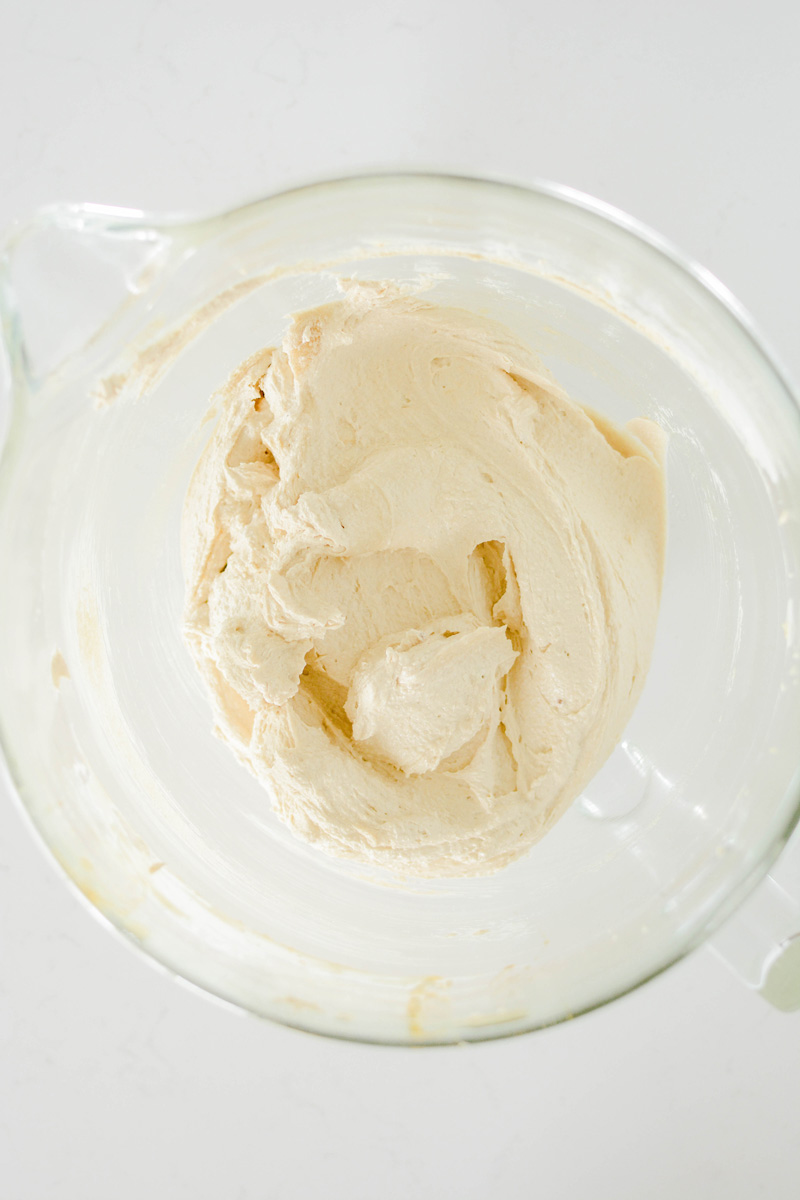
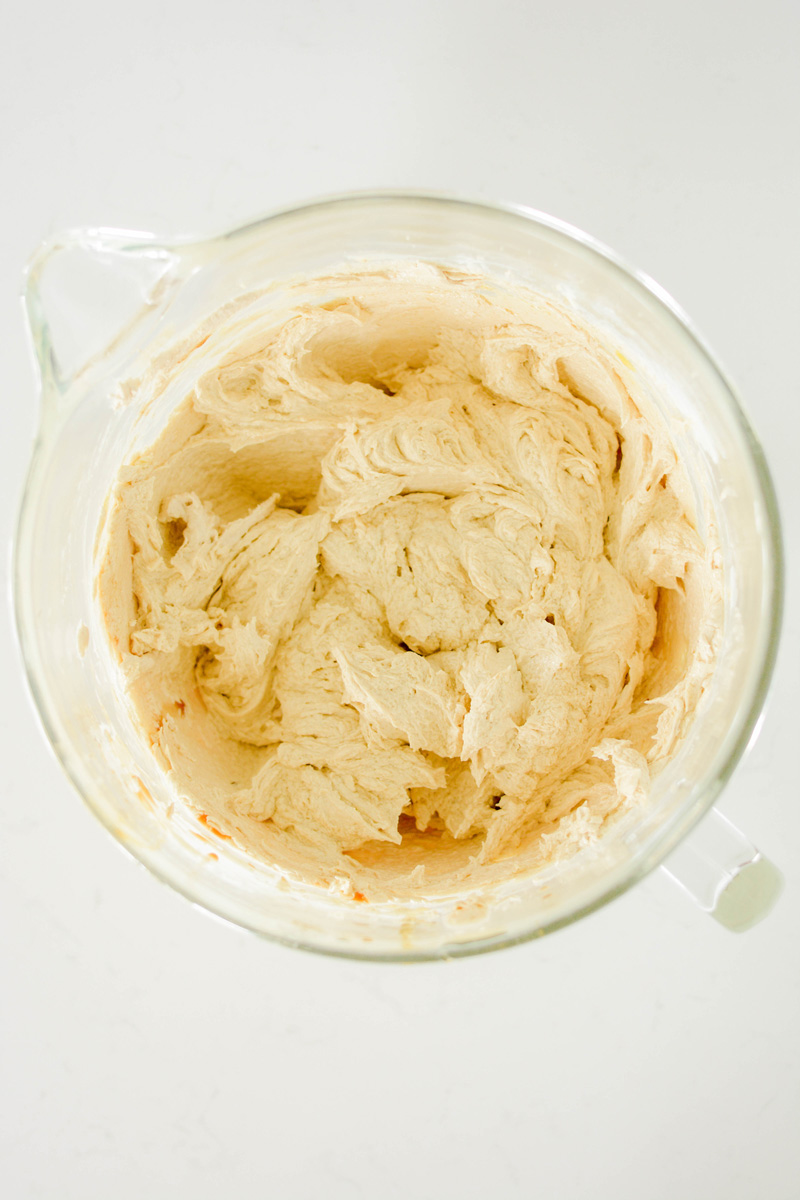
Okay this Marshmallow Frosting is probably my favorite component to this cake. The frosting is super light and fluffy, just like a marshmallow and it's all made from scratch! No jarred marshmallow fluff here and it's easier to make than you think!

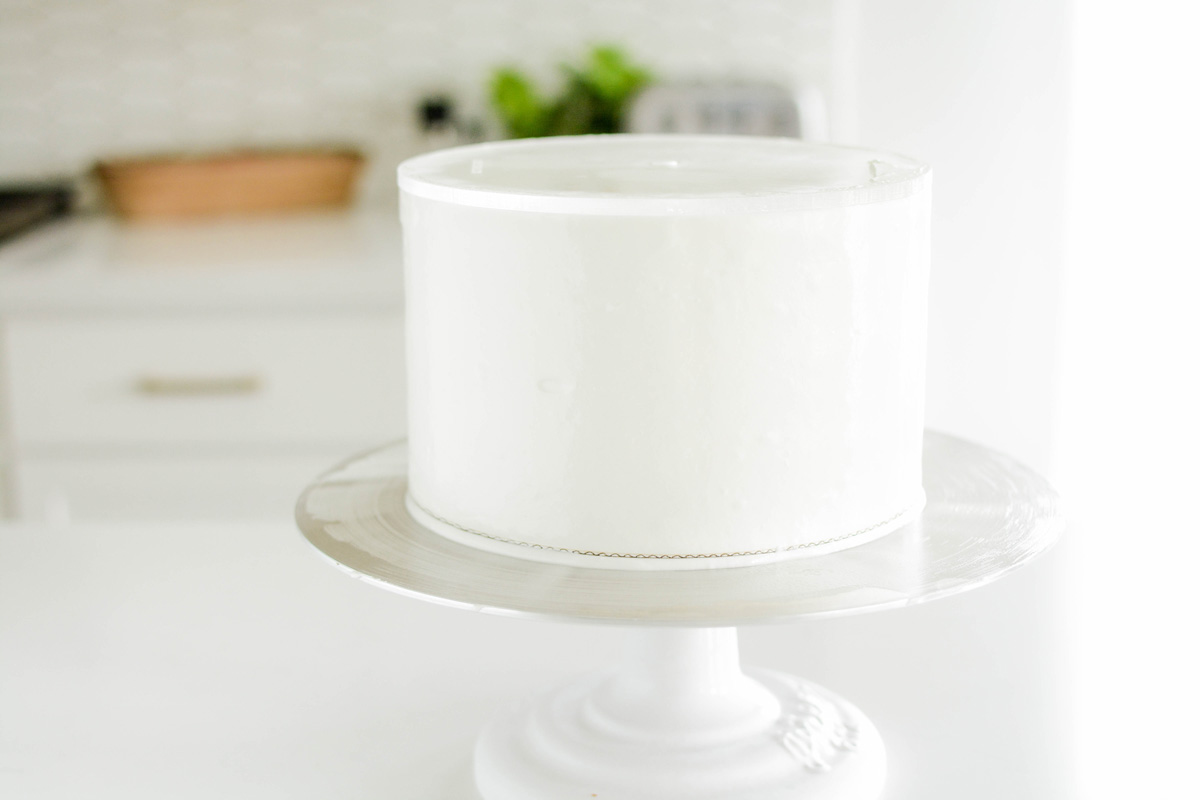
Applying a thin layer of frosting helps hold in the loose crumbs and prevents the cake crumbs from getting into the final coating of frosting. Once the cake has chilled it also gives you a nice base to start decorating your cake on.
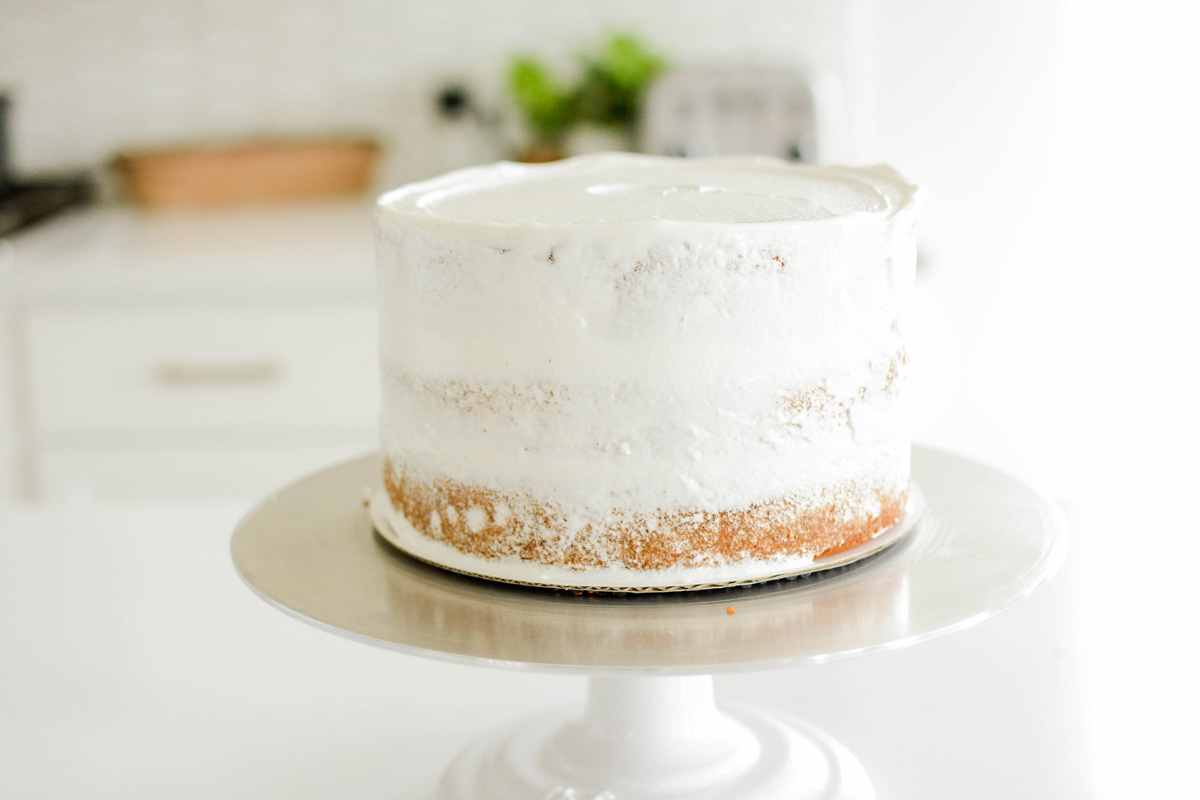
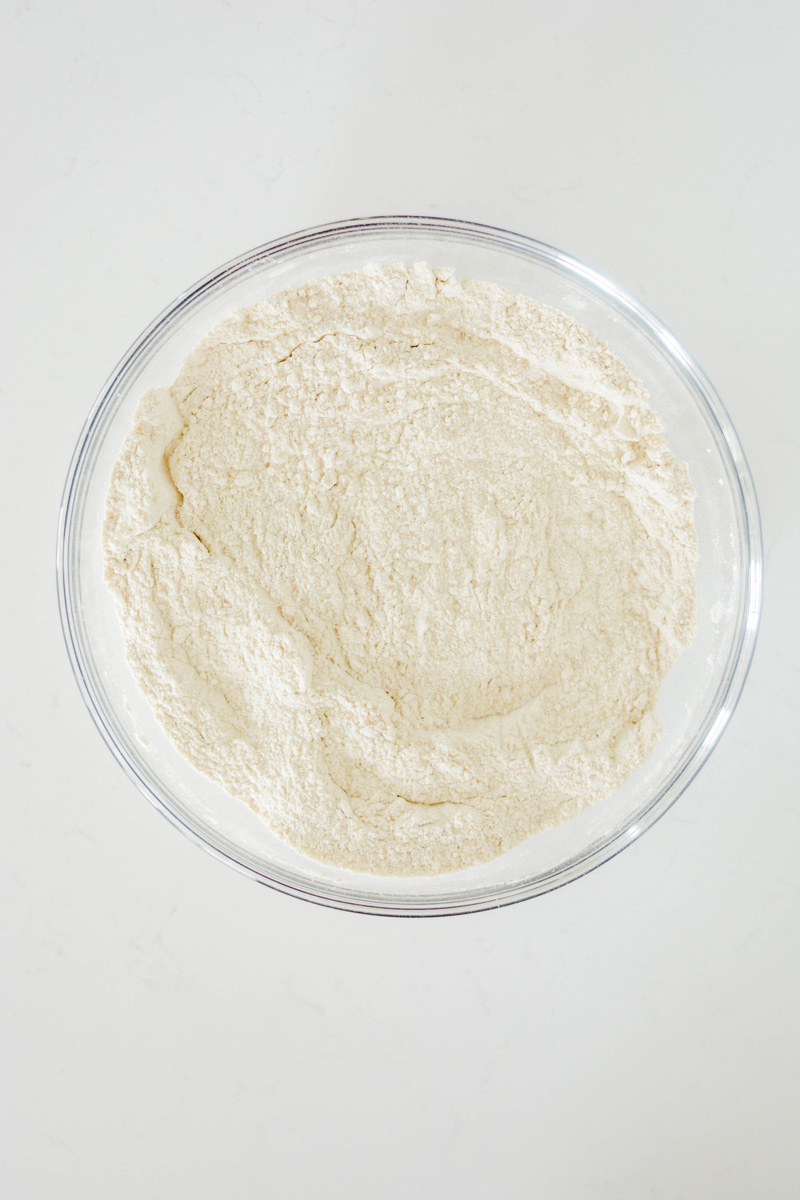
I recommend using whole graham crackers and processing them into crumbs with a food processor or in a zip top bag using a rolling pin to make crumbs. The premade graham cracker crumbs are usually stale and not fresh. And after all this work you want your cake to be as fresh as possible.
Over a rimmed baking sheet, apply graham cracker crumbs on the bottom edge of the cake, by picking the cake up with one hand and apply the graham cracker crumbs with the other hand. Chill the cake in the refrigerator while you prepare the chocolate drip.


The Cake Chica is on the following social media platforms below. Click subscribe, like and follow! We would love to have you over!
Adapted from Layered by Tessa Huff and Sweetapolita by Rosie Alye
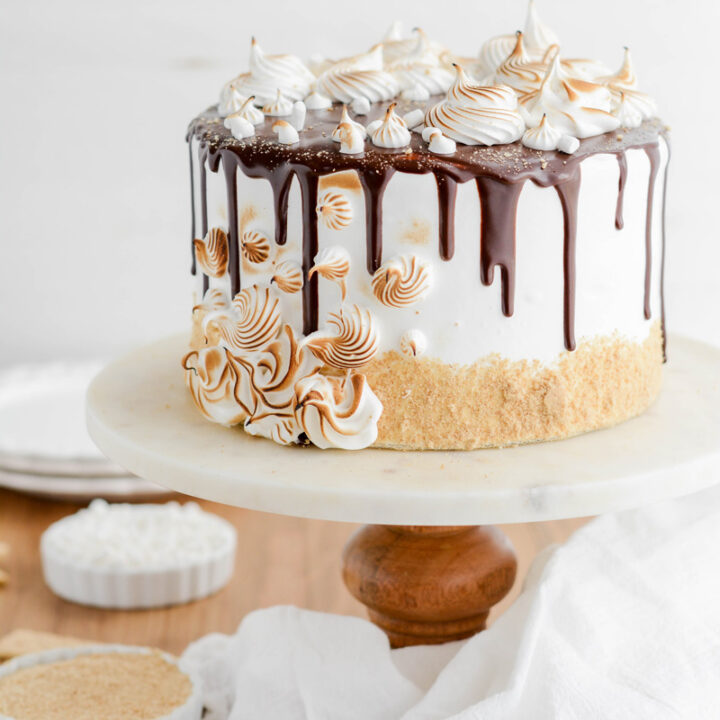
Three layers of graham cracker cake, filled with fudge filling, frosted with marshmallow frosting and garnished with graham cracker crumbs, chocolate drip and toasted marshmallow piping.
Cake layers can be made up to 3 days in advance, wrapped in plastic, stored in an airtight container in the refrigerator.
Filling is best made the day of assembly.
Marshmallow frosting is best made the day of assembly.
*Nutrition information is an estimate and will vary.*