
As an Amazon Associate, I earn from qualifying purchases.
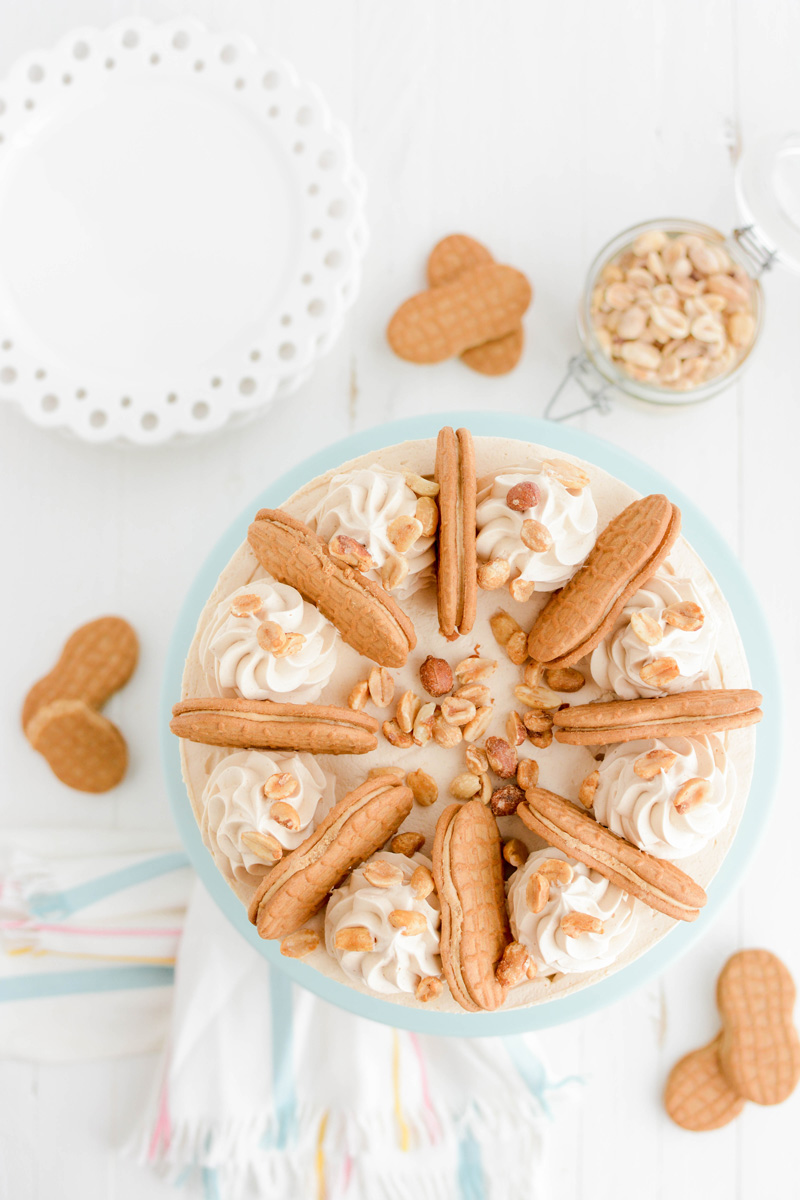
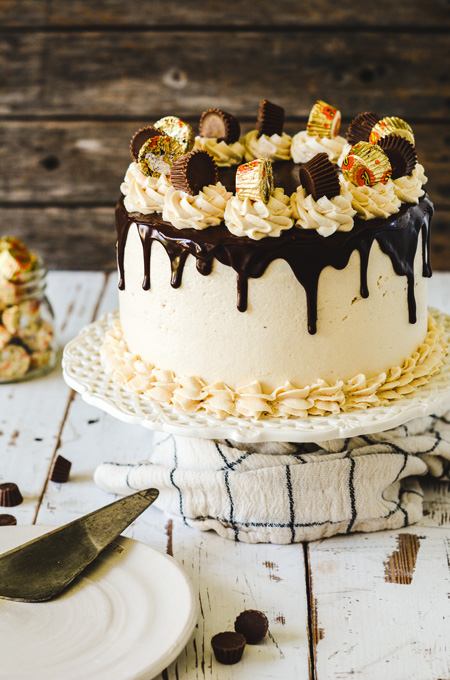
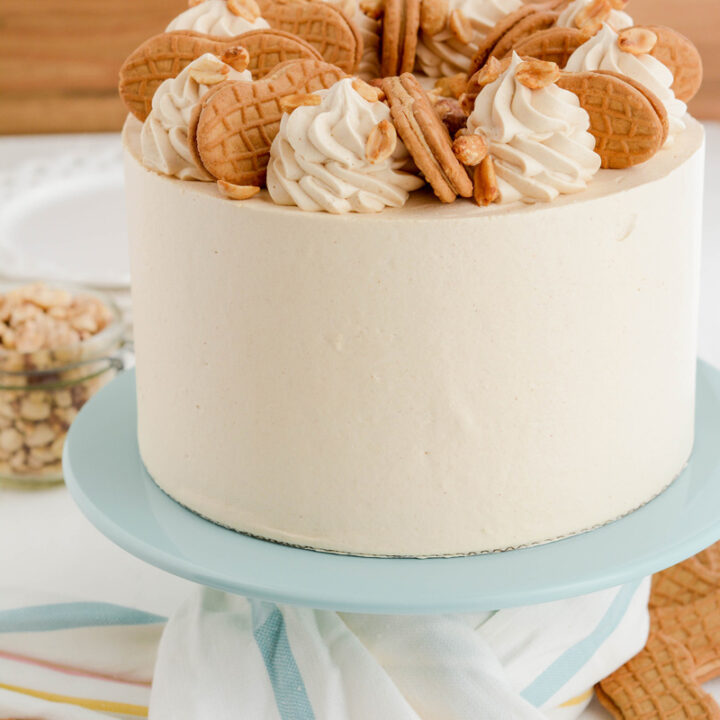
Where are my peanut butter lovers at? If that's you then this Nutter Butter Layer Cake is for you!
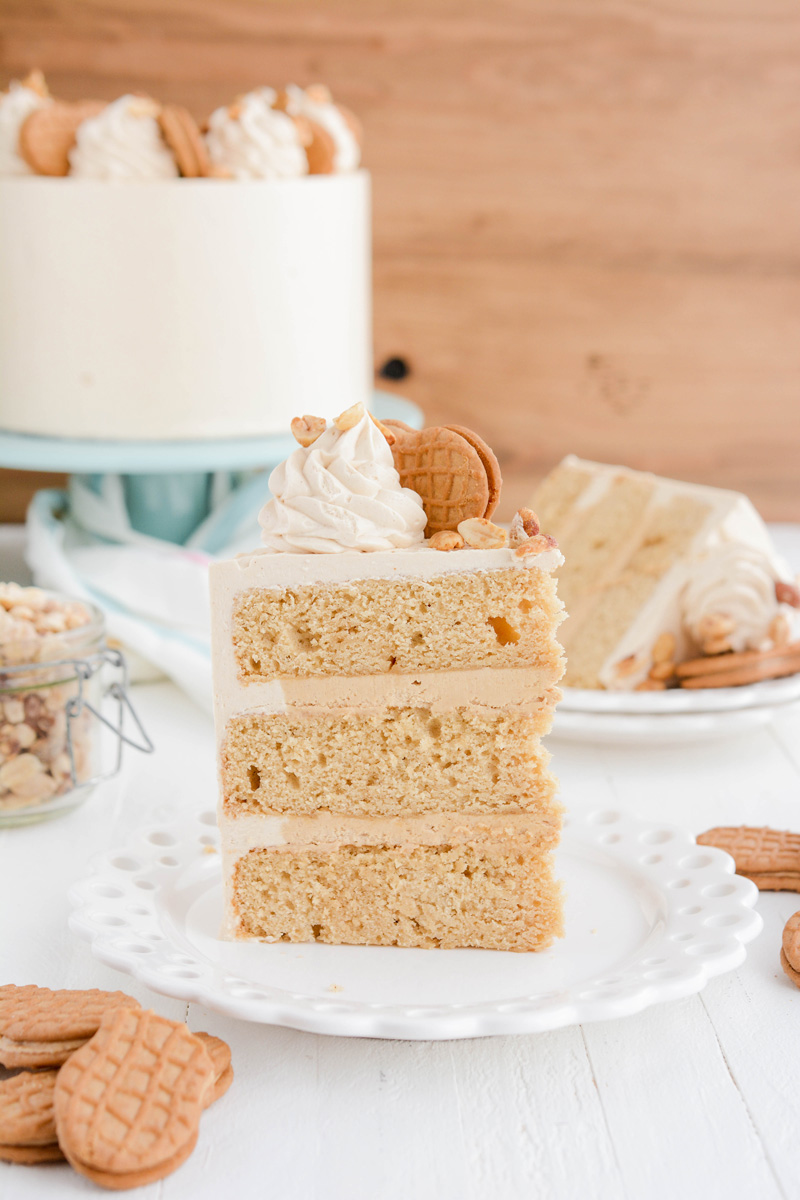
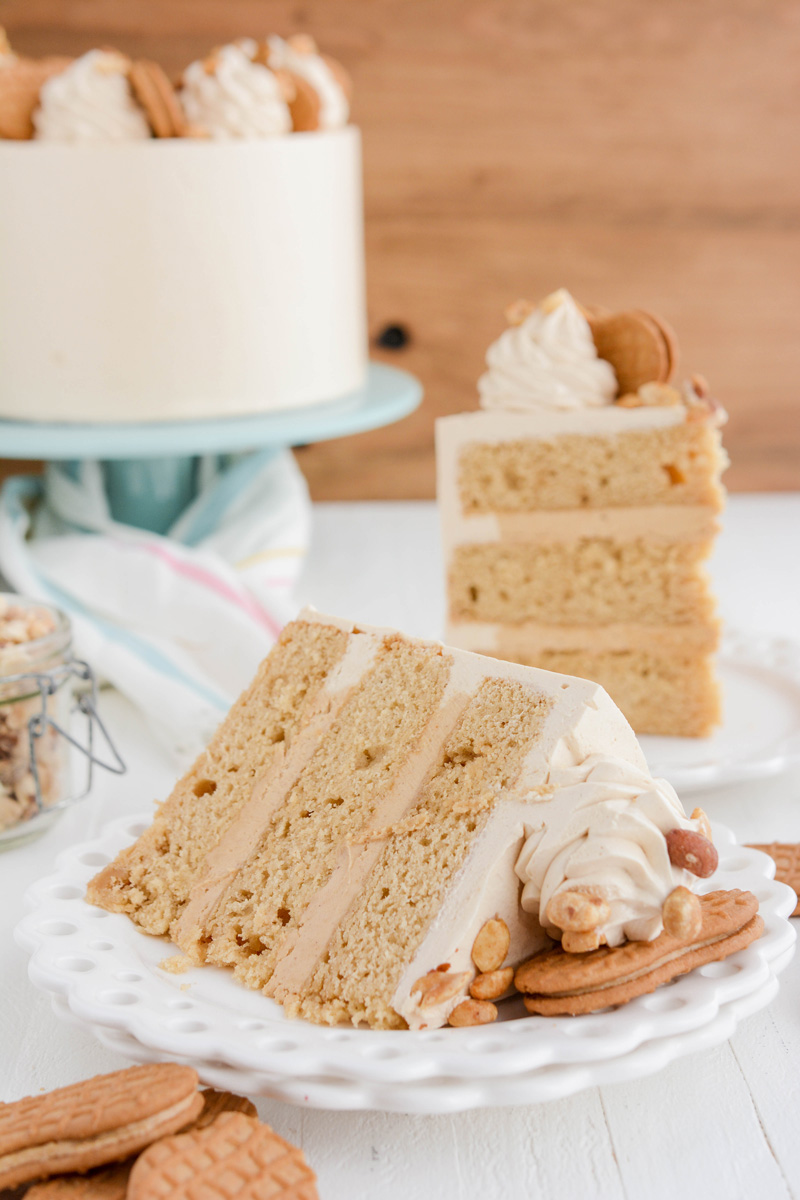
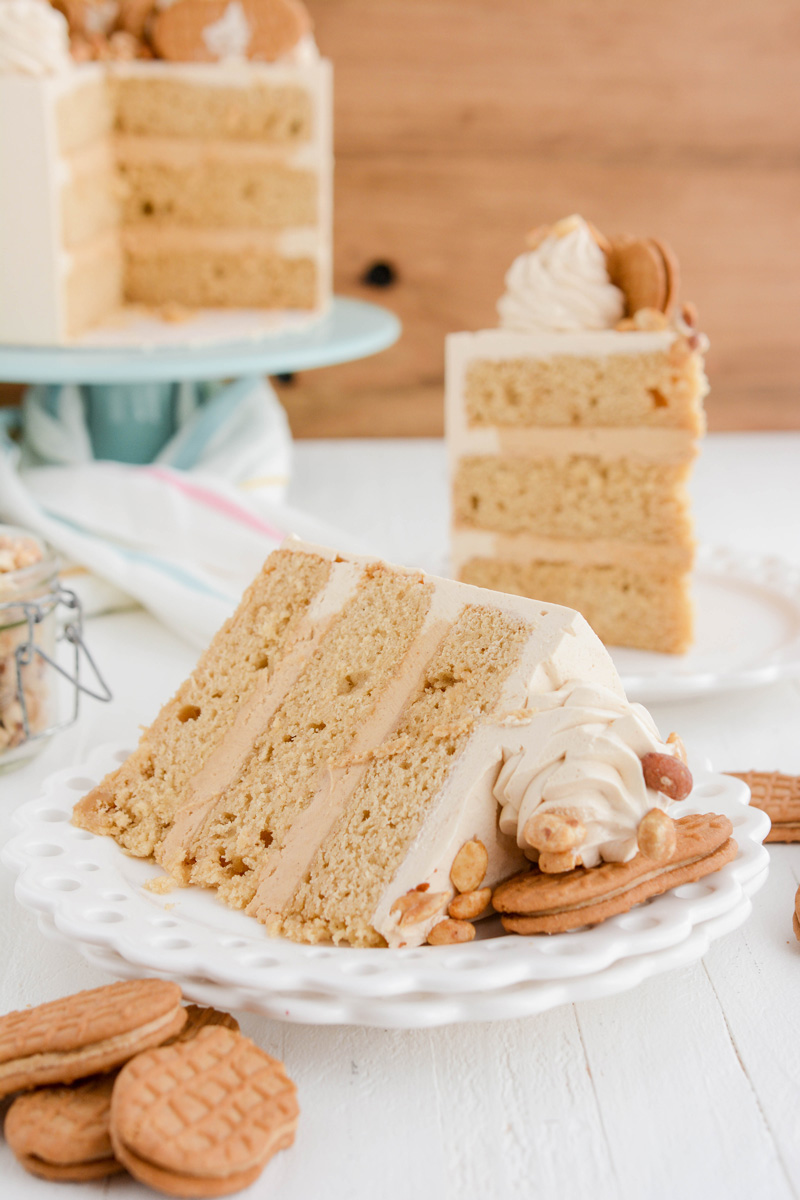
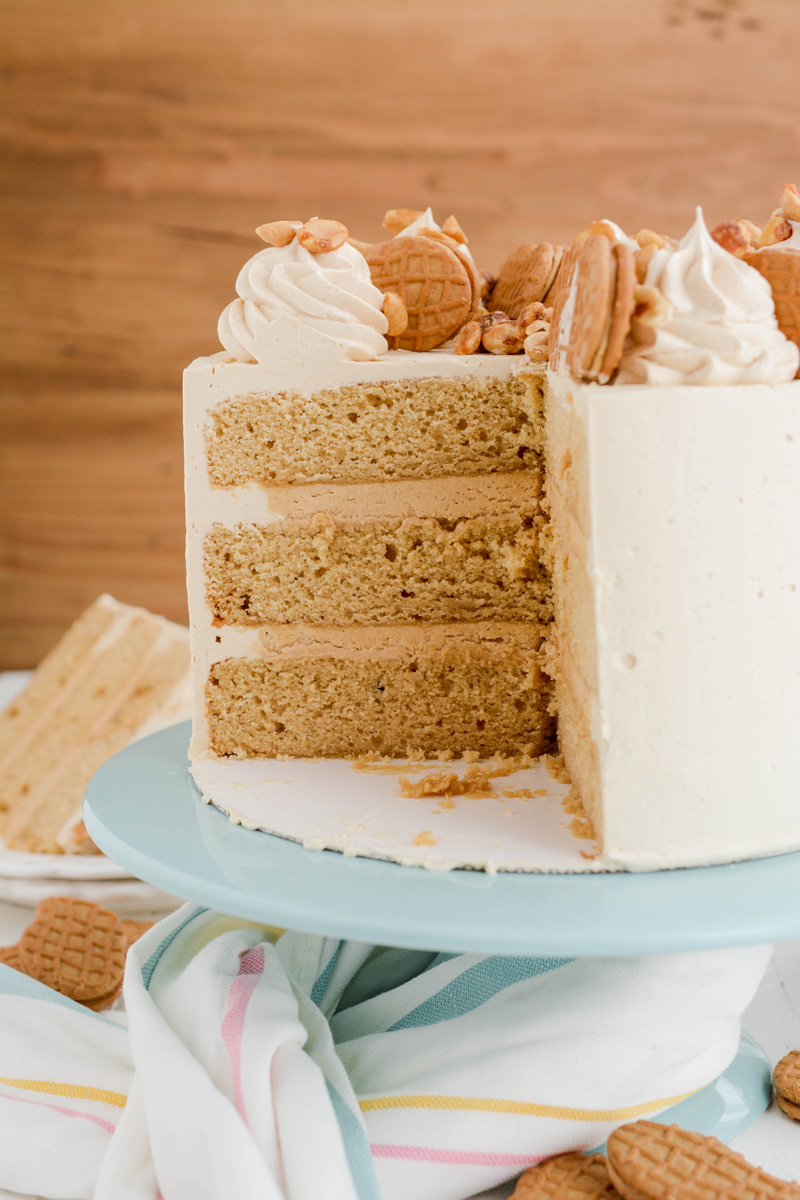
Three layers of rich peanut butter layer cake, filled with a fluffy peanut butter filling, reminiscent of those Nutter Butter cookies you might have in your pantry if you're a fan of cookies and peanut butter.
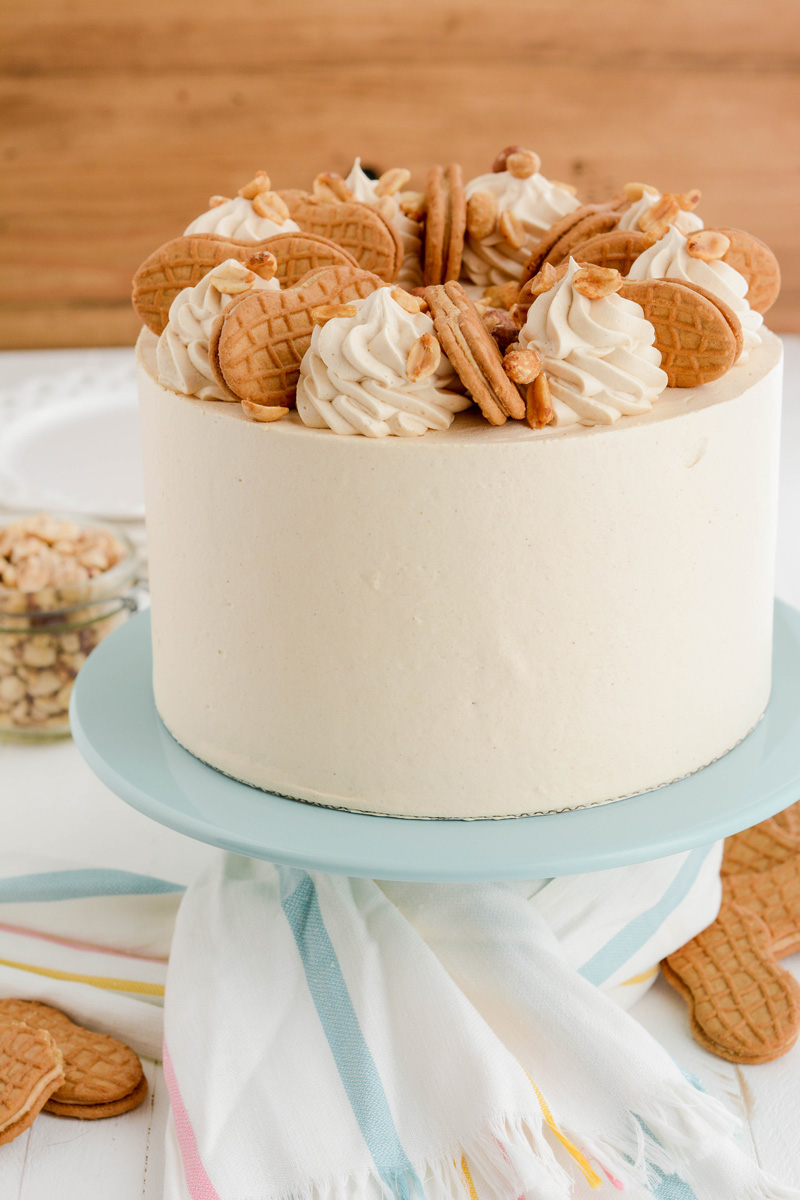
And for the icing on top, I bet you're going to love this Italian meringue peanut butter buttercream. It's light and airy and full of peanut butter flavor you'll probably want to eat it by the spoon full.
Peanut Butter Layer Cake
These rich peanut butter cake layers can be made 3 days in advance. Bake the cake layers, let them cool completely and wrap in plastic wrap and seal in a cake container. You can leave the cakes on the counter at room temperature or in the refrigerator. TIP: I prefer to store them in the refrigerator because a chilled cake is easier to decorate.
Peanut Butter Filling
What I love about this filling is that not only is it super tasty, it's also easy to prepare. Just a bowl and a hand mixer is all you need to mix up this tasty filling for your Nutter Butter Layer Cake.
Italian Meringue Peanut Butter Buttercream
Italian meringue buttercream isn't difficult to make, but it does take some patience and planning. Here are a few tips and tools that I find very helpful:
- A stand mixer is super helpful for making Italian meringue buttercream. You'll need to beat the meringue for a good 12 minutes or until it's come to room temperature.
- Make sure your egg whites are free of egg yolk or your egg whites won't whip up properly.
- A candy or fry thermometer is a must!
- Your butter needs to be at room temperature.
- Your meringue should also be at room temperature before adding the butter 1 tablespoon at a time.
- The buttercream should be as smooth as possible. I sometimes let the mixer run on low speed the last minute or 2 to remove as many air bubbles as possible.
What Is A Crumb Coat?
A crumb coat is a thin layer for buttercream that catches loose crumbs and seals in the cakes moisture. It also creates a great base to start cake decorating from.
Cake Assembly
- Center one cake layer on an 8-inch round cake board and place on a cake turntable.
- Fit a piping bag with a coupler and fill with buttercream.
- Pipe a buttercream dam around the edge of the cake.
- Spread 1 cup of the filling in the center and smooth evenly until it reaches the buttercream dam.
- Place second cake layer on top and pipe another buttercream dam around the edge of the cake.
- Spread 1 cup filling over the top until it the filling reaches the buttercream dam.
- Place the third cake layer on top bottom side up.

Baking and Cake Decorating Tools
- 3 8-inch round cake pans
- Nonstick baking spray
- Stand mixer
- 1 cup liquid measuring cup
- Hand mixer
- Candy thermometer
- 8-inch round cake board
- Cake turntable
- Piping bags
- 8-inch round acrylic disc
- Parchment paper
- Cake scraper
- Ateco piping tip #827
- Nutter Butter cookies, for garnish
- Roasted peanuts, for garnish
Cake Baking Schedule
- Day 1: Bake cake layers.
- Day 2: Prepare filling, buttercream, assemble and serve.
Make Ahead
Cake layers can be made up to 3 days in advance, wrapped in plastic wrap, stored in the refrigerator or at room temperature.
Peanut butter filling is best made the day of assembly.
Peanut butter buttercream is best made the day of assembly.
Let's Connect
The Cake Chica is on the following social media platforms below. Click subscribe, like and follow! We would love to have you over!
Suggested Recipes
Adapted from Life Love and Sugar by Lindsay Conchar
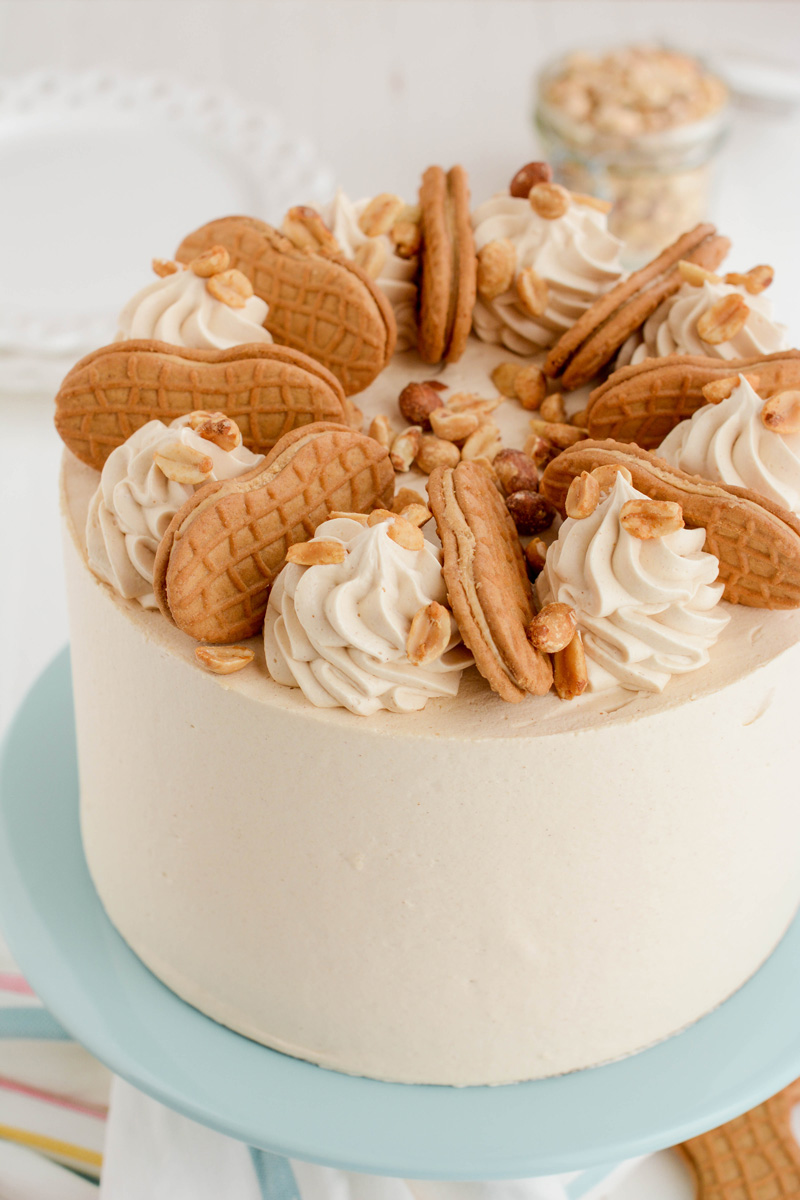
Nutter Butter Layer Cake
Three layers of peanut butter cake filled with a fluffy peanut butter filling and frosted with a light and airy Italian meringue peanut butter buttercream.
Ingredients
SPECIAL TOOLS
- 3 8-inch round cake pans
- Nonstick baking spray
- Stand mixer
- 1 cup liquid measuring cup
- Hand mixer
- Candy thermometer
- 8-inch round cake board
- Cake turntable
- Piping bags
- 8-inch round acrylic disc
- Parchment paper
- Cake scraper
- Ateco piping tip #827
- Nutter Butter cookies, for garnish
- Roasted peanuts, for garnish
PEANUT BUTTER CAKE
- 2 ½ cups (12.5 ounces) all purpose flour
- 2 ¾ teaspoons baking powder
- ½ teaspoon salt
- 8 tablespoons (1/2 cup) unsalted butter, at room temperature, about 68 degrees
- ¾ cup (5.25 ounces) granulated sugar
- ¾ cup (5.25 ounces) light brown sugar, loosely packed
- ¾ cup creamy peanut butter
- ½ cup sour cream, at room temperature
- 2 teaspoons vanilla extract
- 3 large eggs, at room temperature
- ½ cup (4 fluid ounces) whole milk, at room temperature
- ¼ cup (2 fluid ounces) water
PEANUT BUTTER CREAM FILLING
- 12 tablespoons unsalted butter, at room temperature, about 68 degrees
- 2/3 cup creamy peanut butter
- 2 tablespoons honey
- 2 teaspoons vanilla extract
- 1/4 teaspoon salt
- 2 cups (8 ounces) powdered sugar, sifted
PEANUT BUTTER BUTTERCREAM
- 7 large egg whites
- ¼ teaspoon cream of tartar
- 1 ¾ (7 ounces) cups granulated sugar
- 1/3 (2.6 ounces) cup water
- 32 tablespoons (2 cups) unsalted butter, cut into tablespoon sized pieces, at room temperature
- 2 teaspoons vanilla extract
- 1/8 teaspoon salt
- ¾ cup creamy peanut butter
Instructions
CAKE
- Adjust an oven rack to the center position and heat oven to 350 degrees. Spray 3 8-inch round cake pans with nonstick spray and set aside.
- In a large bowl, add the flour, baking powder and salt and whisk to combine.
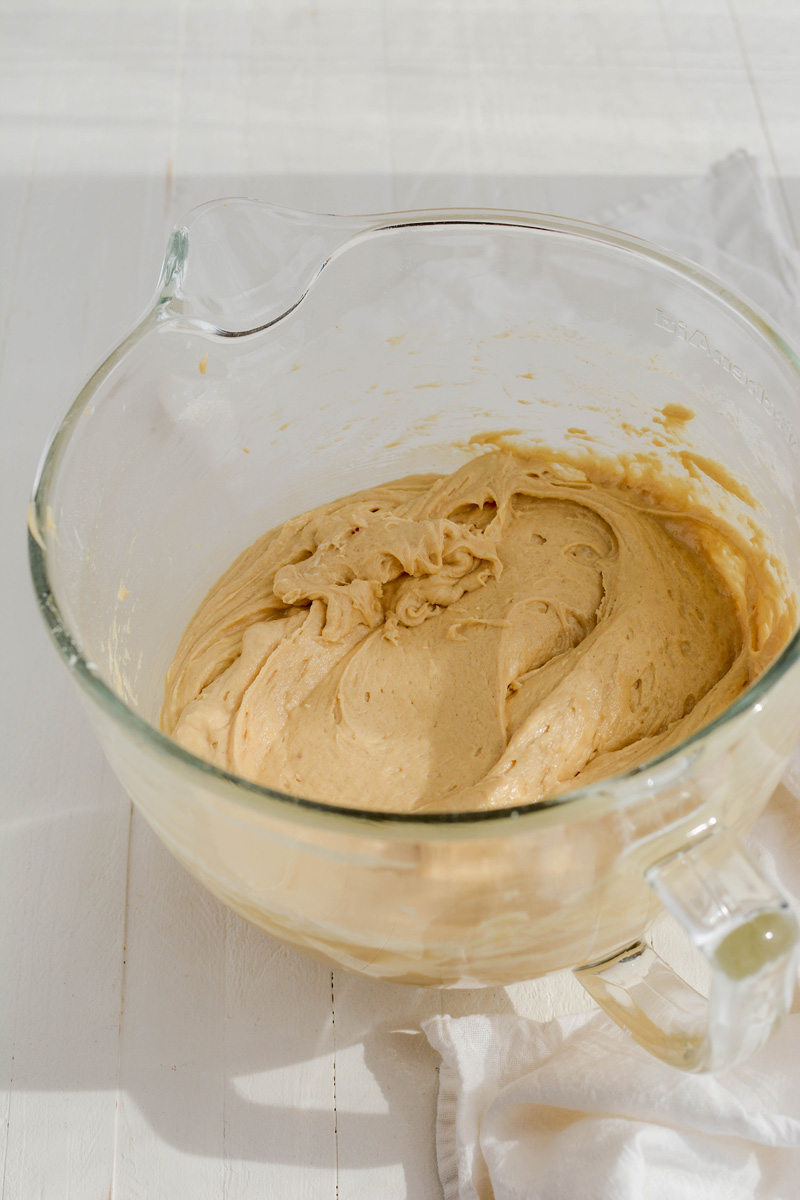
- In the bowl of a stand mixer fitted with the paddle attachment, beat the butter, granulated sugar, brown sugar and peanut butter until fluffy, about 5 minutes.
- Add sour cream and vanilla extract and mix until combined. Add the eggs one at a time mixing until just combined, scraping down the sides of the bowl as needed.
- In a 1 cup liquid measuring cup, combine the milk and water.
- Add half of the dry ingredients in to the mixer bowl with the butter mixture and mix until combined. Add the milk mixture and mix on low speed to combine. Add the remaining dry ingredients and mix on low speed until just combined. Using a rubber spatula, give the batter a few stirs by hand and divide among the prepared cake pans.
- Bake cakes for 20 to 23 minutes, or until a toothpick inserted in the center comes out with a few moist crumbs attached, rotating the pans about halfway through baking.
- Let the cakes cool in their pan for 5 minutes on cooling racks. Then, invert cakes onto cooling rack to cool completely.
PEANUT BUTTER CREAM FILLING
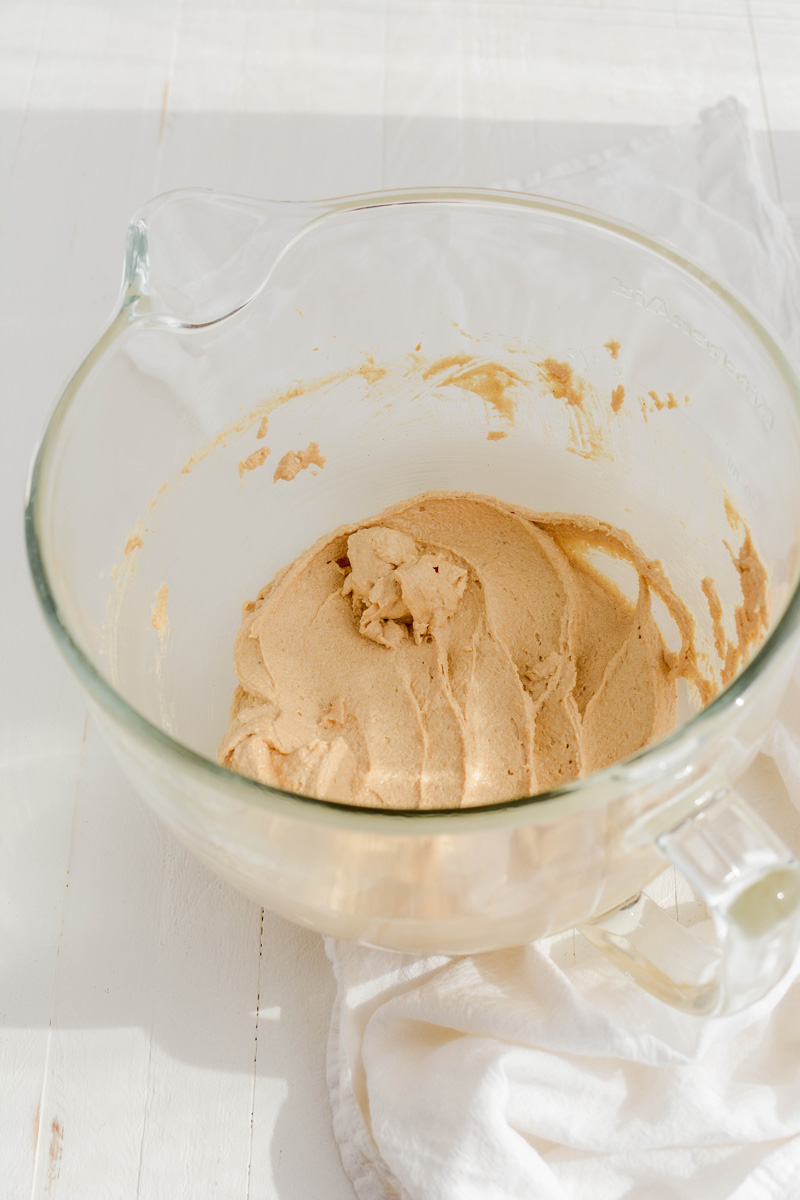
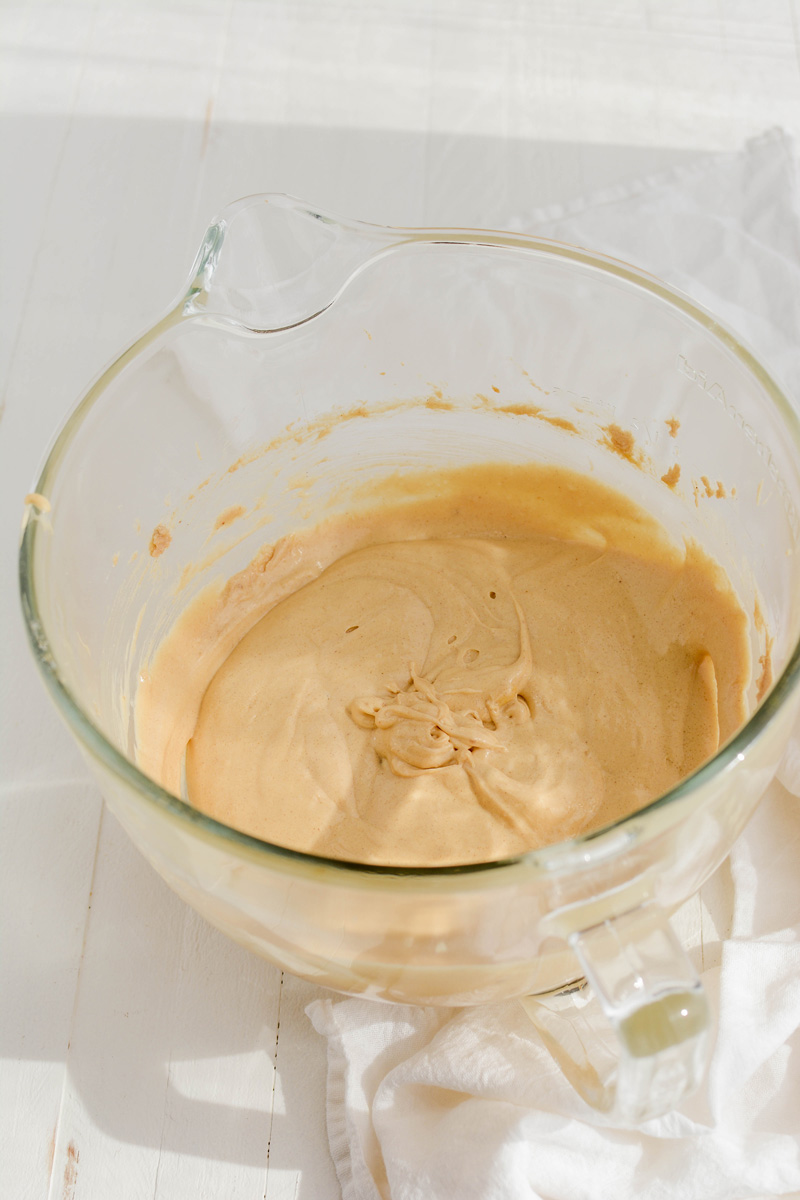
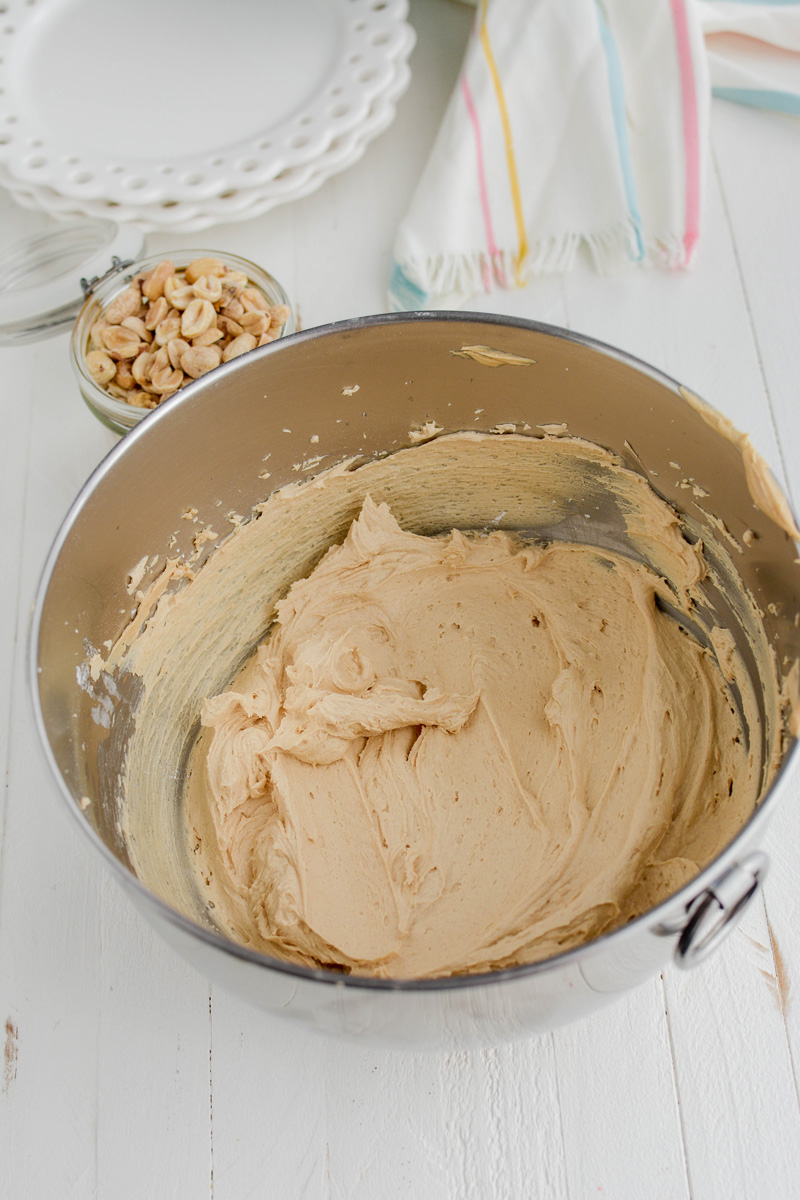
- In a large bowl, mix the butter, peanut butter, honey, vanilla and salt with a hand mixer on low speed to combine. Add the powdered sugar a little at a time. Once all the powdered sugar has been incorporated, increase the mixer speed to medium speed and beat until the cream is light and airy, about 5 minutes, scraping down the sides of the bowl as needed.
PEANUT BUTTER BUTTERCREAM
- In the stainless steel bowl of a stand mixer, with the whisk attachment attached, pour the egg whites and cream of tartar in the bowl and mix on low speed until frothy, about 2 to 3 minutes. Slowly add ¼ cup of the granulated sugar on increase the mixer speed to medium-high. Beat until soft peaks form, about 30 seconds.
- In a small saucepan, add the remaining 1 ½ cups sugar and water. And stir to combine. Attach a candy thermometer to the saucepan and heat mixture over high heat until it reaches 180 degrees, about 5 minutes. Continue to cook until the syrup reaches 240 degrees, about 2 minutes more.
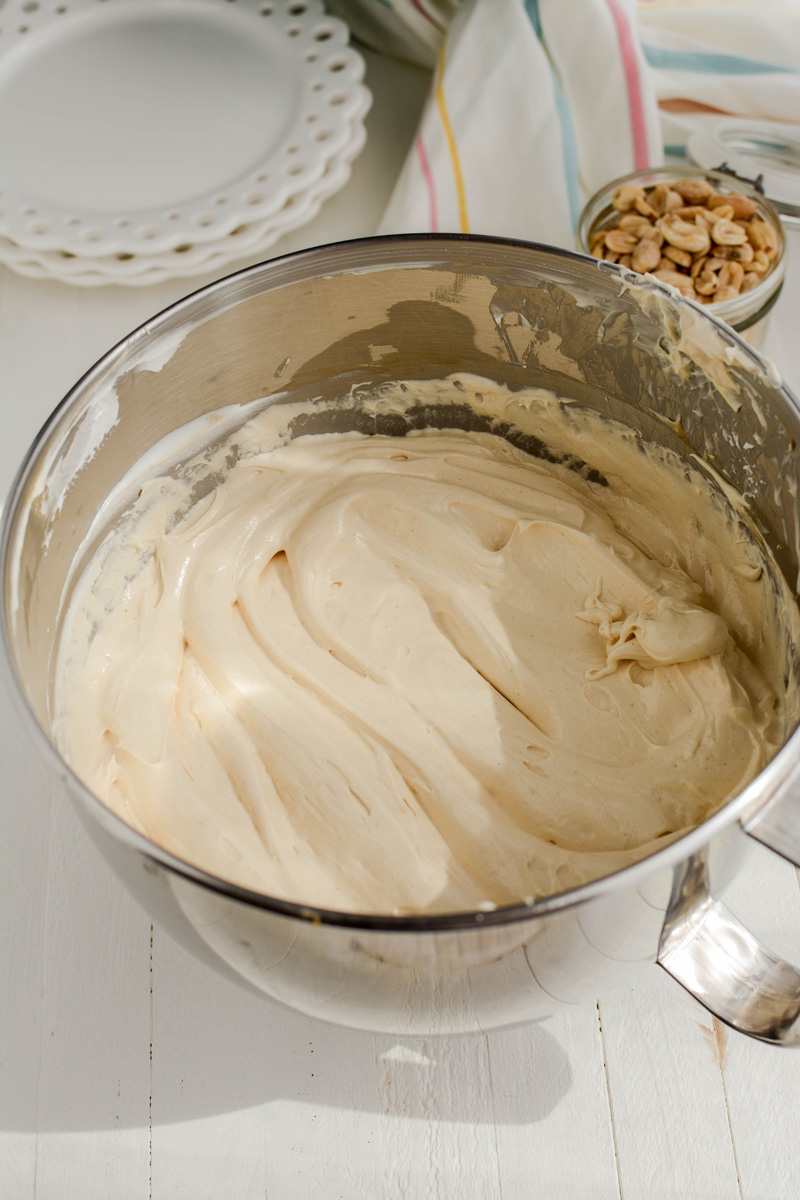
- Once the syrup reaches 240 degrees, with the mixer on low speed carefully pour the syrup in the meringue in the mixer bowl, Increase speed high beat meringue for about 12 minutes or until the mixer bowl is room temperature. Switch out the whisk attachment for the paddle attachment and mix on low speed adding the butter one piece at a time. Once all the butter has been incorporated, increase the speed to medium and beat until the buttercream is thick and fluffy, about 1 minute. Reduce the speed to low and add the vanilla extract and salt. Add in the peanut butter and mix to combine.
ASSEMBLE
- Center one cake layer on an 8-inch round cake board and place on a cake turntable. Fit a piping bag with a coupler and fill with buttercream. Pipe a buttercream dam around the edge of the cake. Spread 1 cup of the filling in the center and smooth evenly until it reaches the buttercream dam. Place second cake layer on top and pipe another buttercream dam around the edge of the cake. Spread 1 cup filling over the top until it the filling reaches the buttercream dam. Place the third cake layer on top bottom side up.
CRUMB COAT
- Spread a thin layer of frosting on the top and sides of the cake. Chill in the freezer for about 10 to 15 minutes, or in the refrigerator for 30 minutes.
DECORATE
- Apply a generous amount of buttercream on top of the chilled cake and spread the buttercream with an offset cake spatula over the top in an even layer. Line an 8-inch acrylic disc with parchment paper. Place the lined acrylic disc on top of the cake (parchment side down) making sure the disc lines up with the bottom cake board.
- Apply more buttercream to the sides of the cake and spread buttercream over the sides evenly. Gently place a cake scraper on the bottom cake board and top acrylic disc and carefully rotate the cake turntable to remove excess buttercream and to smooth out. Place the excess buttercream back into the bowl to be reused again if needed. Fill in any gaps with more buttercream and continue to smooth the sides of the cake with the cake scraper. Chill the cake in the freezer for 15 minutes or in the refrigerator for 30 minutes before removing the acrylic disc.
- Carefully insert a small offset cake spatula under the disc but over the parchment paper and slowly rotate the cake turntable until the acrylic disc releases. Carefully peel off the parchment paper. Fill in any gaps with more buttercream and clean the edges up with a toothpick.
- Fit a piping bag with Ateco piping tip #827 and fill with remaining buttercream. Pipe swirls on the outer edges of the cake, alternating with cookies. Sprinkle with roasted peanuts and serve.
Notes
Assembled cake can be stored at room temperature for up to 1 day in an airtight cake container. Or stored in the refrigerator for up to 3 days. Bring to room temperature before serving.
Nutrition Information:
Yield: 12 Serving Size: 1Amount Per Serving: Calories: 1103Total Fat: 83gSaturated Fat: 39gTrans Fat: 2gUnsaturated Fat: 36gCholesterol: 213mgSodium: 951mgCarbohydrates: 77gFiber: 4gSugar: 42gProtein: 19g
*Nutrition information is an estimate and will vary.*


Leave a Reply