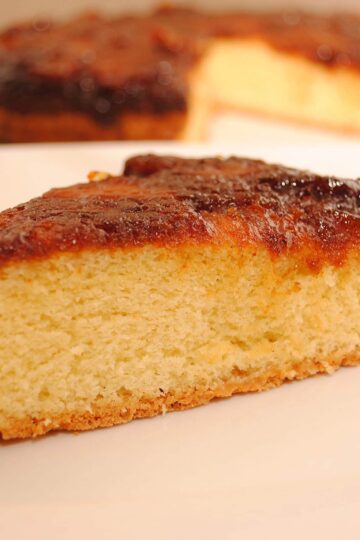
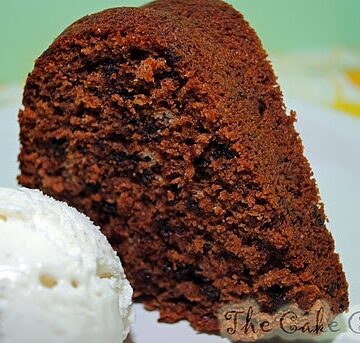
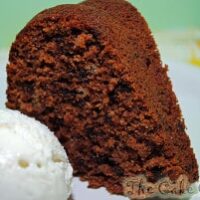
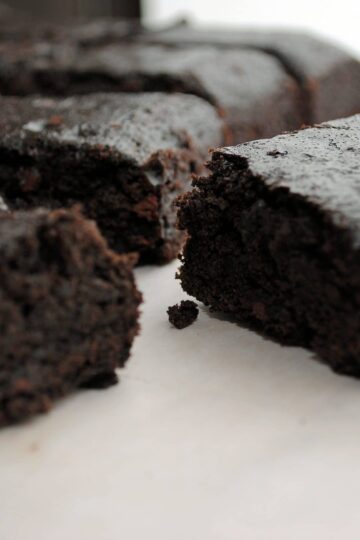
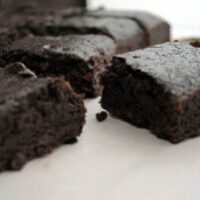
• Skip to primary navigation
  • Skip to main content
  • Skip to primary sidebar
  • About
  • Recipe
    • Listicle
    • Kitchen Staples
    • Drinks
      • Cocktails
      • Non-Alcoholic
      • Smoothies
    • Breakfast
      • Eggs
      • Muffins and Baking
      • Pancakes and Waffles
    • Sweet
      • Brownies and Bars
      • Cakes and Frostings
        • Beginner Cake Recipes
        • Intermediate Cake Recipes
        • Advanced Cake Recipes
      • Cheesecake
      • Cobblers & Fruit Desserts
      • Cookies and Candies
      • Custards & Trifles
      • Pies & Tarts
    • Savory
      • Appetizers
      • Easy Weeknight Meals
      • Beef and Pork
      • Chicken and Turkey
      • Fish and Shellfish
      • Grains and Beans
      • Pasta and Rice
      • Potatoes
      • Quinoa
      • Soups & Stews
      • Vegetables
    • On The Lighter Side
  • Resources
  • Contact
  • Work With Me
  • Privacy Policy

The Cake Chica

menu icon
go to homepage
  • Recipe Index
  • About
  • Work With Me
  • Contact

subscribe
search icon
Homepage link
  • Recipe Index
  • About
  • Work With Me
  • Contact

×
Home

Godiva Swiss Chocolate Cupcakes Filled with Coffee Bavarian Cream Topped with Buttercream

February 7, 2012

Godiva Swiss Chocolate cupcakes w. Coffee Bavarian cream

I made these so I could use up some leftover buttercream I had left over from the Mickey Mouse Birthday cake I did for my nephew about a week ago. I also wanted to try out a new flavor of cake. I usually use the WASC recipe for all my custom cakes so when the opportunity allows, I like to create new flavors from it.

When I am looking for inspiration for a new flavor of WASC cake I usually look over at my bar. Godiva!!!!! Yup that’s the one.

Now for the filling? Ah ha………Coffee Bavarian Cream.

Normally for a fancier cake flavor like this one I would use a fancy buttercream like Italian buttercream or a Swiss buttercream or even a whipped cream topping. But, like I said before I just wanted to use up some of the left over buttercream I had. I do however,  have one more box of Swiss Chocolate cake mix on hand so keep following and I promise I will top this cupcake with something a little more gourmet like.

Makes about 30 cupcakes

1 18 oz. Swiss Chocolate cake mix
1 cup all-purpose flour
1 cup sugar
¾  teaspoon salt
1/3 cup coffee, brewed and cooled
1/3 cup Godiva liqueur
1/8 cup vegetable oil
1 teaspoon real vanilla extract
1 cup sour cream
3 whole eggs

Place all dry ingredients in a large mixing bowl and stir together with a wire whisk.
Add the remaining ingredients and beat on medium speed for 2 minutes.
Pour batter into the lined cupcake tins, filling about 3 quarters full.
Bake in a preheated oven at 325 F until the cakes are done. About 20 minutes.
COFFEE BAVARIAN CREAM FILLING
BUTTERCREAM
I recommend checking this DVD out for using this buttercream.

Mickey Mouse Birthday Cake

January 28, 2012

Mickey Mouse Birthday Cake

I made this cake for my nephew Logan for his 2nd Birthday!!! I hope he likes it.

I used a chocolate version of WASC cake.

I made the topped about a week ago so I could give it time to dry and harden before I touched them. I also mixed some Tylose powder with the fondant to help it dry faster and harder.

I didn't have any real problems with this cake. I think the most time consuming thing was making the little balls to go around the border of the cake.

Thanks for looking.

Items Used:
Satin Ice 5 pounds Blue
Satin Ice 2 pounds Yellow
Satin Ice 2 pounds Red
Satin Ice 2 pounds Black
Floral Wire
Makin's Clay Alphabet Cutters
Disney Mickey Mouse Cookie Cutters
Star Cutters
Number 2 cooking cutter
Wooden dowels
Buttercream Icing Recipe
Tylose powder

Caramelized Pineapple Upside-Down Cake

January 22, 2012

Carmelized Pineapple Upside Down Cake

This ain’t your momma’s pineapple upside-down cake. (At least not my momma’s.)

I remember when I was a kid my mom would make pineapple upside-down cake quite often, usually from a box or a basic homemade version. Believe it or not, when I was a child I didn’t like cake. But I loved pineapple upside-down cake. I think it was the tasty cake that lay underneath the candy-like topping, and the texture of the pineapple; that sweetness in my mouth as I chewed. That brought a smile to my face. And my favorite part, was the maraschino cherries!

This version does not have the cherries, but believe me, you won’t miss them. No offence to my mother, but this is a more sophisticated pineapple upside-down cake.
I found this recipe in the book In the Sweet Kitchen. And it’s absolutely perfect.
 
Caramelized Pineapple Upside-Down Cake

Caramelized Pineapple Upside-Down Cake

Yield: 12

Ingredients

TOPPING

  • 1 large, sweet ripe pineapple
  • 1/3 cup unsalted butter
  • 1 cup plus 2 tablespoons granulated sugar

CAKE

  • 1 ½ cups all purpose flour
  • 1 ½ teaspoons baking powder
  • ¼ teaspoon salt
  • 3 large eggs
  • 4 or 5 large egg yolks (if the yolks seem small for their size of the egg, use 5 rather than 4)
  • 1 ½ cups granulated sugar
  • 3 tablespoons brandy
  • Seeds of ½ large vanilla bean, hull reserved for another use, or 2 teaspoons vanilla extract
  • ¾ cup unsalted butter, melted and cooled

Instructions

  1. Preheat the oven to 350 F. Grease a 10-inch springform cake pan and line the bottom and about 2 inches up the sides with a single sheet of heavy duty aluminum foil. Press the foil into the inside of the pan, smooth out the wrinkles as best as possible. Grease the foil and line the bottom with a circle of parchment paper cut to fit neatly. Grease the paper and sprinkle the bottom of the pan with a little sugar, carefully tapping out the excess while keeping a finger on the linings to hold them in place.
  2. Cut the rind from the pineapple and cut away all the little eyes. Cut the fruit lengthwise into four quarters, then cut out and discard the core. Set aside one quarter for another use, and cut each of the remaining three quarters lengthwise into three pieces. Slice each of these into 1/3- to ½- inch slices. Place these in bowl just large enough to hold the fruit and set the bowl within easy arm’s reach of the stove-stop.
  3. Melt the 1/3 cup of butter in a large heavy pot over medium heat. As soon as the butter is liquid, add the 1 cup plus 2 tablespoons of sugar. Stir constantly over the heat with a wooden spoon until the sugar dissolves and the mixture begins to color. At first the mixture will be grainy and foamy, then after a few minutes of stirring, the oil will separate from the caramel and swirl around on top. Don’t worry about this; the caramel will become homogeneous again. Keep stirring slowly, covering the entire surface of the bottom. At this point, the mixture should look thick and creamy and be a light tawny brown. When the spoon uncovers trails of a darker gold color, watch closely. The caramel will darken quickly now, and you should have the bowl of pineapple ready to add, which will stop the cooking process.
  4. When the caramel is a glossy dark amber, carefully slip the pineapple slices into the pot all at once, standing back to avoid the splatter. This addition will produce a lot of hissing and sputtering from the pot, as the caramel is shocked with the cool wet fruit. Let the commotion subside a little, about 30 seconds, before using the wooden spoon to gently move the fruit around, coating it with the syrup. The caramel will most likely have seized into a few knobs of hardened toffee, making it awkward to stir, but, again don’t concerned. The lumps will eventually melt back into the caramel. When the contents have settled down to a steady boil, keep stirring slowly, for 6 to 8 minutes depending on the juiciness of the pineapple, until the slices are golden, their edges becoming glassy-looking and almost transparent. At this point, remove the pot from the heat to a heatproof pad or folded kitchen towel beside the prepared cake pan.
  5. Using a pair of tongs, remove the pineapple sliced from the caramel and arrange them decoratively in the bottom of the pan. Your design is up to you. Use a slotted spoon to remove any little bits of fruit from the syrup and return the pot to the heat. Continue boiling liquid in the pan, stirring slowly, until it is thick and syrup like. It will be very foamy, and you may need to tilt the pan from time to time, running your spoon across the bottom, to gauge the consistency. Watch closely, as the caramel can burn if left unattended. If you are unsure, take the pot off the heat and let the caramel sit for a minute or so. It should be about the consistency of a thick honey. Pour the hot caramel over the pineapple, and then set the pan aside.
  6. Into a small bowl, sift the flour, baking powder and salt. Set aside. In a larger bowl, lightly whisk the eggs and egg yolks to break them up. Whisk in the 1 ½ cups sugar, then blend in the brandy and vanilla seeds or extract. Add the dry ingredients to the egg mixture in two or three additions, stirring with the whisk until thoroughly incorporated. Gently stir in the cooled melted butter. The batter should be smooth and glossy and will be fairly runny. Pour the batter over the pineapple slices in the pan, taking care not to disturb the fruit layer of fruit.
  7. Place the pan on a baking sheet and set in the middle of the preheated oven. Bake for 1 hour and 10 minutes to 1 hour and 20 minutes. An evenly golden crust will have formed on the top of the cake, and the edges should be just beginning to pull away from the sides of the pan. To test for doneness, poke a wooden skewer through the center of the crust, making a larger hole than the skewer needs, so the crust doesn’t wipe it clean as you pull it out; it should come out clean or with a few moist crumbs clinging to it. Transfer the pan to a rack and cool for 7 to 8 minutes. Run a thin bladed knife around the cake and carefully release the sides of the pan. Invert the cake onto a serving platter and remove the bottom of the pan. Peel away the foil and the parchment paper, taking care not to tear the fragile hot cake. Cool completely before serving or covering and storing. This cake is really best the day it is made, but it can be stored for several days, well covered at room temperature.

Did you make this recipe?

Tag @thecakechica1 on Instagram and hashtag #thecakechica1

© Mary
Category: Dessert

Mocha Muscle Builder

January 10, 2012

Mocha Muscle Builder

I like to make this shake on a Saturday, after a workout. I usually still have coffee left over from my Saturday morning breakfast, so it’s a great opportunity to use up the left over coffee.

 Serves 2
1 cup milk
1/3 cup brewed coffee
1 tablespoon natural creamy peanut butter
1 banana
1 scoop chocolate whey protein powder
Ice cubes
Place all ingredients in a blender and process until smooth.

Cocoa Powder Protein Shake

January 4, 2012

Cocoa Powder Protein Shake

Here is an oldie but a goodie! I found this recipe awhile back in my Oxygen magazine the April 2010 issue. This was one of my first, if not the first protein shake I made once I started working out. I have many protein shake recipes, but I keep coming back to this one. It's a favorite so I decided to share it with you.

SERVES 1

1 banana
1 scoop vanilla whey protein powder
8 ounces low-fat milk
1 tablespoon cocoa powder
A few ice cubes if desired

Blend all ingredients in a blender.

The Victorian Farmhouse (My Gingerbread House)

December 11, 2011

Chocolate Cream Pie

This year was our second year at work to have a Gingerbread House Contest! I was hoping we would have more participants this year than last years. We only had 3 houses come in. This year we only had two!!! Including mine. Last year I had this big idea that just didn't work out. I learned a lot from the first year I did one. Last year when my plan didn't work I had just said I am not going to do one and that was that. Well, I just couldn't give up so I put another one up in maybe 3 days, just so I would have something to bring in. It won one of the two categories last year but it still didn't display any of my skills. So this year as soon as the email came out about the Holiday schedule at work, I got right to work on this years gingerbread house. I started in October.

First, I searched for a template. I found nothing I liked. Just the same old boring online templates. So I started searching for books to see if there were any out there. I found The Gingerbread Architect in my local library. The book had many different styles of homes to choose from and it included templates. I loved the Victorian Farmhouse. I knew when I saw it, that was what I wanted to do this year.

The Gingerbread Architect had several homes I wanted to try so I went ahead and purchased this book.

The back of my house.
I had my husband help me on the templates. In the book they have the measurements they should be. So I got some graph paper and had my husband draw up the templates to size. That probably took about 2 hours. It would have taken me days if I had to do it. He is a lot better at numbers than I am.
The side of my house.
Once the templates were all done. I started making the dough. I made the dough way in advance. I learned from last year to start as early as possible. And that's exactly what I did. I tossed the dough in the freezer until it was time to make the gingerbread house pieces.

I decorated all the outside pieces before putting them together. I didn't do that last year and found that it was definitely easier to do any decorating you can do before putting the house together. I did the siding with Royal Icing. I wish my work was cleaner but I don't think it's too bad it kind of gives it that old house siding look. So I was pretty happy with it. I just need some practice on keeping my hand steady.

The veranda.
I was lucky to get this veranda up. All the candy canes I got kept braking in my hands! These 3 survived somehow. My front and back doors were made with Satin Ice (fondant) and Tylose powder. Tylose powder makes it dry hard and fast. It basically turns it into gumpaste.And the door handles are silver dragees.
The Christmas lights are chocolate covered sunflower seeds with a candy shell. I tried to put these "lights" up quickly because the longer it took the more of these sunflower seeds I would eat.
I love my snowman. He took me just a few minutes to make. The snow is shredded coconut. I did process it to make it more fine. I then added some edible glitter but you can't really see it in the picture.

The Christmas trees were made of fondant/tylose powder mixture, and then piped with leaves all around. This was pretty easy but really hurt my hands.

I love my fat little Santa. I watched this tutorial on how to make him.

I learned how to make these little guys from watching this tutorial.
Some of the windows were made with isomalt and some were made with melted lemon drops. I would have preferred all isomalt windows, but it was my first time using the stuff and I quickly learned I would need a lot more. But the shipping cost was too much and I was running out of time so I improvised and just melted some candy for the others. I do like the isomalt better. It gives the windows a frosty look and isn't sticky like the melted candy windows are.
I made the roof shingles out of fondant/tylose mix. I used my exacto knife for texture. This probably took the longest of all the decorating. It took about 6 hours just to do the roof.

The picket fences were made with royal icing.

If you have any questions please feel free to ask.

Nutella Cookies

November 22, 2011

Nutella Cookies

YUM YUM!!! Are the words that come to mind when I think of these cookies. I found this recipe in a magazine called Cuisine At Home the December 2011 issue.

When I took these babies out of the oven I had to try one, (so did my husband) and WOW they were so ooey and gooey. My husband and I absolutely loved these. The next day I took most of them to work with me to give to my co-workers. I wondered if they were still as delicious as they were right out of the oven. But to my surprise they turned crispy! I am not a fan of crispy cookies, but I kept taking more bites out of this delicious but crispy cookie. I said wow the flavor in this cookie is incredible so much that I don't even mind the crispy texture of the cookie. I still think fresh out of the oven is the best time to munch on cookies, but they can't stay warm forever. I have to say this is my first favorite crispy cookie. I can see myself making these for years to come! Enjoy!!!

"For chewy centers and crisp edges, remove the cookies from the oven when the centers look underdone

Nutella Cookies

Nutella Cookies

Ingredients

WHISK

  • 2 cups all-purpose flour
  • 1/4 cup unsweetened cocoa powder
  • 1/2 tsp baking soda
  • 1/2 tsp table salt

BEAT

  • 1 stick unsalted butter, softened (8 Tbsp)
  • 1 1/2 cups granulated sugar
  • 2 large eggs
  • 1 cup Nutella
  • 1 tsp vanilla extract
  • Finely chopped hazelnuts

Instructions

  1. Whisk together flour, cocoa powder, baking soda, and salt in a bowl; set aside.
  2. Beat butter and sugar with a mixer on medium speed, 5 minutes. Add eggs one at a time, beating to fully incorporate before adding the next. Add Nutella and vanilla; beat until combined. Add flour mixture; mix just until combined. Chill dough 4 hours or overnight.
  3. Preheat oven to 350 degrees. Line baking sheets with parchment paper.
  4. Scoop dough with a #30 scoop (scant 3 Tbsp); roll in hazelnuts. Bake cookies, six at a time, until edges are set, about 15 minutes. Let cookies cool on baking sheets.

Did you make this recipe?

Tag @thecakechica1 on Instagram and hashtag #thecakechica1

© Mary
Category: Dessert


Double Chocolate Delight

October 24, 2011

Double Chocolate Delight

I am getting ready for my gingerbread house contest this year so I am cleaning out my craft room/baking room to make some space for all the gingerbread house pieces.  I have quite a few boxed cake mixes in my craft/baking room so I am trying some new boxed cake recipes to get rid of them. I found this recipe in Duncan Hines Cake Mix Magic 2. The finished cake was delicious and so easy to make. Enjoy!

"This delicious cake is very rich, very moist and very chocolatey. It may not last long but if it does, it keeps very well."

Double Chocolate Delight

Double Chocolate Delight

Yield: 12

Ingredients

  • Preheat oven to 350 F
  • 10 inch Bundt pan, greased and floured
  • 1 package 18.25 oz white cake mix
  • 1/3 cup granulated sugar
  • 1/3 cup unsweetened cocoa powder, sifted
  • 4 eggs
  • 1 cup sour cream
  • 2/3 cup vegetable oil
  • 1 1/2 cups miniature semi-sweet chocolate chips

Instructions

  1. In a large mixer bowl, combine cake mix, sugar, cocoa, eggs, sour cream and oil. Beat on low speed for 1 minute to blend, then on medium speed for 2 minutes. Stir in chocolate chips. Spread batter evenly in prepared pan. Bake for 50 to 60 minutes or until a tester inserted in the center comes out clean. Cool 25 minutes in pan on wire rack, then remove from pan and cool completely on rack.

Notes

TIPS: Always sift cocoa before using. It clumps during storage and the lumps don't come out, even during beating.If you really want to overdose on chocolate, a chocolate drizzle makes a nice finish.VARIATION: Replace semi-sweet chips with milk chocolate chips.

Did you make this recipe?

Tag @thecakechica1 on Instagram and hashtag #thecakechica1

© Mary
Category: Dessert


Banana Loaf Cake

October 23, 2011

Banana Loaf Cake

I was so excited to see a dessert book by Nick Malgieri called Perfect Light Desserts in my local library. I checked it out and couldn't wait to try out some of the recipes. The first one I tried was this one for Banana Loaf Cake. I had over ripe bananas on hand so it was a perfect choice.

I try to eat as healthy as I possibly can by eating clean foods. But I love baking so it's hard not to indulge sometimes. All the recipes in Perfect Light Desserts are all under 300 calories per serving.  Hope you enjoy and happy baking!!!

Banana Loaf Cake

Banana Loaf Cake

Ingredients

  • 2 1/2 cups bleached all-purpose flour (spoon flour into dry-measure cup and level off)
  • 2 teaspoons baking powder
  • 1 teaspoons baking soda
  • 1/2 teaspoon ground cinnamon
  • 3 large egg whites
  • 1/2 cup granulated sugar
  • 1/2 cup dark brown sugar, firmly packed
  • 3 tablespoons unsalted butter, melted
  • 1 teaspoon vanilla extract
  • 2 1/2 cups mashed bananas (about 5 large, very ripe bananas, mashed, then measured)
  • One 9x5x3-inch loaf pan, sprayed with vegetable cooking spray and the sprayed surface coated with fine, dry bread crumbs.
  • 2 1/2 cups bleached all-purpose flour (spoon flour into dry-measure cup)

Instructions

  1. Set a rack in the middle level of the oven and preheat to 350 degrees.
  2. Stir together the flour, baking powder, baking soda, and cinnamon.
  3. In a medium mixing bowl, whisk the egg whites to break them up, then whisk in the granulated sugar and the brown sugar.
  4. Whisk in the butter and vanilla, followed by the mashed bananas.
  5. Sift the flour mixture over the banana mixture and thoroughly fold it in.
  6. Scrape the batter into the prepared pan and smooth the top.
  7. Bake the cake for about 55 to 65 minutes, or until a toothpick inserted in the center emerges clean.
  8. Cool the cake in the pan on a rack for 10 minutes, then unmold it and cool completely on a rack.

Notes

SERVING: This cake is excellent unadorned, or it can be spread with a little-low fat cream cheese.STORAGE: Keep the cake wrapped in plastic at room temperature after it has cooled; For longer storage, double-wrap and freeze for up to a month. Defrost and bring to room temperature before serving.

Nutrition Information:
Serving Size: 34
Amount Per Serving: Calories: 275Total Fat: 4gSaturated Fat: 2gCholesterol: 9mgSodium: 228mgCarbohydrates: 56gFiber: 2gProtein: 5g

Did you make this recipe?

Tag @thecakechica1 on Instagram and hashtag #thecakechica1

© Mary
Category: Dessert


Fried Caramelized Bananas with Ice Cream

October 17, 2011

Fried Caramelized Bananas with Ice Cream

I found this recipe a couple of years ago in the book Simply Mexican by Lourdes Castro. You will never want to go back to using that jared ice cream topping again. This recipe is simple and oh so good!!!

Fried Caramelized Bananas with Ice Cream

Fried Caramelized Bananas with Ice Cream

Ingredients

INGREDIENTS

  • 1/2 cup light brown sugar, firmly packed
  • 4 tablespoons unsalted butter
  • 3 bananas, peeled and halved lengthwise
  • 1/4 cup pecans, chopped
  • 1 pint vanilla ice cream

Instructions

MAKE THE CARAMEL: Place a non stick skillet over medium high heat and add the brown sugar and butter. Allow both to melt and mix well using a heat proof spatula.

FRY THE BANANAS: When the caramel is hot and bubbly, add the bananas, cut side down, along with pecans. Allow the bananas to cook for about 3 minutes before turning them over. The cut side should have a deep golden brown color and slightly crispy texture. (Depending on the ripeness of the banana, they may break. Don't worry they still will be delicious.)

  1. Cook for another 2 minutes, using a spoon to drizzle the caramel sauce over the bananas to keep infusing them with caramel flavor.

SERVE: Place the bananas on a serving dish or platter, top with scoops of ice cream, and drizzle the caramel sauce and nuts over it.

Did you make this recipe?

Tag @thecakechica1 on Instagram and hashtag #thecakechica1

© Mary
Category: Dessert


The Elizabeth

August 14, 2011

Wedding Cake

A few weeks ago my mother got married and she asked me to make her cake. So here it is!

I wasn't sure what I was going to do at first as far as the design. My mom just gave me several ideas and I decided I would design her cake after her champagne classes. A few days later she gave me the cake topper and the champagne glass idea was scrapped. It would not match the cake topper she gave me so I decided to design the cake after her cake topper. I looked and looked online for some designs but couldn't find anything I liked. So I took it upon myself to create the design. And I couldn't have been happier. I really loved the way it turned out.

I didn't really have any trouble with this cake. The only thing I noticed was I need more practice on frosting square cakes but that's about it. I am happy to say every cake I do gets a little easier.

I made White Almond Amaretto cake with Raspberry filling and Vanilla Buttercream. I really enjoyed it and so did the bride.

Chocolate Covered Strawberry Cake

March 12, 2011

Strawberry Cake with Whipped Ganache

I made this for my brother-in-laws Birthday. His favorite cake is Strawberry. I don't have a good homemade strawberry cake recipe so I decided to use the WASC recipe and use a Strawberry cake mix. I substituted half of the water for Strawberry liquor and added 10 ounces thawed strawberries chopped and mixed in to the batter. I loved it!

I paired the cake with my most requested chocolate frosting. Whipped Chocolate Ganache. It tasted just like a chocolate covered strawberry. I loved it. Next time I'll be sure to dump the strawberries on top in chocolate to finish it off.

Chocolate Covered Strawberry Cake

Chocolate Covered Strawberry Cake

Yield: 40

Ingredients

  • 2 (18 ounce) boxes Strawberry cake mix
  • 2 cups all-purpose flour
  • 2 cups granulated sugar
  • 1 1/2 teaspoons salt
  • 1 1/3 cups water
  • 1 1/3 cups Strawberry liquor
  • 1/4 cup vegetable oil
  • 2 teaspoons real vanilla extract
  • 2 teaspoons strawberry extract
  • 2 cups sour cream
  • 6 large eggs
  • 10 ounces thawed strawberries

Instructions

  1. Place all dry ingredients in a large mixing bowl and stir together with a wire whisk.
  2. Add the remaining ingredients and beat on medium speed for 2 minutes.
  3. Pour into greased and floured cake pans, filling each pan a little over half full.
  4. Lightly tap cake pans on counter to bring air bubbles to top.
  5. Bake in preheated 325 F oven until cake tests done.
  6. Baking time varies according to the size and depth of pans being used.

Did you make this recipe?

Tag @thecakechica1 on Instagram and hashtag #thecakechica1

© Mary
Category: Dessert


  • « Go to Previous Page
  • Page 1
  • Interim pages omitted …
  • Page 35
  • Page 36
  • Page 37
  • Page 38
  • Page 39
  • Go to Next Page »

Primary Sidebar

Welcome!

Hi, I’m Mary. The self-taught baker, food stylist, and photographer behind The Cake Chica. If you love creating bakery-style desserts from scratch and want a peek behind the scenes of how they’re styled and captured, you’re in the right place.

More about me

Popular

  • Toasted Coconut Caramel Layer Cake on marble cake pedestal.
    Toasted Coconut Caramel Layer Cake
  • Best Big Fat Chewy Chocolate Chip Cookie
  • Key Lime Pie Layer Cake cover photo.
    Key Lime Pie Layer Cake
  • White Cake with Strawberry Filling
    White Cake with Strawberry Filling

Seasonal

  • Banana Cream Pie
  • Chocolate Root Beer Float Cake
  • Cotton Candy Layer Cake
  • Strawberry Ice Cream Pop Cake

Footer

↑ back to top

About

  • The Cake Chica
  • Recipe Index
  • Work With Me

Legal

  • Privacy Policy

Contact

  • Contact

As an Amazon Associate I earn from qualifying purchases.

Copyright © 2025 The Cake Chica