
As an Amazon Associate, I earn from qualifying purchases.
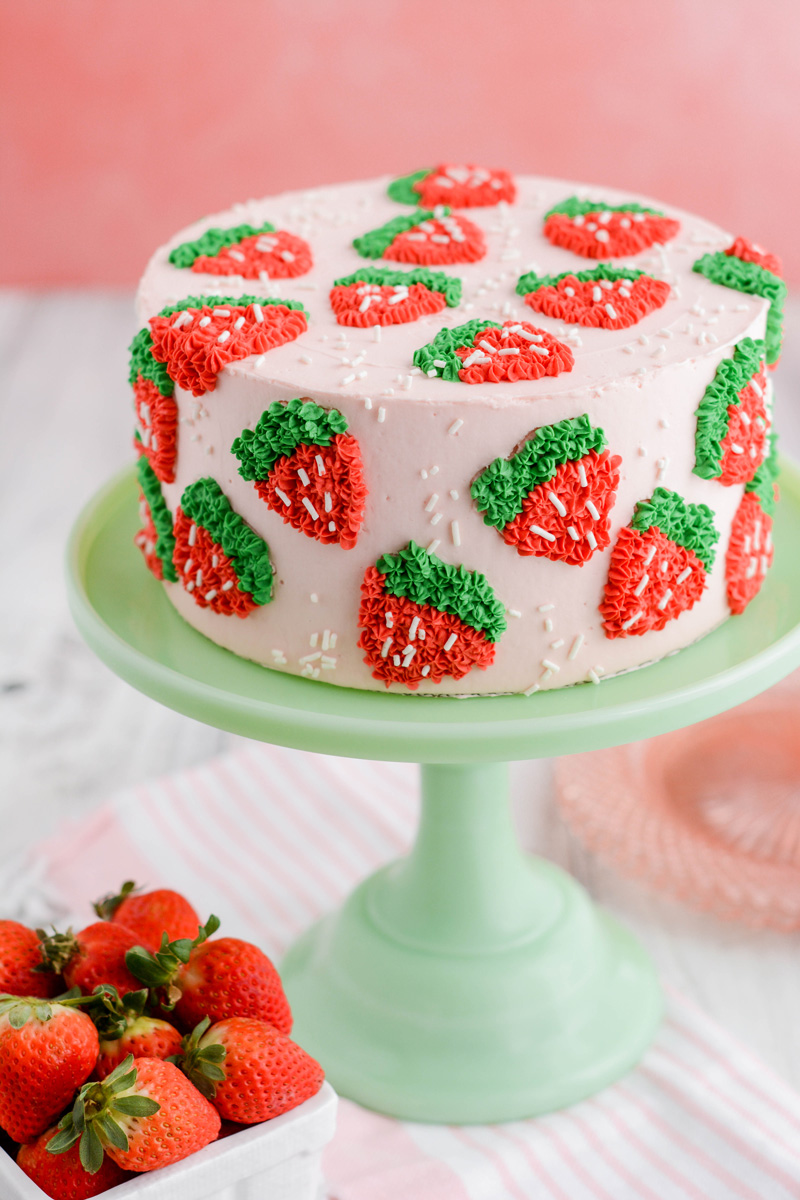
I was inspired to create this Strawberry Patch Layer Cake from the book Caketopia by Sheri Wilson.
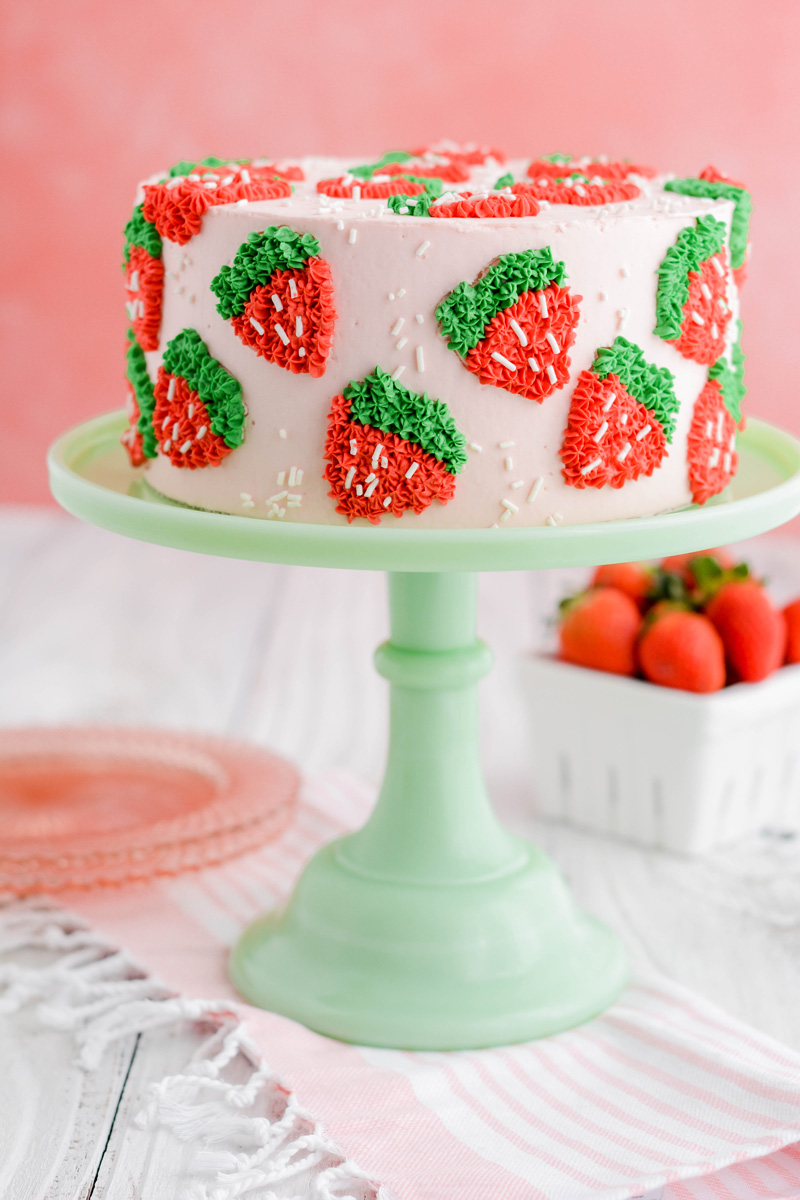
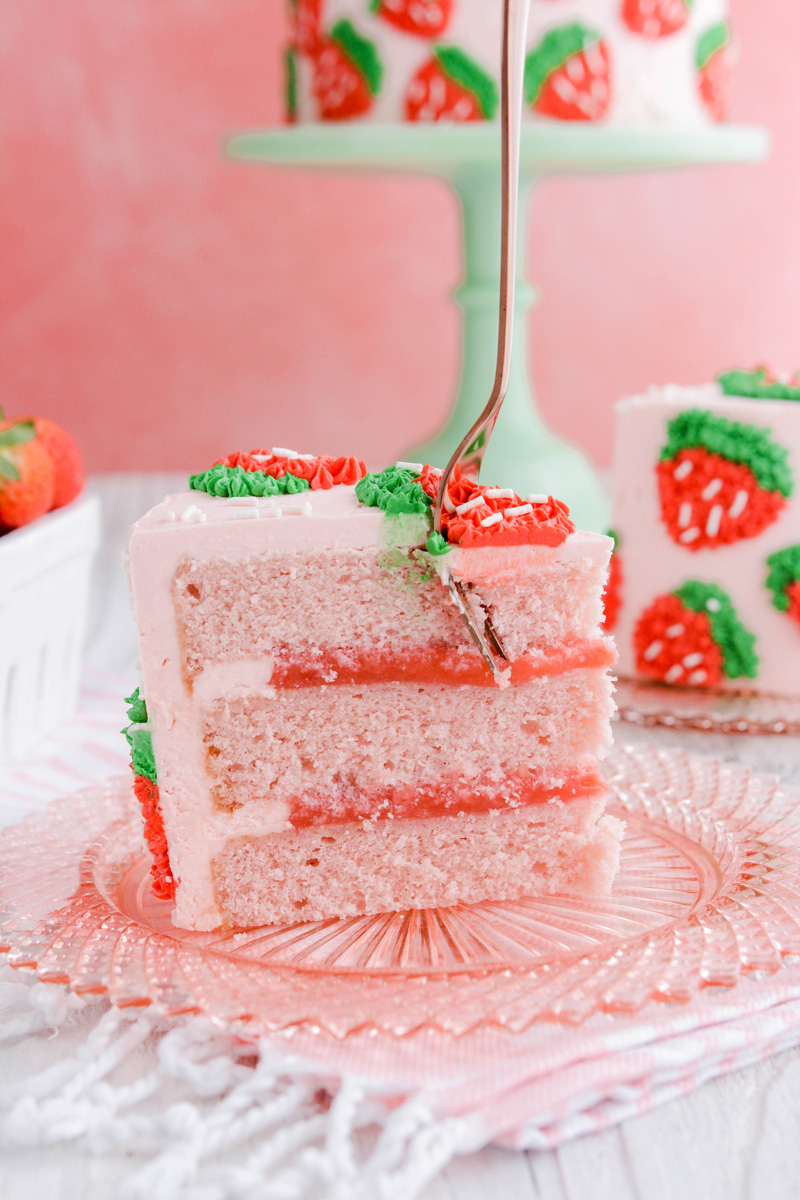
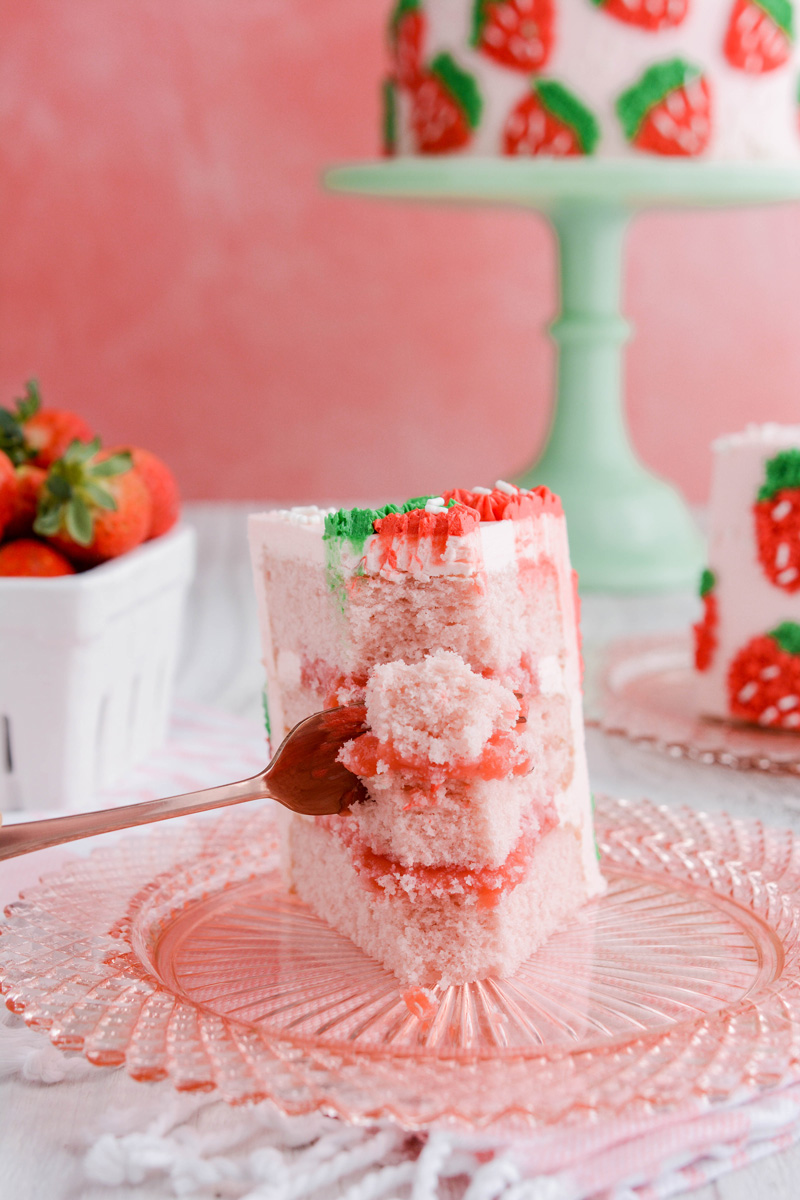
For my version I used my favorite strawberry cake recipe and filled it with strawberry filling. Next, I paired it with a fluffy and sweet strawberry flavored bakery-style frosting.
Strawberry Cake
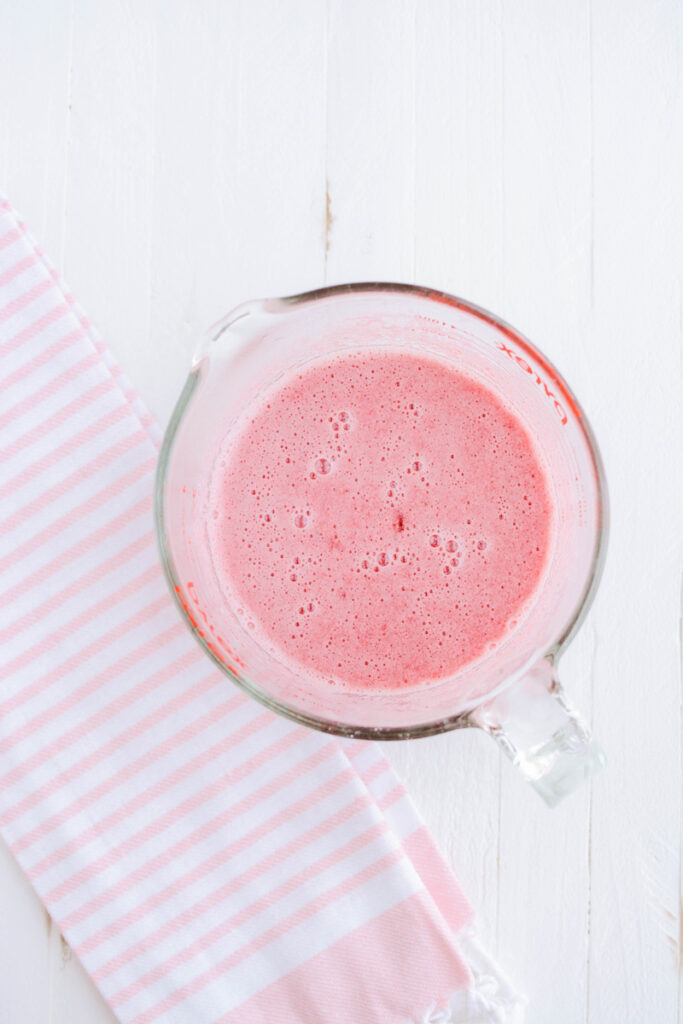
- Frozen strawberries: This recipe only uses the juice from the strawberries. Adding the strawberry solids to this cake batter would be too much for this delicate cake. Save the strawberry solids for another use or toss.
- Whole milk: The fat in whole milk helps to tenderize the cakes crumb. It also interacts with the flour to create just enough gluten to form the cakes structure.
- Egg whites: helps create structure.
- Strawberry emulsion: helps with flavor and color.
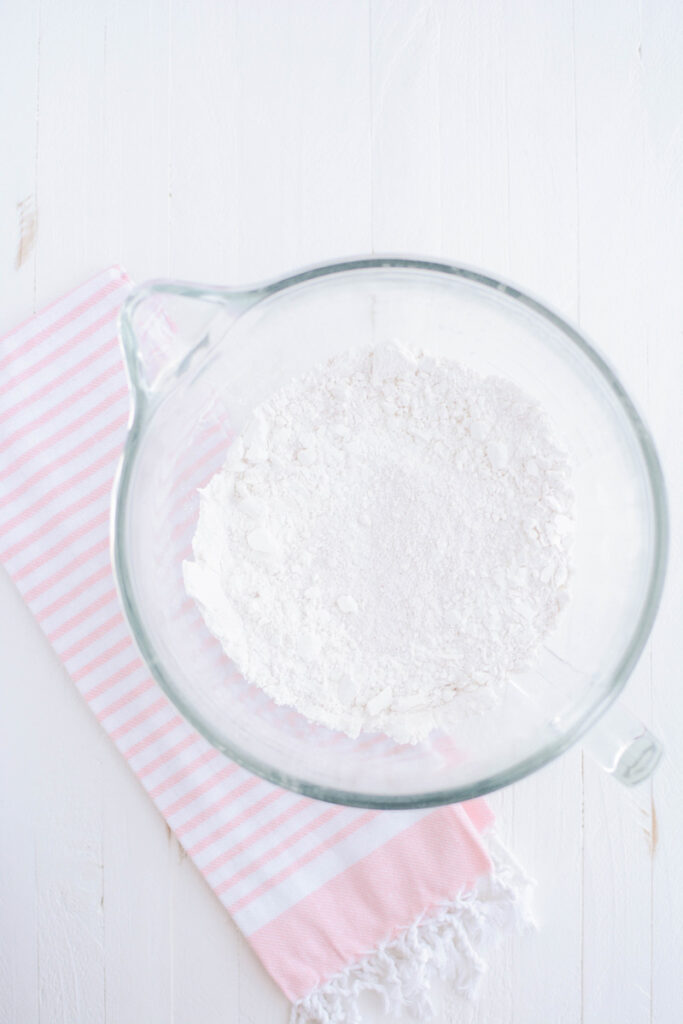
- Cake flour: has a lower protein content than all-purpose flour which helps create a delicate crumb.
- Granulated sugar: Sugar not only sweetens the cake but it also helps tenderize, leavens and browns.
- Baking powder: is a leavener that contains baking soda and cornstarch. Baking soda reacts twice. The first is when it comes into contact with liquid and then when it is heated. Baking soda can’t be used as a substitute for baking powder.
- Salt: helps bring out the sweetness in the cake.
- Unsalted butter: tenderizes, moistens, leavens, browns, and flavors.
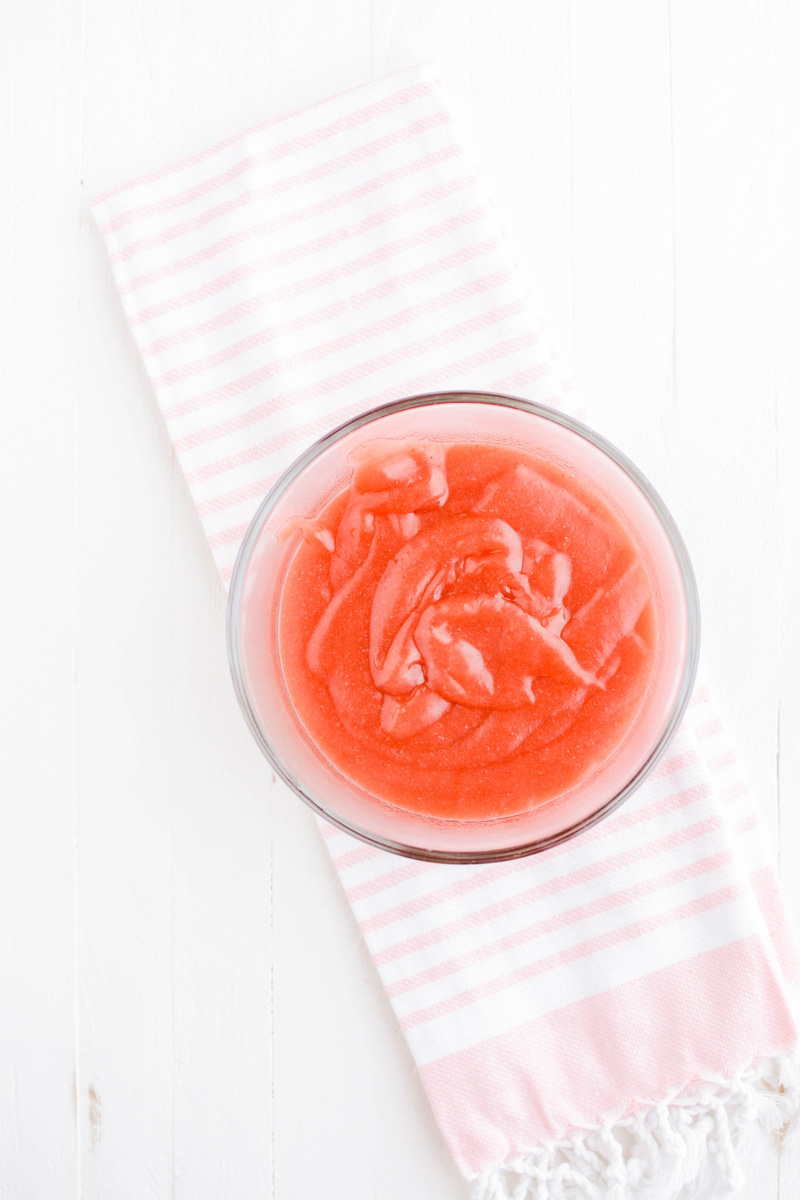
Strawberry Filling
I could eat this filling by the spoonful. Luckily it makes just enough to fill this Strawberry Patch Layer Cake perfectly. This strawberry filling adapts well by substituting your favorite frozen fruit.

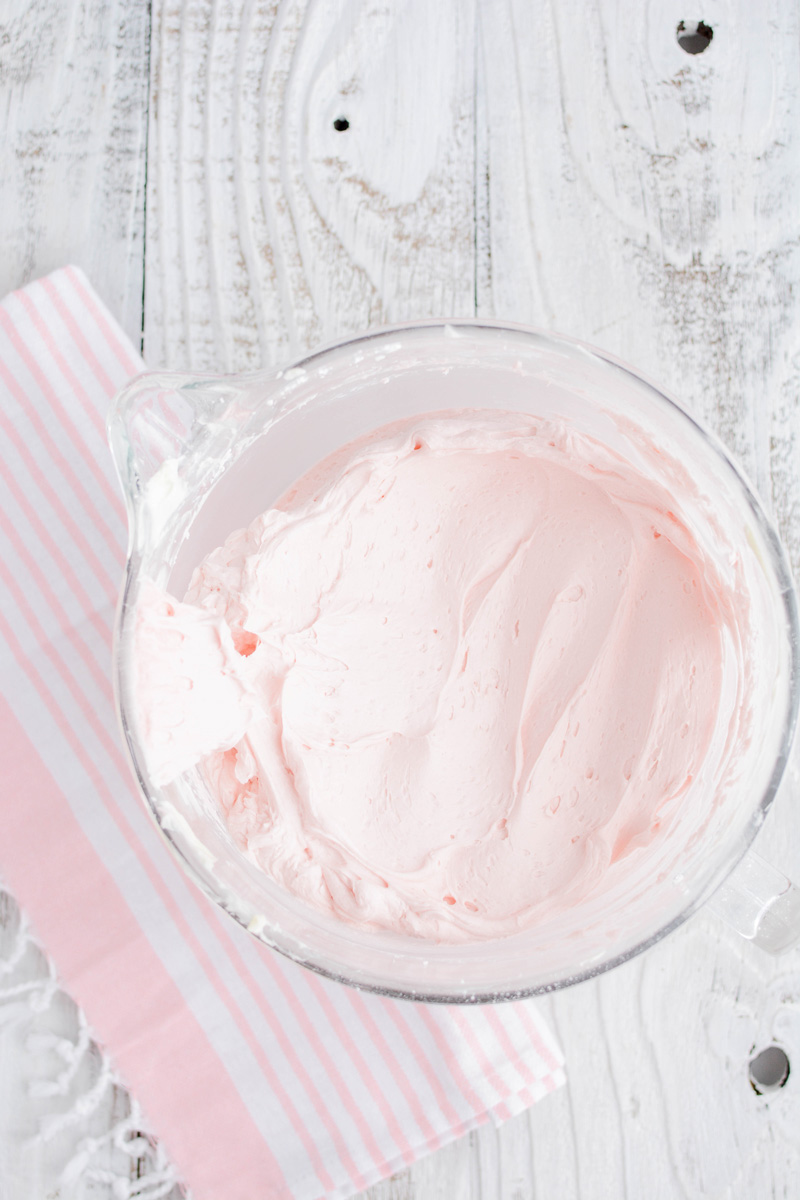
Strawberry Frosting
I use Lorann Strawberry Bakery Emulsion for the strawberry flavor in this frosting. It also gives the frosting a beautiful pink color. Feel free to omit the flavoring if you'd like. If you do omit the flavoring be sure to add some pink gel food coloring into the frosting for a pink hue.
Cake Assembly
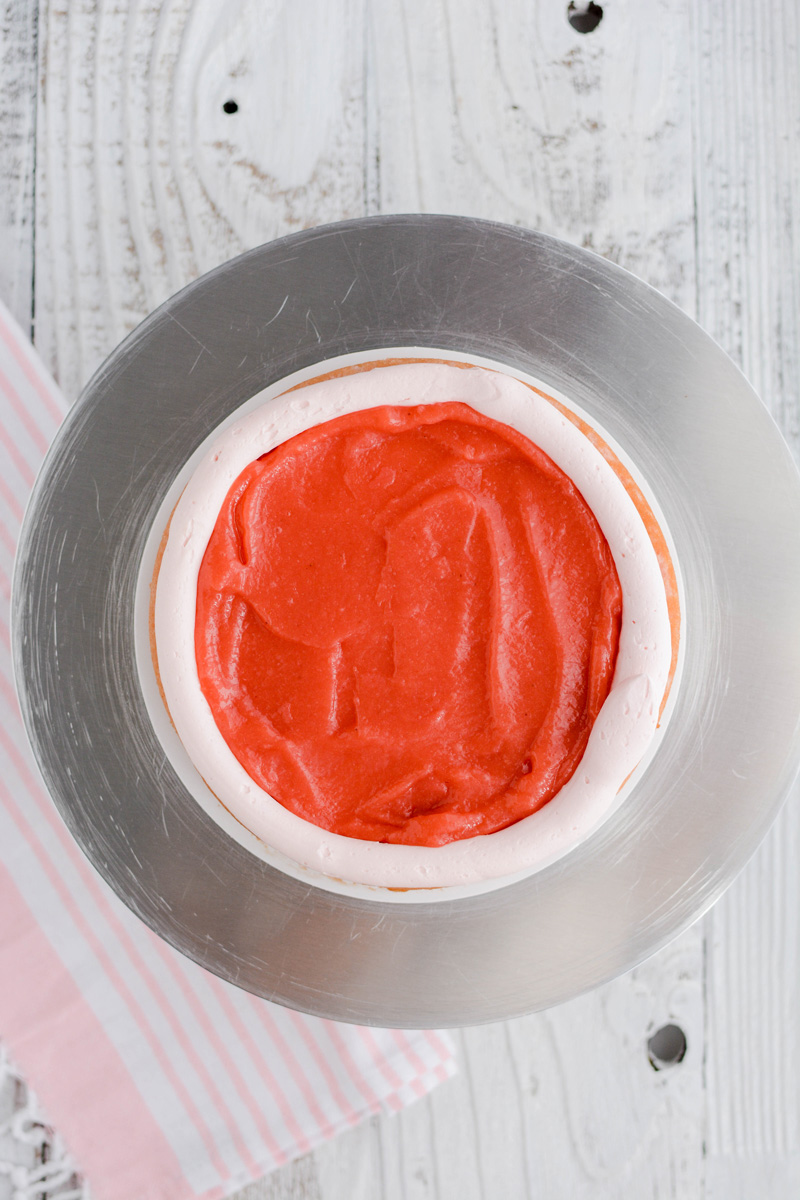
Use a coupler fitted with a piping bag to pipe a frosting dam around the edge of the cake to make sure no filling comes out of the sides. For the filling I measure about 1/2 cup and spread out evenly. You don't want to overfill your cake.
Piping Tips
- Color the frosting in advance for the best color. The longer the color sits in the frosting the deeper it gets.
- Be sure you have 2 Wilton #16 tips.
- Food tweezers are helpful when applying the white jimmies on to the piped strawberries.
- Make sure you clean your tweezers as needed.
- Have a few toothpicks on hand to help adjust your white jimmies if needed.
Cake Decorating Tools
- Nonslip mat for cake turntable
- Cake turntable
- 8-inch round cake board
- Piping bags
- Coupler
- Small offset spatula
- 8-inch round acrylic disc
- Parchment paper
- Cake scraper
- Americolor Leaf Green gel food color
- Americolor Red Red gel food color
- Strawberry shaped cookie cutter
- 2 Wilton piping tip #16
- Food tweezers
- White jimmies

Baking Schedule
- Day 1: Make strawberry filling and bake cake layers.
- Day2: Prepare frosting, assemble and serve.
Let's Connect
The Cake Chica is on the following social media platforms below. Click subscribe, like and follow! We would love to have you over!
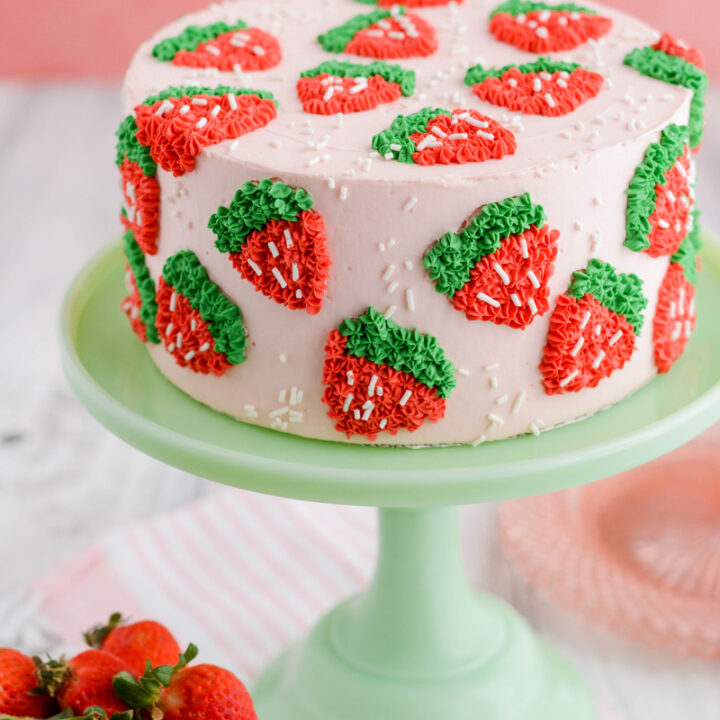
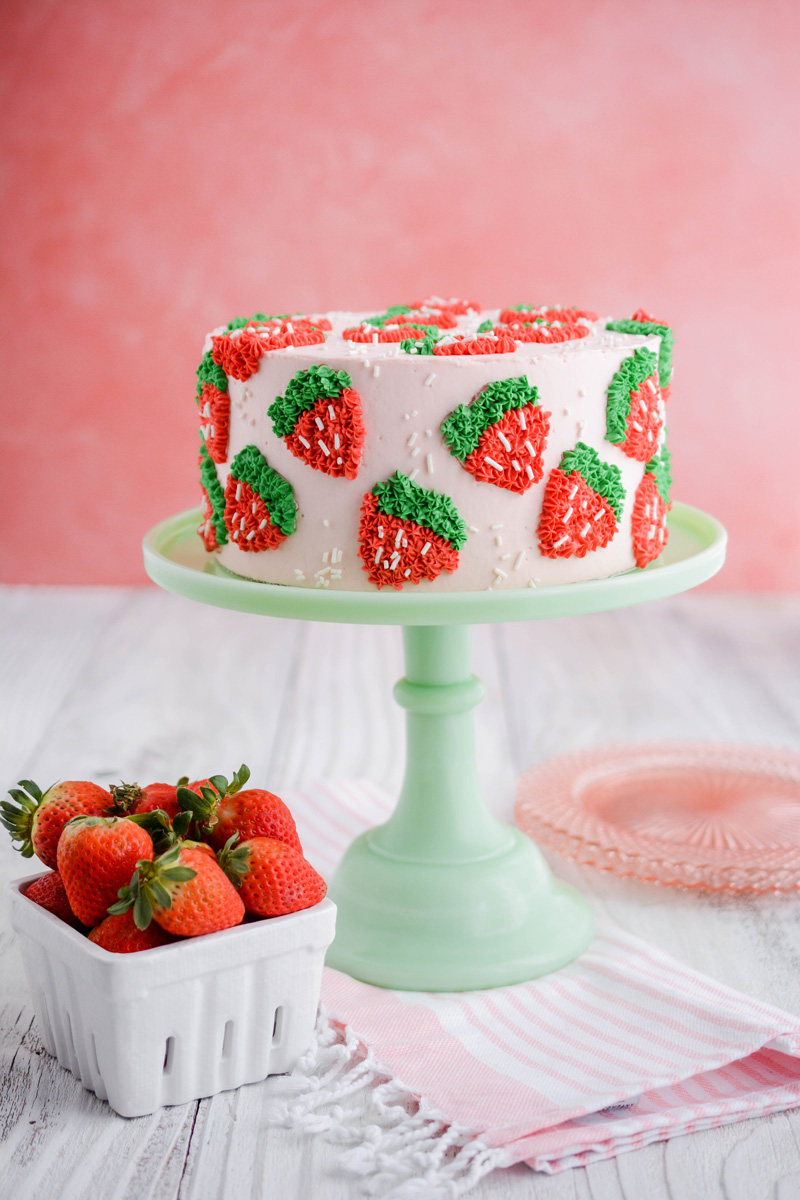
Strawberry Patch Layer Cake
Strawberry cake filled with strawberry filling, covered with sweet and fluffy strawberry frosting with piped frosting strawberries.
Ingredients
SPECIAL TOOLS
- 3 8-inch round cake pans
- Nonstick baking spray
- Sieve
- Stand mixer
- Nonslip mat for cake turntable
- Cake turntable
- 8-inch round cake board
- Piping bags
- Coupler
- Small offset spatula
- 8-inch round acrylic disc
- Parchment paper
- Cake scraper
- Americolor Leaf Green gel food color
- Americolor Red Red gel food color
- Strawberry shaped cookie cutter
- 2 Wilton piping tip #16
- Food tweezers
- White jimmies
STRAWBERRY CAKE
- 10 ounces frozen whole strawberries (2 cups)
- ¾ cup whole milk
- 6 large egg whites
- 2 teaspoons strawberry emulsion
- 2 ¼ cups (9 ounces) cake flour
- 1 ¾ cups (12 ¼ ounces) granulated sugar
- 4 teaspoons baking powder
- 1 teaspoon table salt
- 12 tablespoons unsalted butter, cut into 12 pieces and at room temperature
STRAWBERRY FILLING
- 12 ounces frozen strawberries, thawed
- ¼ (1.75 ounces) granulated sugar
- 3 tablespoons cornstarch, mixed with 3 tablespoons cold water
- Fresh lemon juice, to taste
BAKERY STYLE STRAWBERRY FROSTING
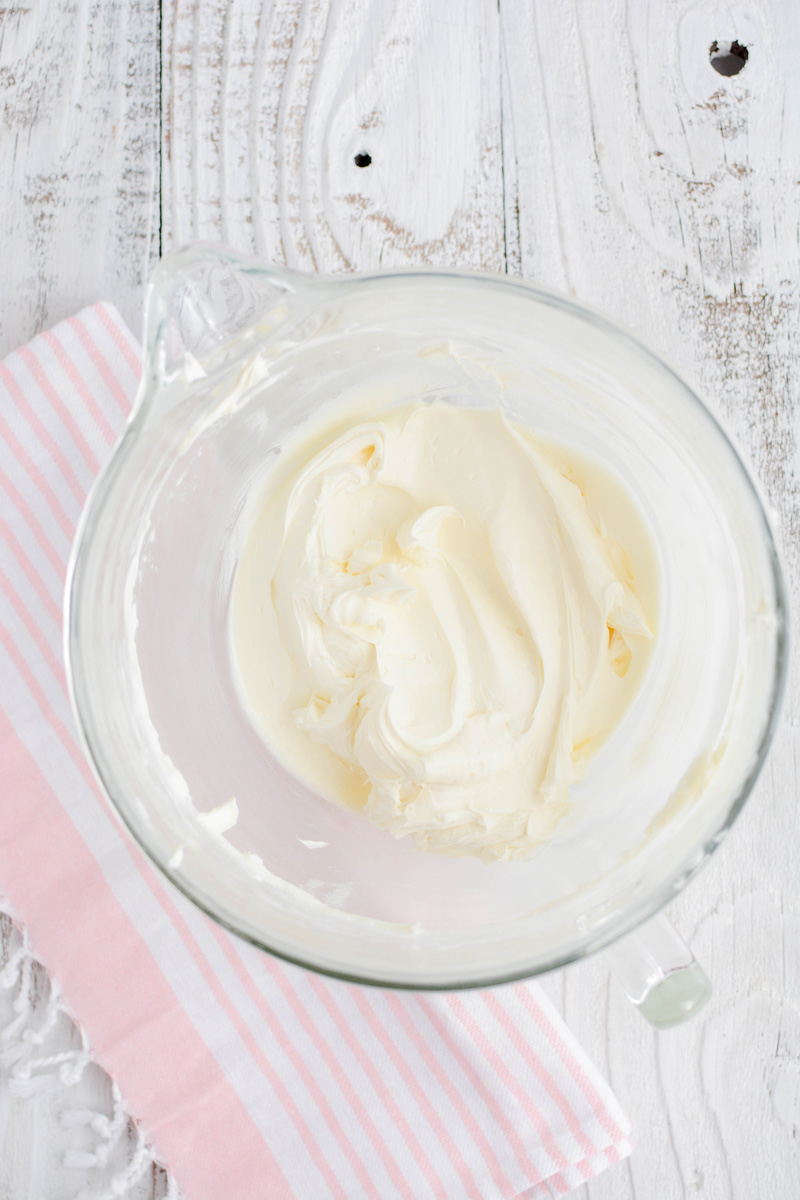
- 2 cups unsalted butter, at room temperature
- 1/2 cup shortening
- 1/4 teaspoon salt
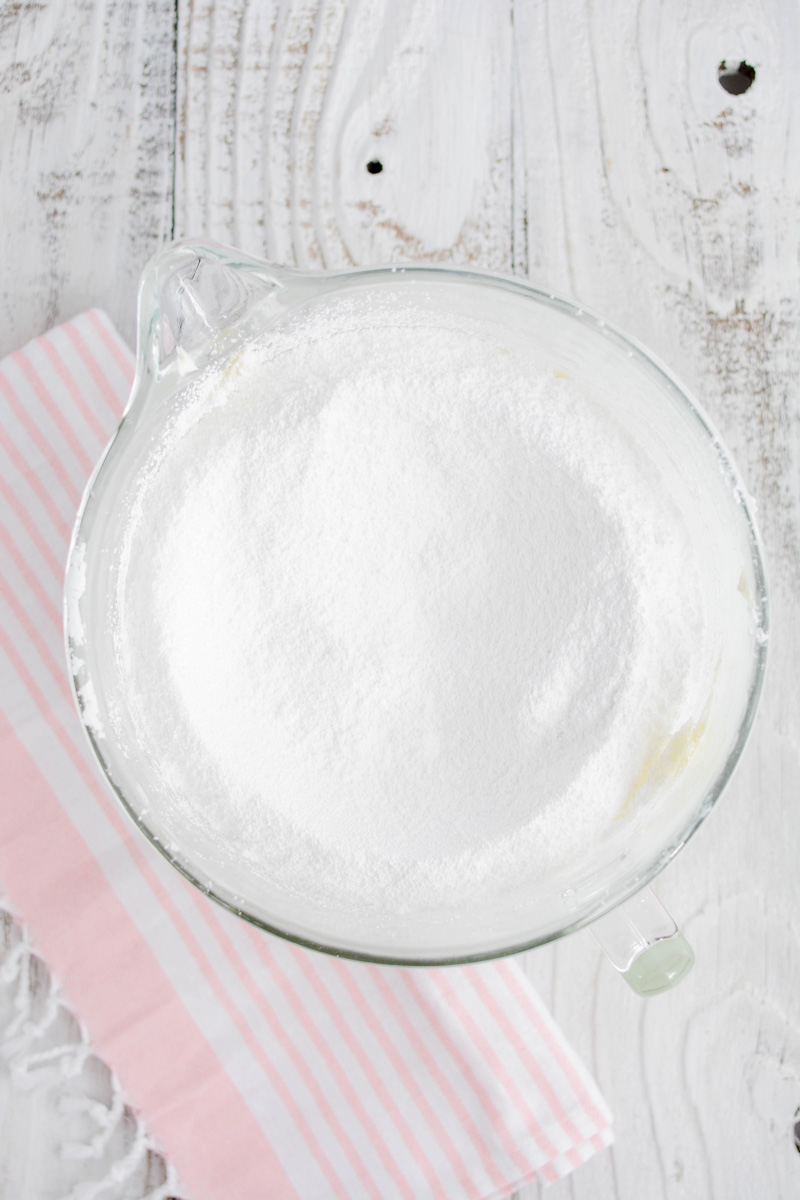
- 6 1/2 cups (26 ounces) powdered sugar
- 1 cup heavy cream
- 2 teaspoons Strawberry Baking Emulsion
Instructions
STRAWBERRY CAKE
- Adjust an oven rack to the middle position and heat oven to 350 degrees. Spray 3 8-inch round cake pans with nonstick baking spray and set aside.
- Microwave strawberries in a microwavable bowl, covered, until strawberries have softened and are juicy, about 5 minutes. Place strawberries in a fine mesh sieve set over a small saucepan and press with a rubber spatula to extract as much juice from the strawberries as possible. Discard strawberry solids. Over medium-high heat, bring the strained strawberry juice to a boil, stirring occasionally until the juice turns into a syrup and measures about ¼ cup, about 6 to 8 minutes. Remove from the heat and stir in the milk. Transfer milk mixture to a clean bowl and whisk in the egg whites and strawberry emulsion until combined.
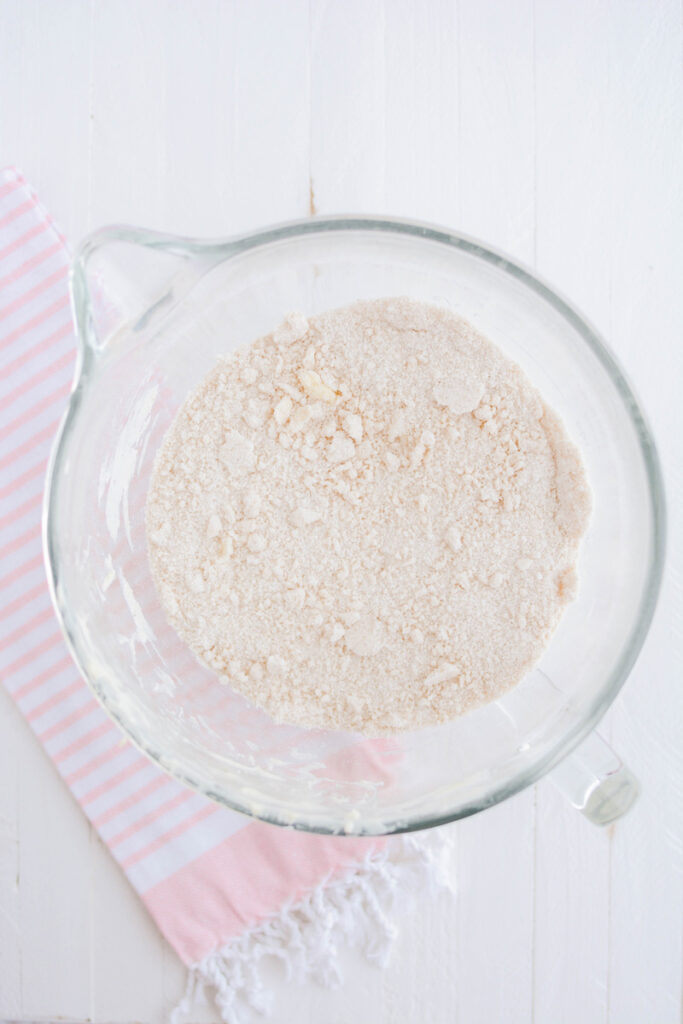
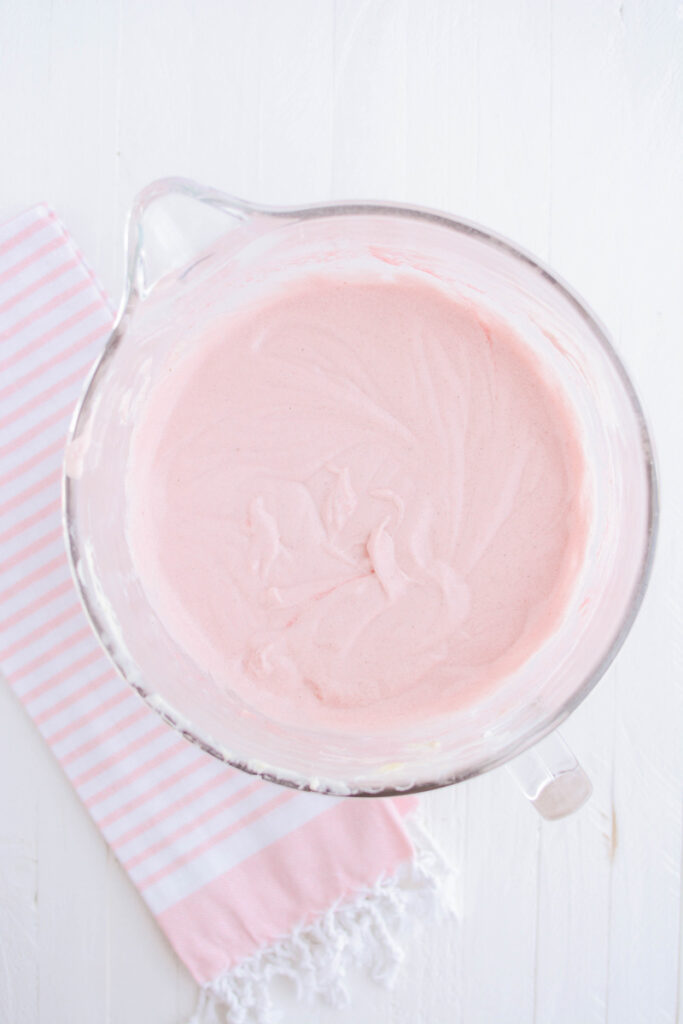
- In the bowl of a stand mixer with the paddle attachment attached, mix the flour, sugar, baking powder and salt on low speed until combined. Add butter one piece at a time and mix until pea-sized pieces remain, about 1 minute. Add half of the milk mixture and increase the speed to medium-high and beat until light and fluffy, about 1 minute. Reduce the mixer speed to low and add in the remaining milk mixture and beat until combined, about 30 seconds.
- Divide the batter between the prepared cake pans and smooth the tops out with a rubber spatula. Give the pans a few light taps on the counter to settle the batter and bake until a toothpick inserted in the center comes out with a few moist crumbs attached, about 20 to 25 minutes, rotating pans halfway through baking.
- Let cakes cool in their pans for 10 minutes on wire racks, and then invert on to racks to cool completely, about 2 hours.
STRAWBERRY FILLING
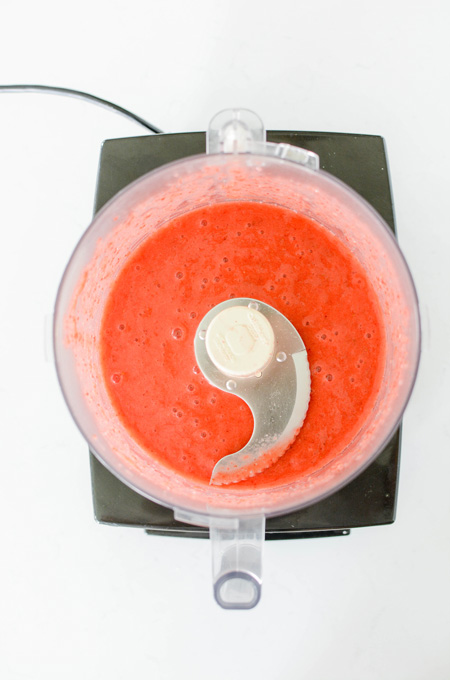
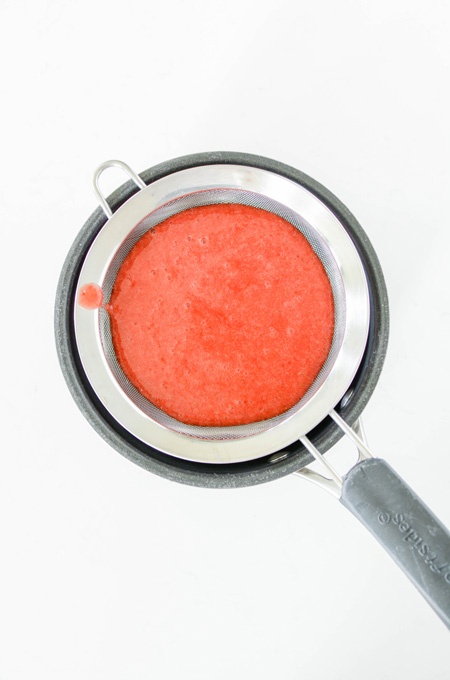
- Place thawed strawberries in a blender or food processor and puree until smooth. Over a bowl pour strawberry puree over a sieve to remove the solids. The puree will be thick. Use a spoon to stir and press the puree through the sieve.
- Place strawberry puree in a small saucepan over medium-low heat. Add sugar and cornstarch mixture and bring to a simmer, stirring constantly to keep lumps from forming. Once the puree thickens, remove from the heat. Cool for 5 minutes and then add fresh lemon juice. Chill for about 2-3 hours in the refrigerator until ready to use.
STRAWBERRY BAKERY-STYLE FROSTING
- In the bowl of a stand mixer with the paddle attachment attached, beat the butter, shortening and salt on medium speed until light and fluffy, about 8 minutes. Add the powdered sugar, heavy cream, and emulsion and slowly mix until combined, about 1 minute.
- Increase the mixer speed to medium-high and beat until light and fluffy, about 6 minutes.
ASSEMBLE
- Place a nonslip mat on top of a cake turntable and place a cake board on top. Center the first cake layer on top of the cake board, making sure there's even spacing from all around the edges. Fit a piping bag with a coupler and fill the bag with frosting. Pipe a frosting dam around the edge go the cake. Spread 1/2 cup strawberry filling over the top of the cake in an even layer with a small offset spatula. Place the second cake layer on top and gently press to adhere to the bottom cake layer. Pipe another frosting dam around the edge go the cake. Spread another 1/2 cup filling over the top of the cake in an even layer. Add the third and final cake layer (bottom side up) on top and gently press to adhere.
CRUMB COAT
- Apply a thin layer of frosting over the top and sides of the cake, creating a crumb coat. Chill the crumb coated cake in the refrigerator for 30 minutes.
DECORATE
- Apply a large dollop of frosting on top of the cake and spread out evenly. Line an 8-inch round acrylic disc with parchment paper with a bit of frosting. Line up the acrylic disc with the bottom cake board and gently press on to the top of the cake to adhere. Cover the sides of the cake with more frosting and gently press a cake scraper against the acrylic disc and bottom cake board and slowly rotate the cake turntable all the way around to create a smooth finish on the side of the cake. Chill the cake in the freezer for 15 minutes or the refrigerator for 30 minutes.
- Place about 1 cup frosting in a bowl and color with Leaf Green gel food color. Place about 1 1/2 cups frosting in another bowl and color with Red Red gel food color and set aside.
- Insert a small offset cake spatula under the acrylic disc, but over the parchment paper and slowly rotate the turntable until the disc releases. Peel off the parchment paper. Fill in any gaps with more frosting and smooth out.
- Gently press a strawberry shaped cookie cutter on to the surface of the frosting to create an outline. Cover the entire cake with strawberry shapes, leaving about 1 inch of space between each.
- Fit two piping bags with Wilton piping tips #16. Place red frosting in one bag and green in the other.
- Pipe the green frosting in the strawberry leaf areas, by using short bursts and squeezing the frosting out of the piping tip and releasing pressure before pulling the piping bag away.
- Pipe the red frosting for the strawberry areas, using short bursts and releasing pressure from the piping bag before pulling the bag away.
- Using food-only tweezers, apply white jimmies for the strawberry seeds on to each strawberry.
- Carefully transfer to a cake pedestal and serve.
Notes
Assembled cake can be stored in an airtight container in the refrigerator for up to 3 days. Bring to room temperature before serving
Cake layers can be made up to 3 days in advance.
Frosting is best made the day of assembly.
Nutrition Information:
Yield: 12 Serving Size: 1Amount Per Serving: Calories: 812Total Fat: 66gSaturated Fat: 36gTrans Fat: 0gUnsaturated Fat: 27gCholesterol: 170mgSodium: 542mgCarbohydrates: 49gFiber: 1gSugar: 23gProtein: 7g
*Nutrition information is an estimate and will vary.*


Megan says
Can you provide the ingredients for the strawberry filing? I see the instructions but not how much. Also it shows 2 teaspoons of vanilla extract but doesn't say when to add it.
Mary says
Thank you so much for catching that! I've updated the recipe with the amounts for the filling ingredients and updated the vanilla extract with strawberry emulsion. However if yo don't have strawberry emulsion you can substitute vanilla extract in its place. You'll have plenty of strawberry flavor from the juice from the strawberries.
Jamie says
I want to make this cake for a gender reveal. Can you make this cake in advance and freeze it?
Mary says
Yes you can freeze the cake. After you've decorate the cake freeze it for about 1 hour. Once the buttercream is set, you can then wrap the entire cake in plastic wrap, and then aluminum foil. The night before you plan to serve the cake, let the cake thaw it in the refrigerator. The morning of the gender reveal you can transfer the cake to the counter and unwrap.
Laura Ines Soto says
I Love Ice Cream Strawberry.