
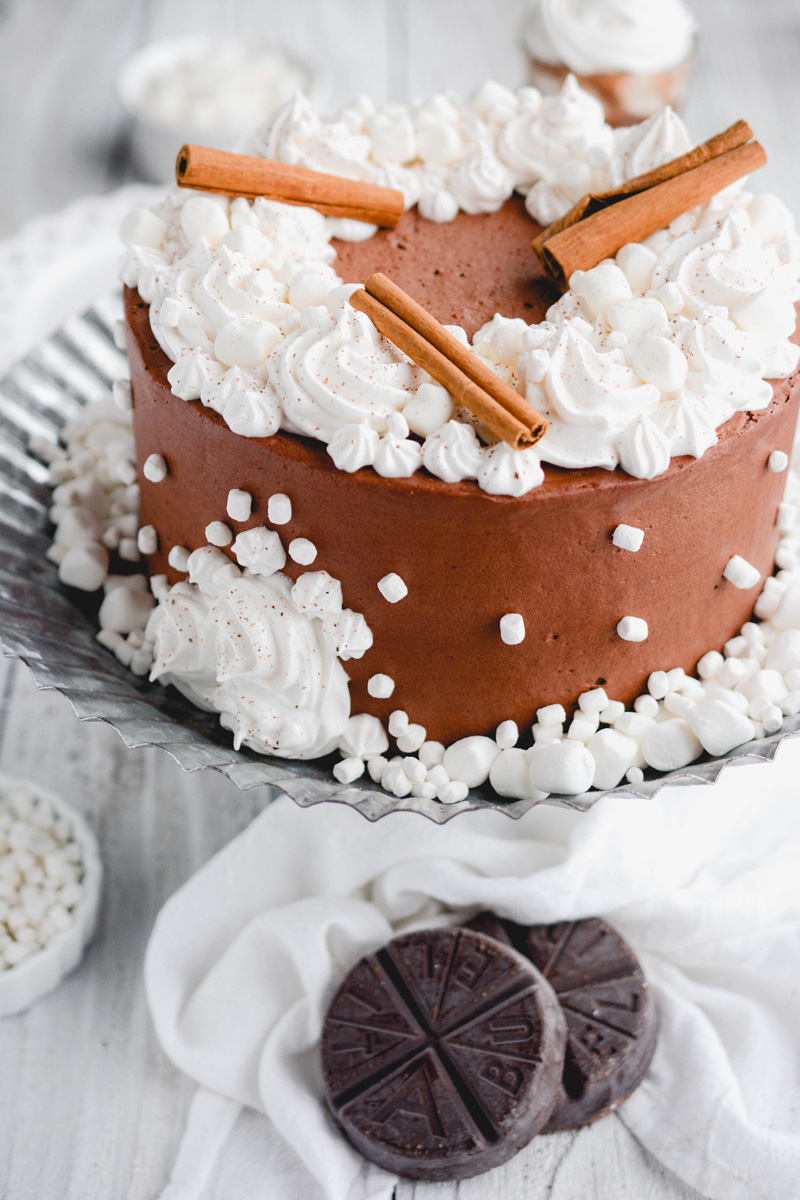
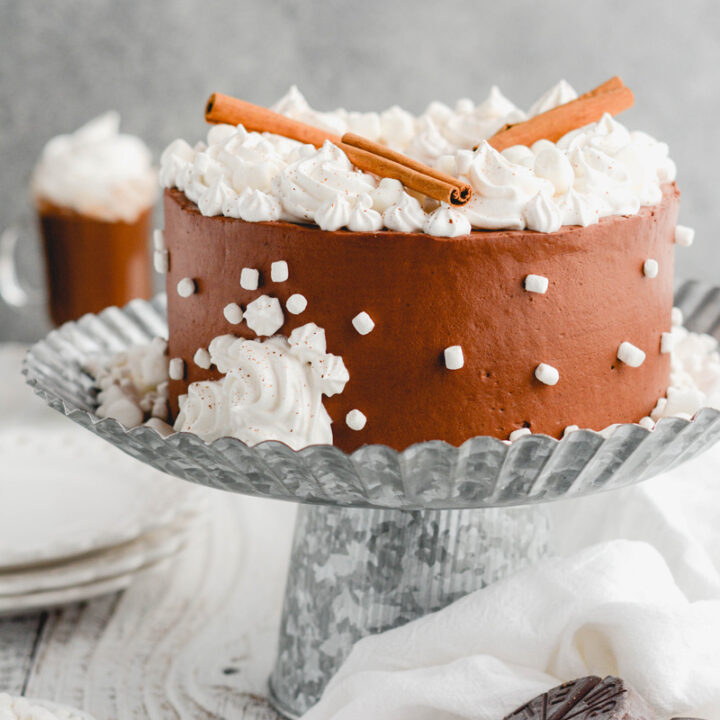
If you're looking for a rich and moist hot chocolate cake baked with a cinnamon twist, then this Mexican Hot Chocolate Cake is it!
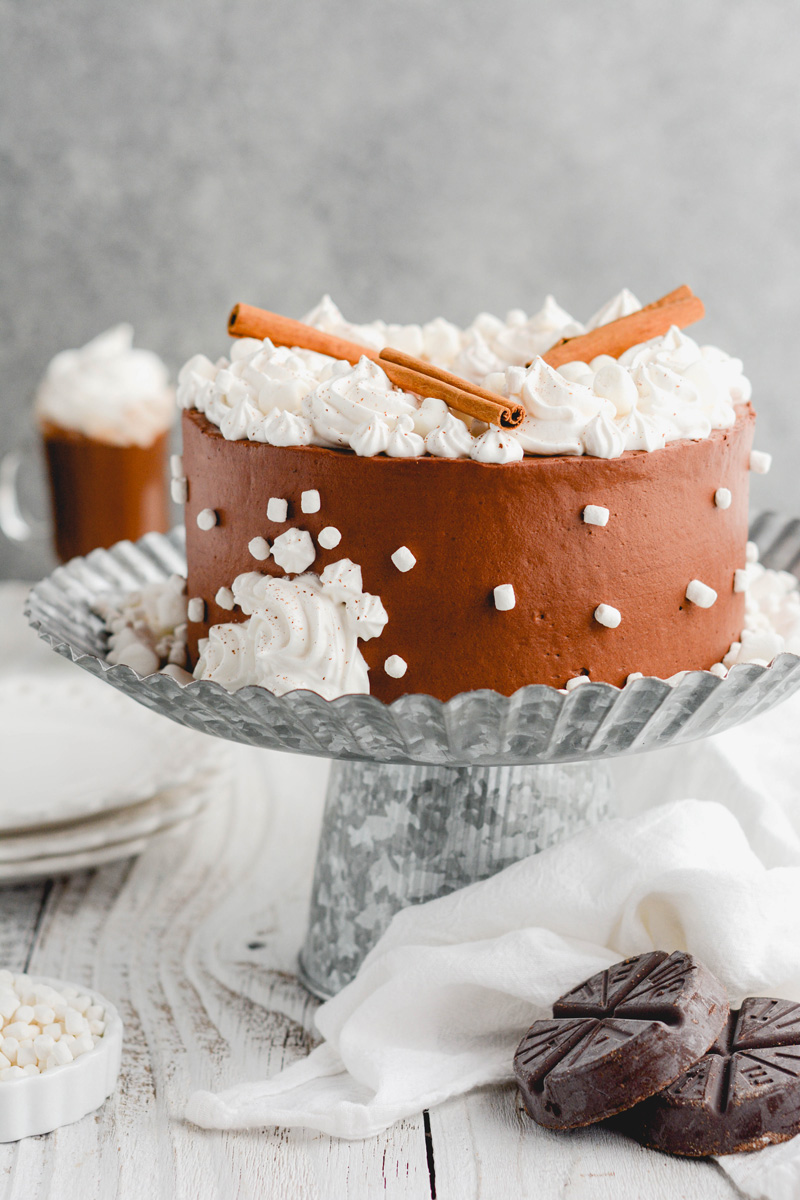
My Mexican Hot Chocolate Cake is a twist on my Hot Cocoa Cake. The chocolate cake layers are made with Abuelita Mexican Hot Chocolate tablets. Plus for a little extra cinnamon flavor I added a teaspoon of ground cinnamon to the dry ingredients.
Mexican Hot Chocolate Cake Ingredients
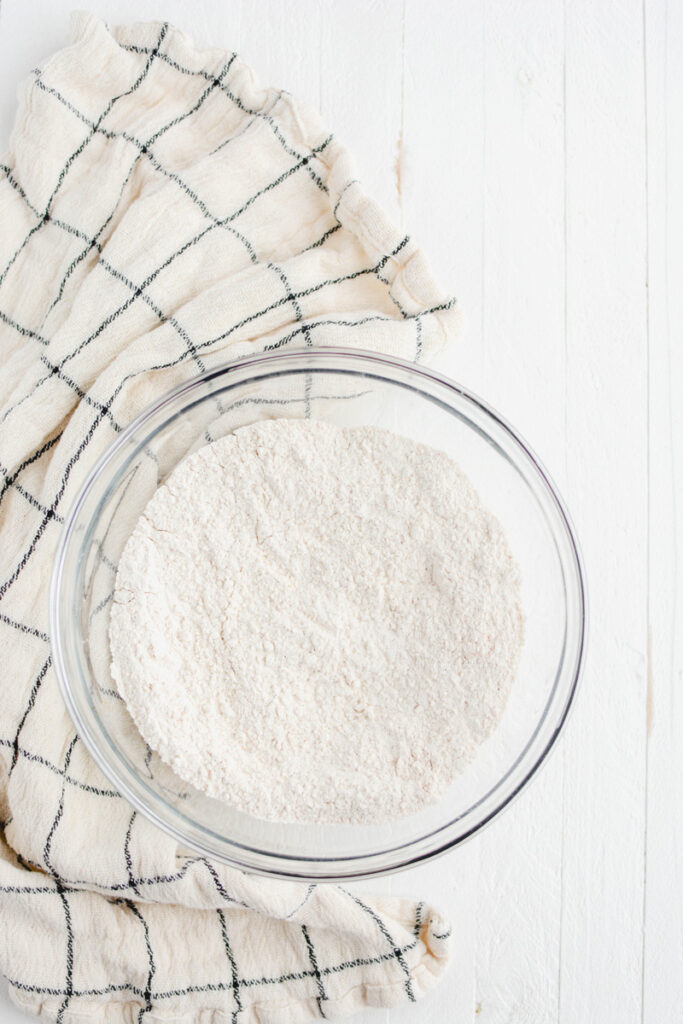
- All-purpose flour: is very versatile for baking and is great for things that require a little extra structure.
- Ground cinnamon: gives the chocolate cake a Mexican twist.
- Baking soda: is a leavener and works with acidic ingredients like sour cream to produce carbon dioxide.
- Baking powder: is a mixture of cornstarch and baking soda. Baking powder reacts twice, when it comes into contact with liquid and when it comes into contact with heat, creating bubbles in the batter that help give the cake its structure.
- Salt: helps bring out the flavor.
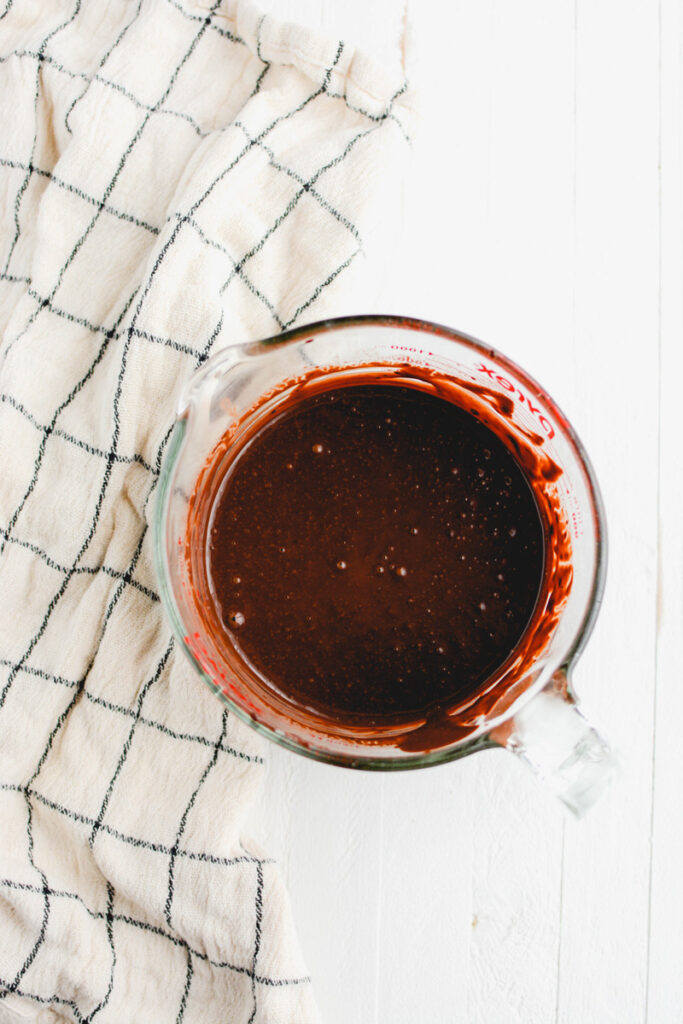
- Prepared boiling Mexican hot chocolate: is used in this recipe to melt the chocolate. To accurately measure boiling water, bring the water to a boil, then pour into a heatproof liquid measuring cup.
- Unsweetened chocolate: is the traditional choice for recipes that produce a bold chocolate flavor.
- Dutch-processed cocoa powder: is less acidic than natural cocoa powder and enhances browning.
- Instant espresso powder: intensifies the chocolate flavor.
- Unsalted butter: is a fat that is rich in flavor and helps determine the texture of the cake.
- Light brown sugar: helps bring out the chocolate flavor in the cake.
- Eggs: bind thicken and emulsifies. I always use large eggs for consistency sake.
- Sour cream: is an acidic ingredient that works with the baking soda to leaven the cake. Sour cream also helps produce a tender cake. Buttermilk and yogurt can be substituted for sour cream in most cakes.
- Vanilla extract: helps bring out the flavors of the cake.
Marshmallow Filling
Don't let cooking the egg whites intimidate you. My marshmallow filling is better than anything you can get in a jar. All you need is a candy thermometer and a little patience and planning. Here are a few tips for making your marshmallow filling process a success:
- Be sure your egg whites are free of egg yolk. If there's even the tiniest bit of yolk, your egg whites won't whip up.
- Use a candy thermometer.
- Read the recipe before starting and have all your tools and ingredients ready to go.
Hot Chocolate Frosting
You'll want to keep this whipped frosting recipe close at hand. It's super easy to make and even easier to work with. Literally just combine all the ingredients in your mixer bowl and whip for about 2 minutes on medium speed.
Cake Assembly
- Fit a piping bag with a round piping tip or coupler and place about 1 cup Cocoa Whipped Cream inside.
- Place 1 cake layer on an 8 inch round cake board and place on a cake turntable with a nonslip mat. Pipe a frosting dam around the edge of the first cake layer.
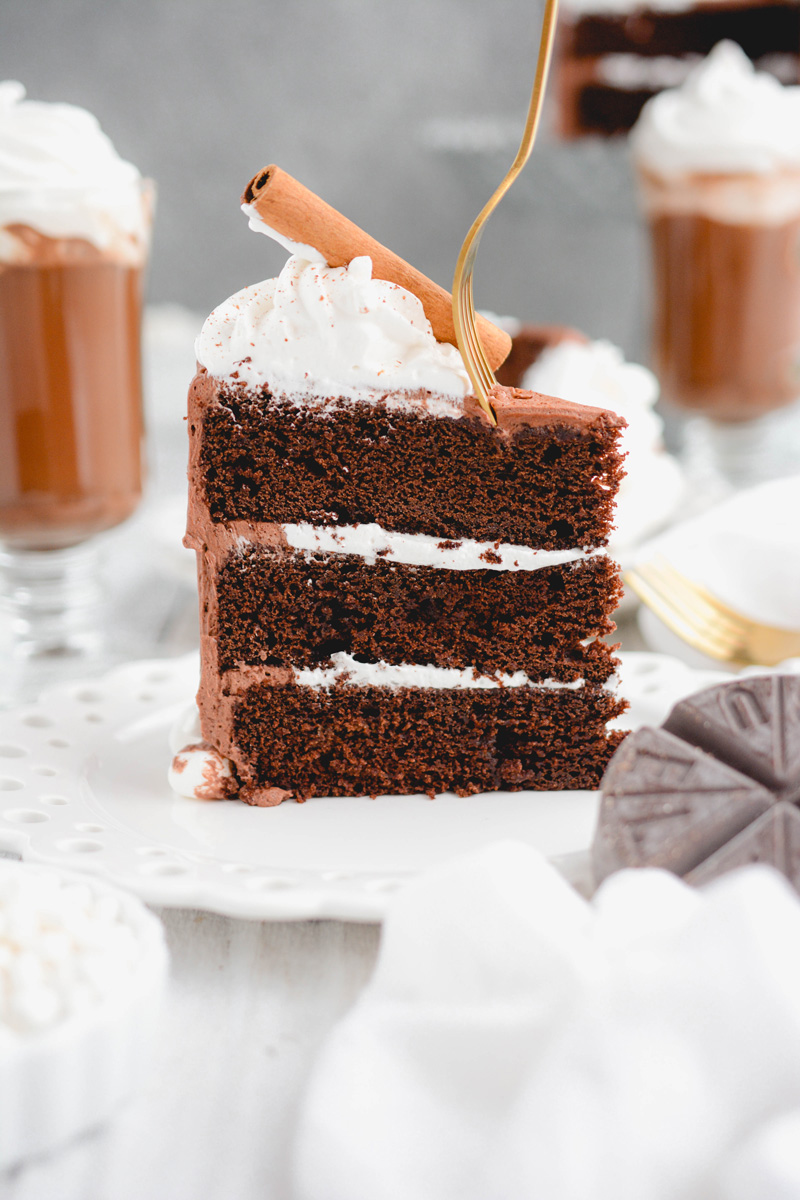
- Spread 1/2 cup of the marshmallow filling in an even layer over the top until the filling reaches the frosting dam.
- Top the second layer of cake and pipe a frosting dam around the edge and spread about 1/2 cup of the marshmallow filling in an even layer over the top, until it reaches the frosting dam. Place the third cake layer on top (bottom side up).

Mexican Hot Chocolate Cake Decorating Tools
- Piping bags
- Round piping tip or coupler
- 8-inch round cake board
- Cake turntable
- Nonslip mat for turntable
- 8-inch acrylic disc
- Parchment paper
- Cake scraper
- Wilton piping tips #1M, #32, #17
Baking Schedule for Mexican Hot Chocolate Cake
- Day 1: Bake chocolate cake layers.
- Day 2: Prepare marshmallow filling and hot cocoa frosting, assemble and serve.

Make Ahead Options
Cake layers can be baked up to 3 days in advance, wrapped in plastic wrap and stored in the refrigerator.
Marshmallow filling and hot cocoa frosting is best made the day the cake is prepared.

Cake Storage
Assembled cake can be stored in an airtight container for up to 2 days.
Marshmallow filling is best made the day of assembly.
Hot cocoa frosting is best made the day of assembly.
Let's Connect
The Cake Chica is on the social media platforms below. Be sure to like and follow for all the latest recipes and baking tips.

Suggested Recipes


Mexican Hot Chocolate Cake
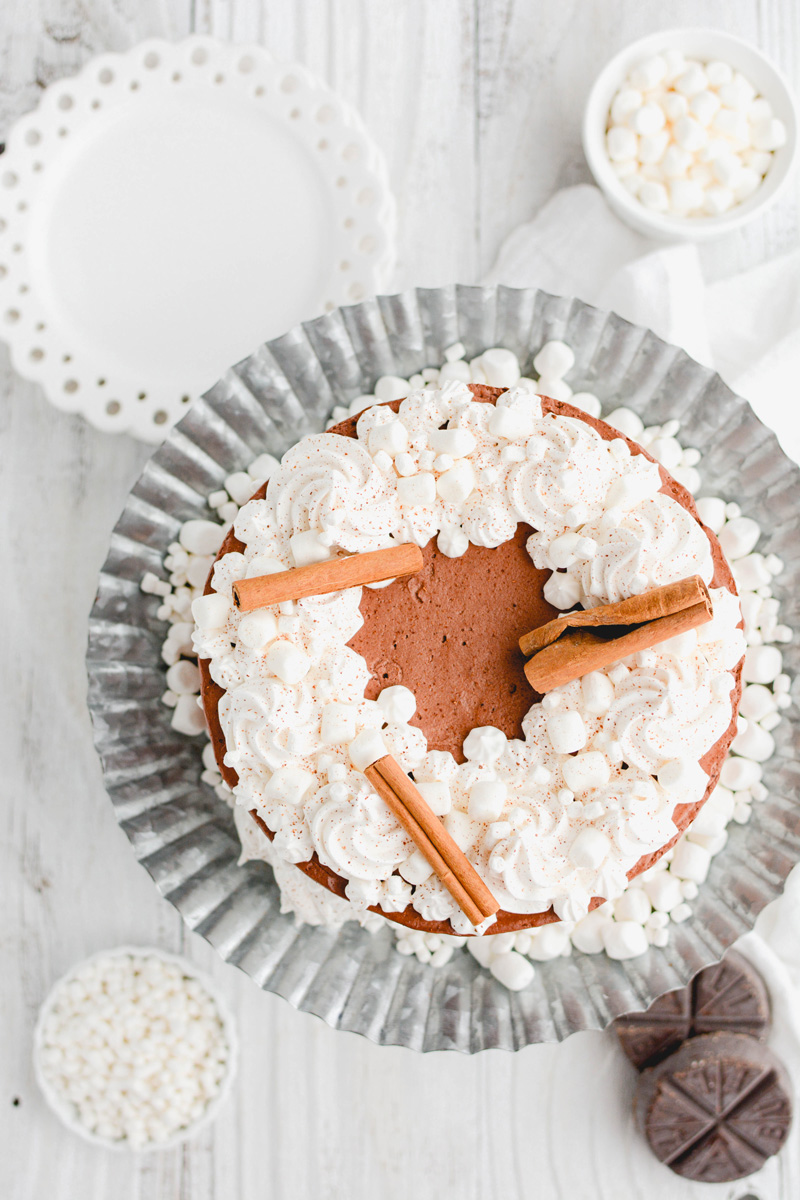
Three layers of Mexican hot chocolate cake layers flavored with ground cinnamon and filled with marshmallow filling and hot cocoa whipped frosting, garnished with more marshmallow filling.
Ingredients
SPECIAL TOOLS
- 3 8-inch round cake pans
- Nonstick baking spray
- Stand mixer
- Candy thermometer
- Piping bags
- Round piping tip or coupler
- 8-inch round cake board
- Cake turntable
- Nonslip mat for turntable
- 8-inch acrylic disc
- Parchment paper
- Cake scraper
- Wilton piping tips #1M, #32, #17
CAKE
- 1 ½ cups (7.5 ounces) all-purpose flour
- 1 teaspoon ground cinnamon
- 1 teaspoon baking soda
- ½ teaspoon baking powder
- ¼ teaspoon salt
- 1 ¼ cups prepared hot chocolate from 1 Abuelita tablet, boiling
- 4 ounces unsweetened chocolate, chopped
- ½ cup (1.5 ounces) Dutch processed cocoa powder
- 1 teaspoon instant espresso powder or instant coffee
- 10 tablespoons unsalted butter, softened
- 1 ½ cups (10.5 ounces)packed light brown sugar
- 3 large eggs, at room temperature
- ½ cup sour cream, at room temperature
- 1 teaspoon vanilla extract
MARSHMALLOW FILLING
- 1 cup (7 ounces) granulated sugar
- 1/4 teaspoon cream of tartar
- 1/2 cup water
- 4 egg whites
- Pinch fine sea salt
- 2 teaspoons vanilla extract
COCOA WHIPPED CREAM FROSTING
- 1 cup (7 ounces) granulated sugar
- 2/3 cup (2.4 ounces) Dutch processed cocoa powder, sifted
- 1/8 teaspoon salt
- 3 cups heavy whipping cream
- 4 teaspoons vanilla extract
GARNISH
- Use remaining marshmallow filling to decorate (optional)
- Marshmallows (optional)
- Cocoa powder (optional)
- Freshly grated cinnamon (optional)
Instructions
CAKE
- Adjust your oven rack to the center position and heat the oven to 350 degrees. Spray 3 8-inch round cake pans with non-stick baking spray and set aside.
- In a large bowl, add flour, baking soda, baking powder and salt and whisk to combine. In a medium bowl add the boiling hot chocolate, chocolate, cocoa powder and instant espresso powder, whisk until smooth.
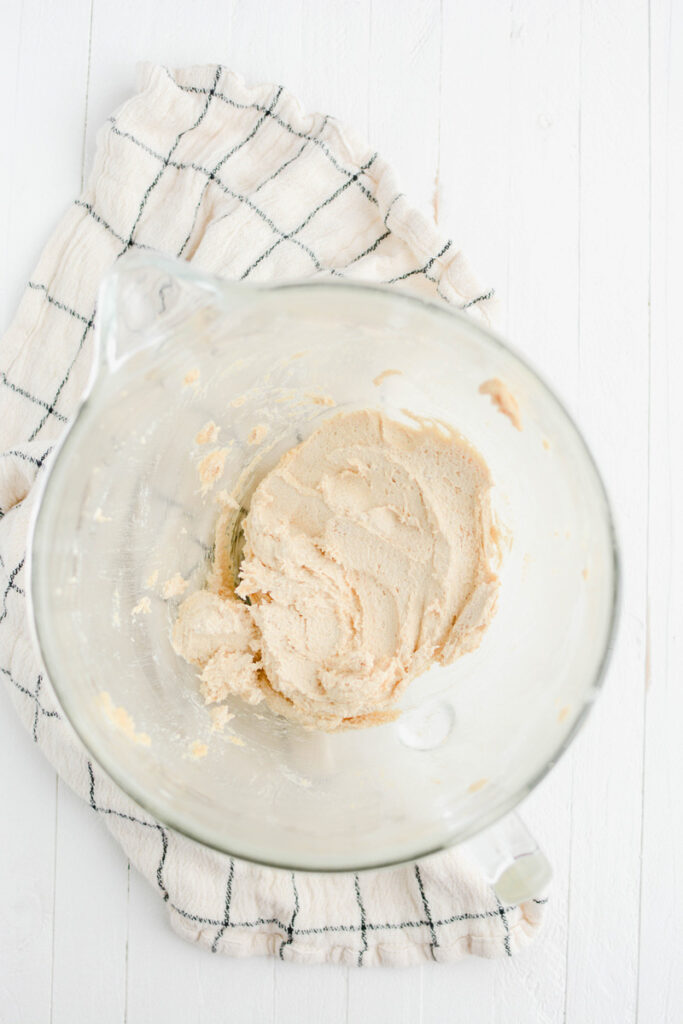
- Attach the paddle attachment to a stand mixer and beat the butter and sugar together on medium speed until light and fluffy, about 5 to 6 minutes. Add eggs one at a time beating after each addition until combined. Beat in sour cream and vanilla until incorporated.
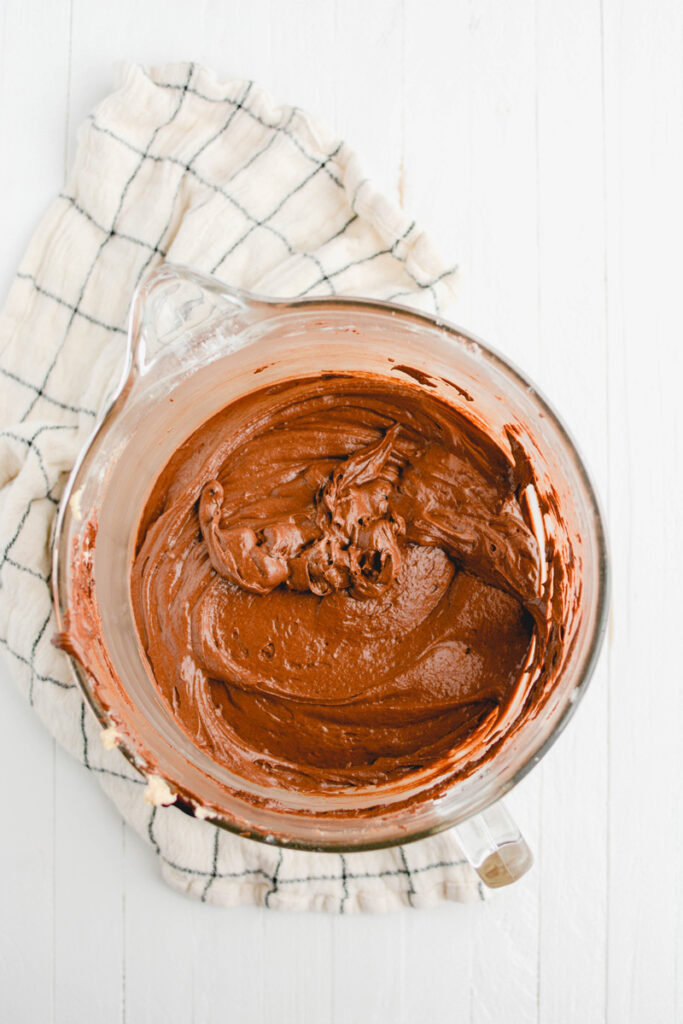
- With the mixer speed on low, add the flour mixture in 3 additions, alternating with the chocolate mixture in 2 additions. Mix until just combined. Do not over mix. Give the batter a few final stirs by hand.
- Divide the batter evenly among the prepared cake pans and smooth the tops with an offset cake spatula or rubber spatula. Gently tap the cake pans on the counter to release air bubbles. Bake for 15 to 20 minutes, or until a toothpick inserted into the center of the cake comes out with a few moist crumbs attached. Rotate cake pans halfway through baking.
- Let cakes cool in their pans on wire racks for 10 minutes. Invert cakes on to wire racks to cool completely, about 2 hours.
MARSHMALLOW FILLING
- Combine the sugar, cream of tartar and water in a small saucepan with a tight fitting lid. Heat saucepan over medium-high heat uncovered. Once the mixture comes to a boil, cover the saucepan and cook for 2 minutes. Uncover the saucepan and continue to boil until the sugar syrup reaches 242 degrees on a candy thermometer.
- While the syrup is heating up, combine the egg whites and salt in a clean bowl of a stand mixer fitted with the whisk attachment. Starting on low speed, beat egg whites, and gradually increase the speed to medium-high in the process. Beat until soft peaks form.
- If your sugar syrup is close to reaching 242 degrees, continue to whip the egg whites to firm peaks. If your sugar syrup is not close to reaching 242 degrees, let the egg whites wait at the soft peak stage before whipping them into firm peaks as the sugar syrup comes to temperature.
- Once the sugar syrup has come to 242 degrees and the egg whites are whipped to firm peaks, run the mixer on high speed and slowly pour the sugar syrup down the inside of the bowl and into the whipped egg whites. Continue whipping until the filling becomes thick and holds stiff peaks, about 5 minute. Add vanilla extract and whip to combine.
COCOA WHIPPED CREAM
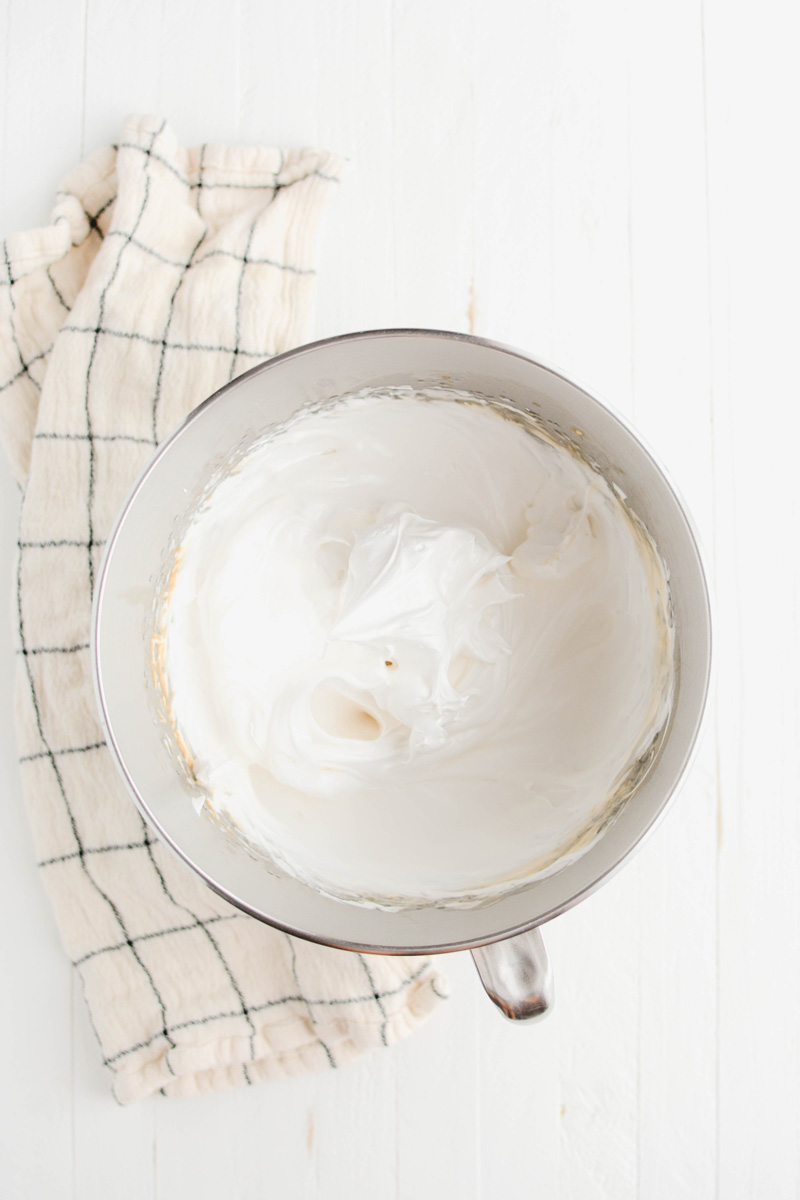
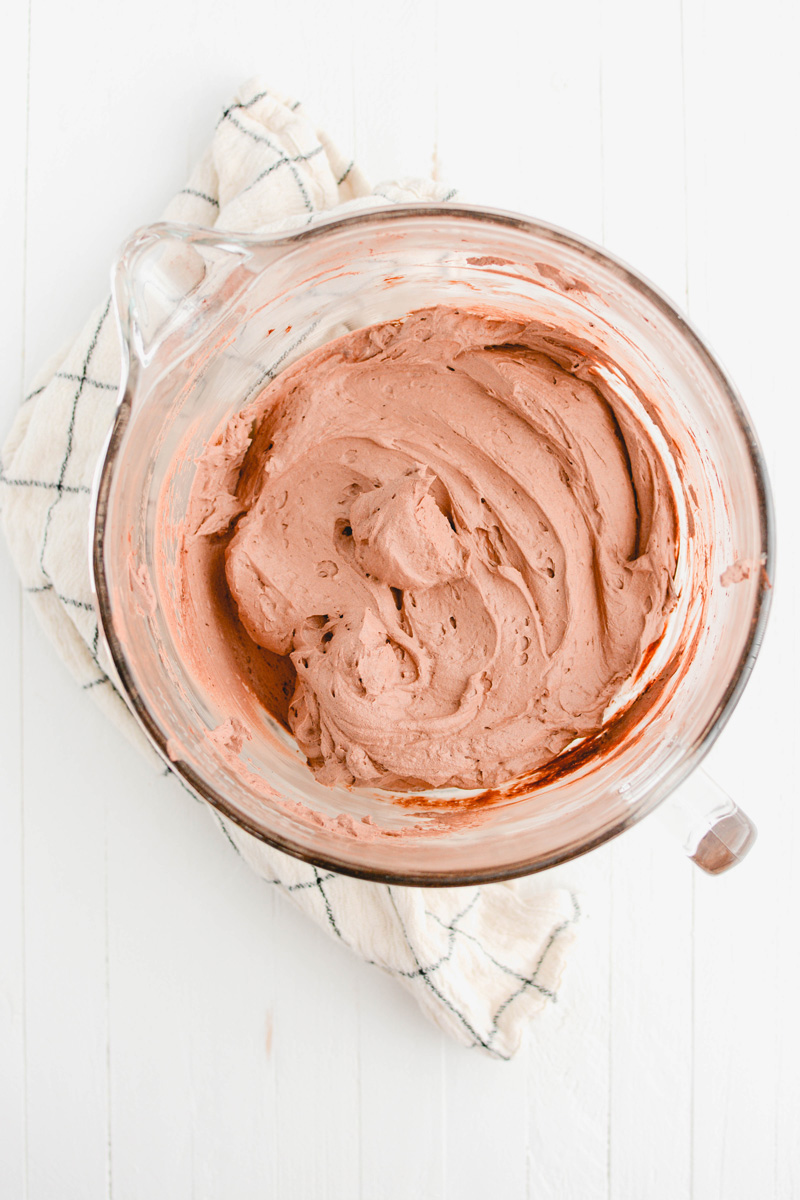
- (If you don’t have an extra mixer bowl, transfer the filling to another bowl and wash and dry your mixer bowl for the Cocoa Whipped Cream.) In the bowl of a stand mixer fitted with the whisk attachment, combine the sugar, cocoa powder, salt, cream and vanilla extract on medium-low speed until the sugar has dissolved, about 1 minute. Increase the mixer speed to medium-high and whip until the cream is thick and holds stiff peaks, about 2 minutes.
ASSEMBLE
- Fit a piping bag with a round piping tip or coupler and place about 1 cup Cocoa Whipped Cream inside. Place 1 cake layer on an 8-round cake board and place on a cake turntable with a nonslip mat. Pipe a frosting dam around the edge of the first cake layer.
- Spread 1/2 cup of the marshmallow filling in an even layer over the top until the filling reaches the frosting dam.
- Top the second layer of cake and pipe a frosting dam around the edge and spread about 1/2 cup of the marshmallow filling in an even layer over the top, until it reaches the frosting dam. Place the third cake layer on top (bottom side up).
CRUMB COAT
- Spread a light coating of frosting over the top and the sides of the cake creating a crumb coat, and freeze the cake for 15 minutes or refrigerate for 30 minutes.
FROSTING THE CAKE
- Line an 8-inch acrylic disc with parchment paper. Apply a large dollop of frosting on the top of the cake and spread out evenly until it reaches the edge of the cake. You should have excess frosting hanging off the edges.
- Place the lined acrylic disc on top of the cake (parchment paper side down), being sure it lines up with the bottom cake board.
- Apply more frosting to the sides of the cake, making sure it covers the bottom cake board all around. Once the cake has been fully covered in frosting, use a heated metal cake scraper and gently press it against the acrylic disc and bottom cake board and rotate the cake turntable to smooth. Apply more frosting to any gaps in the frosting and rotate the turntable until the sides are completely smooth.
- Place the cake in the freezer for 15 minutes, or the refrigerator for 20 to 30 minutes before removing the acrylic disc.
- Using a small offset cake spatula, insert the spatula under the acrylic disc and gently rotate the turntable until the disc releases. Peel off the parchment paper. Smooth out the top of the cake with the cake spatula until smooth.
- Fit a piping bags with Wilton piping tips #1M, #32 ,#17 and fill each piping bag with the remaining marshmallow filling. Use the 1M tip first and pipe rosettes over the the top edge. Use the remaining 2 piping tips to fill in the decorative edges.
- Grate fresh cinnamon over the top and garnish with cinnamon sticks and serve.
Notes
Assembled cake can be stored in an airtight container for up to 2 days.
Marshmallow filling is best made the day of assembly.
Hot cocoa frosting is best made the day of assembly.
Nutrition Information:
Yield: 12 Serving Size: 1Amount Per Serving: Calories: 623Total Fat: 46gSaturated Fat: 25gTrans Fat: 1gUnsaturated Fat: 17gCholesterol: 171mgSodium: 376mgCarbohydrates: 44gFiber: 3gSugar: 23gProtein: 9g
*Nutrition information is an estimate and will vary.*


Leave a Reply