
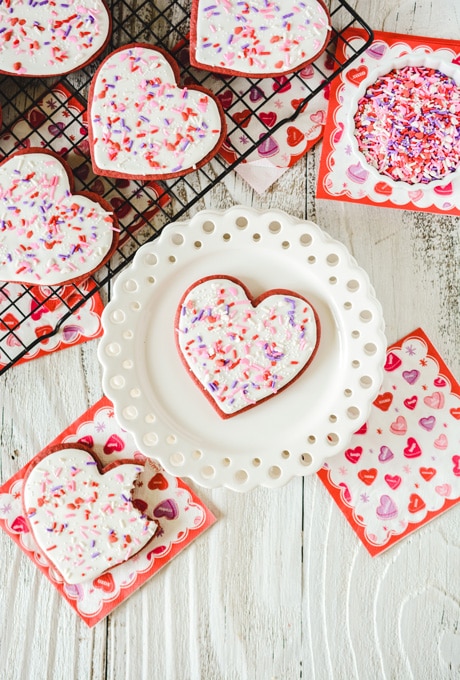
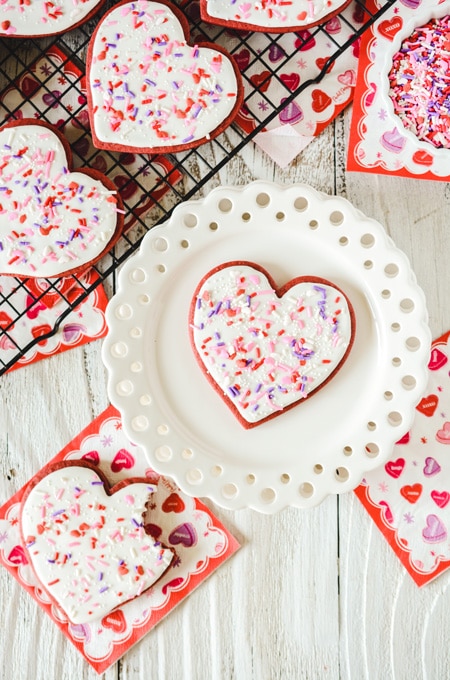
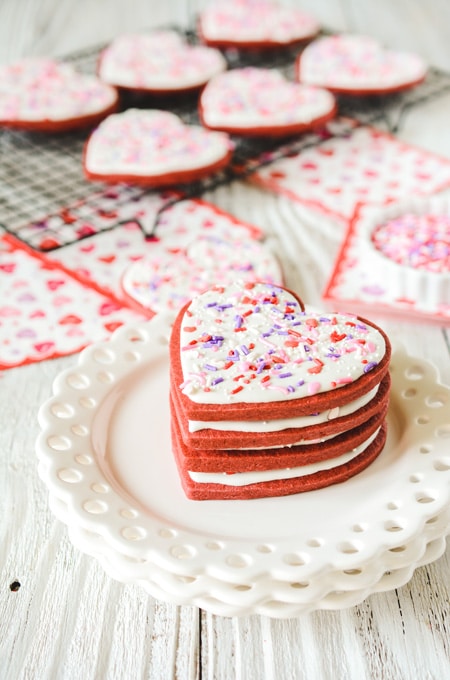
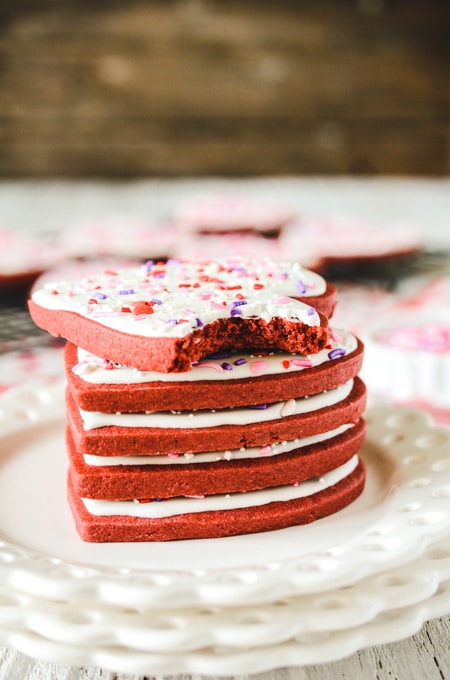
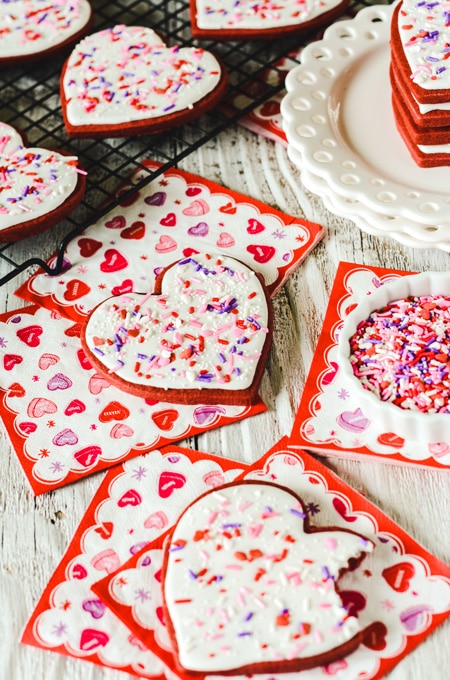
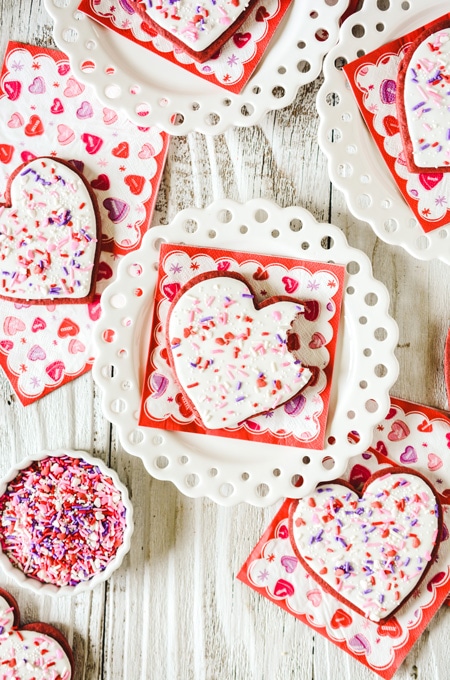
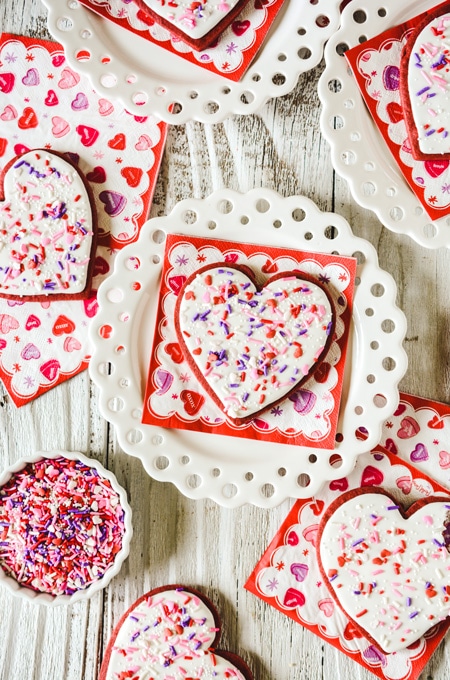
If you're looking for a sugar cookie that is festive for Valentine's Day that's soft in texture and keeps its shape while baking, then look no further! These Red Velvet Sugar Cookies are perfect for the festive holidays (Valentine's Day, July 4th, Christmas).
I've kept the decorating simple by using royal icing and Valentine sprinkles. But you could go all out with these and decorate to your HEART'S desire!
How To Get The Red In The Red Velvet Sugar Cookies
This recipe uses something called Red Velvet Emulsion. I fell in love with this stuff back when I made my Valentine's Day Red Velvet Cake! The emulsion turns the cookie dough a deep red color without adding loads of red food coloring. Plus, it adds a unique (and addicting) flavor to the cookies that make these cookies taste like they came from a professional bakery.
If you don't have Red Velvet Emulsion you can substitute with 2 teaspoons vanilla extract, mixed with 1 teaspoon Americolor Super Red gel paste and 2 teaspoons water.
Cut Out Sugar Cookie Tips
- Try not to use more flour when rolling out the cookie dough. Excess flour can dry out the dough and make the cookies tough. I use parchment paper to roll out the cookie dough to eliminate the need for additional flour when rolling out.
- For thicker cookies, roll the dough out to 1/4-inch thickness using sizing dowels or a rolling pin with the 1/4-inch sizing rings on. For thinner cookies, roll the dough out to 1/8-inch thickness, using the sizing dowels or rolling pin.
- Do your best to cut out as many cookies as you can during the first roll out. The more you roll the dough the tougher the cookies will be. Roll the dough no more than twice for best results!
- I love the "triple-chill" method I read about from The Sweetapolita Bakebook! No matter what sugar cookie dough recipe I use I always apply the "triple-chill" method now. It helps keep the shape of the cookies.
- Set out a small plate with a little flour in it to dip your cookie cutter into incase it sticks to the dough while your cutting out the cookies.
10 Second Royal Icing
Here is another method I learned from reading The Sweetapolita Bakebook. "10 Second Icing" is when you drag a knife through the icing and the icing comes back together in 10 seconds! The consistency is perfect for icing sugar cookies
Icing Decorating Tips
- For a defined outline of icing on the cookie, pipe the icing around the edges and let it dry before filling in the remaining cookie surface.
- For a smooth finish (this is the option I choose), outline the edges of the cookie and fill in immediately. Gently tap the cookie on the counter to help the icing spread out.
- Have toothpicks or a wooden skewer on hand to coax the icing over the cookies and to smooth out any imperfections.
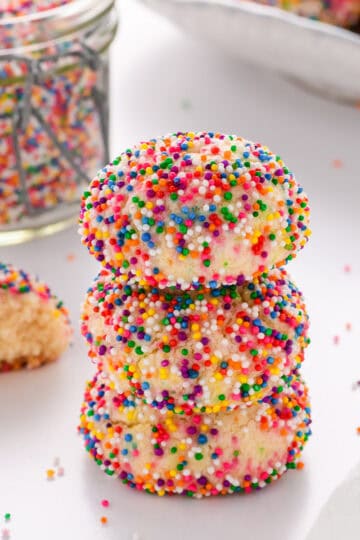
- If you plan on using sprinkles to decorate you'll want to do that as soon as you have iced your cookie before the icing dries.
- It helps to keep things clean if you sprinkle the cookies in a rimmed baking sheet. This will help keep the sprinkles that don't end up on the cookie all together and not all over your counters and floors.
- Always have some paper towels handy. You'll need to clean off your toothpick/skewer as you decorate.
- Since royal icing dries fairly quickly, be sure to keep your piping tip clean. It helps to have multiple piping tips on hand in case one gets clogged. Just switch it out and continue decorating.

Plan It Out
- Day 1: Bake the cookies
- Day 2: Prepare Royal Icing and decorate cookies.
Cookie Storage
The cookies will keep in an airtight container at room temperature for 1 week, or in the freezer for up to 2 months.
Lets Connect
The Cake Chica is on Facebook sharing sneak peeks of recipes to come, Instagram for your food porn desires and Pinterest for your board pinning needs!
Adapted from The Sweetapolita Bakebook by Rosie Alyea

Red Velvet Sugar Cookies Recipe
Soft Red Velvet Sugar Cookies topped with royal icing and festive sprinkles.
Ingredients
SPECIAL TOOLS
- Stand mixer
- Adjustable rolling pin or sizing dowels
- 2 half sized baking sheets, or 1 full sized baking sheet
- Parchment paper or silicone mat(s)
- 4-inch heart cookie cutter
- Toothpicks or wooden skewers
- Wilton piping tips #2 or #3
- Piping bag
- Valentine sprinkles
COOKIES
- 4 ½ cups (18 ounces) cake flour
- 1 tablespoon plus 1 teaspoon Dutch processed cocoa powder
- ½ teaspoon baking powder
- ½ teaspoon salt
- 1 cup (16 tablespoons) unsalted butter, at room temperature
- 1 ¼ cup (9 ounces) superfine sugar
- 2 teaspoons Red Velvet Emulsion
- 1 large egg, lightly beaten
- 2 tablespoons buttermilk
ROYAL ICING
- 8 cups (32 ounces) powdered sugar
- ½ cup meringue powder
- 2/3 cup water, plus more for thinning
- 2 teaspoon fresh lemon juice
- 1 teaspoon almond extract
Instructions
COOKIES
- In a large bowl, whisk together the flour, cocoa powder, baking powder and salt.
- In the bowl of a stand mixer, with the paddle attachment attached, beat the butter and sugar together on medium speed until it becomes pale in color and is the
consistency of paste, about 2 minutes. You don’t want the butter to be fluffy
or the cookies will spread during baking. Add Red Velvet Emulsion or vanilla
extract mixture and mix to combine. Add the egg and buttermilk and mix until
incorporated, about 1 minute. With the mixer speed on the lowest speed,
gradually add the flour mixture, beating until just combined. Wrap the ball of
dough in plastic wrap and press out into a disc and refrigerate for 1 hour. - Place a large piece of parchment paper on your work surface and unwrap the cookie dough. Place another large sheet of parchment paper on top and with a rolling pin; roll out dough to about ¼ inch thickness. Remove the top layer of
parchment paper and slide the bottom parchment paper with dough onto a large
baking sheet or board and freeze the dough for 15 minutes. - Adjust an oven rack to the center position and heat oven to 350 degrees. Line 2 baking sheets or a full sized baking sheet with parchment paper or silicone mat.
Remove the dough from the freezer and using a 4-inch heart shaped cookie
cutter, cut out heart shaped cookies. You can set out a small shallow plate
with a little flour to dip your cookie cutter in to keep the cutter from sticking. Place the cookie dough hearts on the prepared baking sheets about 1 ½ inches apart from each other. Freeze for 15 minutes. - Bake the cookies one sheet at a time until the cookies have crisp edges, about 12 to 15 minutes. Let cookies cool on the baking sheet(s) for 10 minutes. Then carefully transfer the cookies to wire racks to cool completely.
ICING
- In a clean stainless steel bowl of a stand mixer, with the paddle attachment attached, add the powdered sugar, meringue powder, 2/3 cup water, lemon juice, and almond extract in the bowl and mix on low speed until combined. Add water to the icing a few drops at a time until you get “10 second icing”. Take the tip of a knife and run it through the icing. The icing should flow back together and disappear in 10 seconds, no more and no less. This is the perfect consistency to both outline your cookies and fill your cookies.
DECORATE
- Fit a piping bag with a piping tip, such as Wilton #2 or #3 and fill the bag with icing for outlining. Pipe a line of icing around the edges of each cookie. Keep a few toothpicks on hand to adjust the icing if needed.
- It’s up to you if you would like to outline the cookies and let the outlines dry before filling them. If you go with this option your outlines will have a more
pronounced outline, if that’s not what you want, fill the cookies right away
for a more seamless look. - Fill the cookies by piping icing back and forth in lines until the cookie is covered. The icing will begin to spread on its own. You can use a toothpick to help guide the icing and pop any air bubbles that appear. Sprinkle Valentine sprinkles on top before the icing sets. Repeat this process with all cookies.
Notes
Store cookies in an airtight container at room temperature for up to 1 week, or in the freezer for up to 2 months.
Nutrition Information:
Yield: 12 Serving Size: 1Amount Per Serving: Calories: 241Total Fat: 3gSaturated Fat: 1gTrans Fat: 0gUnsaturated Fat: 1gCholesterol: 18mgSodium: 141mgCarbohydrates: 48gFiber: 1gSugar: 11gProtein: 6g
*Nutrition information is an estimate and will vary.*


Leave a Reply