
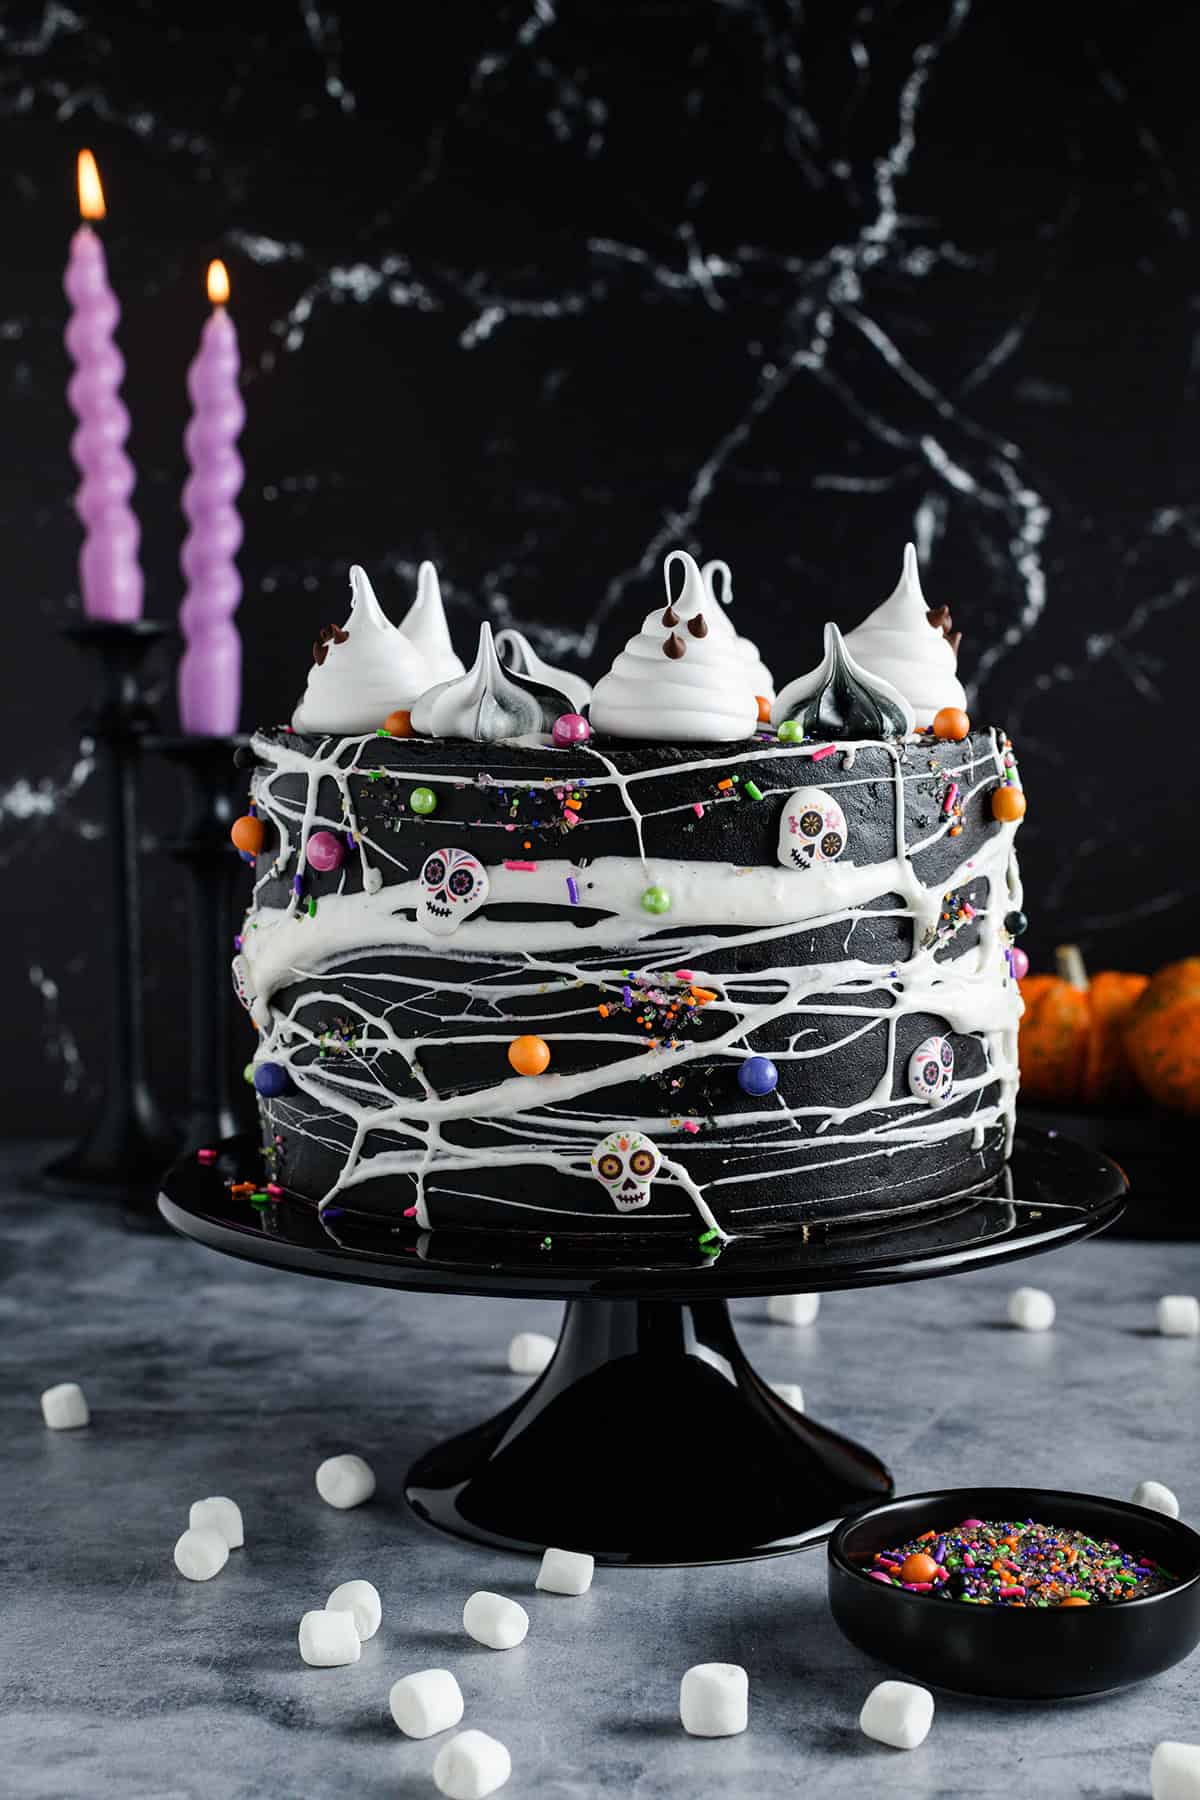
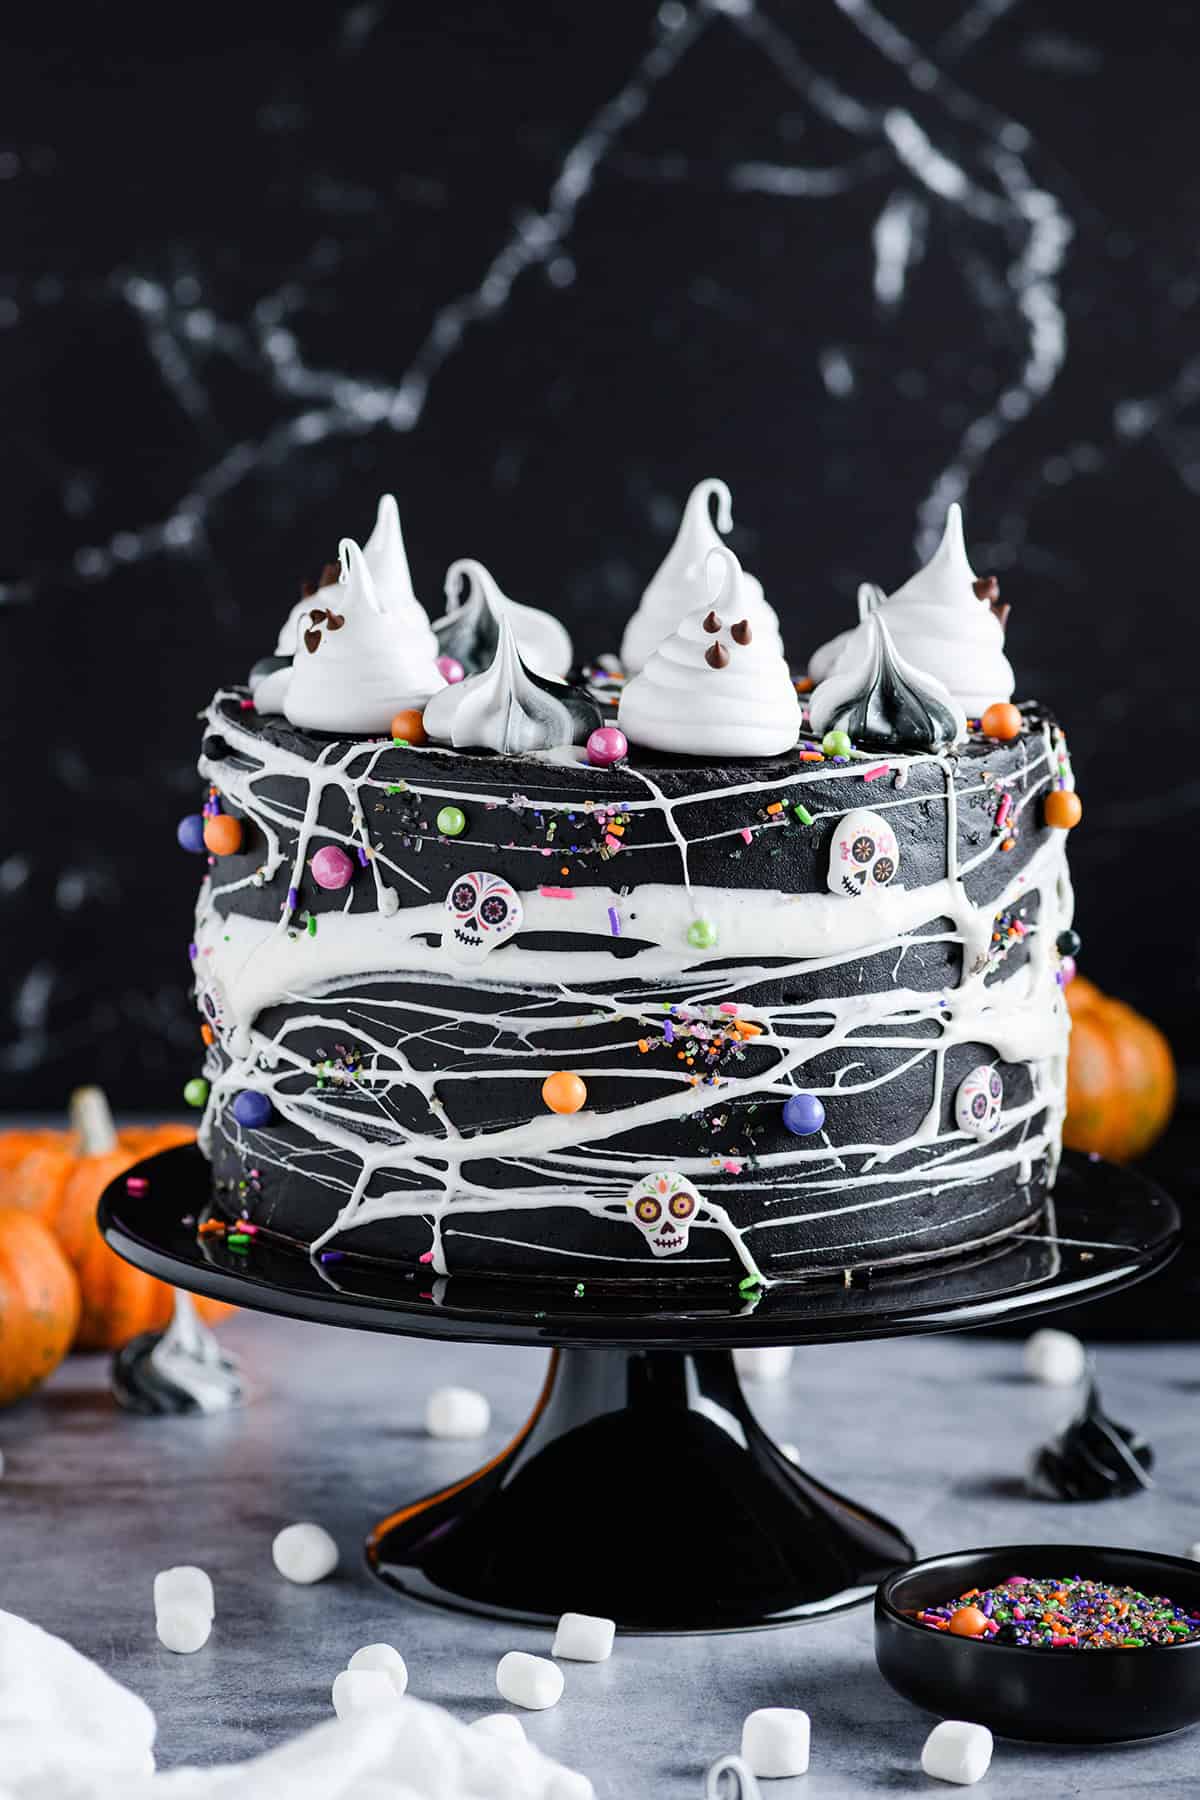
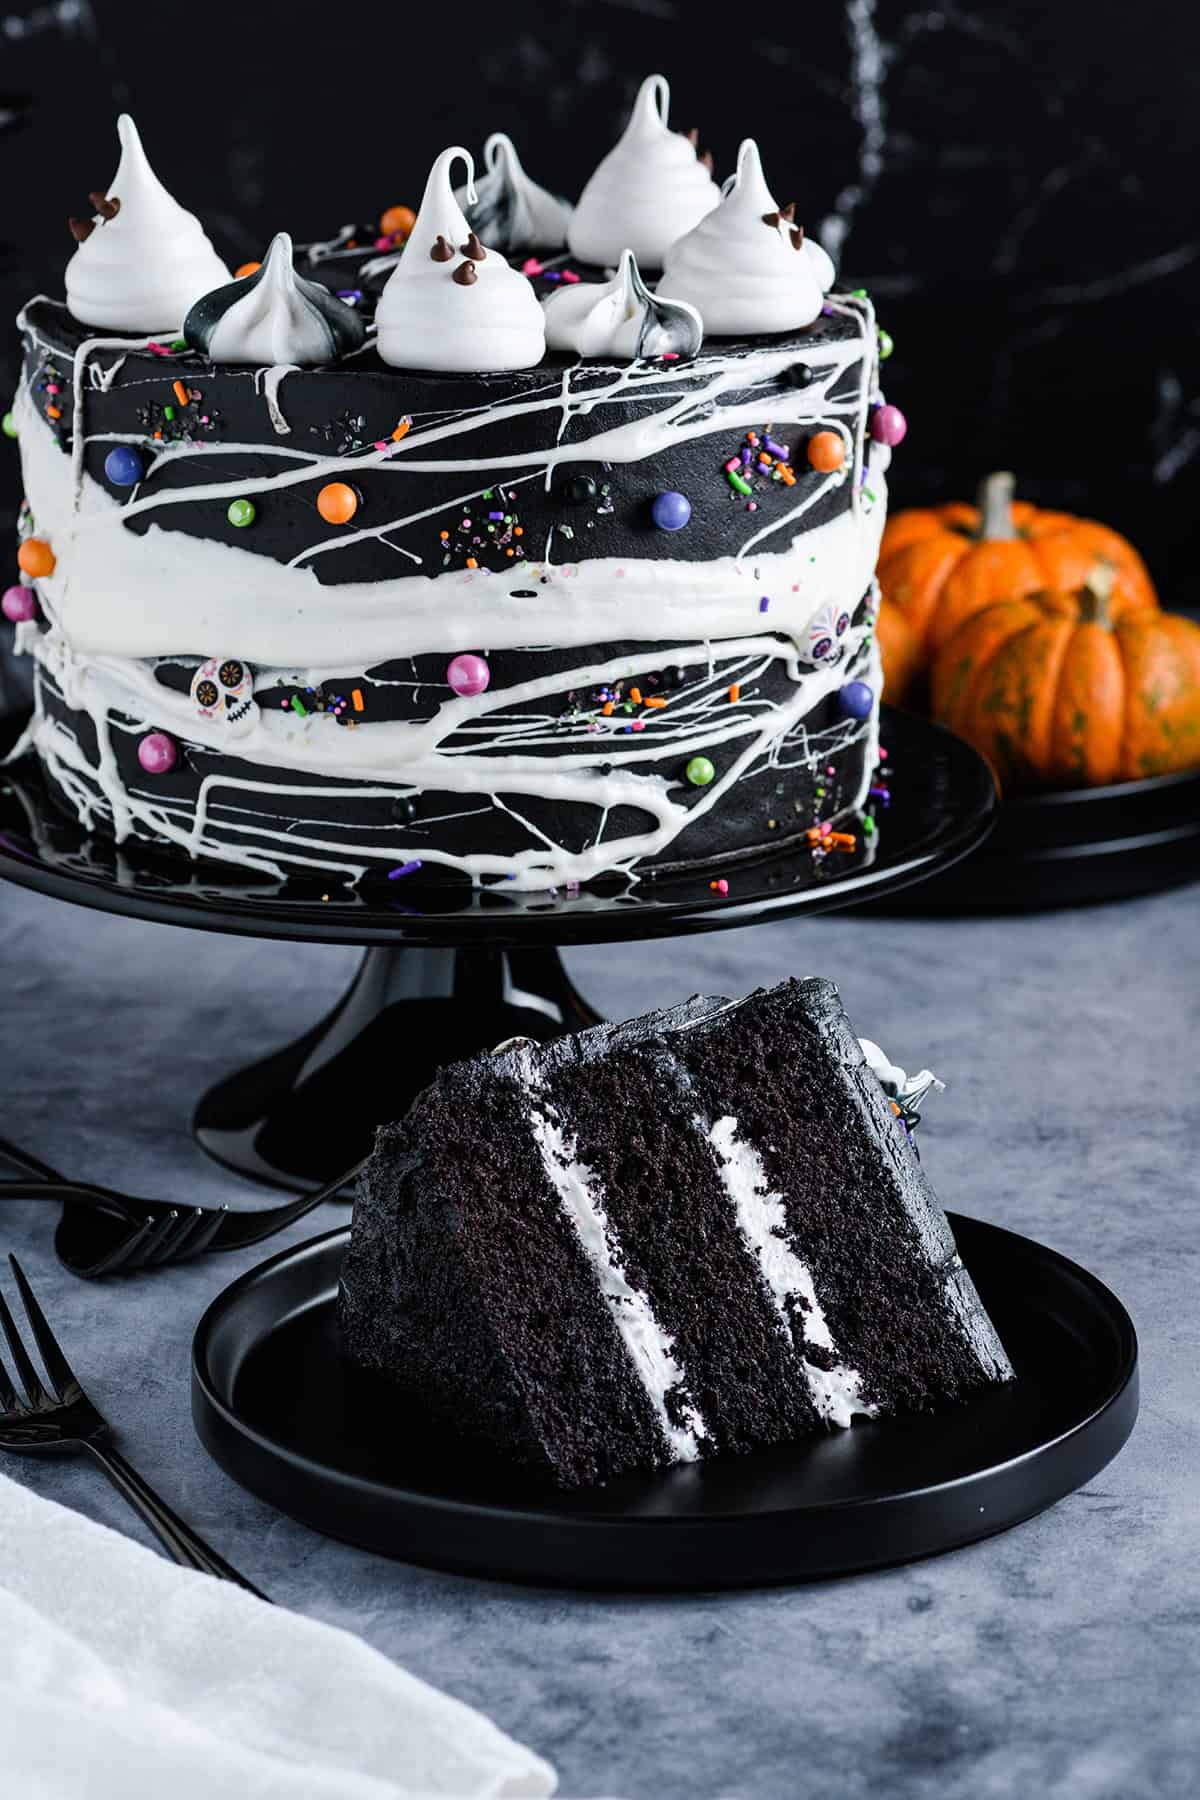
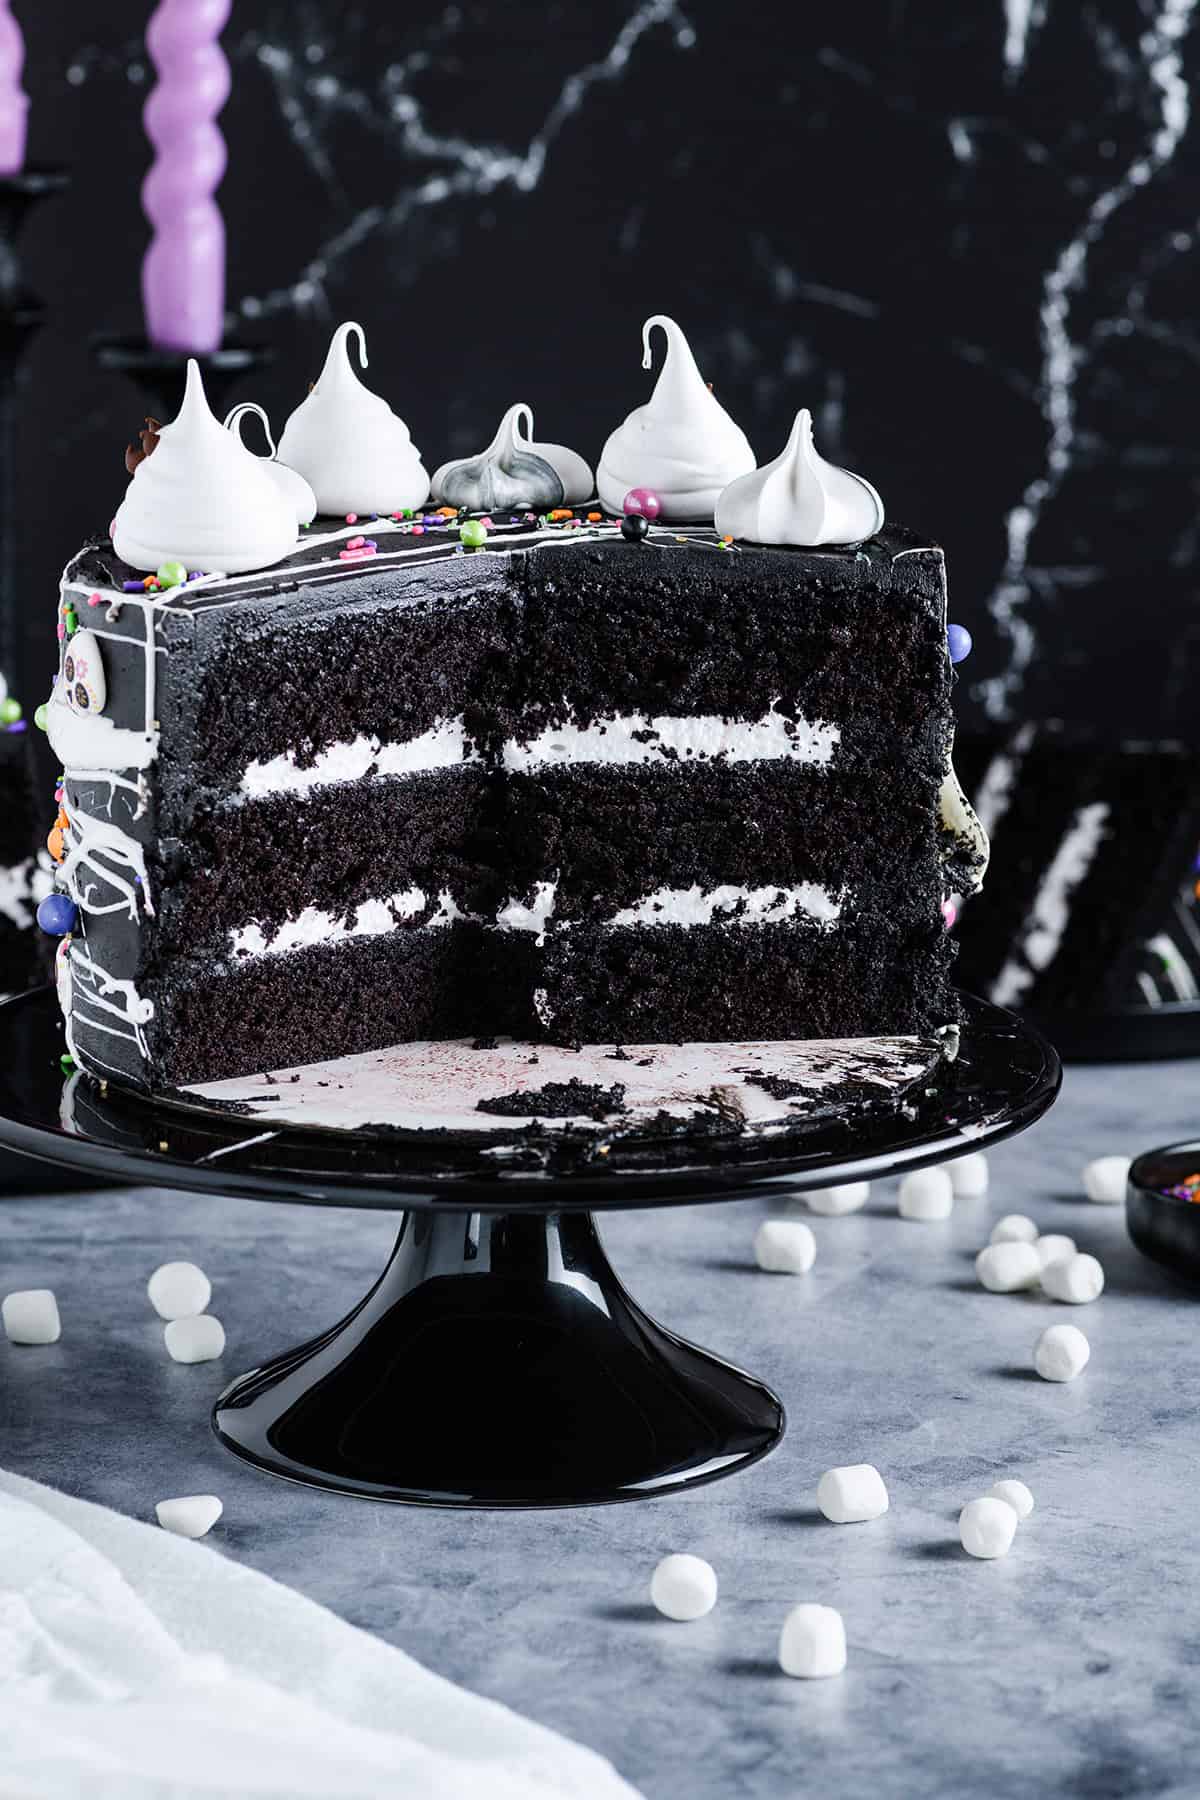
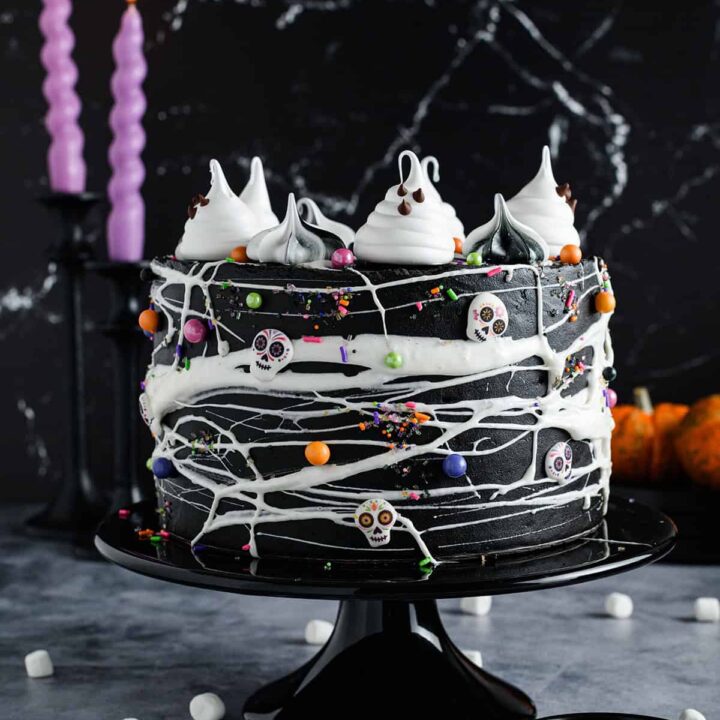
Get ready to spin some spooky dessert magic with this Black Velvet Halloween Cake! Rich black velvet layers are filled with a fluffy homemade marshmallow filling, then wrapped in silky black buttercream for a sleek, dramatic look. But the real fun starts with the sticky marshmallow “spider webs” and a sprinkle of Halloween cheer on top. It’s dark, decadent, and just the right amount of spooky, the kind of cake that’ll have your guests saying “trick or treat… can I have another slice?”
AS AN AMAZON ASSOCIATE I EARN FROM QUALIFYING PURCHASES.
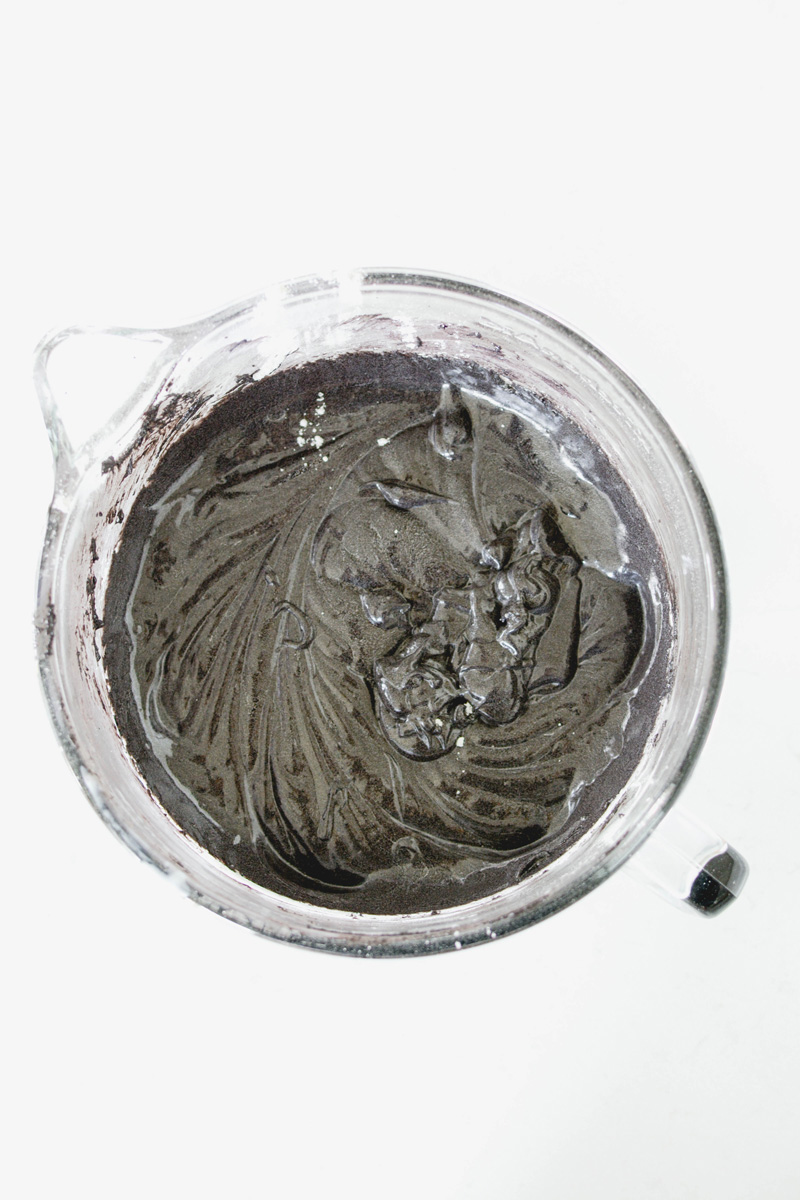
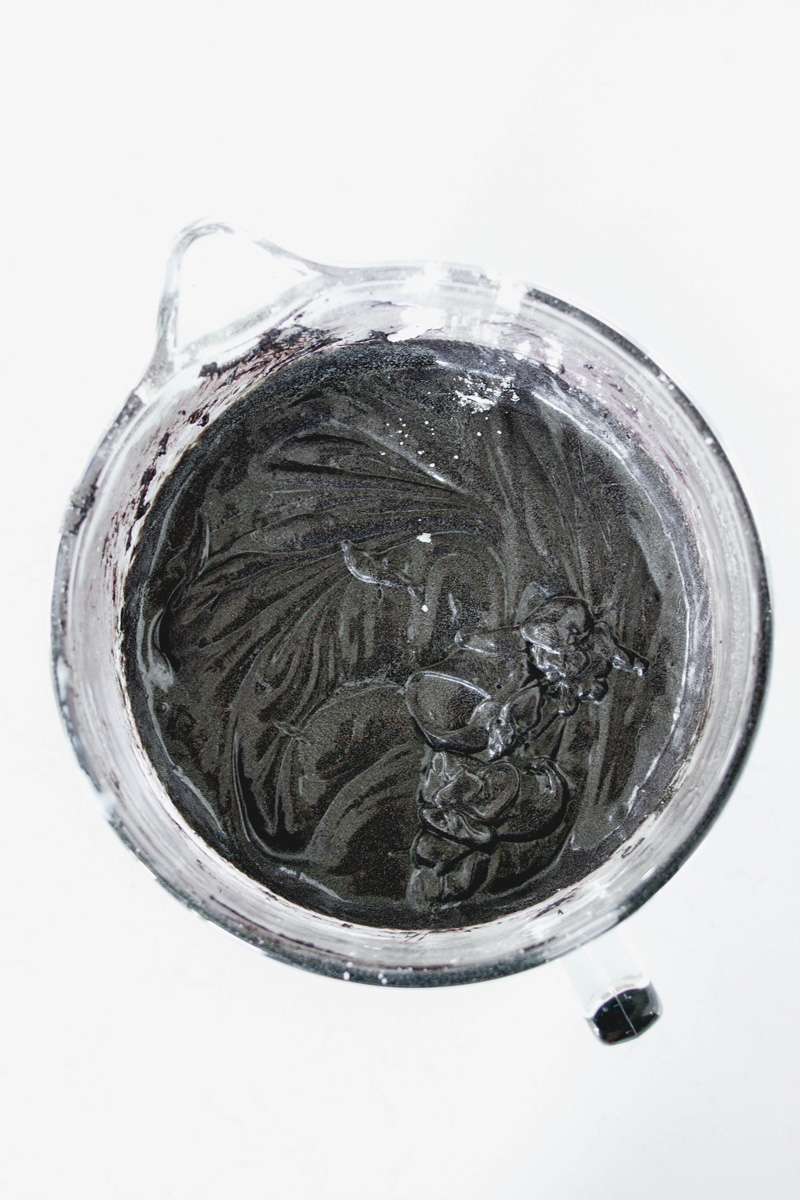
Don’t worry, this cake’s dark side doesn’t come at the cost of an entire bottle of food coloring! Just 2 teaspoons for the batter and a few quick squeezes (optional) for the buttercream give you that rich, velvety black hue. Want it extra bold? Go ahead, embrace your inner kitchen witch and add a little more.
Jump to:
- Black Velvet Cake
- Marshmallow Filling
- How To Make Black Buttercream
- How To Fill And Stack A Cake
- Crumb Coating
- Icing Black Velvet Halloween Cake
- Marshmallow Cobweb Tips
- Meringue Ghost
- Cake Decorating Tools
- Black Velvet Halloween Cake
- Photography Gear and Food Styling
- Let's Connect
- Ingredients
- Instructions
- Notes
- Did you make this recipe?
Black Velvet Cake
- Cake flour: has less protein than all-purpose flour which helps create a cake with a delicate and fine crumb.
- Baking powder: is a mixture of baking soda and cornstarch. Baking powder works twice by coming in contact with liquid and then again when it comes into contact with heat.
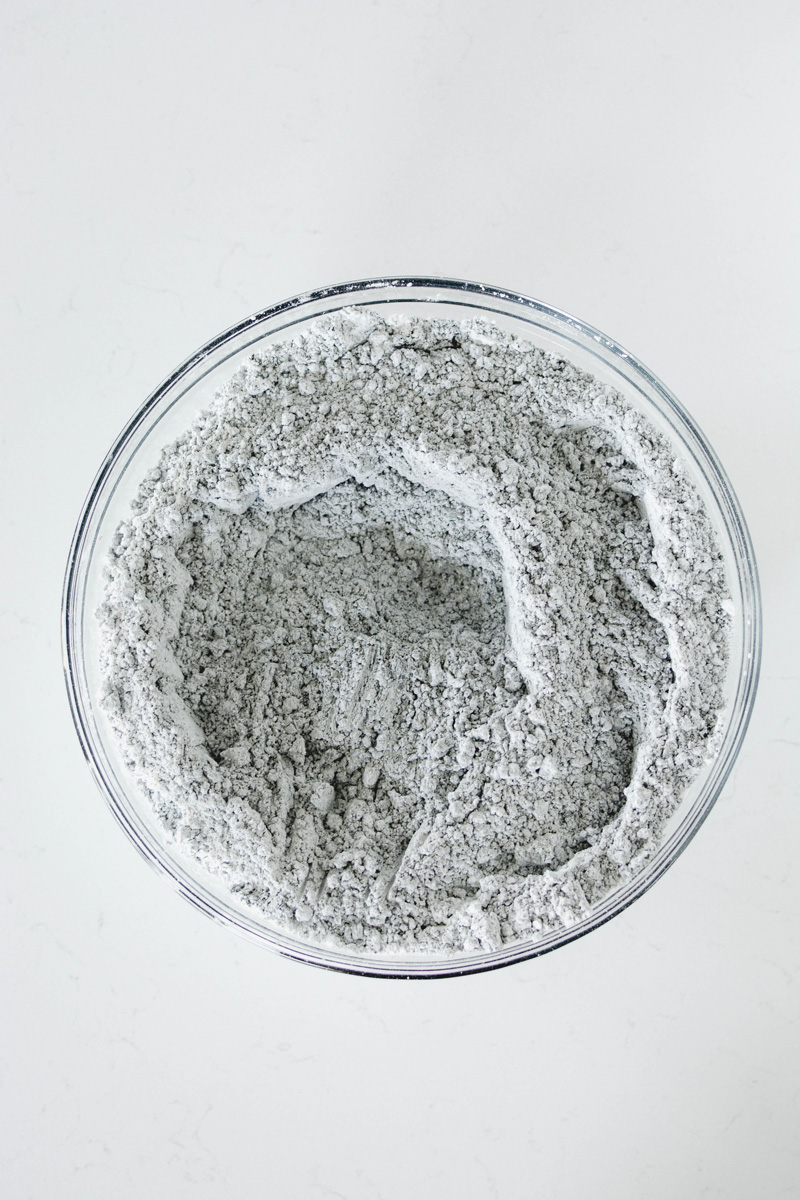
- Black Dutch-processed cocoa powder: is a Dutch-processed cocoa that is heavily alkalized making it dark brown to black in color.
- Salt: helps bring out the flavor.
- Unsalted butter: adds a rich flavor and creates texture in the cake.
- Superfine sugar: is granulated sugar the has been ground down into even smaller crystals. This helps create a cake with a very light texture.
- Vegetable oil: creates a cake that remains moist even while chilled.
- Red Velvet Bakery Emulsion: adds a unique flavor and color.
- Eggs: binds, thickens, emulsifies and leavens. I always use large eggs for consistency sake.
- Buttermilk: gives this cake a slightly tangy taste and adds moistness.
- Baking soda: is an alkali and must be used with an acidic ingredient such as sour cream or buttermilk.
- Distilled vinegar: helps with the cakes rise and also creates a cake with a moist and airy texture.
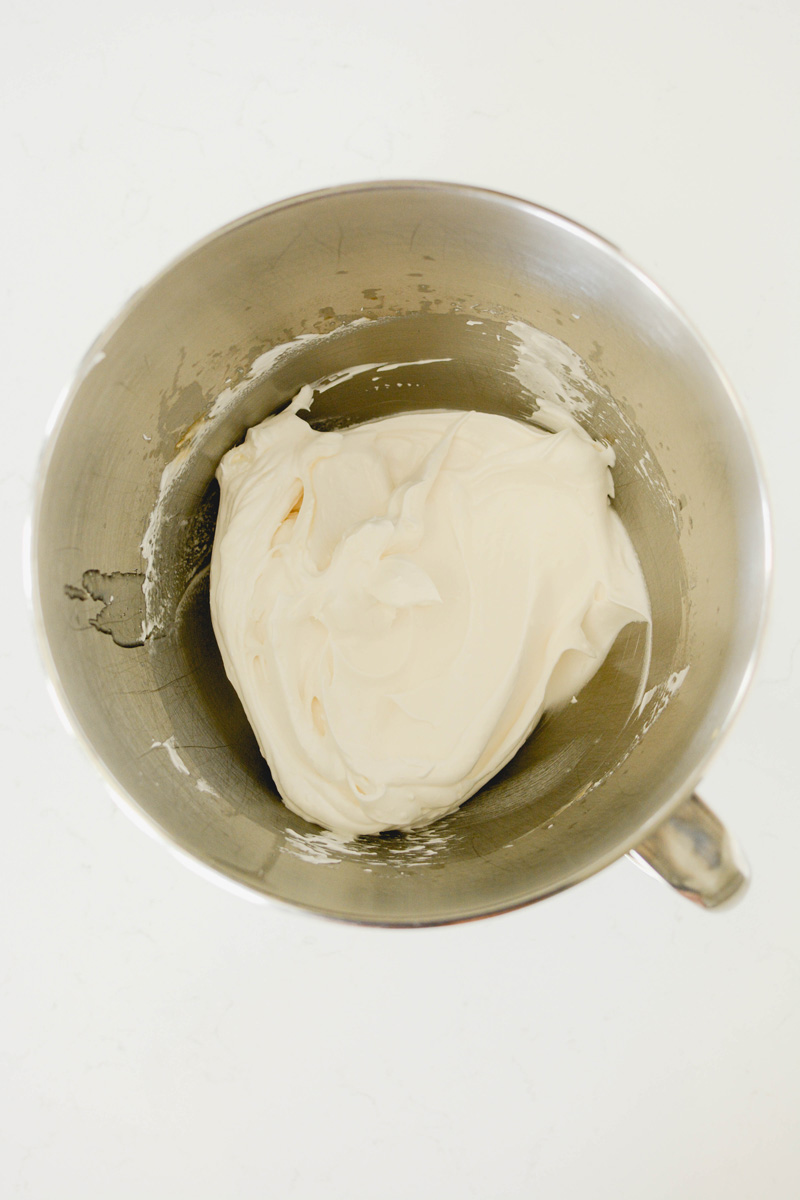
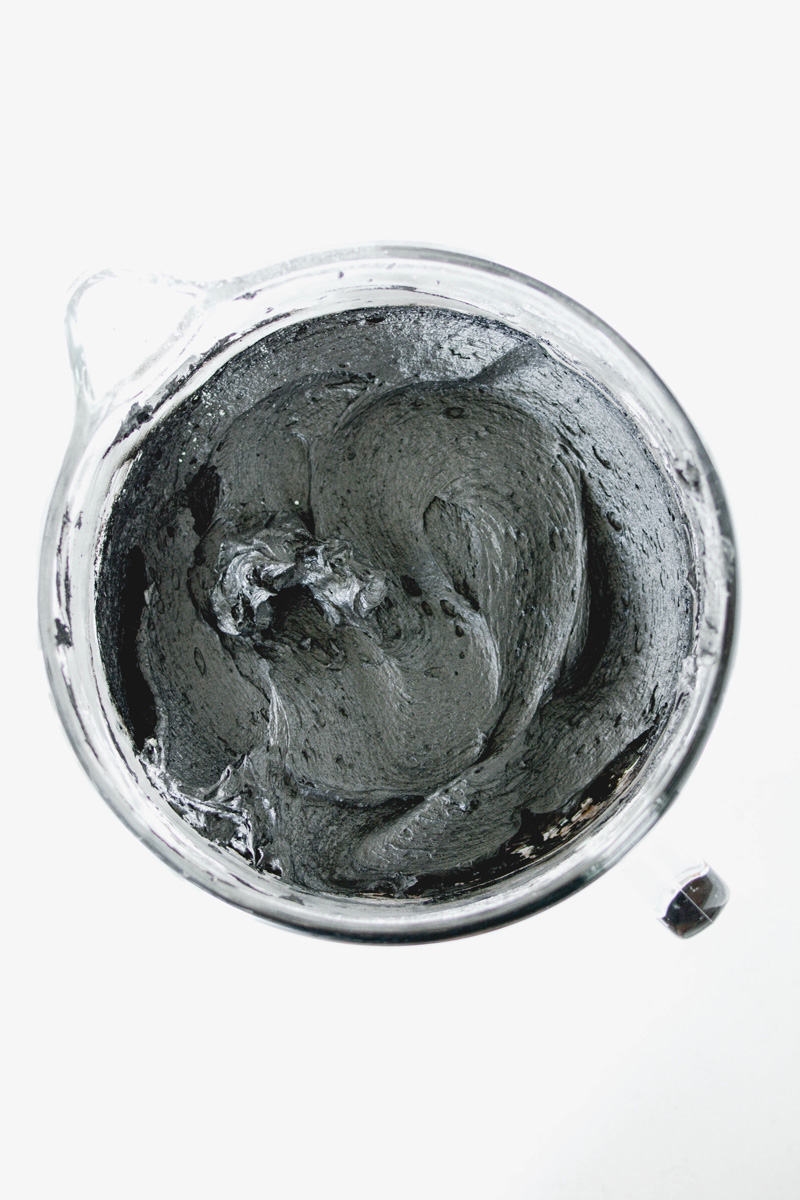
Marshmallow Filling
This marshmallow filling and frosting is best used as soon as it’s made. Be sure you have all your equipment and supplies ready to go. Timing is everything here.
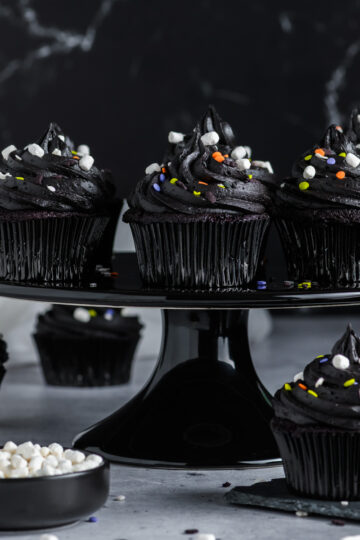
How To Make Black Buttercream
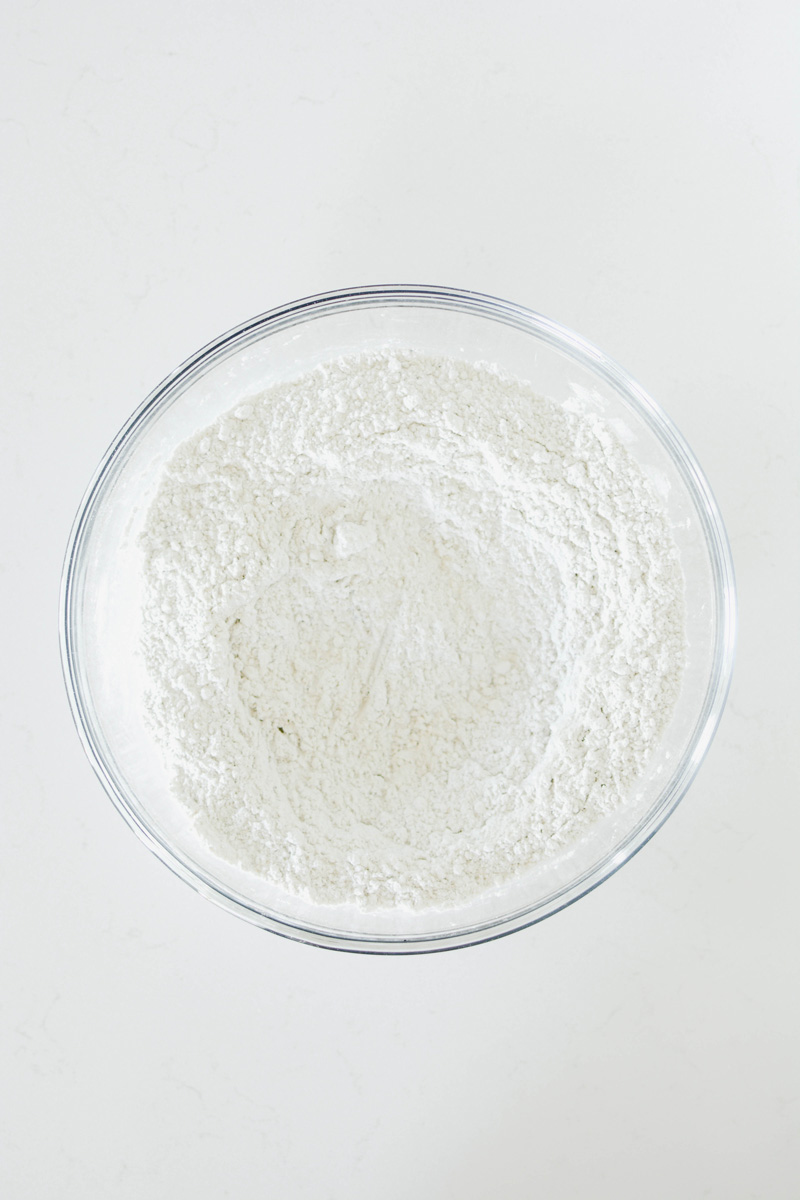
- Sift the cocoa powder and powdered sugar into a large bowl and set aside.
- In the bowl of a stand mixer fitted with the paddle attachment, beat the butter on high speed for 5 minutes until light and fluffy.
- Lower the mixer speed to low and add the heavy cream, vanilla and salt.
- While the mixer is still running, slowly add the cocoa mixture 1 cup at a time, until all has been added. Increase the mixer speed to medium and mix until creamy and combined, about 1 to 2 minutes. Do not over mix.
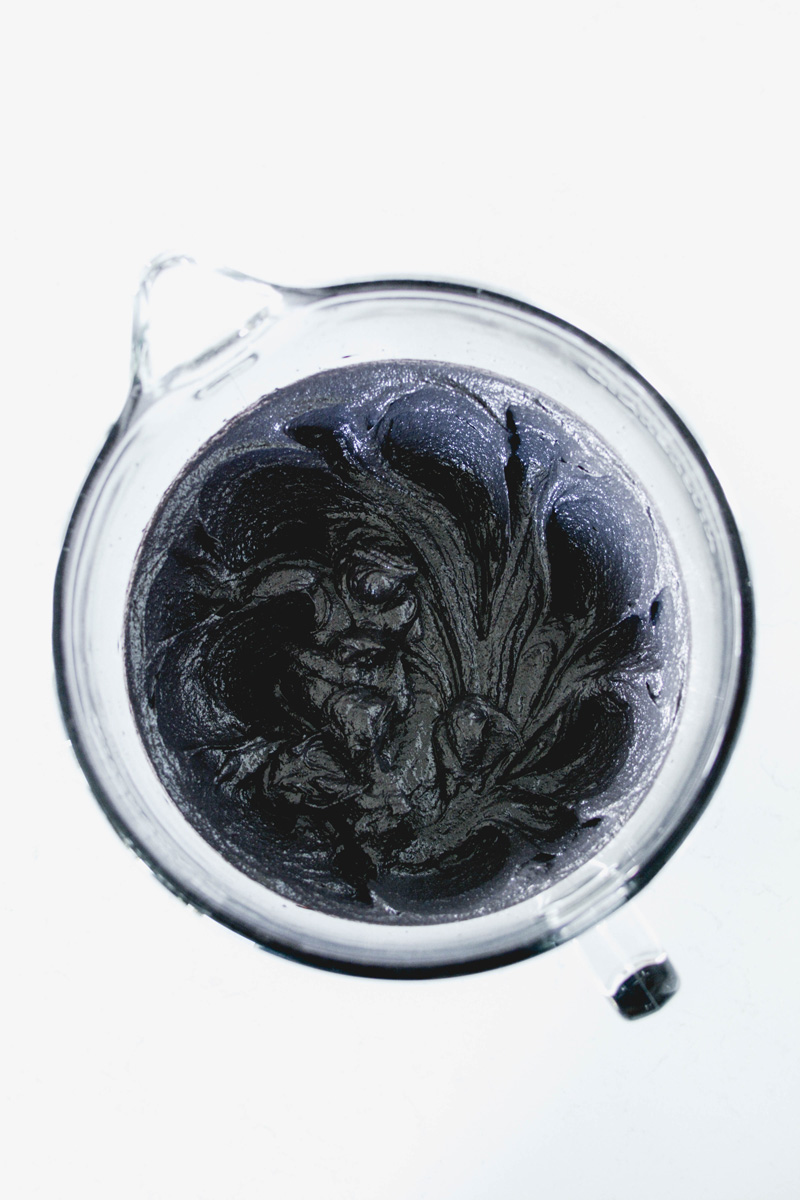
- At this point you can add black gel food coloring to achieve the amount of darkness you want in your buttercream. Mix on low speed for about 5 minutes. Having your mixer on low speed will help reduce air bubbles in the buttercream.

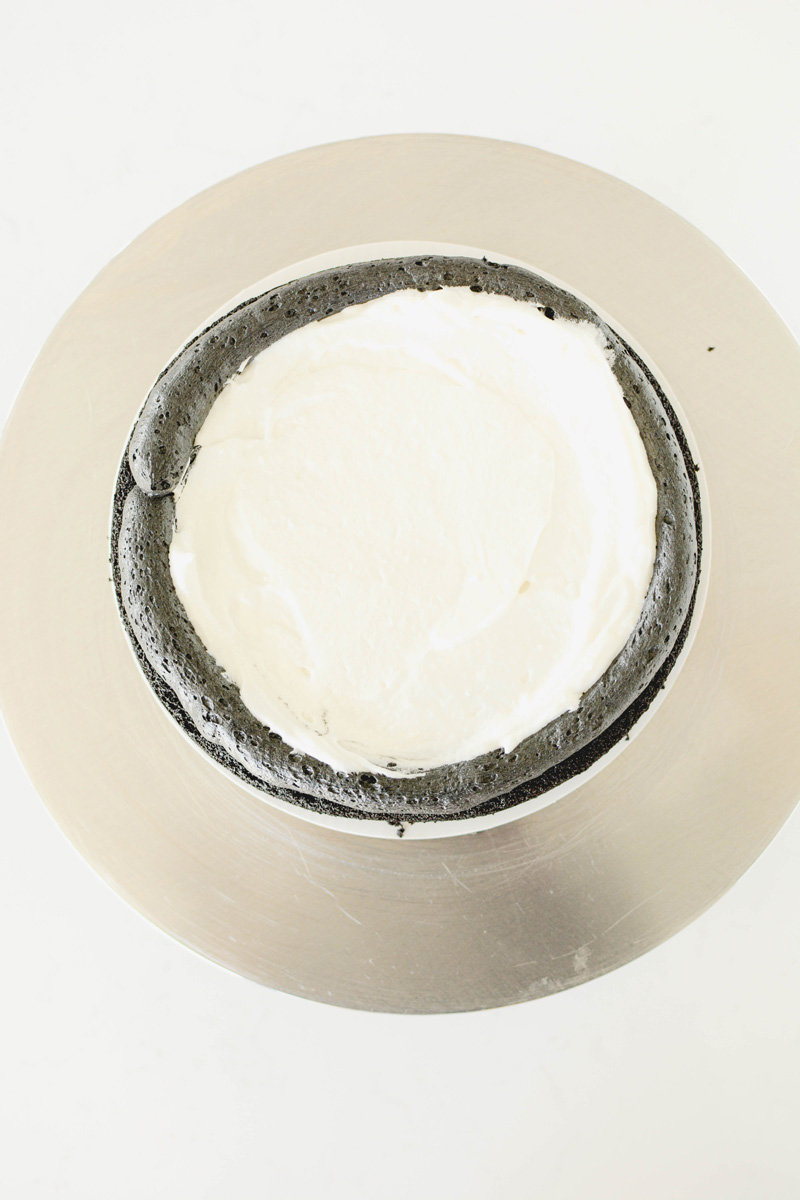
How To Fill And Stack A Cake
- Set a nonstick mat on top of a cake turntable. Place an 8-inch round cake board on top. Smear a bit of buttercream on top of the cake board to act as glue. Center one cake layer on top, making sure there is even spacing all around the edges.
- Attach a round piping tip or coupler to a piping bag and fill with about 1 cup buttercream. Pipe a dam of buttercream around the edge of the cake layer. Add about 2/3 cup marshmallow filling in the center and spread out in an even layer until it reaches the cake dam.
- Place the second cake layer on top and gently press to adhere. Pipe another buttercream dam around the edge. Add 2/3 cup marshmallow filling to the center and spread out evenly until the filling reaches the buttercream dam.
- Place the last cake layer on top (bottom side up) and gently press to adhere. Use the remaining buttercream in the piping bag for the crumb coat.
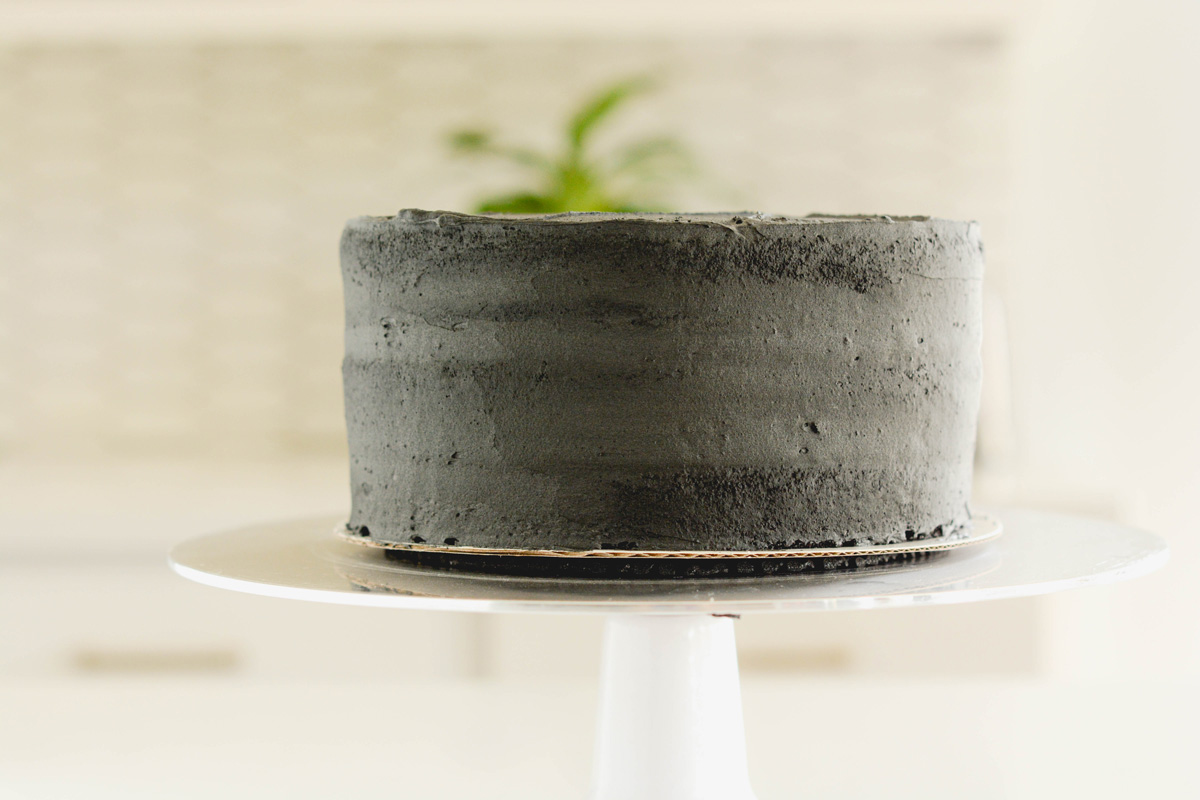
Crumb Coating
Place a small dollop of frosting on top of the cake and using your offset cake spatula, spread a thin layer of frosting over the top and sides of the cake catching any loose crumbs and sealing them in. Refrigerate or freeze the cake for 15 to 30 minutes.
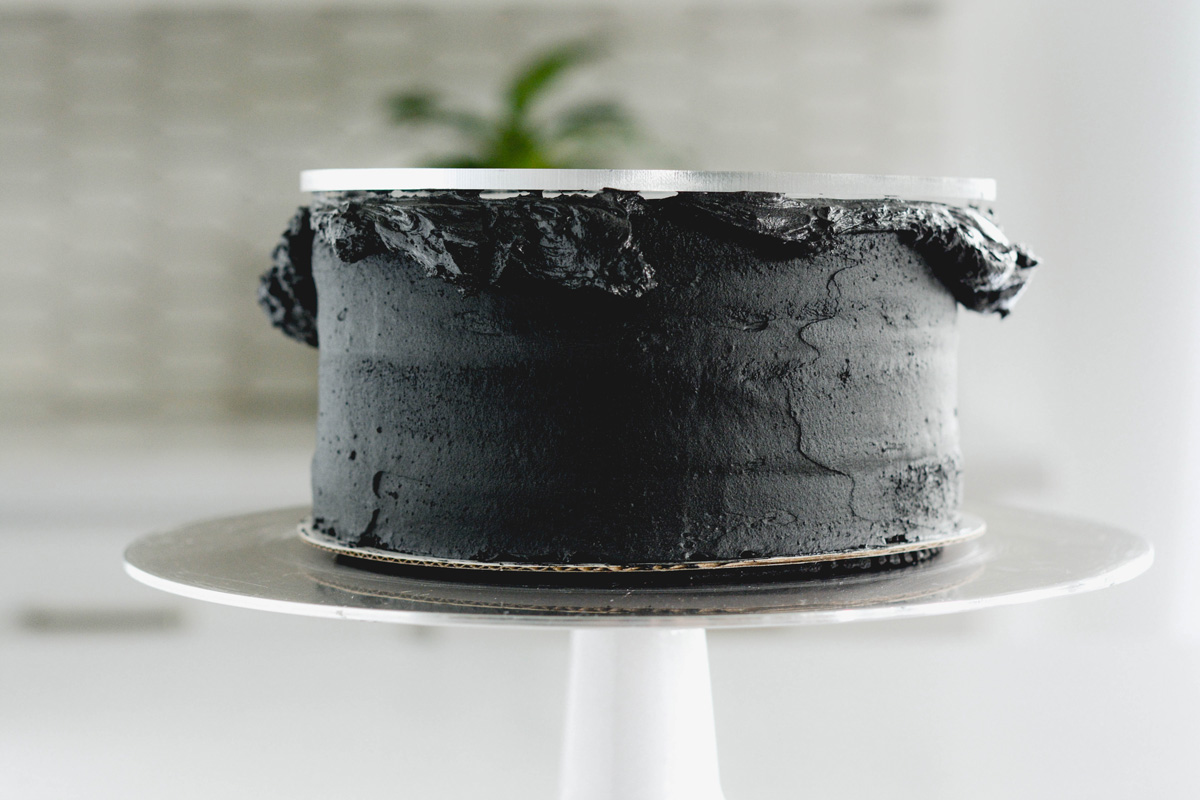
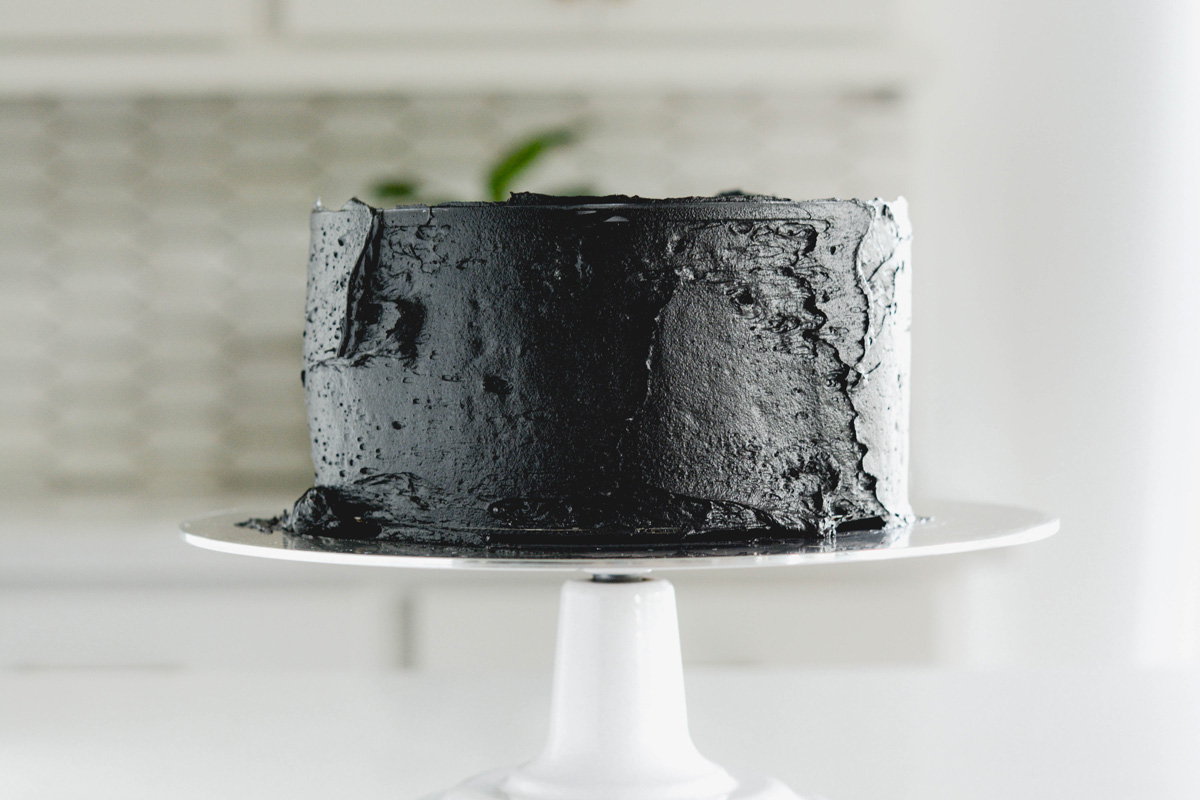
Icing Black Velvet Halloween Cake
- Apply a generous amount of buttercream to the top of the cake and spread in an even layer. You should have excess buttercream hanging off the edge.
- Line an 8-inch round acrylic disc with parchment paper and place on top of the cake (parchment side down), making sure it’s even with the bottom cake board on all sides. Apply buttercream on the sides of the cake making sure to cover the bottom board completely.
- Gently touch the bottom cake board and acrylic disc with a cake scraper. Using the cake turntable, rotate the turntable to remove excess buttercream and smooth out the cake. Add more buttercream to any gaps and rotate until the sides are smooth.
- Chill the cake in the refrigerator or freezer for about 15 minutes.
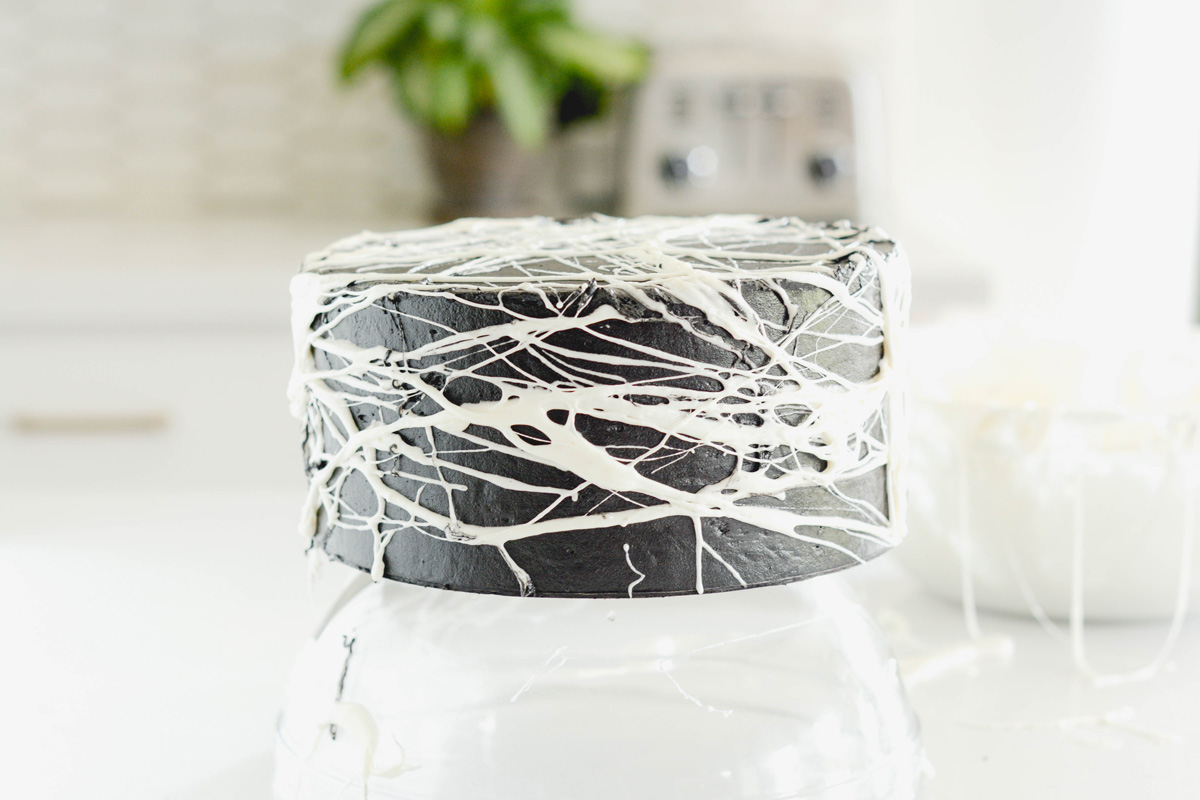
Marshmallow Cobweb Tips
This was my first time doing marshmallow cobwebs. There were a couple of mistakes I made that I would do differently next time. I made these mistakes so you don’t have to. Here’s what I learned:
- Start with a very chilled cake. I recommend placing the cake in the freezer for at least 30 minutes, or in the refrigerator for at least an hour.
- Once your marshmallows have melted be sure to let them cool for about 15 to 20 minutes. If the marshmallows are too hot it will melt your buttercream. You can always reheat the marshmallows if needed.
- Place a piece of parchment paper on your work surface before placing the cobwebs on for easy clean up.
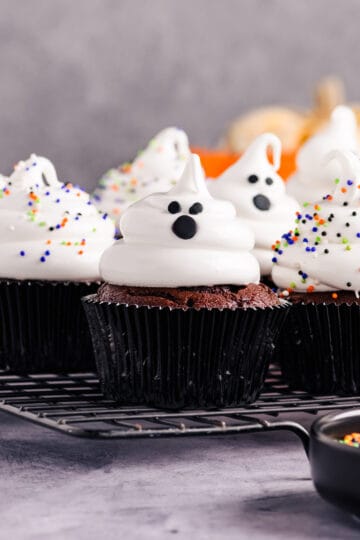
Meringue Ghost
These meringue ghosts are the perfect decoration for this Black Velvet Halloween Cake. They are easy to make and can be made up to 1 week in advance, stored in an airtight container at room temperature.
Cake Decorating Tools
- Ateco piping tips #808, #827
- Wilton piping tips #1M, #4
- Small food safe paint brush
- Parchment paper
- Cake turntable
- Nonslip mat
- 8-inch round cake board
- Round piping tip or coupler
- Piping bags
- 8-inch round acrylic disc
- Cake scraper
- Small offset cake spatula
- Food safe disposable gloves

Black Velvet Halloween Cake
- Day 1: Prepare the meringue ghost.
- Day 2: Bake cake layers.
- Day 3: Make filling, buttercream and assemble and decorate cake.
Photography Gear and Food Styling
Camera Gear
- Camera: Nikon D850
- Lens: Nikon 50mm and Nikon 105mm Macro
- Tripod: Carbon Fiber Heavy Duty Tripod WEYLLAN 81'' Professional Tripod
- Lighting: GODOX AD200 Pro. With Glow EZ Lock 36x48 Quick Rectangle Softbox
- Reflectors: Black and White foam core to lighten shadows and reduce highlights.
Lighting and Composition
- Lighting style: Side light.
- Backdrop: Dark gray and black marble for a dramatic and moody setting.
- Props: Black cake stand, black plates and forks, plus Halloween sprinkles and mini marshmallows.
Let's Connect
Want more behind-the-scenes peeks, recipe drops, and food photography inspo? Come hang out with me on Instagram, Pinterest, Facebook and more. I’d love to connect with you there!
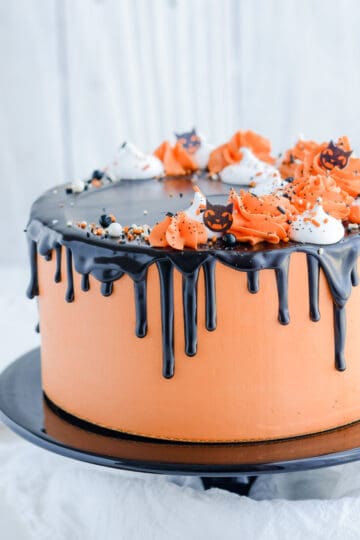
Black Velvet Halloween Cake
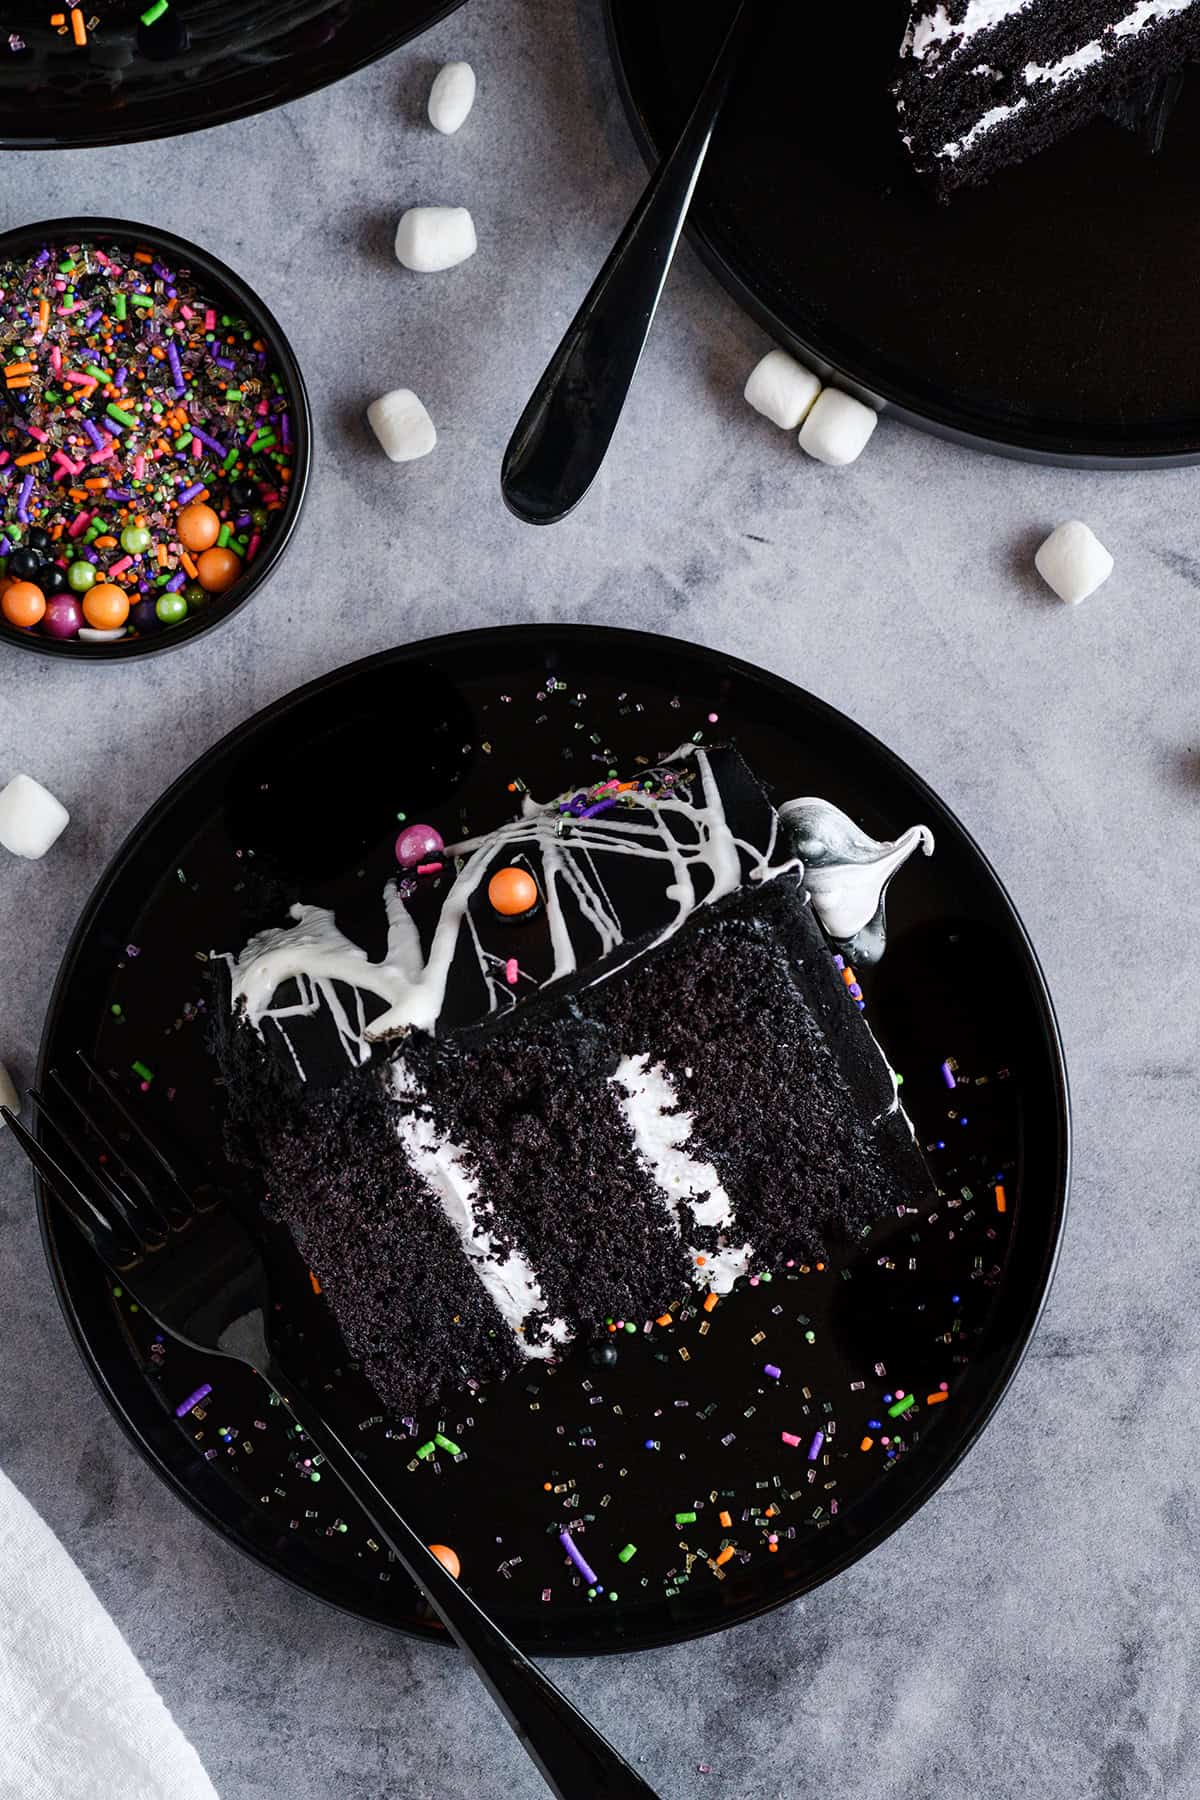
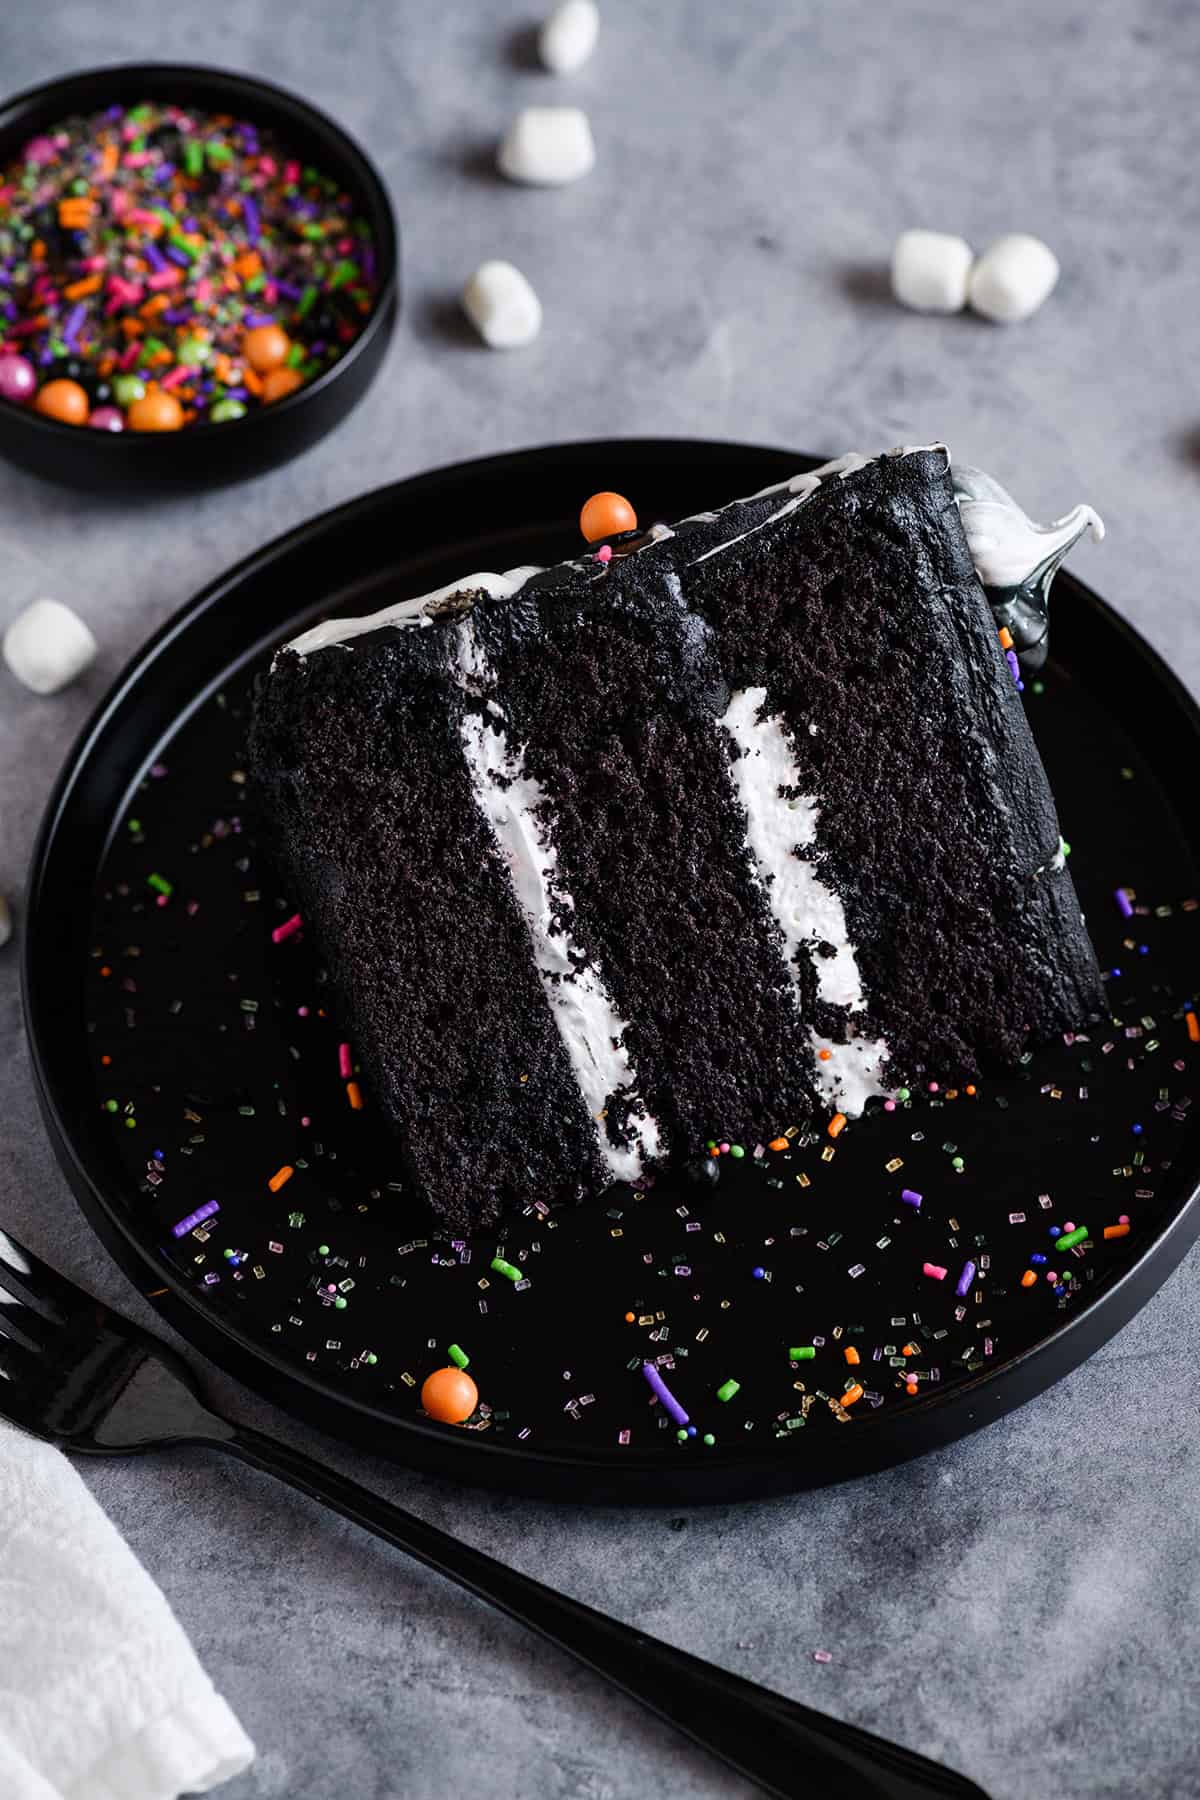
Homemade black velvet cake made with black Dutch-processed cocoa powder filled with marshmallow filling and frosted with black Dutch-processed cocoa powder buttercream and garnished with marshmallow cobwebs and festive bespoke sprinkles.
Ingredients
SPECIAL TOOLS
- Stand mixer
- Candy thermometer
- Ateco piping tips #808, #827
- Wilton piping tip #1M, #4
- Small food safe paint brush
- Parchment paper
- Rimmed baking sheet
- 3 8-inch round cake pans
- Nonstick baking spray
- Cake turntable
- Nonslip mat
- 8-inch round cake board
- Round piping tip or coupler
- Piping bags
- 8-inch round acrylic disc
- Cake scraper
- Small offset cake spatula
- Food safe disposable gloves
- Bespoke Halloween sprinkles
- Meringue Ghost
- Meringue Decorations
MERINGUE GHOST AND DECORATIONS
- 1/2 cup egg whites
- 1 cup (7 ounces) granulated sugar
- 1/2 cup chocolate chips, melted
BLACK VELVET CAKE
- 3 cups cake flour (12 ounces/345 grams)
- 1 teaspoon baking powder
- 1 teaspoons Dutch-processed cocoa powder
- 3/4 teaspoon salt
- 1/2 cup (8 tablespoons/115 grams) unsalted butter, at room temperature
- 2 cups (14.5 ounces/410 grams) superfine sugar
- 1/2 cup vegetable oil
- 2 tablespoons Red Velvet Bakery Emulsion
- 2 teaspoons Super Black AmeriColor gel food color
- 3 large eggs, at room temperature
- 1 1/2 cups buttermilk, at room temperature
- 1 teaspoon baking soda
- 2 teaspoons distilled white vinegar
MARSHMALLOW FILLING
- 1/2 cup (3.5 ounces/99 grams) granulated sugar
- 1/8 teaspoon cream of tartar
- 1/4 cup water
- 2 large egg whites
- Pinch salt
- 1 teaspoon vanilla extract
- 1/8 teaspoon marshmallow flavoring, optional
BLACK BUTTERCREAM
- 1 1/2 cups (4.5 ounces/232 grams) Dutch-processed black cocoa powder, such as The Cocoa Trader
- 2 pounds (32 ounces/907 grams) powdered sugar
- 2 cups (4 sticks/452 grams) unsalted butter, at room temperature
- 1 cup (8 fluid ounces/240 grams) heavy cream
- 1 tablespoon vanilla extract
- 1/8 teaspoon salt
- Black gel food coloring, optional
MARSHMALLOW COBWEBS
- 10.5 ounces mini marshmallows
Instructions
MERINGUES
- Adjust an oven rack to the center position and heat oven to 175 degrees.
- In the bowl of a stand mixer fitted with the whisk attachment, pour in the egg whites and sugar and whisk by hand until combined. Fill a medium saucepan with about 2 inches of water and bring to a simmer. Place mixer bowl on top, being sure the bottom of the bowl does not touch the water and attach a candy thermometer. Whisking occasionally, heat the egg mixture until the temperature reaches 160 degrees.
- Once the mixture reaches 160 degrees, transfer to a stand mixer and beat the mixture on high speed for 10 minutes or until medium-stiff peaks form.
- Prepare a piping bag with Ateco piping tip #808, 827 and Wilton 1M. Using a paint brush, paint black vertical stripes on the inside of the piping bags with tips #1M and #827 attached.
- Transfer meringue to each piping bag. Secure a piece of parchment paper to a rimmed baking sheet by dabbing a small amount of meringue onto each corner of the baking sheet and then pressing down parchment paper down to adhere to the baking sheet. With the piping bag with piping tip #808 attached, pipe ghost shapes on to the paper by applying pressure to the bag to release the meringue to create the ghosts base. Stop squeezing and pull the piping bag up to create a pointy top. With the remaining piping bags, pipe striped meringues onto the paper and bake for 2 hours. Turn off the oven and keep the oven door shut. Let the meringues cool in the oven overnight. Store the meringues in an airtight container at room temperature for up to 2 weeks.
- To pipe faces on the meringue ghost, place melted chocolate in a piping bag fitted with Wilton piping tip #4. Carefully pipe two eyes and a mouth on each ghost. Allow the meringues to sit for at least 1 hour for the chocolate to set.
BLACK VELVET CAKE
- Adjust and oven rack to the center position and heat oven to 350 degrees. Spray 3 8-inch round cake pans with nonstick baking spray and set aside.
- In a large bowl, whisk together flour, baking powder, cocoa powder and salt and set aside.
- In the bowl of a stand mixer fitted with the paddle attachment, beat the butter, sugar, oil, emulsion and food coloring on medium speed until light and fluffy, about 8 minutes. Add the eggs, one at a time mixing until just combined. Reduce the mixer speed to low and add the flour mixture in 3 additions, alternating it with the buttermilk in 2 additions, mixing until combined.
- In a small bowl, combine the baking soda and vinegar, and quickly whisk into the batter. Dive the batter evenly between prepared cake pans.
- Bake for 20 to 25 minutes, or until a skewer inserted in the center comes out with a few moist crumbs attached, rotating pans a little over halfway through baking.
- Let the cakes cool in their pan for 10 to 15 minutes, then invert on to wire racks to cool completely.
MARSHMALLOW FILLING
- In a small saucepan combine the sugar, cream of tartar, and water and bring to a boil over medium heat. Cover the saucepan with a lid and continue to cook for 2 minutes. Uncover the saucepan and continue to boil the sugar until the syrup reaches 242 degrees on a candy thermometer.
- While the sugar syrup is coming to temperature, combine the egg whites and salt in the bowl of a stand mixer fitted with the whisk attachment. Beat on low speed, gradually increasing the speed to medium-high speed. Continue to beat the egg whites until soft peaks form. If your syrup is close to reaching 242 degrees, continue to whip the eggs whites to firm peaks. If your syrup is not close to reaching temperature then let the egg whites wait at soft peaks before whipping them to firm peaks as the syrup approaches temperature.
- Once the sugar syrup has reaches 242 degrees and the egg whites have been whipped to firm peaks, run the mixer at medium-high speed while slowly pouring the syrup down the inside of the mixer bowl. Continue whipping until the frosting has become thick and holds stiff peaks, about 5 minutes. Add vanilla extract and marshmallow flavoring and whip to combine.
BLACK BUTTERCREAM
- Sift the cocoa powder and powdered sugar into a large bowl and set aside.
- In the bowl of a stand mixer fitted with the paddle attachment, beat the butter on high speed for 5 minutes until light and fluffy.
- Lower the mixer speed to low and add the heavy cream, vanilla and salt.
- While the mixer is still running, slowly add the cocoa mixture 1 cup at a time, until all has been added. Increase the mixer speed to medium and mix until creamy and combined, about 1 to 2 minutes. Do not over mix.
- At this point you can add black gel food coloring to achieve the amount of darkness you want in your buttercream. Mix on low speed for about 5 minutes. Having your mixer on low speed will help reduce air bubbles in the buttercream.
ASSEMBLE
- Set a nonstick mat on top of a cake turntable. Place an 8-inch round cake board on top. Smear a bit of buttercream on top of the cake board to act as glue. Center one cake layer on top, making sure there is even spacing all around the edges.
- Attach a round piping tip or coupler to a piping bag and fill with about 1 cup buttercream. Pipe a dam of buttercream around the edge of the cake layer. Add about 2/3 cup marshmallow filling in the center and spread out in an even layer until it reaches the cake dam.
- Place the second cake layer on top and gently press to adhere. Pipe another buttercream dam around the edge. Add 2/3 cup marshmallow filling to the center and spread out evenly until the filling reaches the buttercream dam.
- Place the last cake layer on top (bottom side up) and gently press to adhere. Use the remaining buttercream in the piping bag for the crumb coat.
CRUMB COAT
- Pipe out the remaining buttercream from the piping bag on the top of the cake and spread a thin layer of buttercream over the top and sides to catch any loose crumbs. Chill the cake in the refrigerator or freezer for 15 to 30 minutes.
DECORATE
- Apply a generous amount of buttercream to the top of the cake and spread in an even layer. You should have excess buttercream hanging off the edge. Line an 8-inch round acrylic disc with parchment paper and place on top of the cake (parchment side down), making sure it’s even with the bottom cake board on all sides. Apply buttercream on the sides of the cake making sure to cover the bottom board completely. Gently touch the bottom cake board and acrylic disc with a cake scraper. Using the cake turntable, rotate the turntable to remove excess buttercream and smooth out the cake. Add more buttercream to any gaps and rotate until the sides or smooth. Chill the cake in the refrigerator or freezer for about 15 minutes.
- With a small offset cake spatula, carefully insert the spatula under the acrylic disc and gently rotate the turntable until the disc releases. Peel off the parchment paper and fill in any gaps to the top of the cake by adding more buttercream and smoothing out. Place the cake back into the refrigerator or freezer (freezer preferred) while you prepare the marshmallow cobwebs.
MARSHMALLOW COBWEBS
- Place marshmallows in a large microwaveable bowl. Microwave on 10 second intervals until completely melted. Let cool for about 15 minutes before placing cobwebs on the cake. If the webs are too hot it will melt your buttercream. This is why placing the cake in the freezer is preferred. You want the cake as cold as possible when you do this.
- Put on food safe disposable gloves and pickup a handful of the melted marshmallows and stretch it between your hands until it looks stringy. Wrap it over the top and sides of the cake. Repeat this process until the cake is covered with marshmallow cobwebs. Reheat the marshmallows if necessary, as they set quickly.
- Add festive Halloween sprinkles on top with meringue ghost and decorations and serve.
Notes
Meringue ghost can be made up to 1 week in advance, stored in an airtight container at room temperature.
Cake layers can be made up to 3 days in advance, wrapped in plastic wrap, in an airtight container stored in the refrigerator.
Marshmallow filling must be made the day of assembly.
Black buttercream is best used the day it is made.
Assembled cake will keep in an airtight cake container at room temperature for 1 day.
Nutrition Information:
Yield: 24 Serving Size: 1Amount Per Serving: Calories: 742Total Fat: 33gSaturated Fat: 16gTrans Fat: 0gUnsaturated Fat: 15gCholesterol: 101mgSodium: 277mgCarbohydrates: 109gFiber: 1gSugar: 86gProtein: 6g
*Nutrition information is an estimate and will vary.*


Leave a Reply