
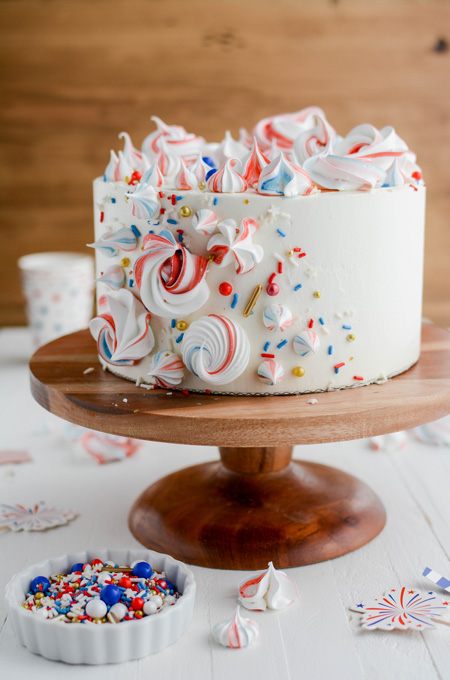
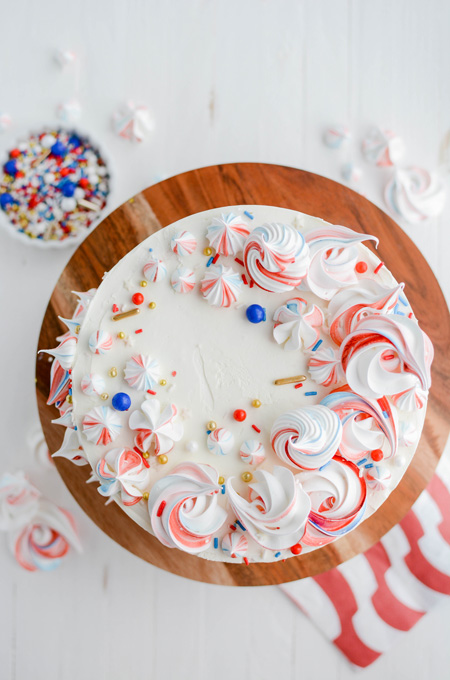
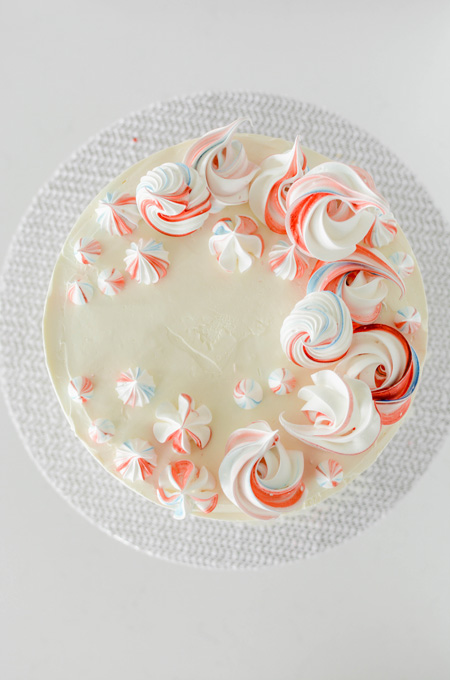
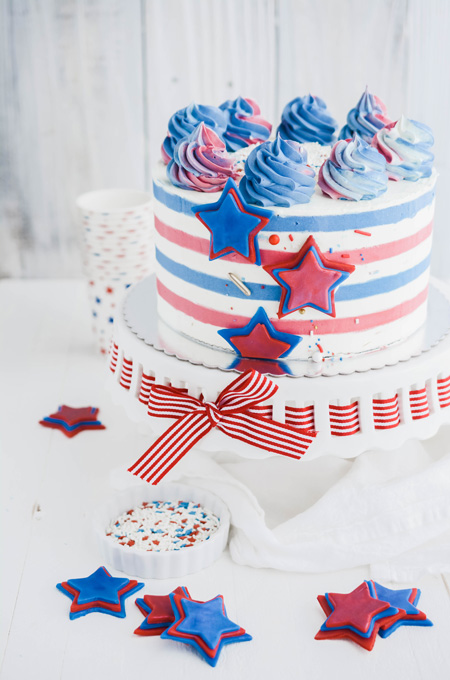
I created a fun and festive Red White and Blue Swirl Cake for July 4th this year! It's colorful, tasty and darn, it just makes me happy!
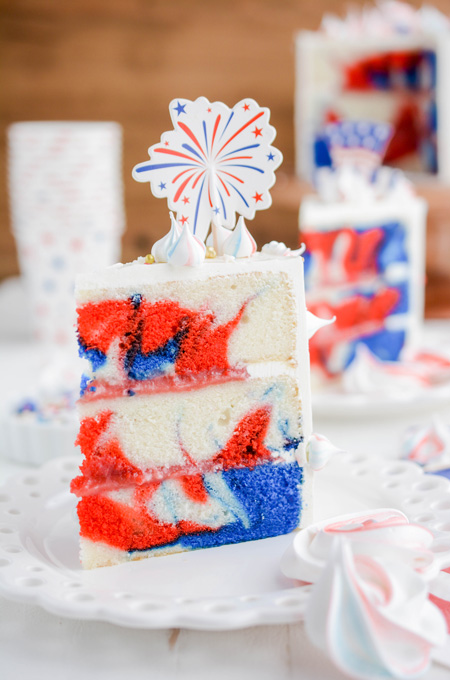
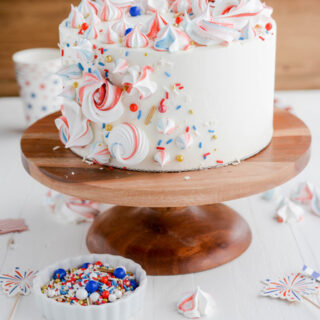
My Red White and Blue Swirl Cake is 3 layers of vanilla cake, filled with strawberry filling and frosted with Vanilla Swiss meringue buttercream. Plus, I made a batch of colorful meringues for the finishing touch!
How To Make Meringue Decorations
- Adjust an oven rack to the center position and heat oven to 175 degrees.
- In the bowl of a stand mixer fitted with the whisk attachment, pour in the egg whites and sugar and whisk by hand until combined. Fill a medium saucepan with about 2 inches of water and bring to a simmer. Place mixer bowl on top, being sure the bottom of the bowl does not touch the water and attach a candy thermometer. Whisking occasionally, heat the egg mixture until the temperature reaches 160 degrees.
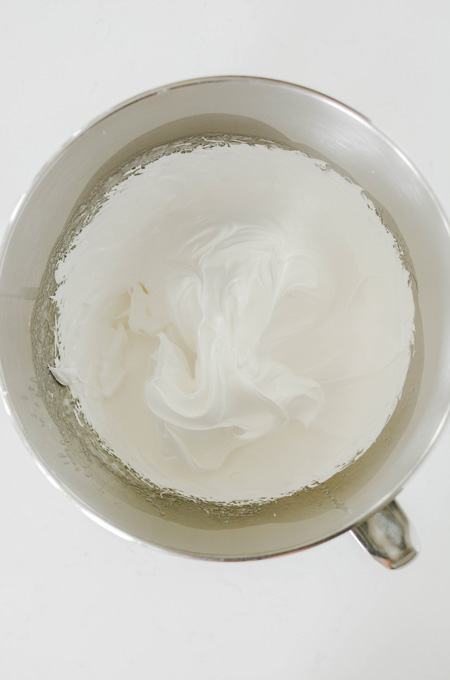
- Once the mixture reaches 160 degrees, transfer to a stand mixer and beat the mixture on high speed for 10 minutes or until medium-stiff peaks form.
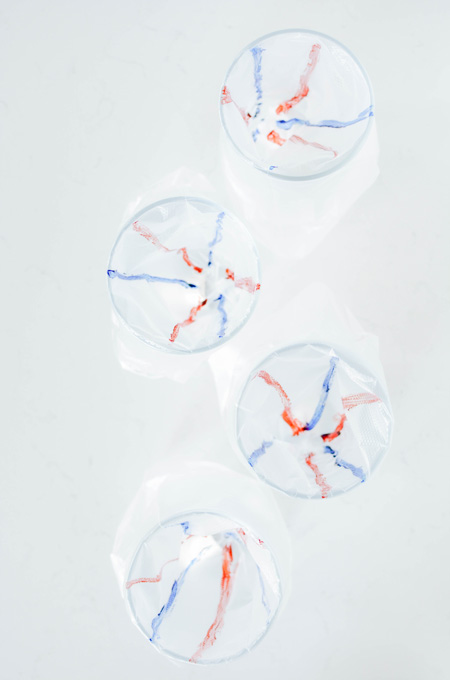
- Prepare a piping bag with Wilton piping tips 1M, #12, #2D and 4B. Using a paint brush, paint vertical stripes on the inside of each piping bag with Americolor Royal Blue and Red Red gel food coloring.
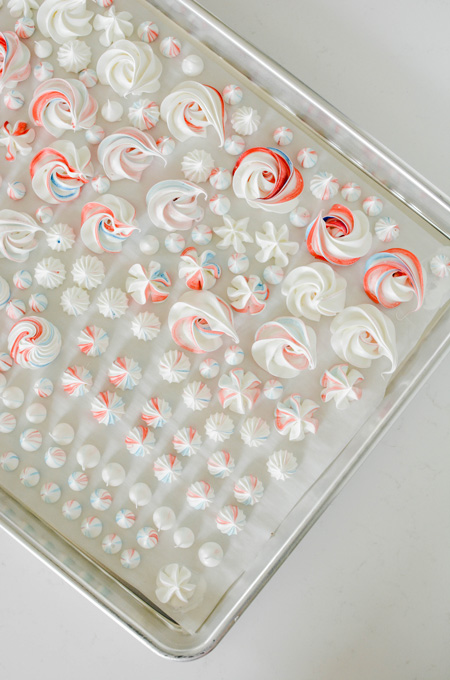
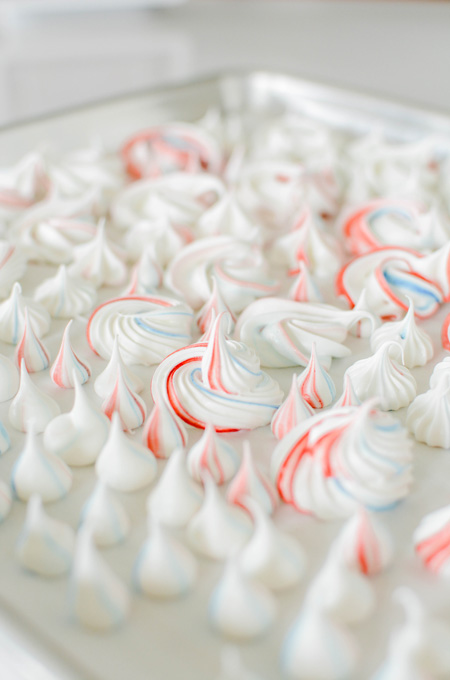
- Transfer meringue to each piping bag. Secure a piece of parchment paper to a baking sheet by dabbing a small amount of meringue onto each corner of the baking sheet and then pressing parchment paper down to adhere to the baking sheet. Pipe desired shapes onto the paper and bake for 2 hours. Turn off the oven and keep the oven door shut. Let the meringues cool in the oven overnight. Store the meringues in an airtight container at room temperature for up to 2 weeks.
Cake Ingredients
- Whole milk: thins out the batter, generates steam during baking and helps gluten develop when it interacts with the flour.
- Egg whites: this cake uses egg whites instead of whipped egg whites to reduce the holes in the cake layers.
- Vanilla extract: enhances flavor.
- Sour cream: lends a tangy flavor to the cake and creates a moist texture. Buttermilk or yogurt can be substituted for sour cream.
- Cake flour: also known as soft flour, contains less protein than all-purpose flour. And creates a delicate and fine crumbed cake.
- Granulated sugar: sweetens the cake and easily mixes in to cake batter.
- Baking powder: is a mixture of baking soda and cornstarch. Baking powder works twice by coming in contact with liquid and then again when it comes into contact with heat.
- Baking soda: is an alkali and must be used with an acidic ingredient such as sour cream.
- Salt: enhances the cakes flavor.
- Unsalted butter: adds a rich flavor and creates texture in the cake.

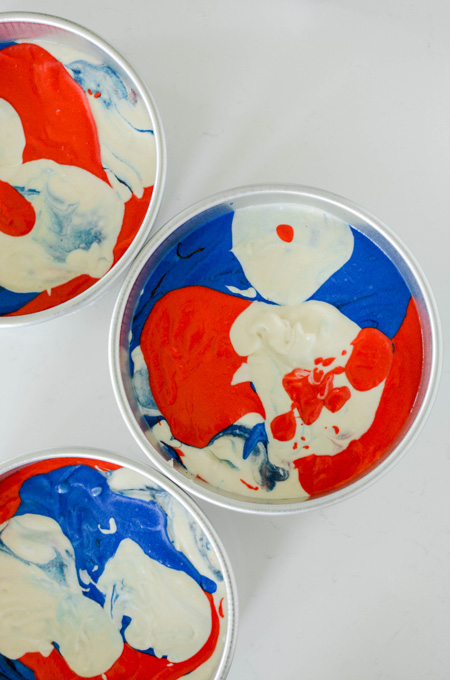
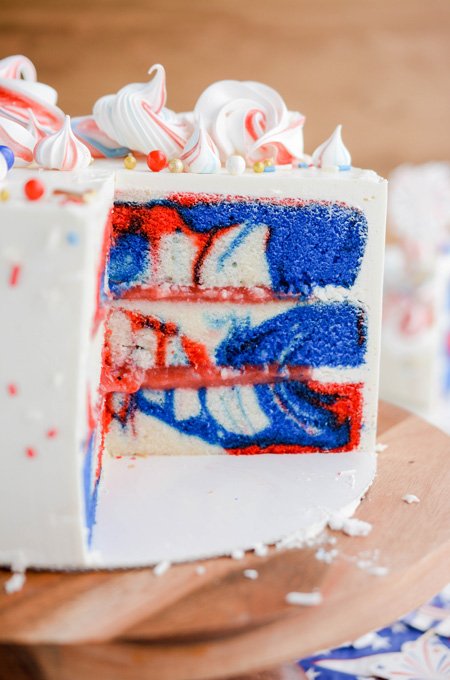
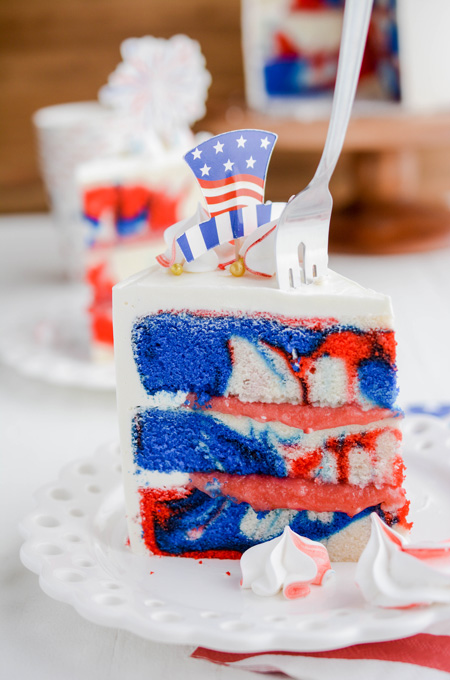
Cake Swirl
I used Americolor's Royal Blue and Red Red gel food coloring. The colors are intense and don't fade while baking. Start with a little and then add more as needed. The Cake Chica's Tip: It helps to use an ice cream scoop to divide out the different colored cake batter. Also, don't over mix the colors or the cake batter will become one color. And when red and blue mix together too much you'll get purple.

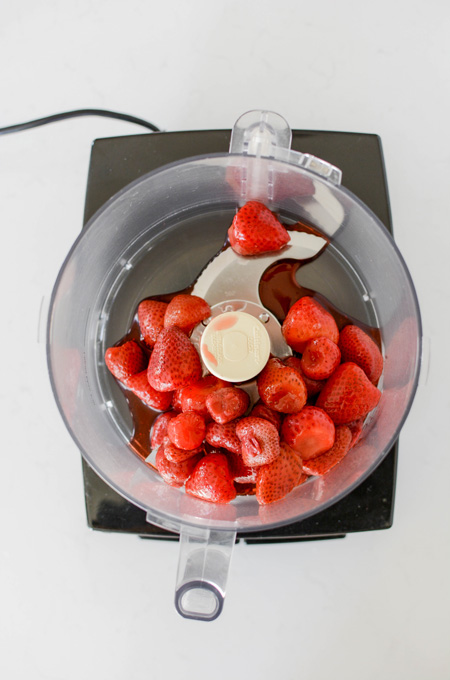
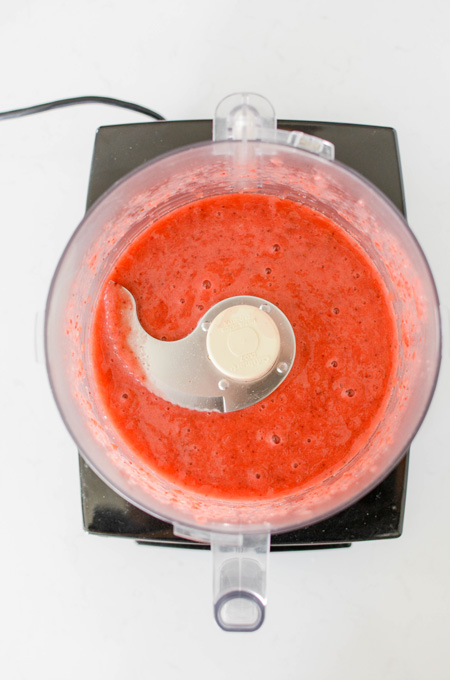
Strawberry Filling
My tried and true strawberry filling recipe is easy to make and the strawberries can easily be substituted with any frozen fruit you can get your hands on!

Swiss Meringue Buttercream
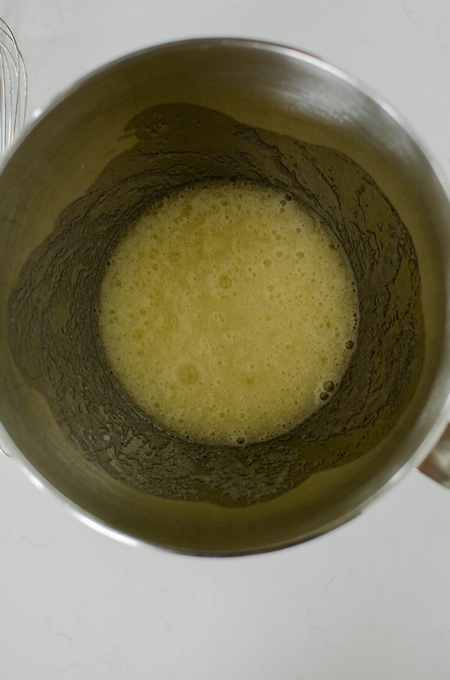
- In the bowl of a stand mixer fitted with the whisk attachment, pour in the egg whites and sugar and whisk by hand until combined. Fill a medium saucepan with about 2 inches of water and bring to a simmer. Place mixer bowl on top, being sure the bottom of the bowl does not touch the water and attach a candy thermometer.
- Whisking occasionally, heat the egg mixture until the temperature reaches 160 degrees. Once the mixture reaches 160 degrees, transfer to a stand mixer and beat the mixture on high speed for 10 minutes or until medium-stiff peaks form. At this point the outside of the mixer bowl should be room temperature.
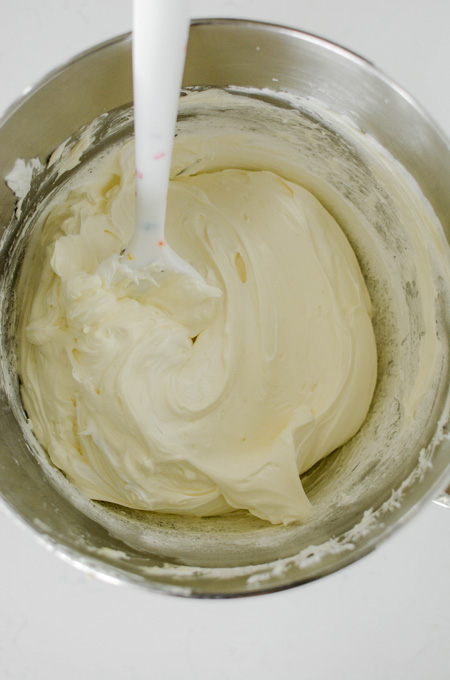
- Switch out the whisk attachment with the paddle attachment and with the mixer on low speed, add the butter one tablespoon at a time, and then add the vanilla extract or emulsion. Once combined, turn the mixer speed to medium-high and beat until buttercream is smooth, about 4 minutes. Reduce the mixer speed to low and beat for 1 more minute to remove as many air bubbles from the buttercream as possible.

Swiss Meringue Buttercream Tips
- Your mixer bowl should be completely dry and clean before use.
- There should be no grease residue on the bowl and your egg whites should be free of egg yolks.
- Whisk together the sugar and egg whites well, or the eggs may start to cook on their own.
- Make sure the double boiler stays at a simmer.
- Your butter should be room temperature before using.
- Add your butter by tablespoon to the meringue.
- The buttercream should be as smooth as possible.
- To help remove air bubbles, run the mixer on low speed for one minute.
Cake Assembly
- Place a nonslip mat on top of a cake turntable and place a cake board on top.
- Center the first cake layer on top of the cake board, making sure there's even spacing from all around the edges.
- Fit a piping bag with a round piping tip or coupler and fill the piping bag with about 1 1/2 cup buttercream.
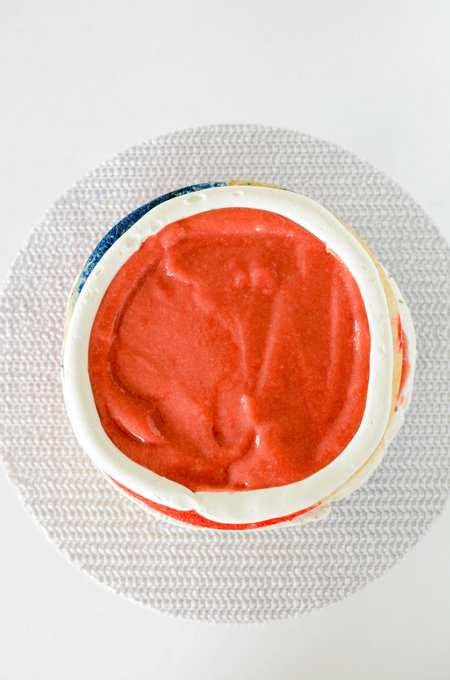
- Pipe a buttercream dam around the outer edge of the cake.
- Fill the center with half of the filling and spread out in an even layer with a small offset cake spatula.
- Place the second cake layer on top and gently press to adhere to the bottom cake layer.
- Pipe a buttercream dam around the outer edge and spread the remaining filling out in an even layer until it reaches the buttercream dam.
- Add the third and final cake layer (bottom side up) on top and gently press to adhere.
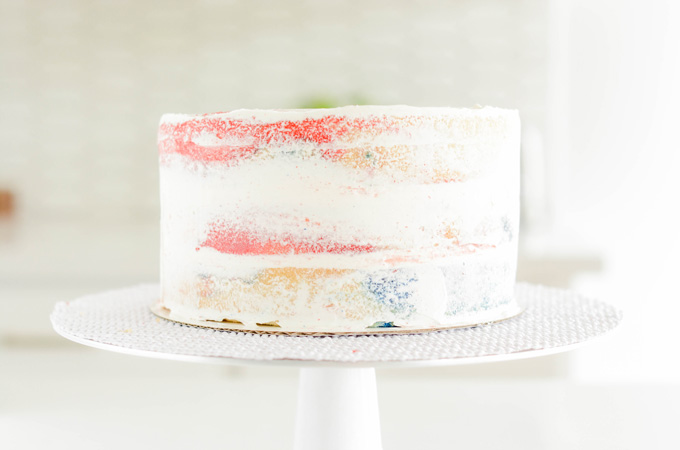
- Apply a thin layer of buttercream over the top and sides of the cake, creating a crumb coat.
- Chill the crumb coated cake in the refrigerator for 30 minutes.


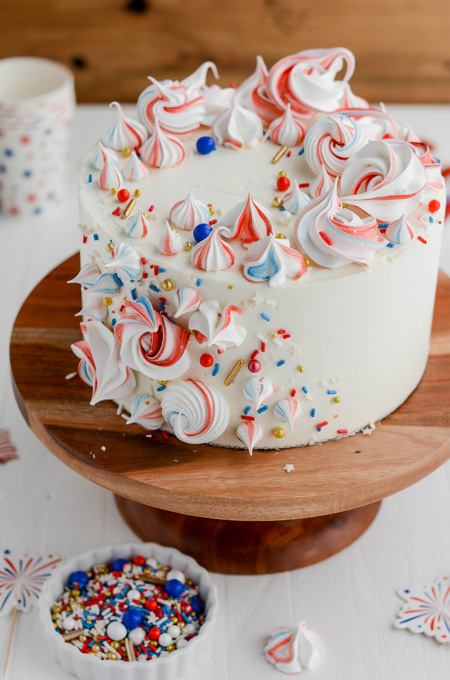
Cake Decorating
As long as you have your meringues made ahead of time, decorating this cake is a breeze! Remember to pick your best looking meringues for decoration. Check out the steps below on how you can decorate this cake.
Cake Decorating Tools
- 8-inch round cake board
- Piping bags
- Wilton piping tips #1M, #2D, #4B, #12
- Americolor Royal Blue and Red Red gel food coloring
- Cake turntable
- 8-inch round acrylic disc
- Offset cake spatula
- Cake scraper
Red White and Blue Swirl Cake Baking Schedule
- Day 1: Prepare strawberry filling.
- Day 2: Make meringues and bake cake layers.
- Day 3: Prepare Swiss meringue buttercream, assemble, decorate and serve cake.

Make Ahead
- Meringues: can be made up to 7 days in advance, stored in an airtight container at room temperature.
- Strawberry filling: can be made up to 5 days in advance, stored in an airtight container in the refrigerator.
- Cake layers: can be made up to 3 days in advance, wrapped in plastic, stored in an airtight container in the refrigerator.
Let's Connect
The Cake Chica is on the following social media platforms below. Click subscribe, like and follow! We would love to have you over!
Suggested Recipes

Red White and Blue Swirl Cake
Vanilla cake with festive swirls, filled with strawberry filling, frosted with Swiss meringue buttercream, decorated with colorful meringues and bespoke sprinkles.
Ingredients
SPECIAL TOOLS
- 3 8-inch round cake pans
- Nonstick baking spray
- Stand mixer
- Baking sheet
- Candy thermometer
- Wilton piping tips #1M, #12, #2D, #4B
- Small food only paint brush x2
- Americolor Royal Blue gel food coloring
- Americolor Red Red gel food coloring
- Parchment paper
- 8-inch round cake board
- Cake turntable
- Offset cake spatula
- 8-inch round acrylic disc
- Cake scraper
MERINGUES
- 1/2 cup egg whites
- 1 cup (7 ounces) granulated sugar
STRAWBERRY FILLING
- 12 ounces frozen strawberries, thawed
- ¼ granulated sugar
- 3 tablespoons cornstarch, mixed with 3 tablespoons cold water
- 2 - 3 tablespoons Chambord (optional)
- Fresh lemon juice, to taste
VANILLA CAKE
- 1 3/4 cups (420g/10.6 ounces) whole milk, at room temperature
- 6 large egg whites
- 1 tablespoon vanilla extract
- 2/3 (150g/5.3 ounces)cup sour cream, at room temperature
- 4 1/3 cups (498g/17.3 ounces) cake flour
- 2 1/2 cups (500g/17.7 ounces) granulated sugar
- 1 1/4 teaspoon baking powder
- 1/2 teaspoon baking soda
- 1/2 teaspoon salt
- 1 1/4 cups (282g/10 ounces) unsalted butter, cut into tablespoon sized pieces, at room temperature, about 65 degrees
- Red and blue gel food coloring
SWISS MERINGUE BUTTERCREAM
- 1/2 cup + 2 tablespoons egg whites
- 1 1/4 cups (8.75 ounces) granulated sugar
- 2 cups (4 sticks) unsalted butter, cut into tablespoon sized pieces, at room temperature
- 2 tablespoons vanilla extract or emulsion
Instructions
MERINGUES
- Adjust an oven rack to the center position and heat oven to 175 degrees.
- In the bowl of a stand mixer fitted with the whisk attachment, pour in the egg whites and sugar and whisk by hand until combined. Fill a medium saucepan with about 2 inches of water and bring to a simmer. Place mixer bowl on top, being sure the bottom of the bowl does not touch the water and attach a candy thermometer. Whisking occasionally, heat the egg mixture until the temperature reaches 160 degrees.
- Once the mixture reaches 160 degrees, transfer to a stand mixer and beat the mixture on high speed for 10 minutes or until medium-stiff peaks form.
- Prepare a piping bag with Wilton piping tips 1M, #12, #2D and 4B. Using a paint brush, paint vertical stripes on the inside of each piping bag with Americolor Royal Blue and Red Red gel food coloring.
- Transfer meringue to each piping bag. Secure a piece of parchment paper to a baking sheet by dabbing a small amount of meringue onto each corner of the baking sheet and then pressing down parchment paper down to adhere to the baking sheet. Pipe desired shapes onto the paper and bake for 2 hours. Turn off the oven and keep the oven door shut. Let the meringues cool in the oven overnight. Store the meringues in an airtight container at room temperature for up to 2 weeks.
STRAWBERRY FILLING
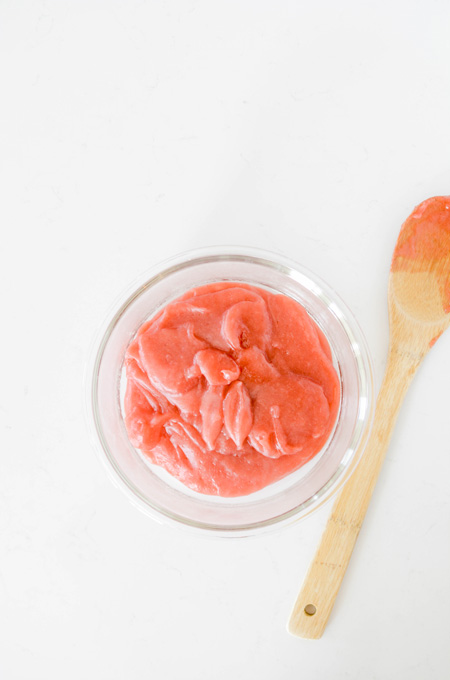
- Place thawed strawberries in a blender or food processor and puree until smooth. Over a bowl pour strawberry puree over a sieve to remove the solids. The puree will be thick. Use a spoon to stir and press the puree through the strainer.
- Place strawberry puree in a small saucepan over medium-low heat. Add sugar and cornstarch mixture and bring to a simmer, stirring constantly to keep lumps from forming. Once the puree thickens, remove from the heat. Cool for 5 minutes and then add fresh lemon juice and Chambord. Chill for about 2-3 hours in the refrigerator until ready to use.
VANILLA CAKE
- Adjust an oven rack to the center position and heat oven to 325 degrees. Spray 3 8-inch round cake pans with nonstick baking spray and set aside.
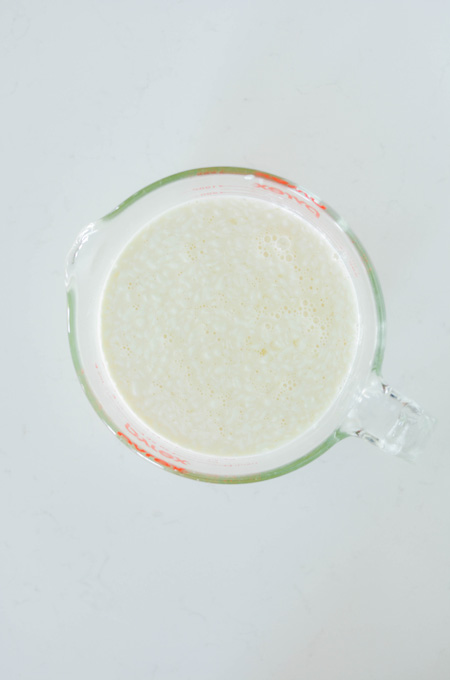
- In a 4 cup liquid measuring cup, whisk together the milk, egg whites, extract, flavoring and sour cream.
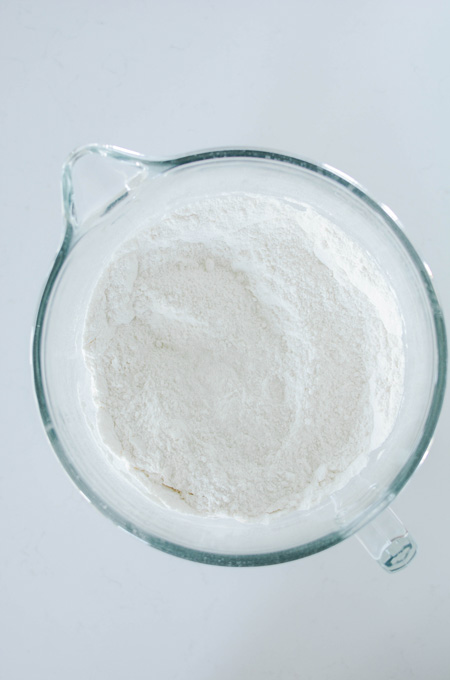
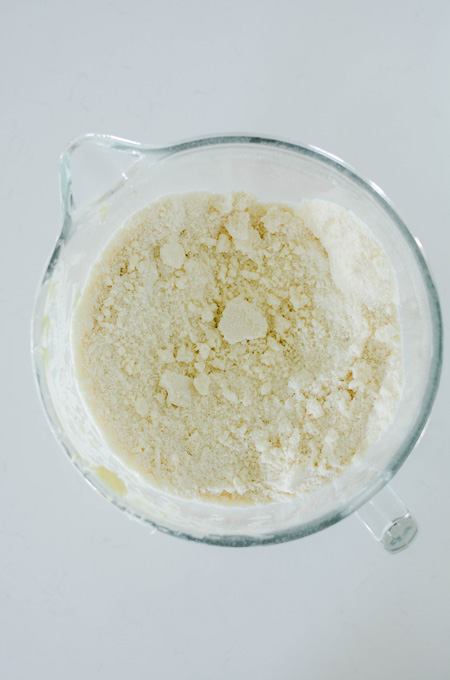
- In the bowl of a stand mixer, with the paddle attachment attached, mix the flour, sugar, baking powder, baking soda, and salt on low speed until combined. Add butter one tablespoon at a time until the mixture forms pea-sized pieces, about 1 minute. Reserve ½ cup of the milk mixture and pour the remaining to the flour mixture and mix on medium-high speed until light and fluffy, about 1 minute. Reduce the mixer speed to medium-low and add the reserved ½ cup milk mixture to the batter and mix until combined, about 30 seconds. Do not over mix. The batter may look curdled. Give the batter a final stir by hand with a rubber spatula. Divide the batter between 3 bowls. Leave one bowl of batter uncolored. Color the second bowl with red gel food coloring. Color the third bowl of batter with red gel food coloring. Using spoons or ice cream scoops, add in one scoop of white batter to a cake pan, then one scoop of red batter and then a scoop of blue batter. Repeat this process until all of the batter has been divided between the cake pans. With a wooden skewer or knife, slightly swirl the cake batter in a figure 8 pattern.
- Gently tap cake pans on the counter to settle the batter and bake until a toothpick inserted in the centers comes out with a few moist crumbs attached, about 30 to 35 minutes, switching and rotating pans halfway through baking.
- Let cakes cool in their pans for 30 minutes on cooling racks. Then invert on cooling racks to cool completely.
SWISS MERINGUE BUTTERCREAM
- In the bowl of a stand mixer fitted with the whisk attachment, pour in the egg whites and sugar and whisk by hand until combined. Fill a medium saucepan with about 2 inches of water and bring to a simmer. Place mixer bowl on top, being sure the bottom of the bowl does not touch the water and attach a candy thermometer.
- Whisking occasionally, heat the egg mixture until the temperature reaches 160 degrees. Once the mixture reaches 160 degrees, transfer to a stand mixer and beat the mixture on high speed for 10 minutes or until medium-stiff peaks form. At this point the outside of the mixer bowl should be room temperature.
- Switch out the whisk attachment with the paddle attachment and with the mixer on low speed, add the butter one tablespoon at a time, and then add the vanilla extract or emulsion. Once combined, turn the mixer speed to medium-high and beat until buttercream is smooth, about 4 minutes. Reduce the mixer speed to low and beat for 1 more minute to remove as many air bubbles from the buttercream as possible.
ASSEMBLE
- Center one cake layer on a cake board set on top of a cake turntable. Fit a piping bag with a coupler or plain round tip and fill with about 1 cup buttercream. Pipe a ring around the edge to create a cake dam. Fill the dam with half of the strawberry filling, spreading evenly with on offset spatula. Top with the second layer of cake and repeat. Place the last cake layer on top (bottom side up).
CRUMB COAT
- Apply a thin coat of buttercream over the top and sides of the cake and chill in the refrigerator for 15 minutes.
- Add a large dollop of buttercream on top of the cake and smooth out with an offset cake spatula. There should be some overhang of buttercream off the edge of the cake. Line an 8-inch round acrylic cake disc with parchment paper and place it on top of the cake (paper side down) and make sure it is even and that it lines up with the bottom cake board.
- Apply buttercream to the sides of the cake. Using a cake scraper, gently touch the scraper against the bottom cake board and the top acrylic disk and rotate the turntable. Clean off the scraper by placing the excess frosting back into your mixer bowl. Fill in any gaps with more buttercream and rotate the turntable with the cake scraper again. Chill the cake in the refrigerator for 30 minutes. Carefully place a small offset cake spatula under the acrylic disc and rotate the turntable until the disc loosens up and remove the disc and the parchment paper.
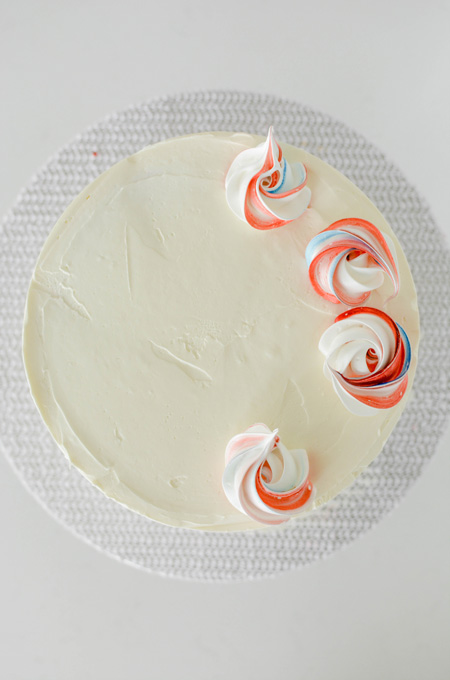
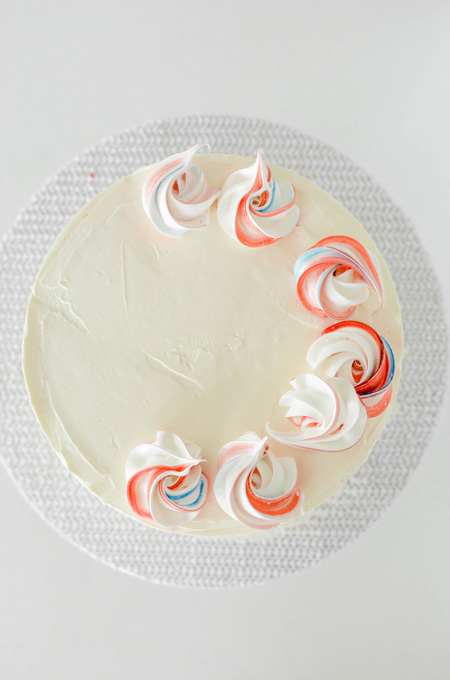
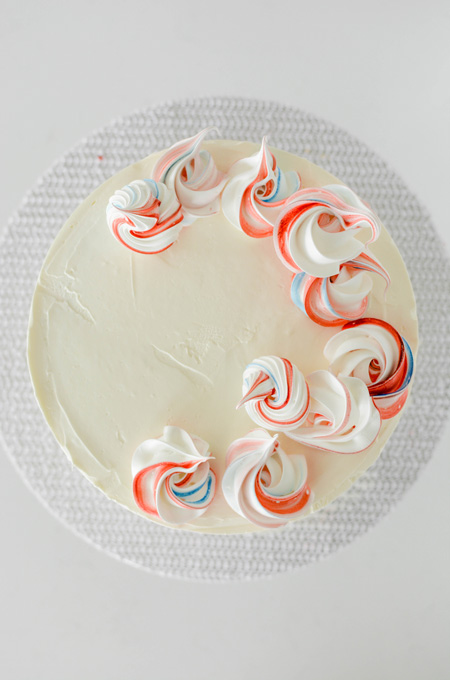
DECORATION
- Apply meringues on top and the sides of the cake in a decorative fashion. Carefully place cake on a cake serving platter and serve.
Notes
Meringues can be prepared up to 2 weeks in advance. Stored in an airtight container at room temperature.
Strawberry filling can be made up to 7 days in advance.
Cake layers can be made up to 3 days in advance.
Assemble cake can be kept in an airtight container for up to 3 days in the refrigerator. Bring to room temperature before serving.
Nutrition Information:
Yield: 12 Serving Size: 1Amount Per Serving: Calories: 443Total Fat: 14gSaturated Fat: 5gTrans Fat: 0gUnsaturated Fat: 8gCholesterol: 48mgSodium: 393mgCarbohydrates: 67gFiber: 2gSugar: 23gProtein: 11g
*Nutrition information is an estimate and will vary.*


Leave a Reply