
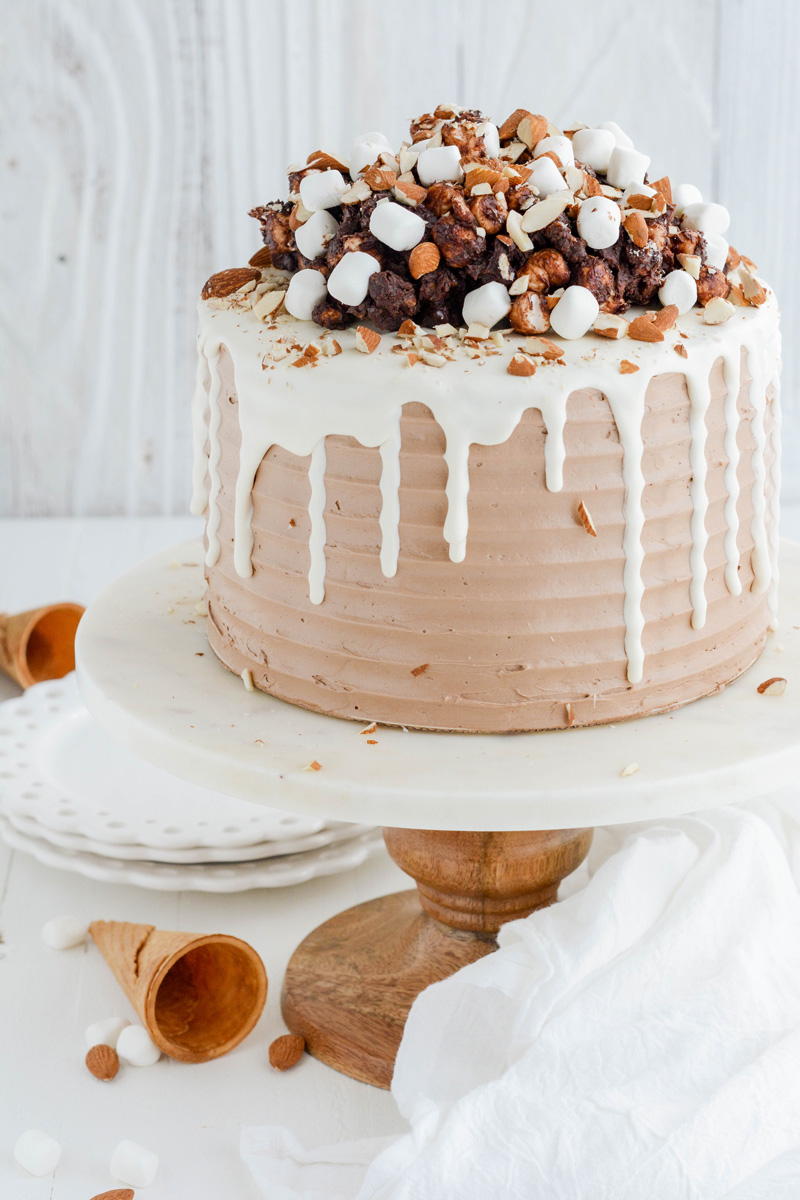
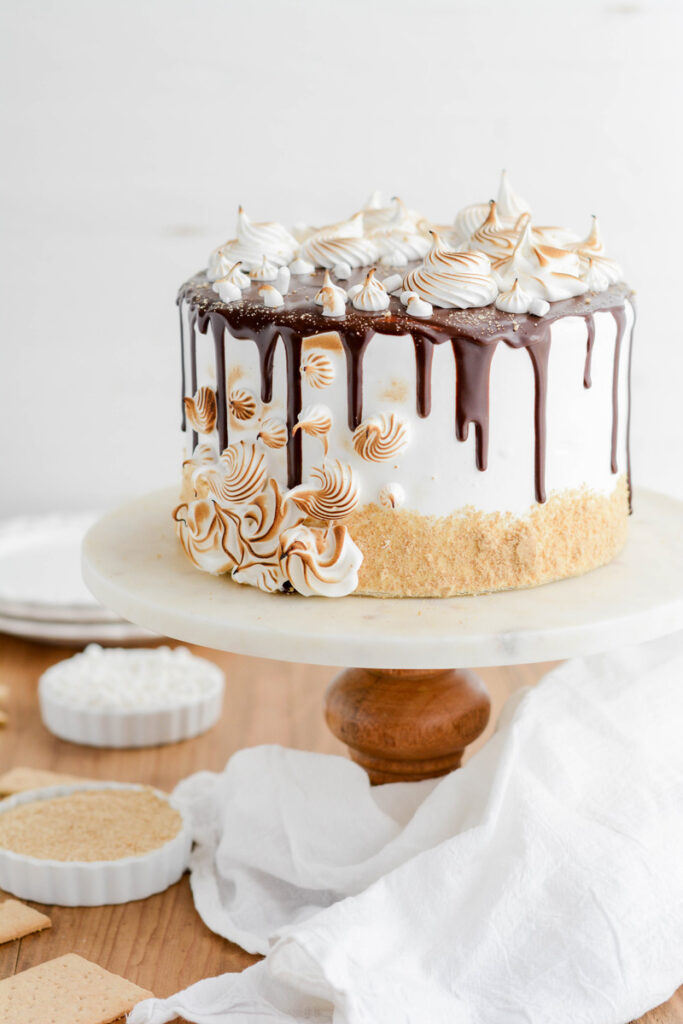
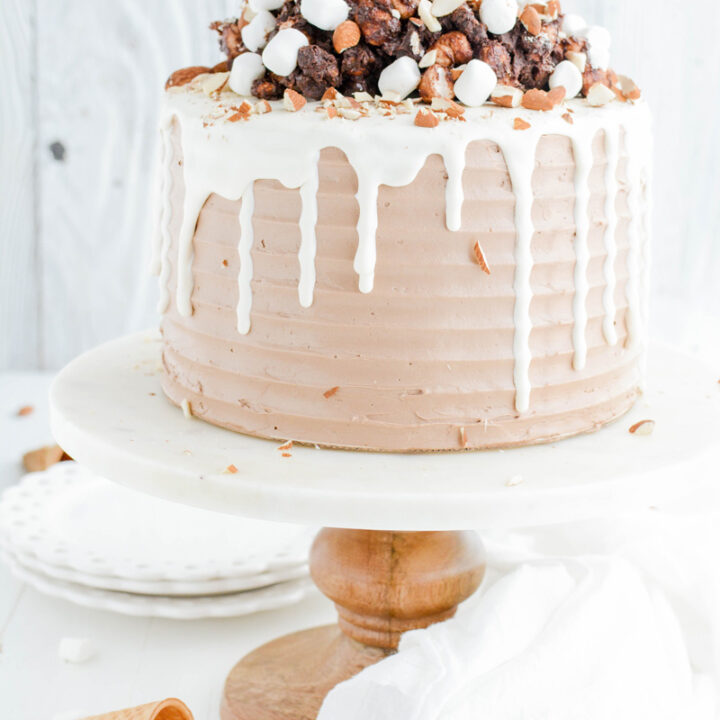
Rocky Road Ice Cream is my favorite ice cream flavor. It's the flavor that for me, doesn't matter what brand it is, I'm going to love it! Which is why I was shocked that I haven't created my favorite ice cream flavor in cake. Well the time has come where I share my special Rocky Road Layer Cake creation with you!
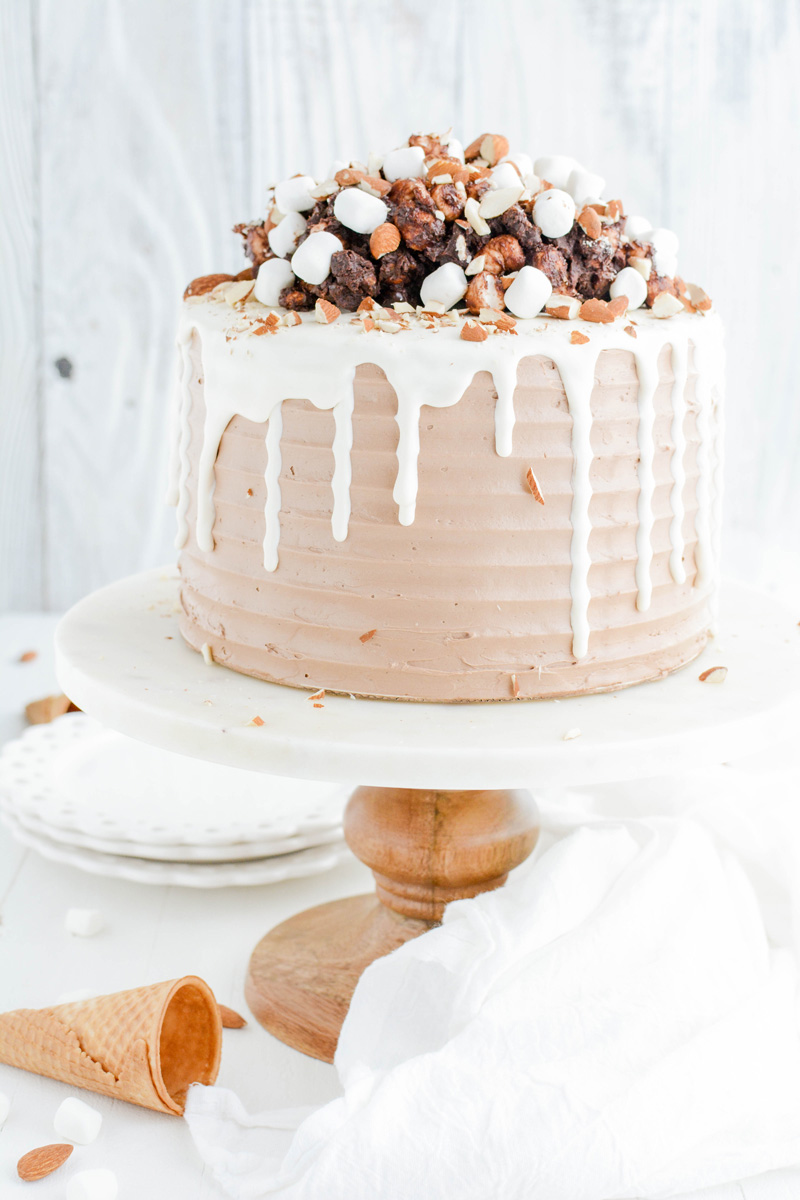
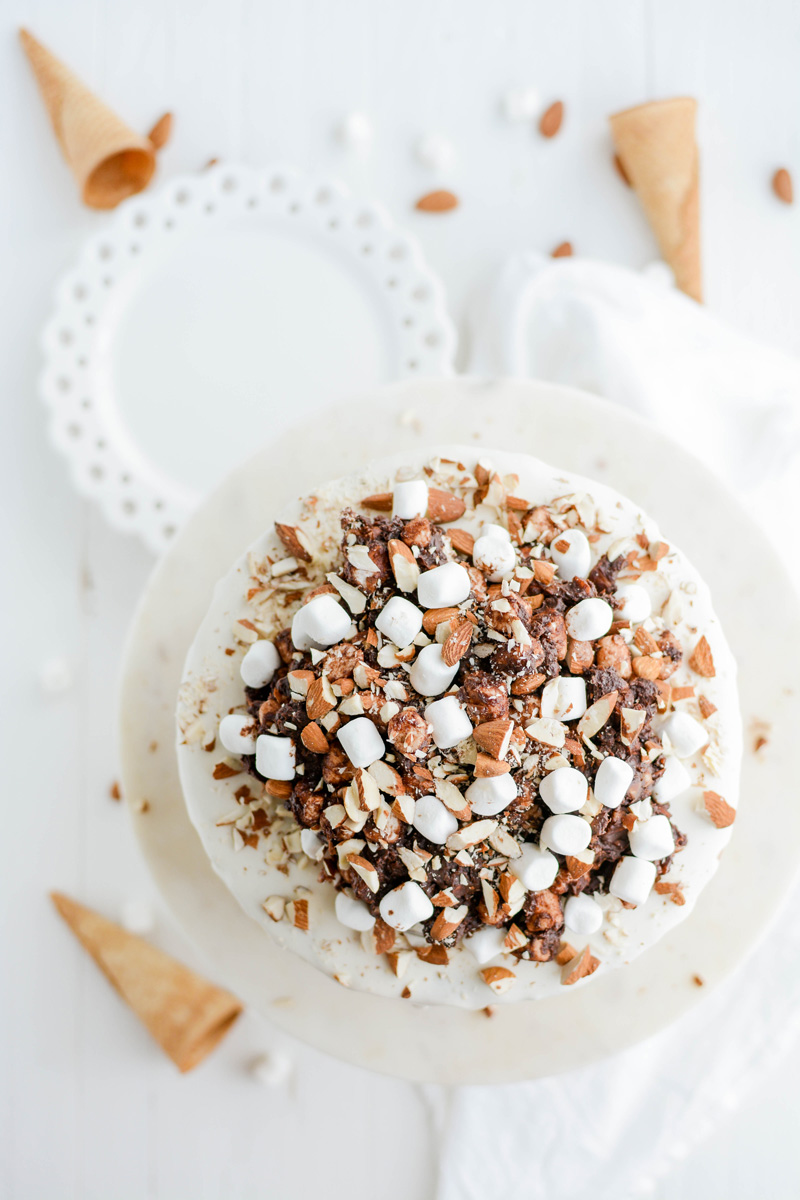
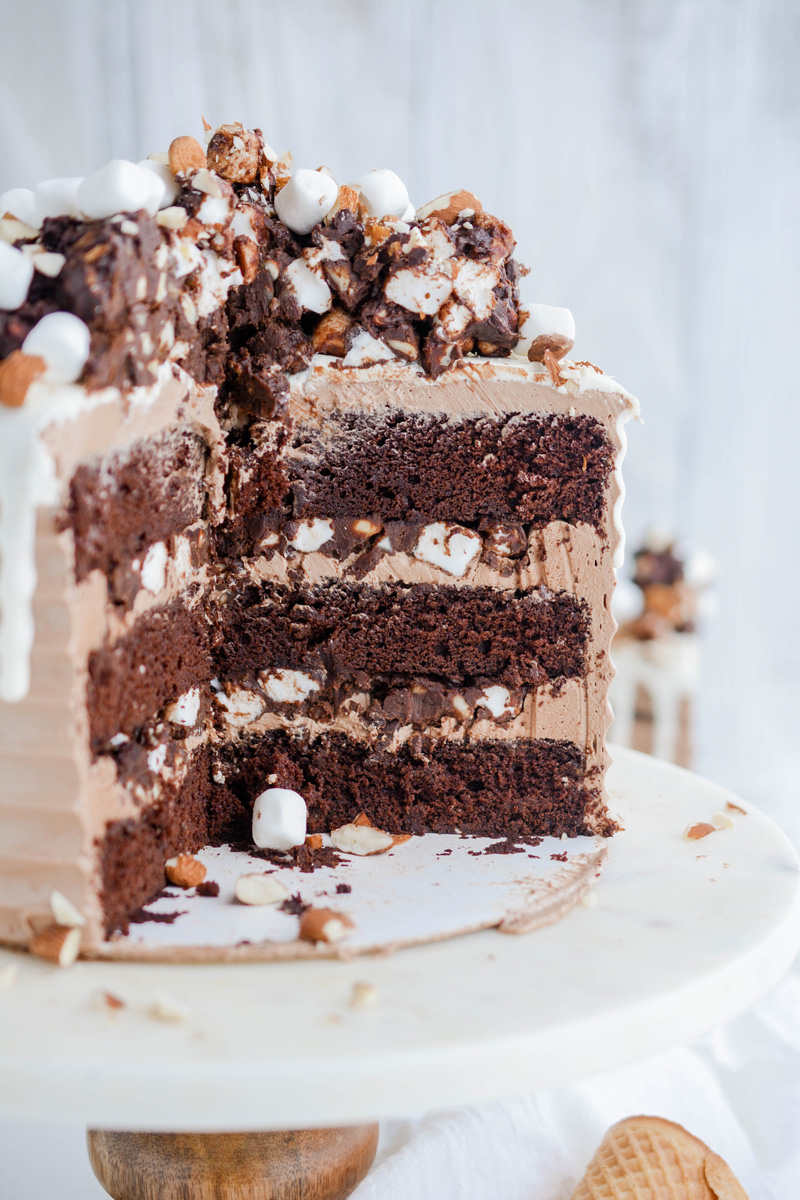
My version of this cake has three layers of dark chocolate cake that are filled with a rocky road filling made of melted chocolate, almonds, marshmallows and chocolate chips. I used a chocolate frosting made from chocolate ice cream to finish off the cake. And for the finishing touch, it's topped with white chocolate drip and more rocky road filling!
How To Get The Best Chocolate Flavor In Chocolate Cake
- Using a mix of unsweetened chocolate with Dutch-processed cocoa powder (which is less acidic) will help enhance the rich color in chocolate cake. Tip: Don't substitute natural unsweetened cocoa powder for Dutch-processed cocoa powder.
- Mixing chocolate and cocoa together in water instead of milk will help keep the focus on the chocolate flavor.
- The use of brown sugar and espresso powder helps enhance the flavor of the chocolate.
How To Accurately Measure Boiling Water
- Bring a saucepan full of water to a boil.
- Pour out the required amount for the recipe into a heatproof measuring cup.

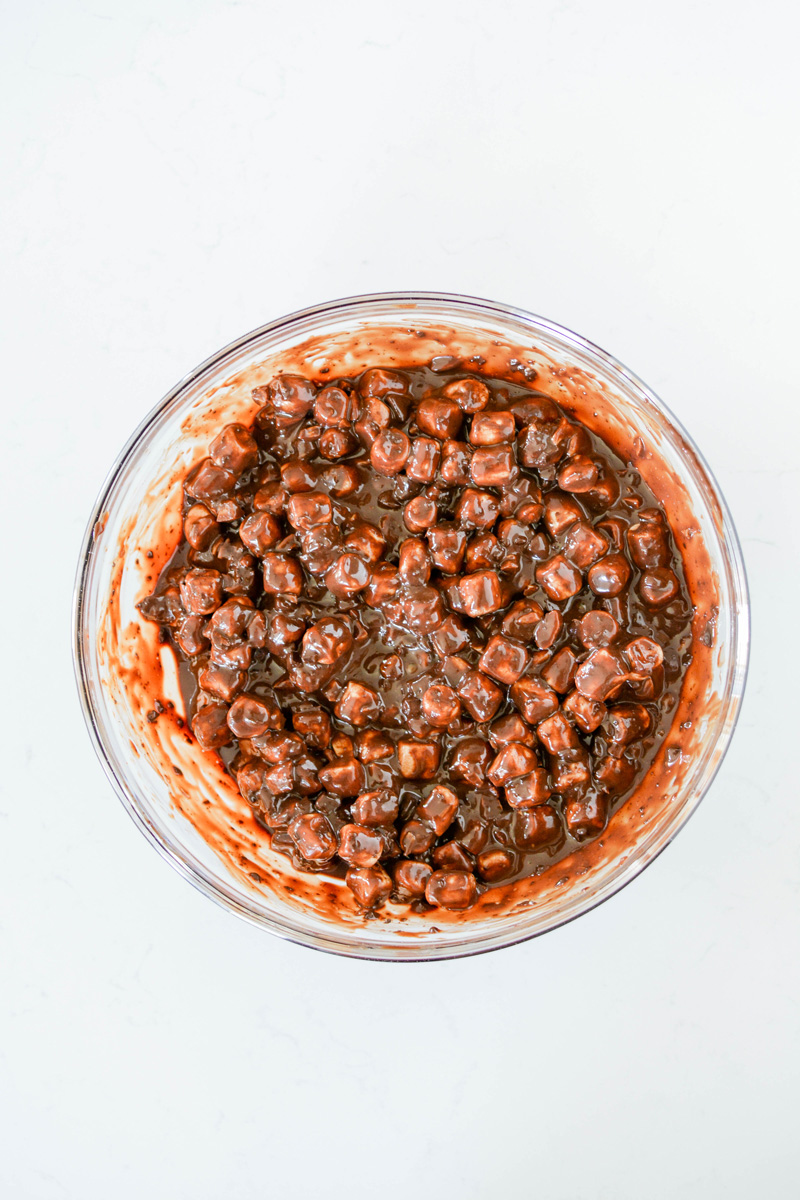
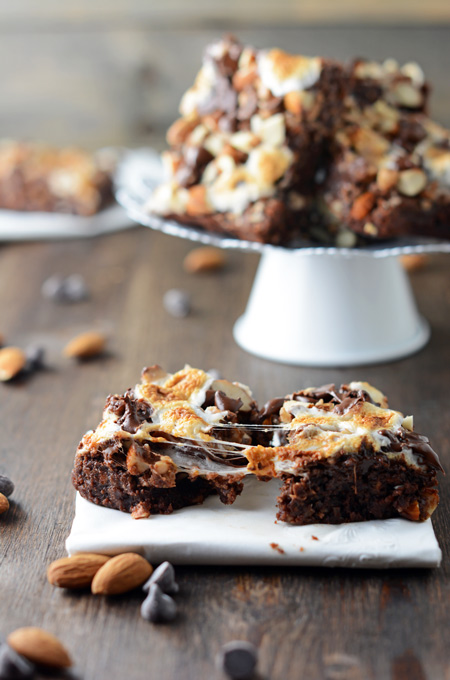
Rocky Road Filling
I was completely inspired by a recipe I saw in the book Cake Confidence for this rocky road filling. My version uses almonds instead of peanuts which was in the original recipe. I also doubled the recipe in my version and it makes the perfect amount for my version of Rocky Road Layer Cake.

What Is Chocolate Bloom?
You'll notice I have some chocolate bloom on my chocolate chips in the first picture above. This doesn't mean the chocolate has gone bad. And thankfully the chocolate is still safe to use! There are two types of bloom called sugar bloom and fat bloom.
Sugar bloom: means moisture has come in contact with the chocolate. It dissolves the sugar on the surface of the chocolate creating the white powder look.
Fat bloom: occurs when the chocolate has been stored incorrectly, either in shipping, or during the tempering process.
Chocolate Ice Cream Frosting
If you're looking for a chocolate frosting that is fluffy and sweet then this is it! The fun part of this frosting is that it's made with melted chocolate ice cream!

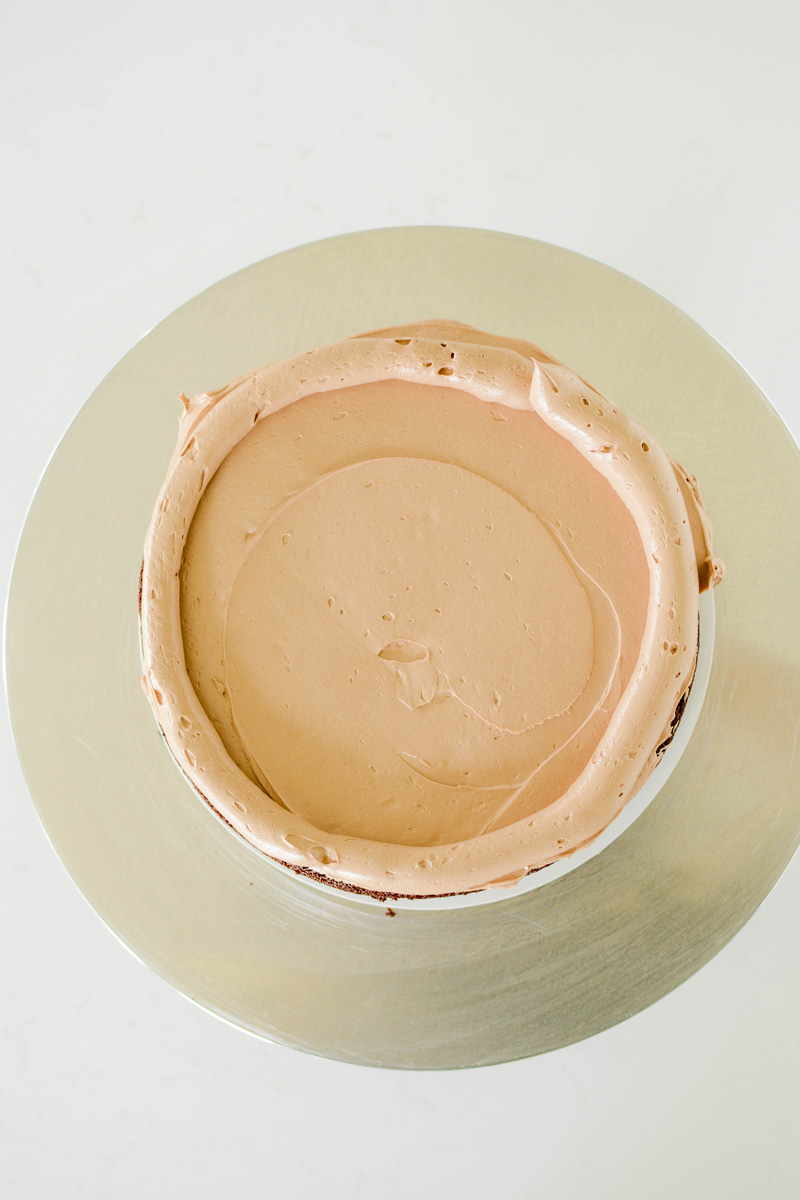
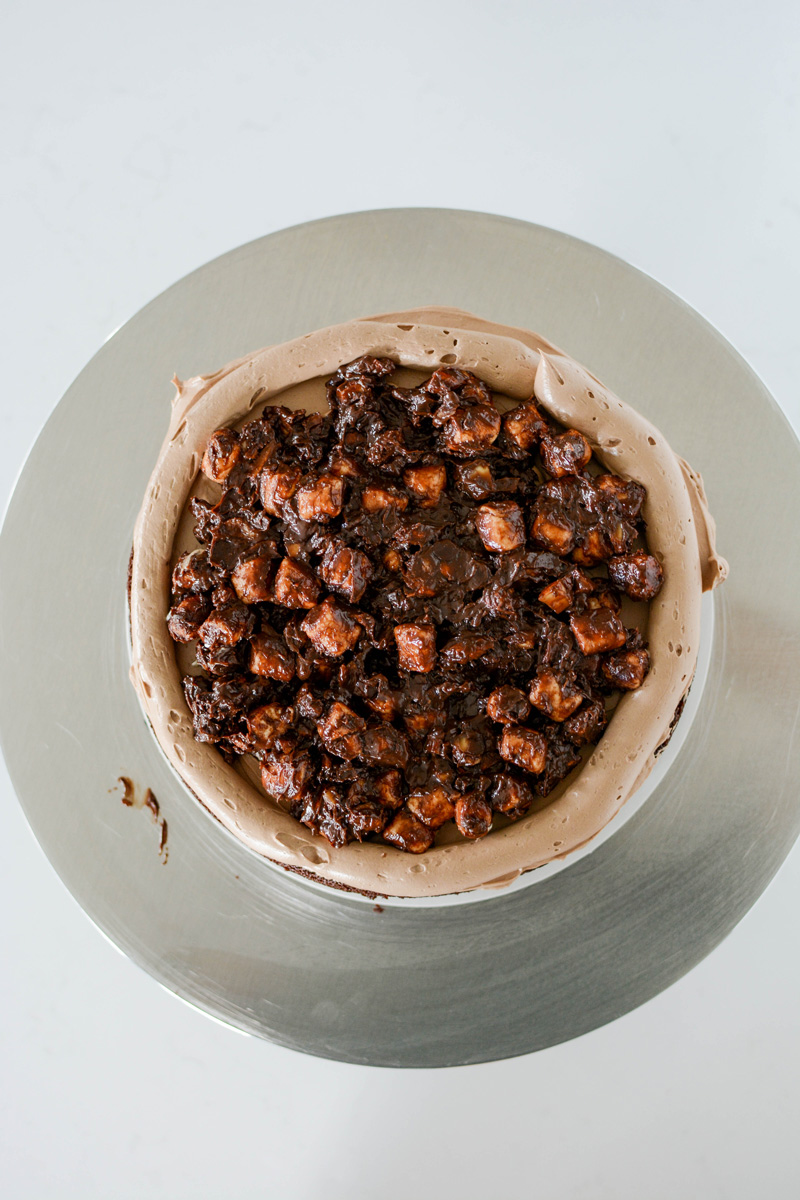
Filling And Stacking
Spread about 1/2 cup frosting over the cake with an offset cake spatula. Fit a piping bag with a plain round piping tip or coupler and fill with about 1 cup frosting. Pipe a frosting dam around the edge of the cake and then add about 1 cup of the Rocky Road Filling over the top. Add the second cake layer on top and repeat the process. Place the last cake layer on top (bottom side up).
Crumb Coat
I recommend crumb coating cakes because it helps keep loose crumbs from getting into your final layer of frosting. Not only that, but it also helps seal your cake in keeping it fresh and gives you a solid base to decorate on.

White Chocolate Drip Tips
- Chill your cake before adding the drips. The chilled cake will help slow down the drips, giving you more control.
- Make sure the chocolate is the right temperature. It should be fluid but not warm.
- Find the spot on your cake that will be the back and run a test drip on it. If the drip slips off the cake it's too hot. If the drips clump, it's too cold.
- For more controlled drips, use a spoon or a squeeze bottle and add the drips to the sides of the cake first. I prefer using a spoon for my drips.
- Once you have your side drips done, gently pour the remaining chocolate on the top and spread out until it meets the edges. Reheat the chocolate if needed.

Rocky Road Layer Cake Decorating Tools
- Cake turntable
- Nonslip mat for turntable
- 8-inch round cake board
- 10-inch round cake board
- Cake comb

Rocky Road Layer Cake Baking Schedule
- Day 1: Bake chocolate cake layers.
- Day 2: Prepare rocky road filling, frosting, assemble and serve.
Let's Connect
The Cake Chica is on the following social media platforms below. Click subscribe, like and follow! We would love to have you over!
Suggested Recipes

Inspired by Cake Confidence by Mandy Merriman
Rocky Road Layer Cake
Three layers of rich dark chocolate cake filled with rocky road filling and frosted with chocolate ice cream frosting. White chocolate drip and more rocky road filling finish off this decadent Rocky Road Layer Cake.
Ingredients
SPECIAL TOOLS
- 3 8-inch round cake pans
- Nonstick baking spray
- 4 cup liquid measuring cup
- Stand mixer
- Nonslip mat for turntable
- Cake turntable
- 8-inch round cake board
- 10-inch round cake board
- Cake comb
CHOCOLATE CAKE
- 1 ½ cups (7 1/2 ounces/213 grams) all-purpose flour
- 1 teaspoon baking soda
- ½ teaspoon baking powder
- ¼ teaspoon table salt
- 4 ounces unsweetened chocolate, chopped
- ½ cup (1 ½ ounces/42.5 grams) Dutch-processed cocoa powder
- 1 teaspoon instant espresso powder or instant coffee powder
- 1 ¼ cups boiling water
- 10 tablespoons unsalted butter, cut into tablespoon sized pieces, at room temperature
- 1 ½ cups (10 1/2 ounces/297 grams) light brown sugar
- 3 large eggs, at room temperature
- ½ cup sour cream, at room temperature
- 1 teaspoon vanilla extract
ROCKY ROAD FILLING
- 1 cup (6.6 ounces/188 grams) chocolate chips + 1 cup (6.6 ounces/188 grams) chocolate chips, roughly chopped
- 1 cup (8 ounces) heavy cream
- 1 cup (4.8 ounces/136 grams) chopped almonds, plus more for garnish
- 2 cups (4 ounces/115 grams) mini marshmallows, plus more for garnish
CHOCOLATE ICE CREAM FROSTING
- 1 cup (2 sticks) unsalted butter, at room temperature
- 1/4 cup (50 grams) shortening
- Pinch of salt
- 3 1/4 cup (13 ounces/410 grams) powdered sugar, sifted
- 1/4 cup (4 ounces) heavy cream
- 1/2 cup melted chocolate ice cream
WHITE CHOCOLATE DRIP
- 1 cup (180 grams/8 ounces) Wilton Very White chocolate candy melts
- 1/4 cup (2 ounces) heavy cream
Instructions
CHOCOLATE CAKE
- Adjust an oven rack to the center position and heat oven to 350 degrees. Spray 3 8-inch round cake pans with nonstick baking spray and set aside.
- In a large bowl, whisk the flour, baking soda, baking powder, and salt together. In a 4 cup liquid measuring cup, combine the chopped chocolate, cocoa powder, instant espresso powder or coffee powder, and boiling water and whisk until the chocolate is melted and combined.
- In the bowl of a stand mixer fitted with the paddle attachment, beat together the butter and sugar on medium-high speed until fluffy and pale in color, about 5 minutes. On low speed add eggs one at a time mixing until just combined. Add in the sour cream and vanilla extract and mix on low until incorporated. Add flour in 3 additions, alternating with the chocolate mixture in 2 additions. Scrape down the sides of the bowl needed and give the batter a final stir by hand with a rubber spatula.
- Divide the batter into the prepared cake pans. Gently even out the batter but tapping gently on the counter and bake until a toothpick inserted in the centers comes out with a few moist crumbs attached, about 15 to 20 minutes, rotating pans halfway through baking. Let cakes cool in their pan for 10 minutes on a cooling rack, then invert on cooling rack to cool completely.
ROCKY ROAD FILLING
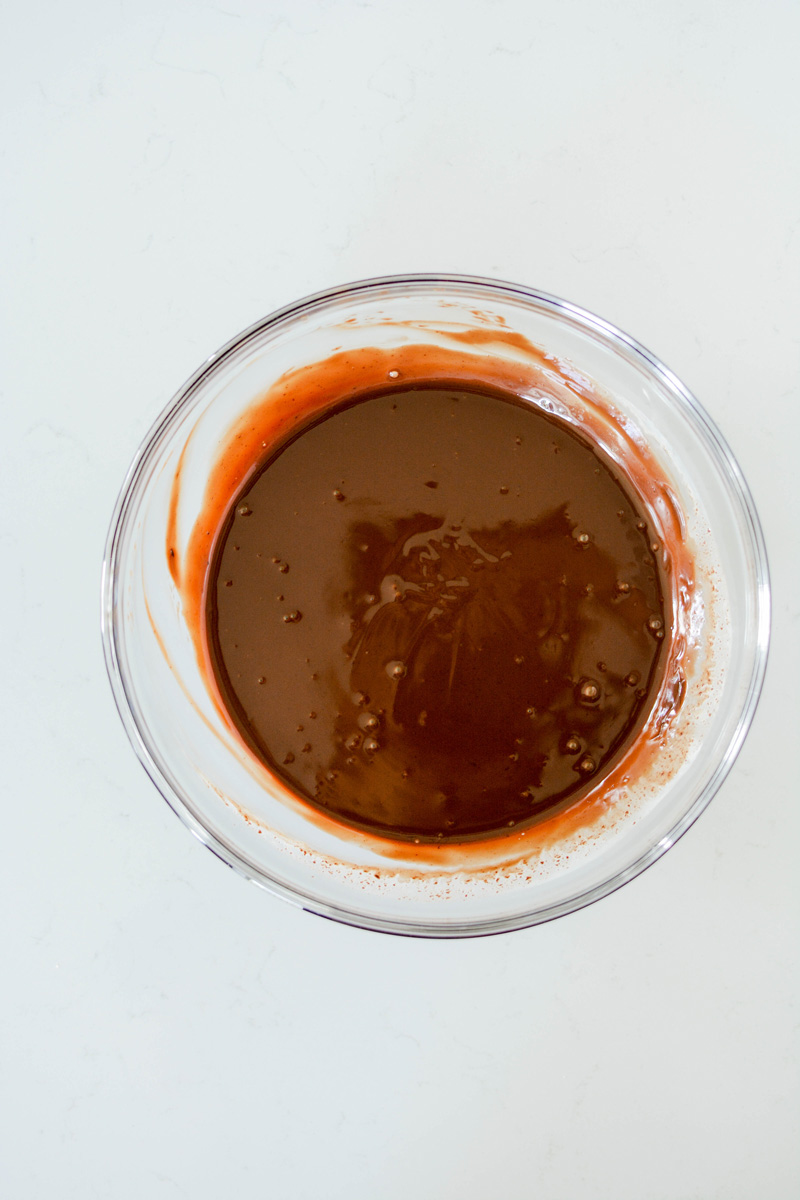
- In a microwave safe bowl, combine 1 cup chocolate chips and 1 cup heavy cream and microwave on 30 second intervals until the chocolate is completely melted and there are no lumps. Let chocolate cool for 10 minutes.
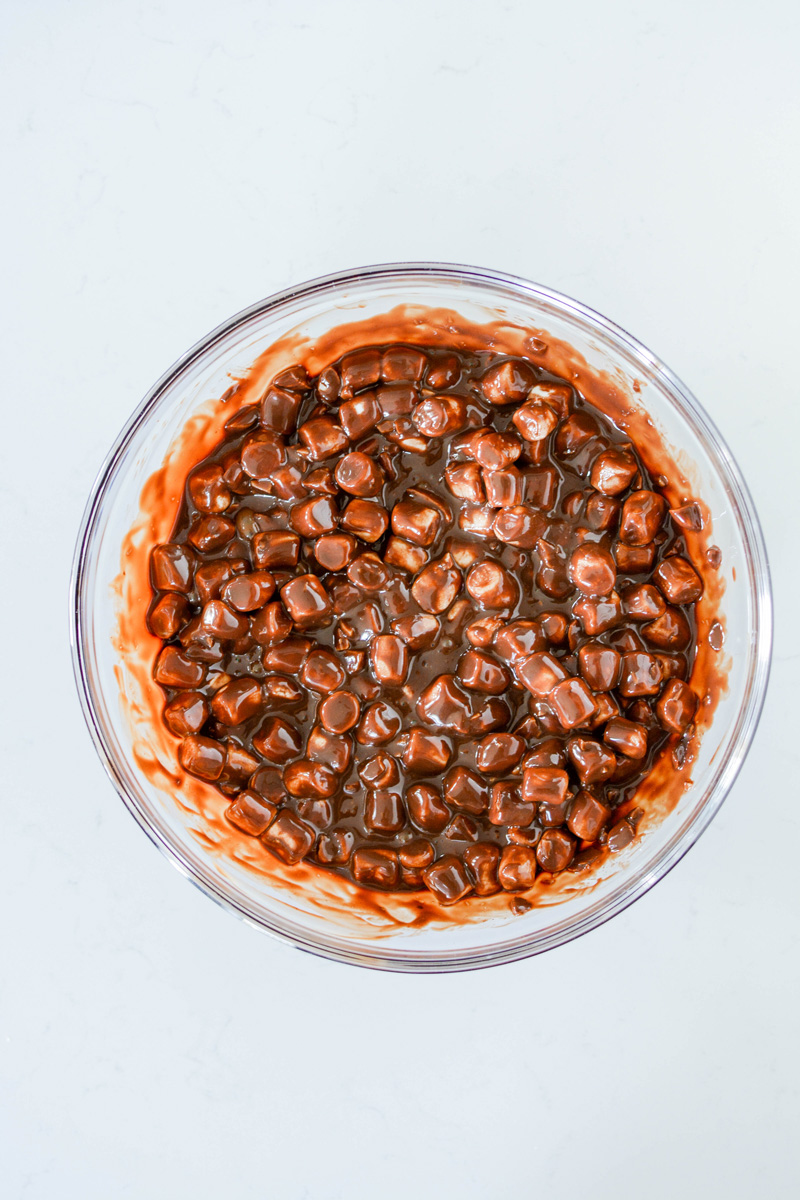
- Add the chopped almonds, and marshmallows and stir to combine.
- Gently fold in the remaining 1 cup chopped chocolate chips and set aside.
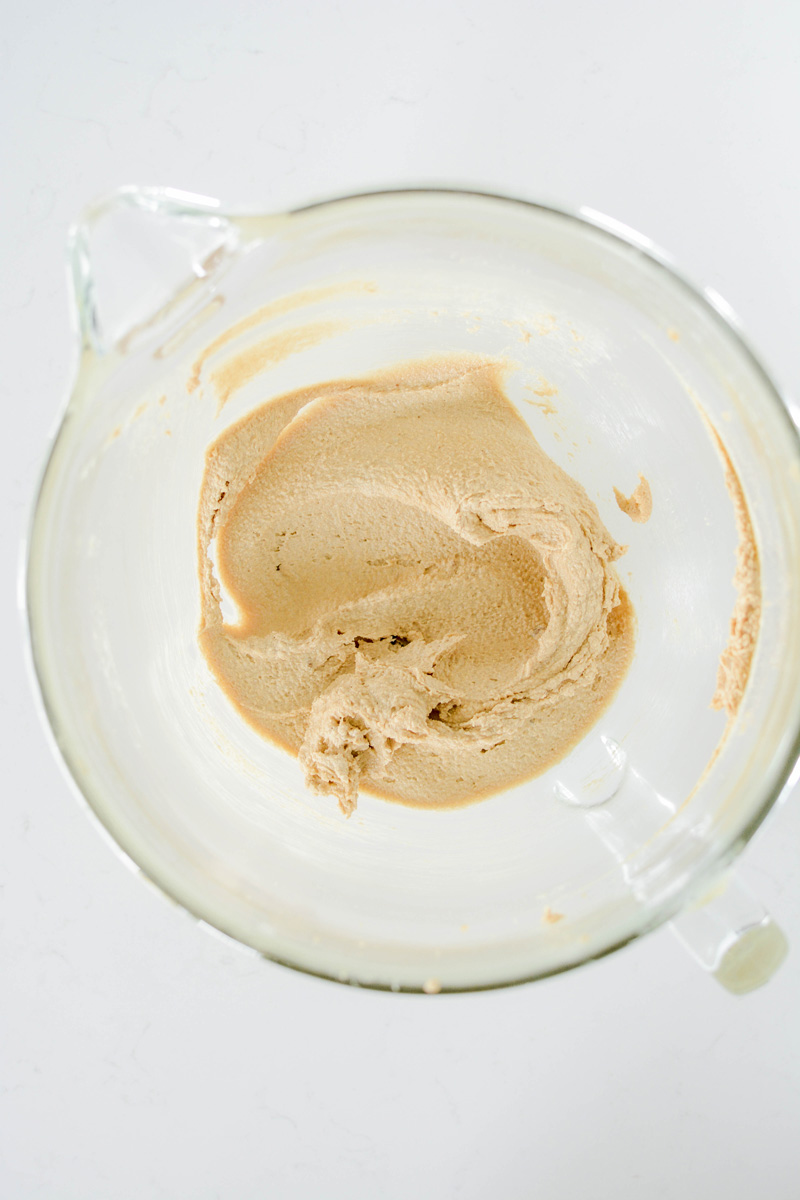
CHOCOLATE ICE CREAM FROSTING
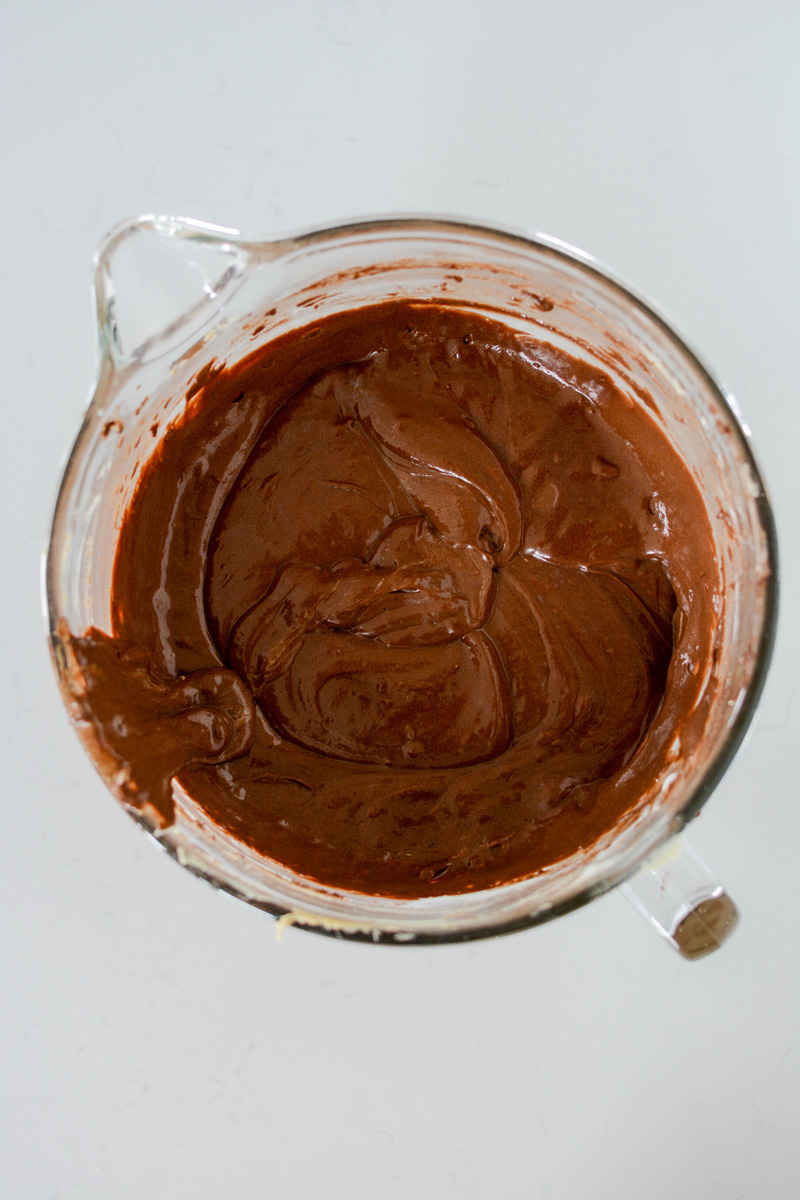
- In the bowl of a stand mixer fitted with the paddle attachment, beat the butter, shortening and salt on medium speed until light and creamy, about 8 minutes. Add cooled melted chocolate and mix to combine. Add the powdered sugar, heavy cream and melted ice cream.
- Reduce the speed to the lowest setting and beat for 1 minute. Increase the speed to medium-high and beat until very light and fluffy, about 6 minutes.
ASSEMBLE
- Place a nonslip mat on top of a cake turntable and place an 8-inch cake board on top. Center the first cake layer on top of the cake board, making sure there’s even spacing from all around the edges.
- Spread about 1/2 cup frosting over the cake with an offset cake spatula. Fit a piping bag with a plain round piping tip or coupler and filled with about 1 cup frosting. Pipe a frosting dam around the edge of the cake and then add about 1 cup of the Rocky Road Filling over the top. Add the second cake layer on top and repeat the process. Place the last cake layer on top (bottom side up). Apply a thin coat of frosting over the top and sides of the cake, creating a crumb coat. Chill the cake in the refrigerator or freezer for 15 to 30 minutes.
- Apply a small amount of frosting in the center of a 10-inch cake board and place the cake on top. Place the the cake back on the turntable and apply a generous amount of frosting on top, spreading it out to the edge. You should have excess frosting hanging off the sides of the cake.
Apply more frosting to the sides of the cake, making sure it’s evenly covered. Gently press a cake comb against the bottom of the 8-inch cake board and smooth out the sides of the cake by rotating the cake turntable. Fill in any gaps in the frosting and rotate the cake turntable with the cake scraper again. Once the sides are smooth and even chill the cake in the refrigerator or freezer while you prepare the white chocolate drip.
WHITE CHOCOLATE DRIP
- In a microwavable bowl combined candy melts and heavy cream and microwave for 20 second intervals, stirring between each interval until melted. Add marshmallow flavoring if using and stir to combine.
- Let chocolate cool at room temperature for about 10 to 15 minutes.
- Add chocolate drip to a squeeze bottle, piping bag or use a spoon to apply to the sides of the cake. Pour remaining white chocolate drip in the center of the cake and spread to meet the edges of the dripped chocolate.
- Chill the cake in the refrigerator or freezer until the chocolate has set before adding the remaining Rocky Road Filling. White Chocolate Drip has set, place the remaining Rocky Road Filling on top. Sprinkle chopped almonds and mini marshmallows and top. Carefully transfer cake to a cake pedestal and serve.
Notes
Cake Layers can be made up to 3 days in advance, wrapped in plastic, stored in an airtight container in the refrigerator.
Filling and Frosting is best made the day of assembly.
Nutrition Information:
Yield: 12 Serving Size: 1Amount Per Serving: Calories: 503Total Fat: 32gSaturated Fat: 15gTrans Fat: 0gUnsaturated Fat: 14gCholesterol: 117mgSodium: 357mgCarbohydrates: 49gFiber: 2gSugar: 25gProtein: 7g
*Nutrition information is an estimate and will vary.*


Leave a Reply