
As an Amazon Associate, I earn from qualifying purchases.
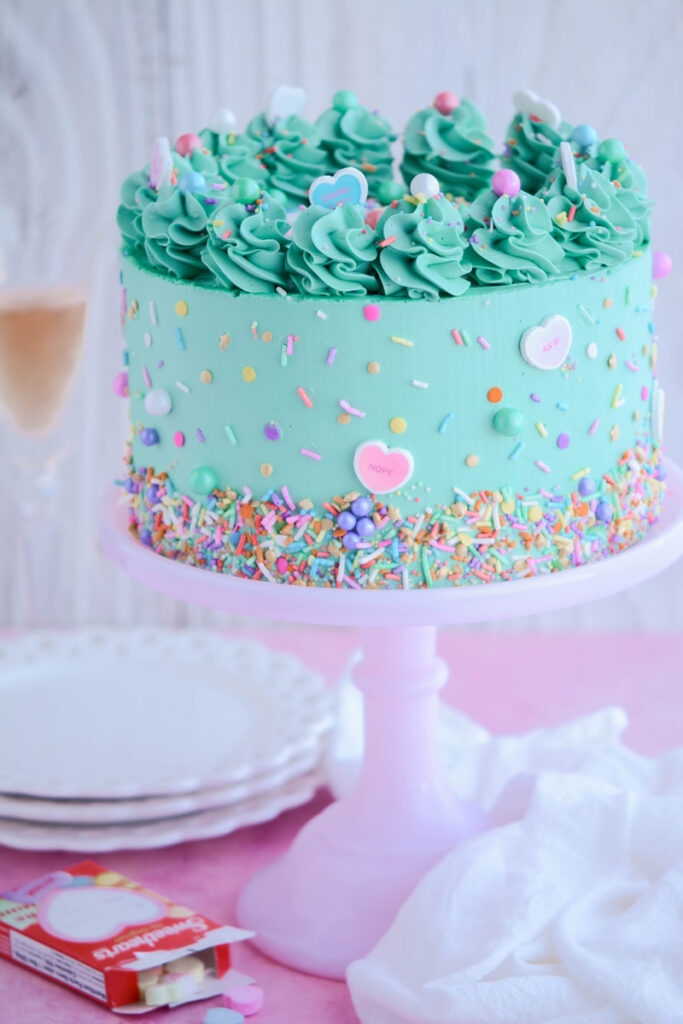
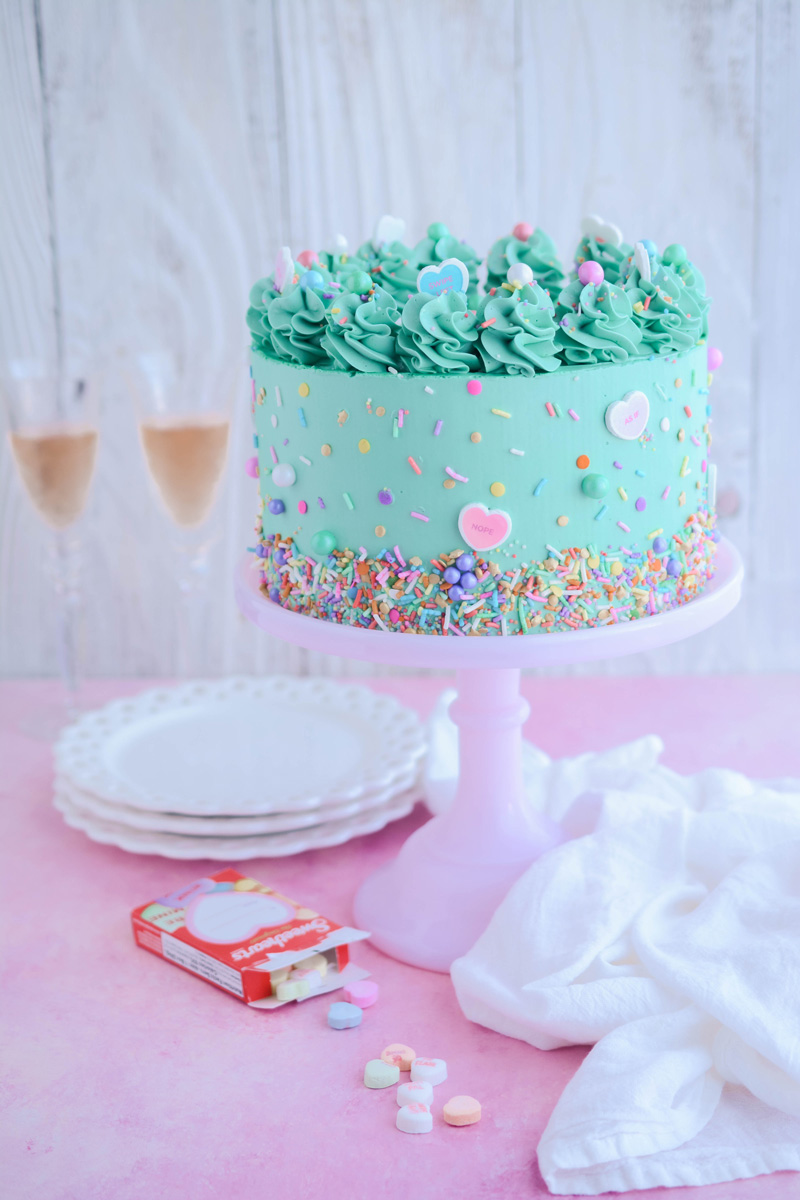
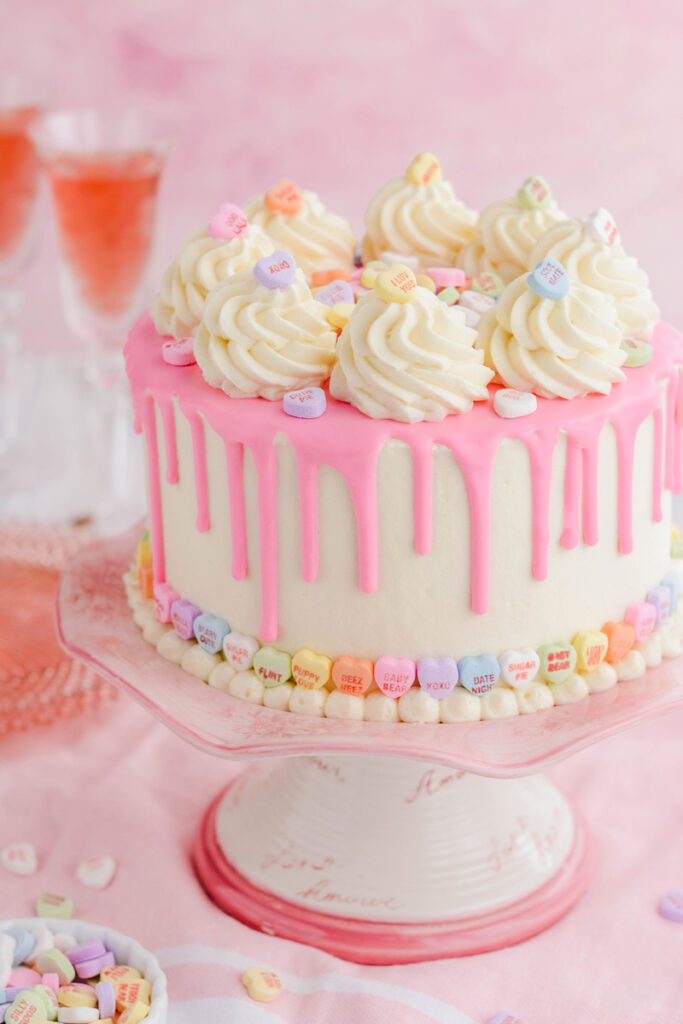
Indulge in a symphony of sweetness with our enchanting Valentine's Day Pink Champagne Cake! Crafted with love and adorned with layers of delicate pink champagne-infused cake, this exquisite confection is a celebration of romance and decadence.
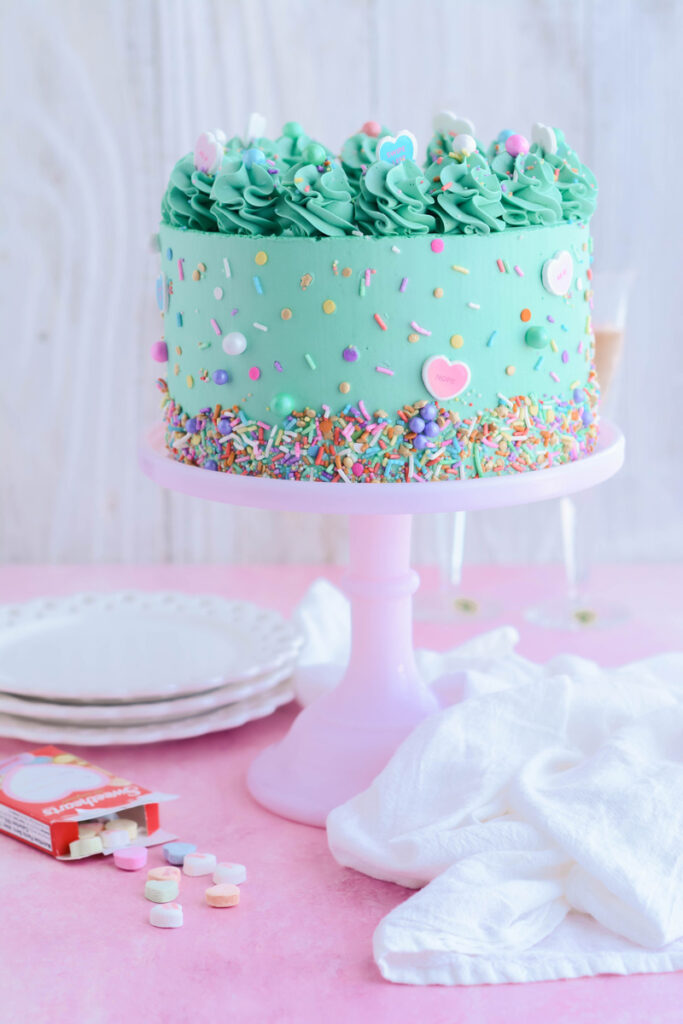
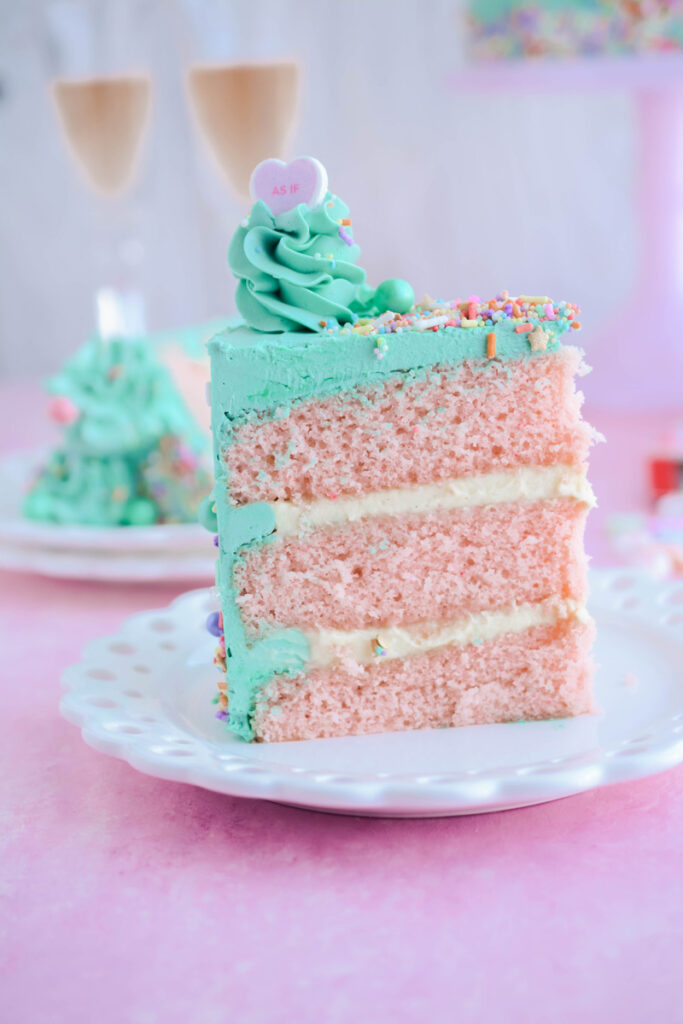
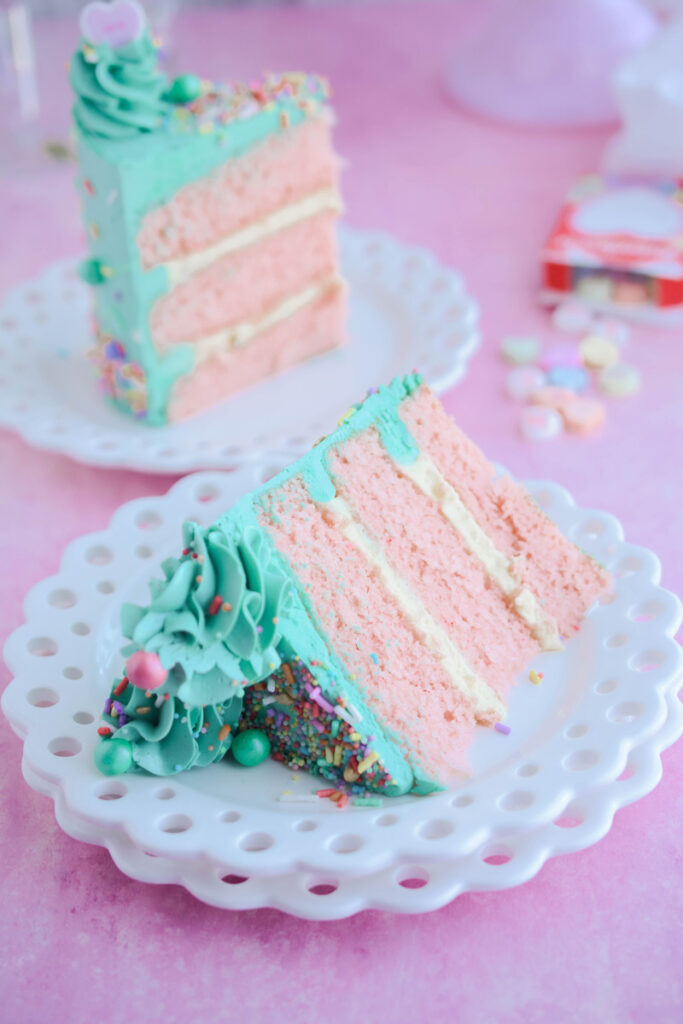
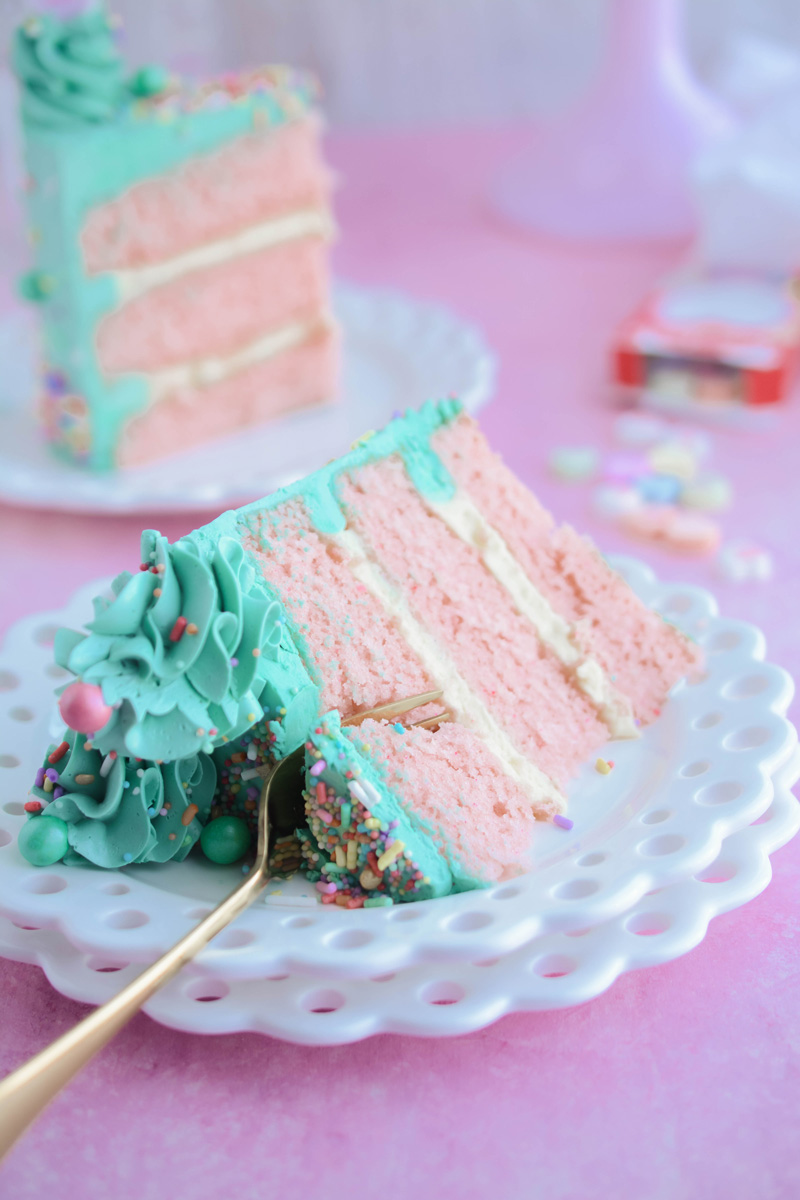
Each tasty bite is full of bubbly champagne flavor. Plus, the addition of homemade vanilla bean pastry cream filling takes this festive dessert to a new level!
Pink Champagne Cake
- Cake flour: I love baking with cake flour because of its low protein content which creates cakes that are light and gives cakes their fine crumb.
- Baking powder: is a leavener and works when it comes into contact with liquid and when it comes into contact with heat.
- Salt: helps round out the flavors in the cake.
- Eggs: bind, thicken, emulsifies and leavens.
- Granulated sugar: is perfect for cakes because it incorporates well in cake batters and dissolves easily while baking.
- Vanilla extract: helps round out the flavors.
- Vegetable oil: helps the cake remain moist even at cooler temperatures which gives the cake a softer crumb.
- Champagne: gives this cake its unique flavor.
- AmeriColor Soft Pink gel food color: the cake will not naturally be pink in color so I added 1 to 2 drops of pink food coloring to the batter.
Vanilla Bean Pastry Cream Filling
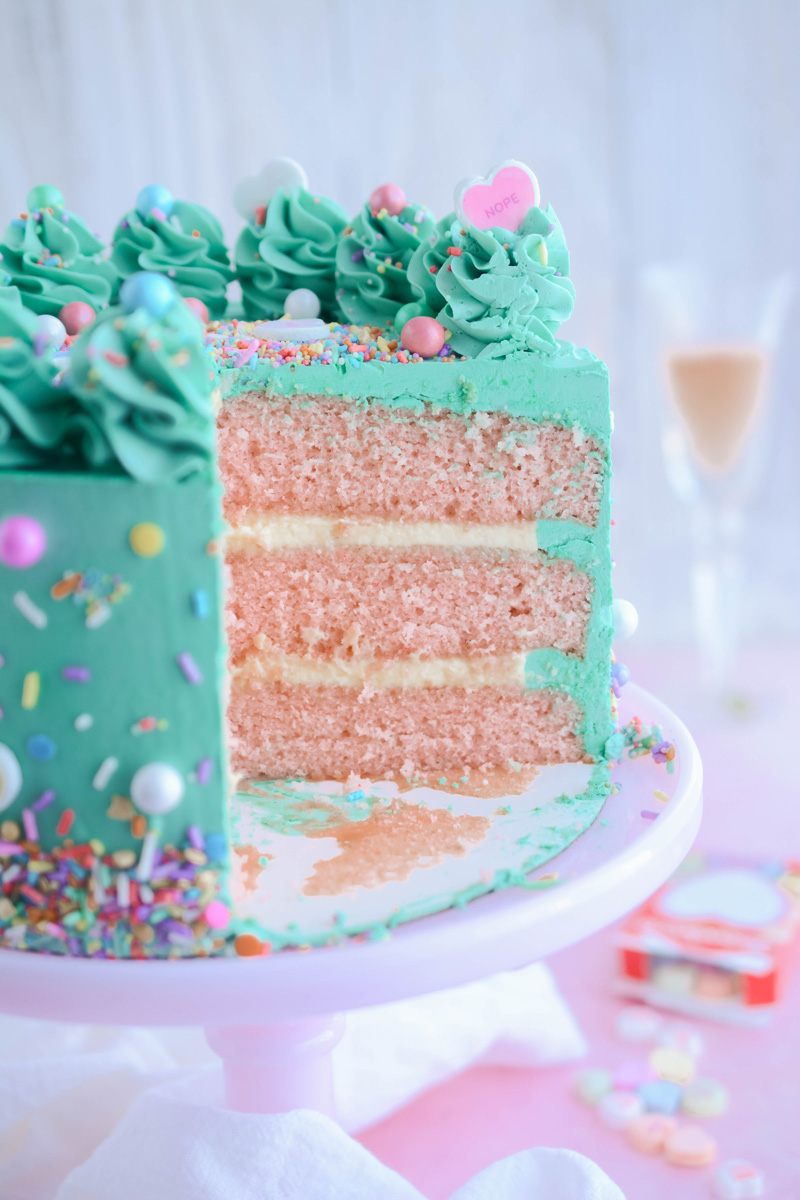
I recommend measuring out your filling before spreading on top. This helps keep the layers even, as well as keeps you from over filling your cake. I recommend 2/3 cup filling between the cake layers for this cake. Overfilling the cake can make your cake slide around while you're frosting and decorating your cake. For the leftover filling, grab a spoon and indulge!
Champagne Swiss Meringue Buttercream Tips
- Your mixer bowl should be completely dry and clean before use.
- There should be no grease residue on the bowl and your egg whites should be free of egg yolks.
- Whisk together the sugar and egg whites well, or the eggs may start to cook on their own.
- Make sure the double boiler stays at a simmer.
- Your butter should be room temperature before using. I typically leave my butter out on the counter 2 to 3 hours before using.
- Add your butter by tablespoon to the meringue.
- The buttercream should be as smooth as possible.
- To help remove air bubbles, run the mixer on low speed for one minute.
- Slowly add the champagne to the buttercream, waiting until the champagne is fully incorporated into the buttercream before adding more.
- *Food coloring will deepen in color as it sits.*
Assembly Tips
- Use a piping bag with a round tip or coupler attached to pipe a buttercream border around the top edge of the cake before filling.
- Don't over fill your cake. It's better to have leftover filling than a cake that is slipping and sliding around when trying to decorate it. I recommend 2/3 cup filling between each layer.
- I prefer to use a round acrylic disk to help achieve a super smooth finish to my cakes. If you don't have an acrylic disk, you can use a round cake circle in its place. Just make sure the cake is well chilled before carefully removing it.
- Chilling the cake is your best friend during the assembly process. Don't skip this step.
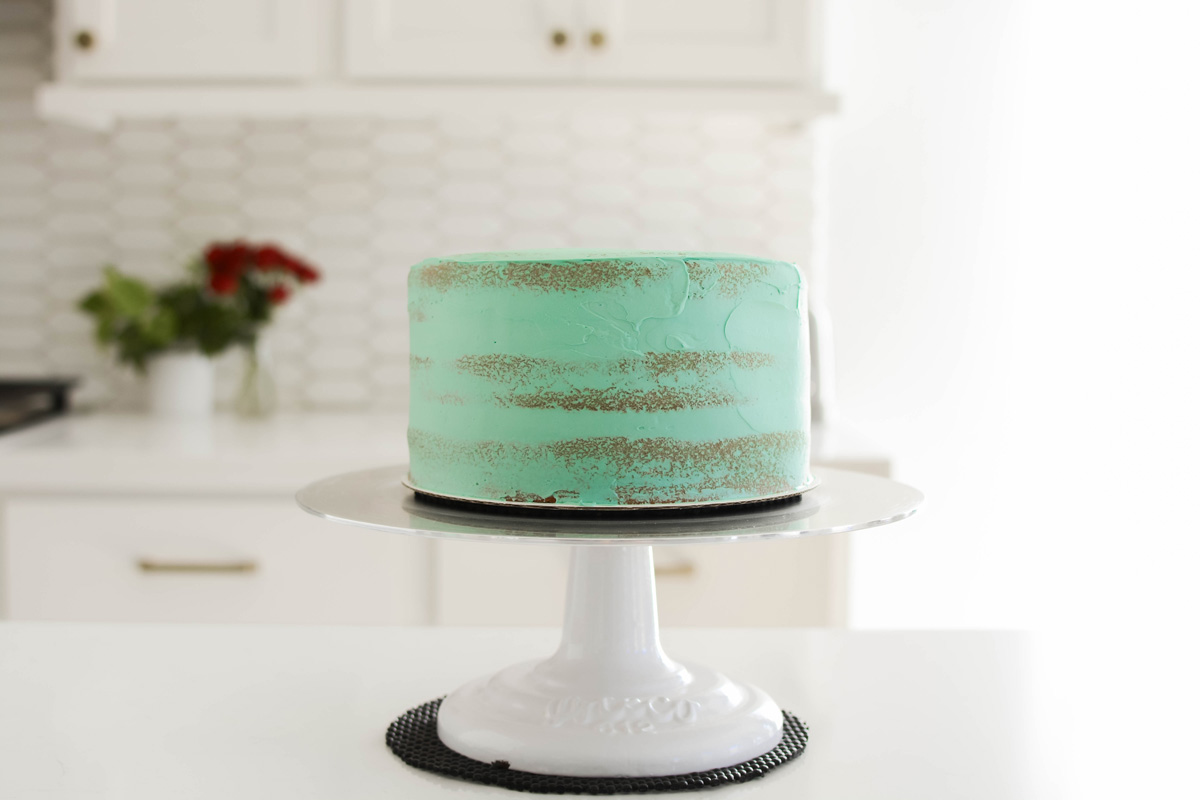
Crumb Coating
Apply a thin layer of buttercream over the top and sides of the cake, creating a crumb coat. Chill the crumb coated cake in the freezer for 15 minutes or in the refrigerator for 30 minutes.
Decorating Tips
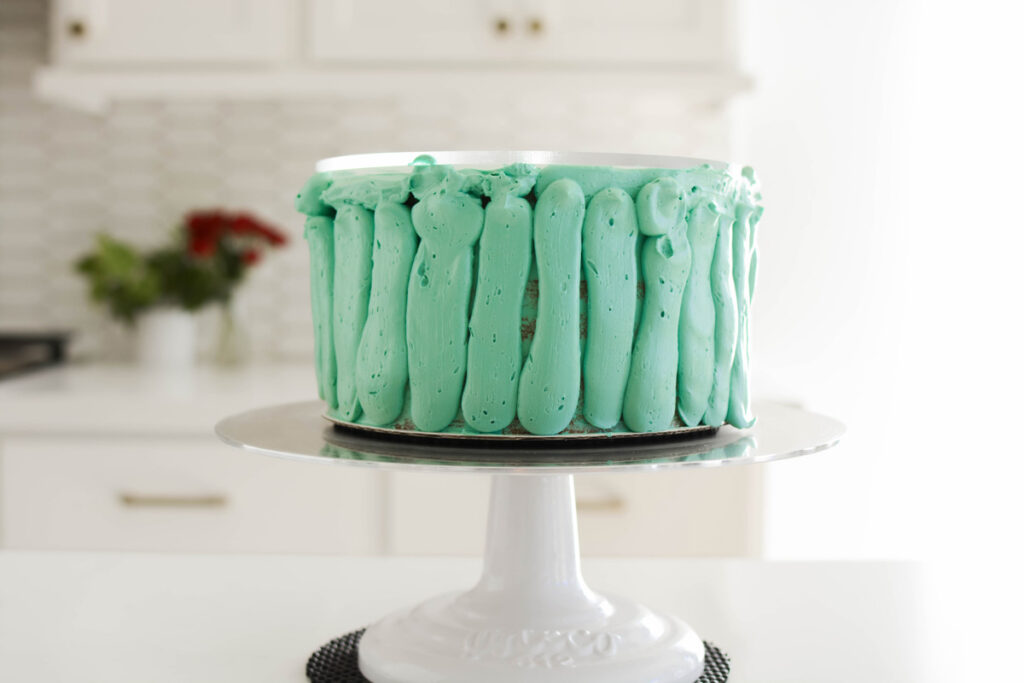
- Apply a large dollop of buttercream on top of the cake and spread out evenly.
- Line an 8-inch round acrylic disc with parchment paper and attach it with a bit of buttercream. Line up the acrylic disc with the bottom cake board and gently press on to the top of the cake to adhere.
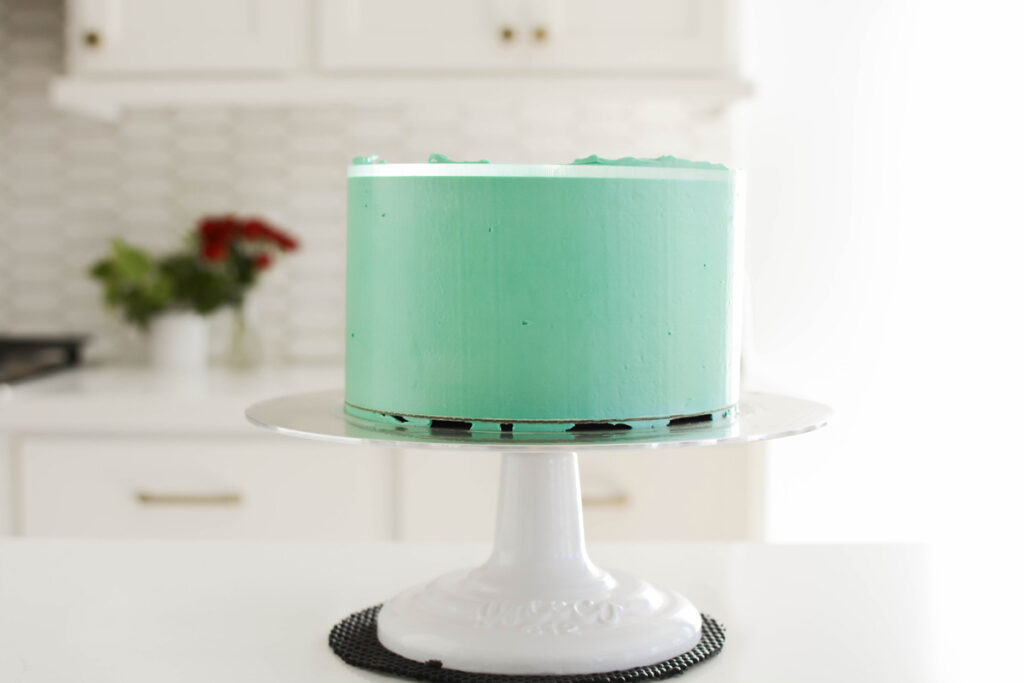
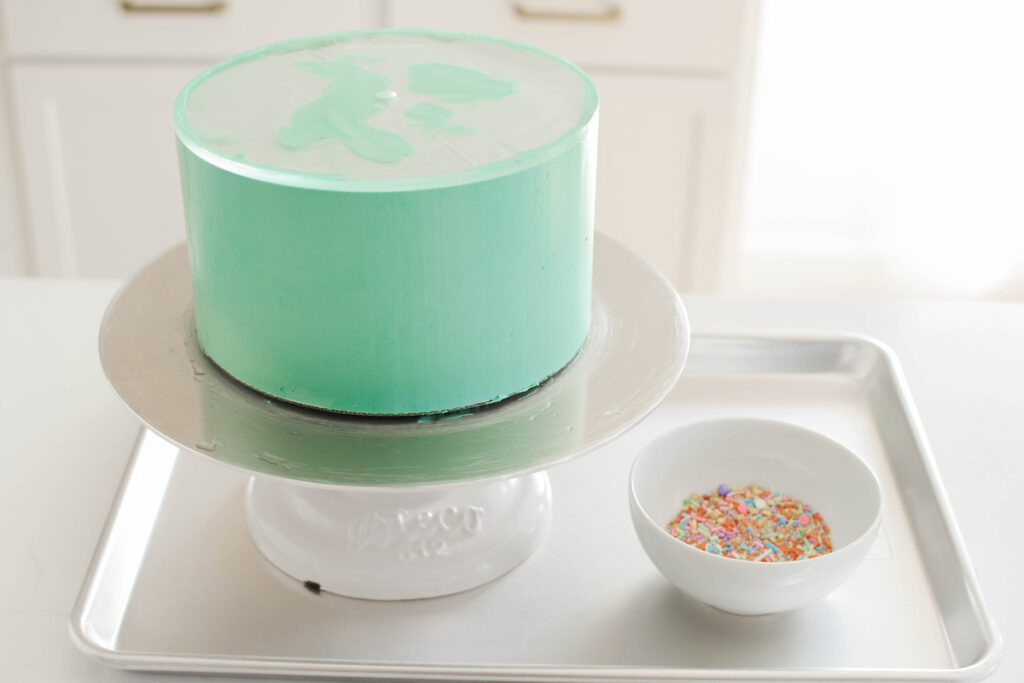
- Cover the sides of the cake with more buttercream and gently press a cake scraper against the acrylic disc and bottom cake board and slowly rotate the cake turntable all the way around to create a smooth finish on the side of the cake.
- Fill in any gaps in the buttercream with more buttercream and continue to rotate the cake turntable with the cake scraper until smooth.
- Carefully pick up the cake with one hand, over a rimmed baking sheet. With the other hand, apply sprinkles to the bottom sides of the cake. The rimmed baking sheet will help catch the extra sprinkles so you can reuse the ones that don't stick the first time around.
- To strategically place sprinkles on the upper sides, use your finger to apply each sprinkle one at a time, being careful that your finger doesn’t touch the cake (only the sprinkle should touch the cake). If the sprinkles won’t stick to your finger, you can press your finger on to a moist towel so the sprinkle will attach to your finger.
- Once the bottom and sides are covered with sprinkles, chill the cake in the freezer for 15 minutes.
- Insert a small offset cake spatula under the acrylic disc, but over the parchment paper and slowly rotate the turntable until the disc releases. Peel off the parchment paper.
- Apply more buttercream to the top of the cake to fill in any gaps if needed and smooth the surface with a cake spatula.
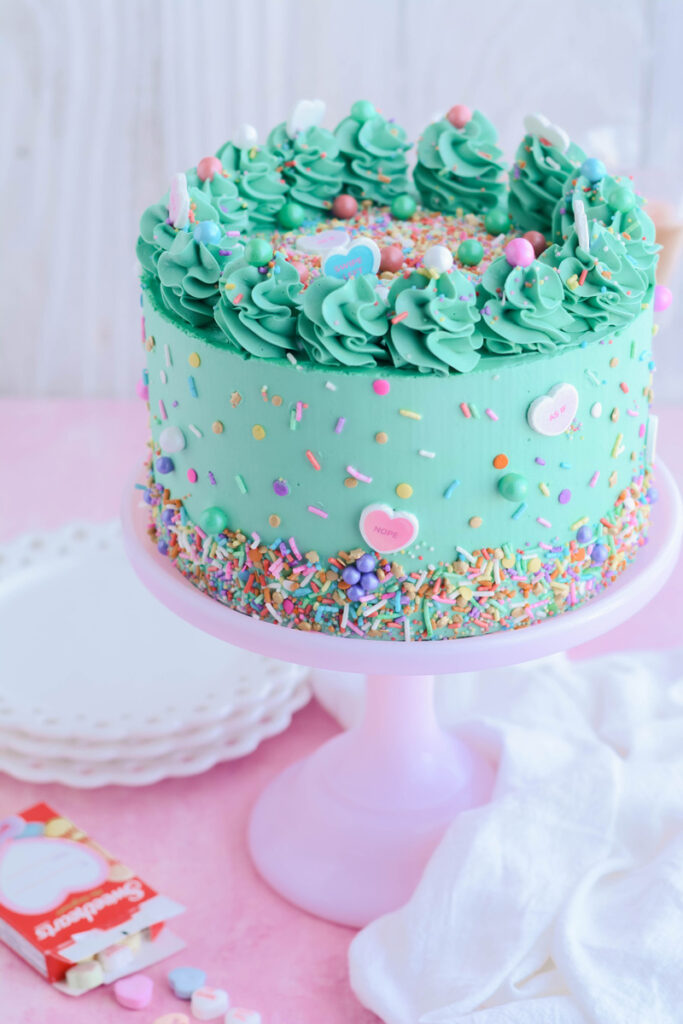
- Fit a piping bag with Wilton piping tip #1M and fill with remaining buttercream. Pipe swirls around the top edge of the cake and top with more sprinkles.

Baking and Cake Decorating Tools
- 3 8-inch round cake pans
- Nonstick baking spray
- Stand mixer
- Candy thermometer
- Blue and green gel food color
- Cake turntable with nonslip mat
- 8-inch round cake board
- Piping bags (2)
- Coupler or round piping tip
- Small offset spatula
- 8-inch round acrylic disk
- Parchment paper
- Cake scraper
- Wilton piping tip #1M
- Bespoke sprinkles (4oz)
Baking Schedule
- Day 1: Bake cake layers and prepare vanilla bean pastry filling.
- Day 2: Prepare buttercream, assemble and serve.
Let's Connect
The Cake Chica is on the following social media platforms below. Click subscribe, like and follow! We would love to have you over!
Suggested Recipes

Valentine's Day Pink Champagne Cake
Homemade Pink Champagne Cake filled with vanilla bean pastry cream filling, covered in champagne Swiss meringue buttercream and bespoke sprinkles.
Ingredients
SPECIAL TOOLS
- 3 8-inch round cake pans
- Nonstick baking spray
- Stand mixer
- Candy thermometer
- Blue and green gel food color
- Cake turntable with nonslip mat
- 8-inch round cake board
- Piping bags (2)
- Coupler or round piping tip
- Small offset spatula
- 8-inch round acrylic disc
- Parchment paper
- Cake scraper
- Wilton piping tip #1M
- Bespoke sprinkles
PINK CHAMPAGNE CAKE
- 3 cups (12 ounces/339 grams) cake flour
- 2 ½ teaspoons baking powder
- ½ teaspoon table salt
- 4 large eggs, at room temperature
- 1 ¾ cups (12.25 ounces/346.5 grams) granulated sugar
- 2 teaspoons vanilla extract
- 1 cup (8 ounces/227 grams) vegetable oil
- 1 cup (8 ounces/227 grams) pink champagne
- 1 to 2 drops AmeriColor Soft Pink gel food color
VANILLA BEAN PASTRY CREAM
- 2 cups (16 ounces/454 grams) half and half
- 1/2 cup (3 1/2 ounces/99 grams) granulated sugar, divided
- 1/2 vanilla bean, halved length wise, seeds removed and reserved
- 1/8 teaspoon salt
- 5 large egg yolks
- 3 tablespoons cornstarch
- 4 tablespoons (1/4 cup) unsalted butter, cut into tablespoon sized pieces
CHAMPAGNE SWISS MERINGUE BUTTERCREAM
- ½ cup, plus 2 tablespoons egg whites
- 1 ¼ cup granulated sugar
- 2 cups (4 sticks) unsalted butter, cubed, slightly under room temperature
- 2 teaspoons vanilla extract
- ½ cup champagne
Instructions
CAKE
- Spray 3 8-inch round cake pans with nonstick spray and set aside.
- Adjust an oven rack to the center position and heat oven to 350 degrees. In a large bowl, sift the flour, baking powder and salt. Then whisk to combine.
- In the bowl of a stand mixer fitted with the paddle attachment, beat the eggs, sugar and vanilla together on medium speed for 1 minute. Reduce the mixer speed to low speed and slowly pour the oil into the mixture until combined. On low speed, add the flour mixture in 3 parts, alternating with the champagne in 2 parts, beginning and ending with the flour mixture, mixing until just barely blended. Scrape the sides of the bowl as necessary. The batter will be thin. Mix in pink gel food coloring on low speed. Use a rubber spatula to finish mixing the batter together to be sure you don’t over mix.
- Divide the cake batter between the prepared cake pans and bake for 30 to 35 minutes, or until a toothpick inserted in the center comes out with a few moist crumbs attached; rotating pans halfway through baking. Remove the cakes from the oven and let cool in their pans on wire racks for 10 to 15 minutes. Invert the cakes onto wire racks and let cool completely.
VANILLA BEAN PASTRY CREAM
- In a medium saucepan, add half-and-half, 6 tablespoons of sugar, vanilla bean seeds and salt to a simmer over medium-high heat, stirring occasionally.
- Meanwhile, combined the egg yolks, cornstarch and remaining 2 tablespoons sugar in a bowl and whisk until smooth.
- Whisk in about 1 cup of the half-and-half mixture into the yolk mixture to temper. Slowly whisk in the tempered egg mixture into remaining half-and-half mixture. Reduce the heat to medium and continue to cook, whisking constantly, until the pastry cream is thick and bubbles start to pop on the surface, about 30 seconds.
- Remove from the heat and remove the vanilla bean and whisk in the butter. Transfer the pastry cream to a bowl and press plastic wrap directly on the surface of the cream. Refrigerate until set, about 3 hours or up to 2 days.
CHAMPAGNE SWISS MERINGUE BUTTERCREAM
- In the bowl of a stand mixer fitted with the whisk attachment, pour in the egg whites and sugar and whisk by hand until combined. Fill a medium saucepan with about 2 inches of water and bring to a simmer. Place mixer bowl on top, being sure the bottom of the bowl does not touch the water and attach a candy thermometer.
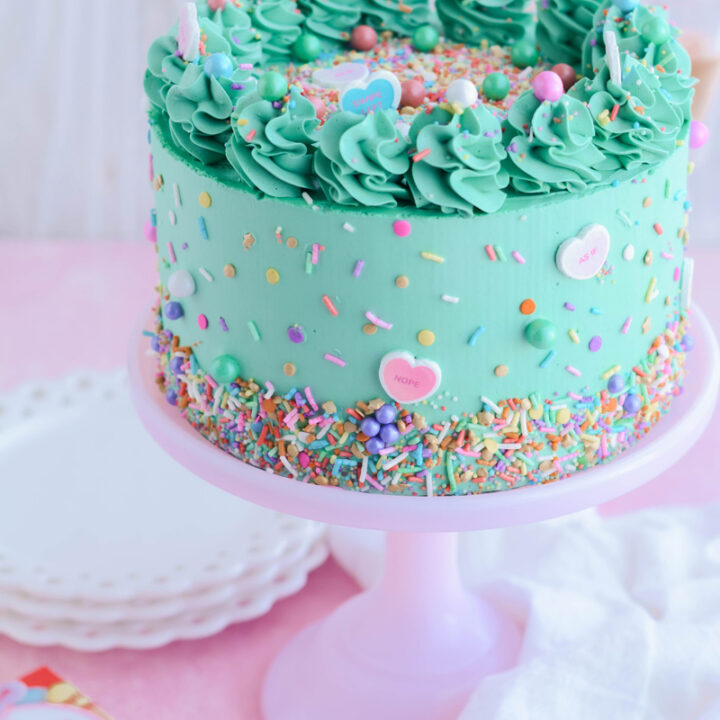
- Whisking occasionally, heat the egg mixture until the temperature reaches 160 degrees. Once the mixture reaches 160 degrees, transfer to a stand mixer and beat the mixture on high speed for 10 minutes or until medium-stiff peaks form. At this point the outside of the mixer bowl should be room temperature. Switch out the whisk attachment with the paddle attachment and with the mixer on low speed, add the butter one tablespoon at a time, and then add the vanilla extract and champagne. Once combined, turn up the mixer speed to medium-high and beat until the buttercream is smooth about 5 minutes. Add gel food color to the buttercream a little at a time. (I used a mix of blue and green to create teal.)
ASSEMBLE
- Place a nonslip mat on top of a cake turntable and place an 8-inch cake board on top. Center the first cake layer on top of the cake board, making sure there's even spacing from all around the edges. Fit a piping bag with a coupler or round piping tip and pipe a buttercream dam around the cakes edge. Spread about 2/3 cup pastry cream over the top of the cake in an even layer with a small offset spatula. (Don’t overfill the cake, or the cake layers will start sliding.) Place the second cake layer on top and pipe another buttercream dam around the edge. Spread another 2/3 cup pastry cream over the top of the cake in an even layer. Add the third and final cake layer (bottom side up) on top and gently press to adhere.
CRUMB COAT
- Apply a thin layer of buttercream over the top and sides of the cake, creating a crumb coat. Chill the crumb coated cake in the freezer for 15 minutes or in the refrigerator for 30 minutes.
DECORATE
- Apply a large dollop of buttercream on top of the cake and spread out evenly. Line an 8-inch round acrylic disc with parchment paper with a bit of buttercream. Line up the acrylic disc with the bottom cake board and gently press on to the top of the cake to adhere. Cover the sides of the cake with more buttercream and gently press a cake scraper against the acrylic disc and bottom cake board and slowly rotate the cake turntable all the way around to create a smooth finish on the side of the cake. Fill in any gaps in the buttercream with more buttercream and continue to rotate the cake turntable with the cake scraper until smooth.
- Carefully pick up the cake with one hand, over a rimmed baking sheet. With the other hand, apply sprinkles to the bottom sides of the cake. To strategically place sprinkles on the upper sides, use your finger to apply each sprinkle one at a time, being careful that your finger doesn’t touch the cake (only the sprinkle should touch the cake). If the sprinkles won’t stick to your finger, you can press your finger on to a moist towel so the sprinkle with attach to your finger. Once the bottom and sides are covered with sprinkles, chill the cake in the freezer for 15 minutes.
- Insert a small offset cake spatula under the acrylic disc, but over the parchment paper and slowly rotate the turntable until the disc releases. Peel off the parchment paper.
- Apply more buttercream to the top of the cake to fill in any gaps if needed and smooth the surface with a cake spatula. Fit a piping bag with Wilton piping tip #1M and fill with remaining buttercream. Pipe swirls around the top edge of the cake and top with more sprinkles. Carefully transfer to a cake pedestal and serve.
Notes
- Assembled cake can be stored in an airtight container in the refrigerator for up to 3 days. Bring to room temperature before serving.
- Cake layers can be made up to 3 days in advance, wrapped in plastic wrap, stored in the refrigerator.
- Vanilla bean pastry filling can be made up to 2 days in advance.
- Buttercream can be made up to 10 days in advance, stored in the refrigerator. Bring to room temperature before remixing.
Nutrition Information:
Yield: 24 Serving Size: 1Amount Per Serving: Calories: 241Total Fat: 9gSaturated Fat: 3gTrans Fat: 0gUnsaturated Fat: 5gCholesterol: 98mgSodium: 204mgCarbohydrates: 34gFiber: 0gSugar: 18gProtein: 5g
*Nutrition information is an estimate and will vary.*


Leave a Reply