
Welcome to The Cake Chica's Central Texas Home Renovation post! We've officially closed on our central Texas home in Kyle and will be moving back to the Houston area very soon. I meant to update my blog as soon as we updated each room but I just never got around to doing it, because there was just so much to do and I honestly just got overwhelmed.
But before my husband and I leave this charming home I wanted to write a blog post of all the work we put into this house. It's truly been a labor of love.

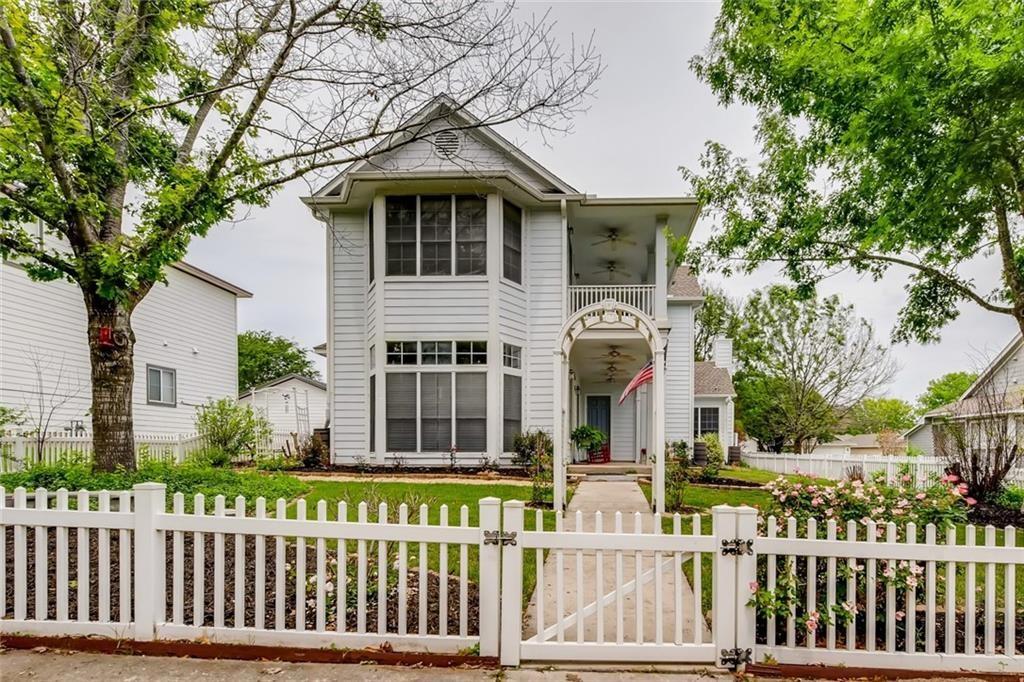
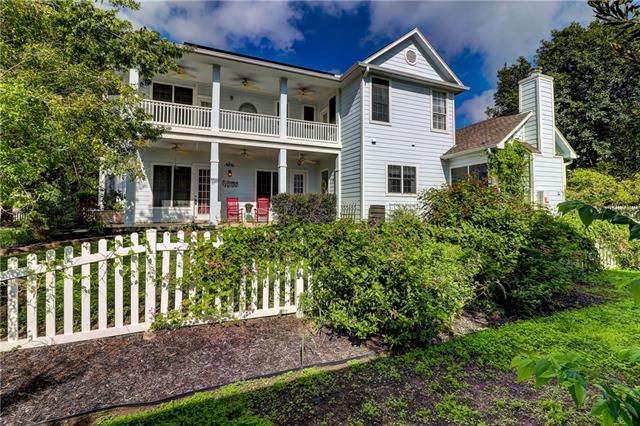
The Outside Before
We get so many compliments on our home from friends, family, neighbors and strangers alike. But many don't know the work we put into this house by looking on the outside. I invite you to grab a cup of coffee or your favorite beverage as I take you through the before and afters in each room of what I affectionately called this "crayon box" of a house when we first moved in.
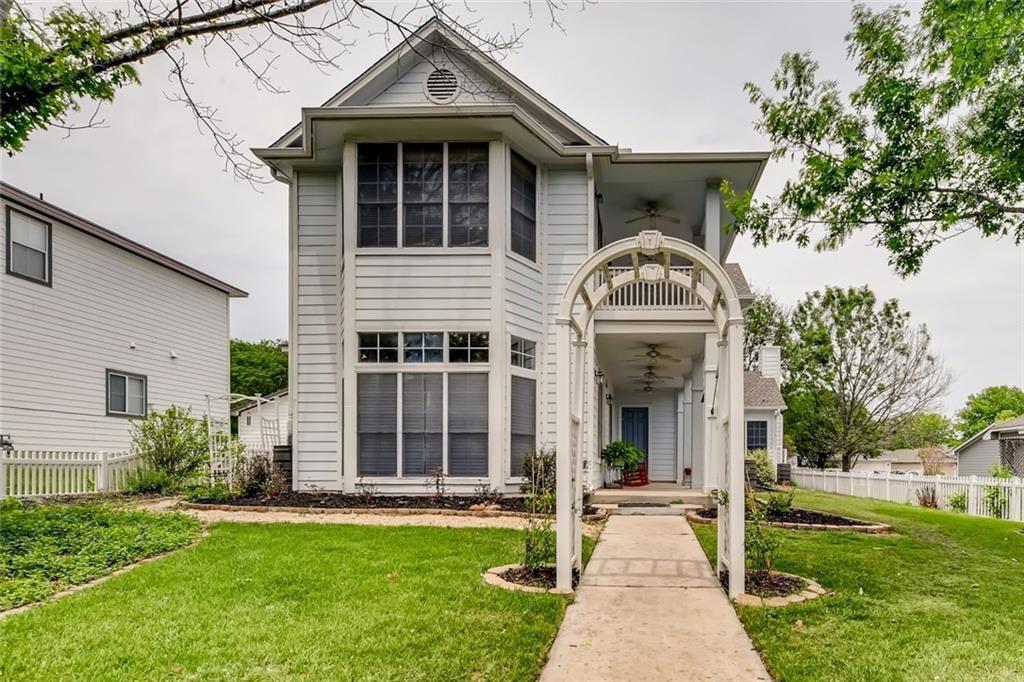
Tree Trimming and Sod
The first thing we did was trim the 2 large oak trees in the front yard and install sod in the front yard. I never want to install sod again! My husband and I worked from when the sun came up until the sun went down installing the front yard sod and I can tell you I never want to do it again! We were sore for days. With the trees trimmed and grass installed the curb appeal of the house was looking good!
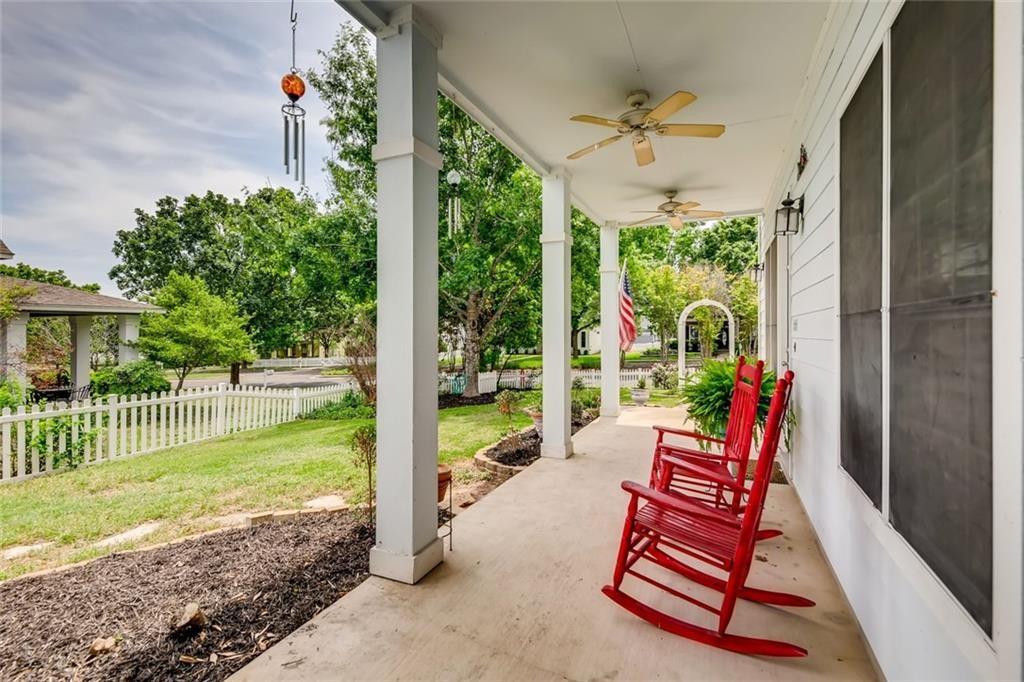
The Rocking Chair Life
I was excited to see the red rocking chairs still on the large porch when we moved in. Every porch needs rocking chairs and central Texas weather is perfect for sitting out on the porch with your favorite drink in hand watching the beautiful birds and wildlife here.
Come On In
This is what we walked into about 2 1/2 years ago on our home search.
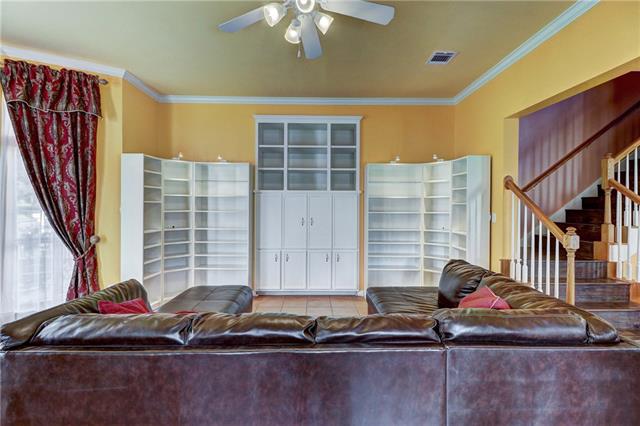
The Living Room Before
Yes the room that was the color of a school bus I kid you not! The picture actually looks better than it did in person. This color gave me a headache and I had to get this room painted quickly.
Even the ceiling was painted. In fact, almost all the ceilings in this house were painted, which meant we also had to paint them.
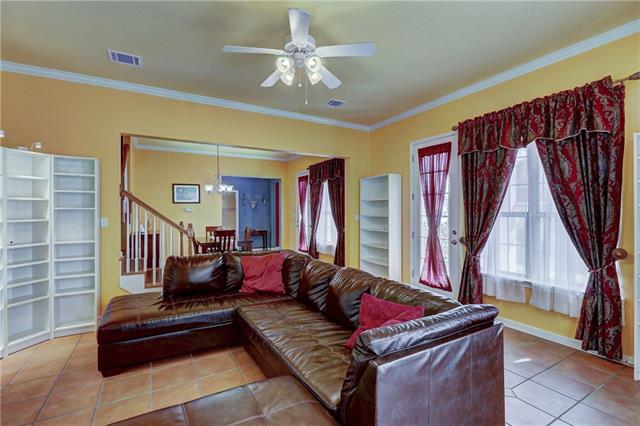
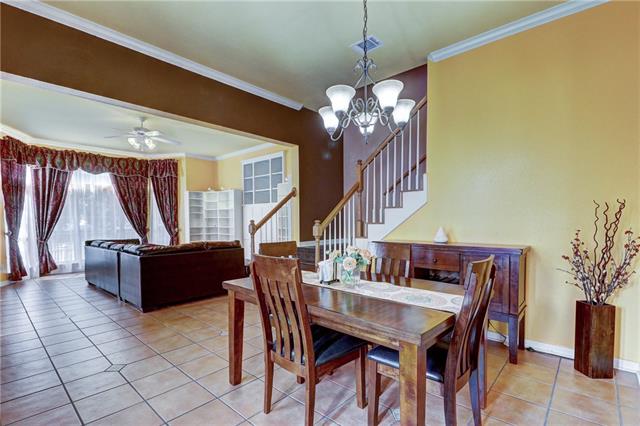
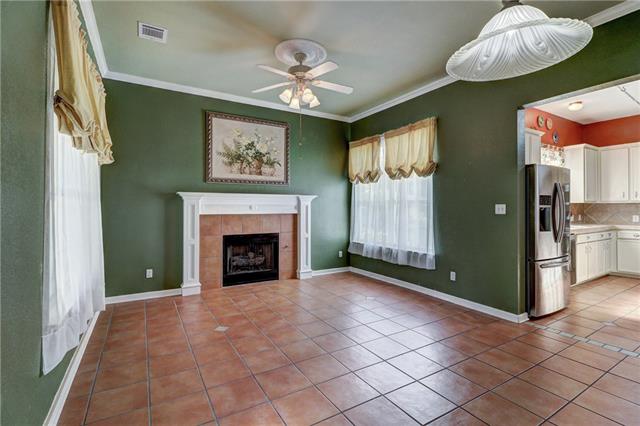
Here's a great shot of the living room, breakfast room and main entryway (we have lots of entryways in this house). Even though this house was painted in very bold colors I was able to see the potential and was excited to see what I could make this house into.
The Living Room After
Isn't it amazing how paint can change a room? After I walked through this house I knew I wanted to go neutral. We painted the walls, ceilings and base boards. We took down the heavy curtains and installed faux wood blinds.
- Wall color: Sherwin Williams Repose Gray
- Trim color: Benjamin Moore Decorator's White color matched by Sherwin Williams

Many people assume the bookcases are built in, but they're not! I got the book cases from Ikea and purchased the matching glass doors to go with them to display my ever growing cookbook collection. The center section however is built in and they go so well together the new homeowner wanted the bookcases so I decided to let them go. One less thing to move right? At least that's what I am telling myself. 🙂
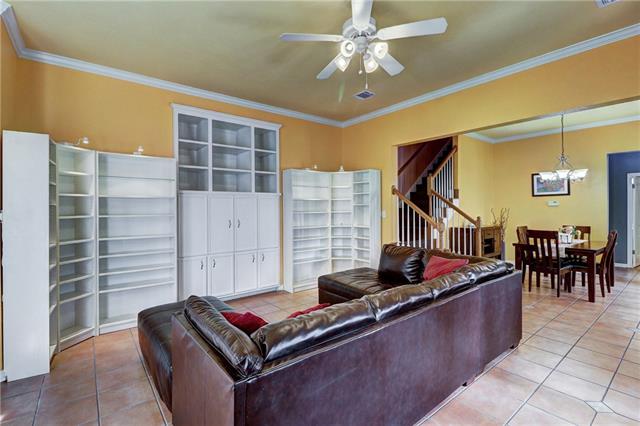
The Breakfast Room Before
I thought the yellow was bad enough but then I saw the brown paint.

We decided to bring the paint colors in from the living room to help the spaces flow together well. Oh and check out the peach paint color on the staircase wall. Yes another paint color to paint over. The blue walls on the right side of the photo is the main entryway. And I have a whole blog post about that renovation.
The Breakfast Room After
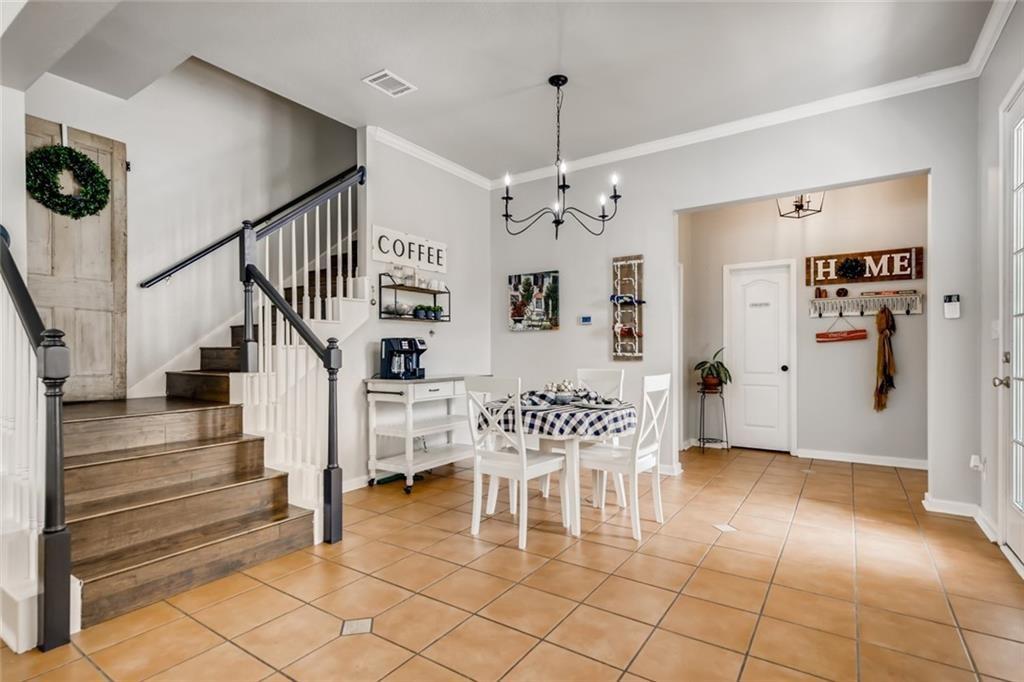
Our cute breakfast room! We painted all the walls, trim and ceiling. Plus we gave the staircase an update by painting the trim as well. It really made a huge difference I think.
- Wall color: Sherwin Williams Repose Gray
- Trim color: Benjamin Moore Decorator's White matched by Sherwin Williams
- Staircase hand rail: Benjamin Moore Wrought Iron matched by Sherwin Williams
The Cake Chica's Office Before
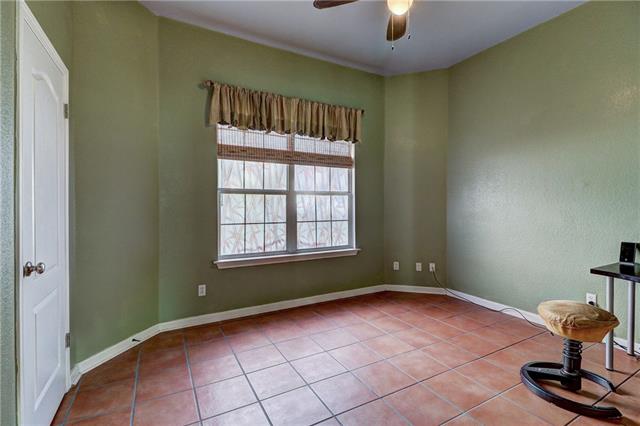
The color isn't terrible but certainly not me. And you probably can't see from the picture but the ceiling is also painted in a light blue color. At this point I was really tired of all the colors in this home and decided to paint this room Repose Gray as well.

One of the things I love about this house is the bedrooms are large. I was able to fit my desk and daybed in it just incase I needed an extra guest room.
The Cake Chica's Office After

We removed the peel and stick window sticker from the window as well as the curtain shade and replaced them with a faux wood blind.
For this room we stuck with the neutral paint again and I purchased a new desk and chair from North Carolina Furniture, glass shelves with gold trim from Wayfair, and my daybed with trundle from Gallery Furniture. That daybed has been with me since the 4th grade, so I can definitely vouch for Gallery Furniture's quality! The daybed bedding is from Laura Ashley.
The Guest Room Before

I had a whole lotta fun taking the wall paper trim off these walls. Ha. That's me being sarcastic! I did learn something new though, the trick to taking off wall paper is to use a steamer!
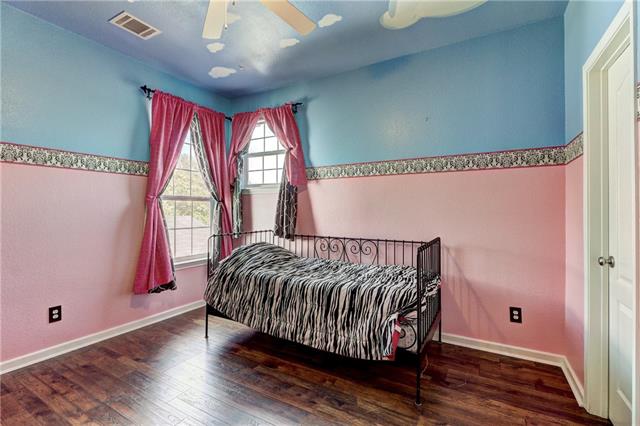
Check out those clouds on the ceiling. There were three different paint colors used in this room. This is the smallest bedroom but I think it took the most work with all the decals and paint colors used. Oh and I didn't get a picture of it unfortunately, but the closet in this room was painted hot pink!!! Yes I've never seen anything like it.
The Guest Room After
This is our main guest room, but really I call it my mom's room. This is where she'd love to stay when she came over to visit us from the Houston area.
I purchased some curtains from Target for the window treatments and purchased a headboard from Wayfair for the bed. Everything else I already had from our previous home.
- Wall color: Benjamin Moore's White Rain matched by Sherwin Williams
- Trim color: Benjamin Moore's Decorator's White matched by Sherwin Williams
The Home Gym Before
This is obviously a bedroom, but the home we came from had a dedicated game room where we put our home gym in. Unfortunately this home did not have a game room but it did have a very large secondary bedroom that could fit our home gym. And yes another bold color on the walls and heavy window treatments.
The Home Gym After
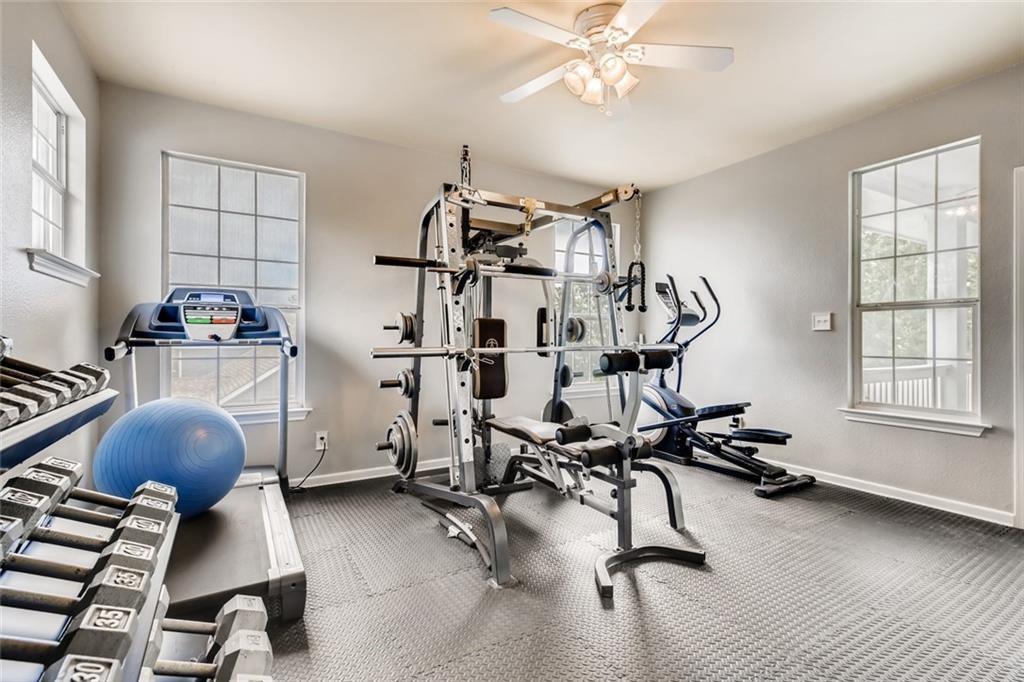
Luckily for us we had help painting this room. My mom and her husband came over to help us get settled when we first moved here. Seeing the home and the state it was in they knew right away that we were going to need help anyway we could get it. With my mom and her husband being no stranger to home renovations, they helped us paint this room.
I went a shade darker in this room with the paint. We also laid down rubber flooring to protect the Pergo laminate wood floors that ran throughout the top floor. I decided to leave the windows bare to let as much natural light in and since this room doesn't really need any privacy, why not.
- Wall color: Sherwin Williams Mindful Gray
- Trim color: Benjamin Moore's Decorator's White matched by Sherwin Williams
The Upstairs Guest Bathroom Before
This was the last room that was painted in the house. And was done just a few weeks ago when we knew we were going to be selling. It was the least used bathroom so it took us awhile to get to it. But we finally did! As you can see this bathroom also connects to the guest room upstairs as well as the home gym.
The Upstairs Guest Bathroom After
I would have liked to have done more with this bathroom but time just didn't allow. What we did have time to do was put a fresh coat of paint on. I chose to use the same paint color we used for the guest bedroom, White Rain by Benjamin Moore.
The Downstairs Guest Bathroom Before
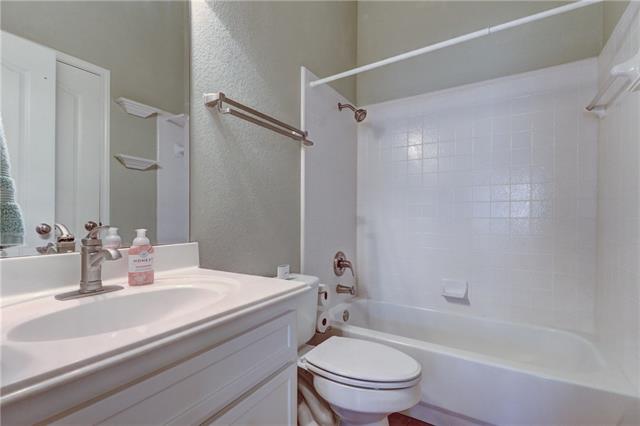
I actually liked this paint color in this bathroom. And it took me a little bit to decide if I was even going to repaint it, but since the entire house was getting a new paint job my O.C.D. couldn't let it stay like this.
The Downstairs Guest Bathroom After
I'm glad I decided to repaint this bathroom, because I loved the way it turned out. I used the same Repose Gray paint color in here as in the majority of the house. I bought a new vanity mirror from Kirklands, (which unfortunately is no longer available) wood shelving from Wayfair and a cute shower curtain from Target. We also purchased a new light fixture but is not shown in the picture.
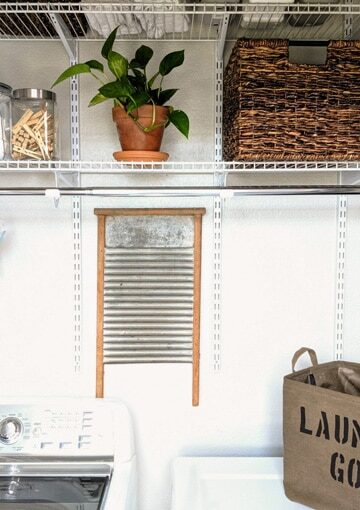
The Laundry Room Before
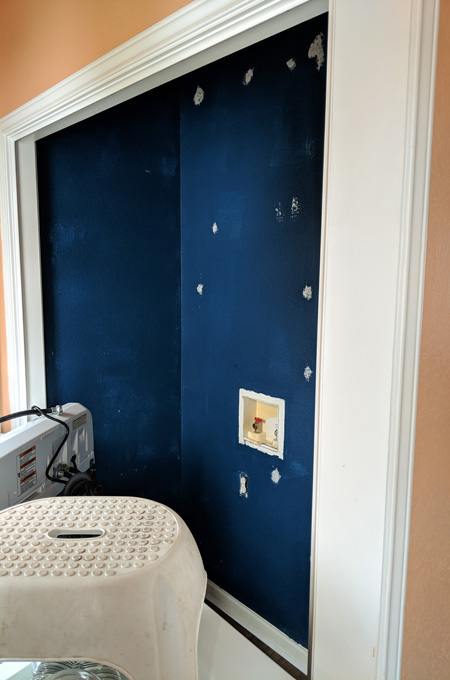
Our laundry room is more of a laundry space or closet. Okay technically it was a closet but I made it into a space.
The Laundry Room After

You can check out more details about that space in my Laundry Room Makeover post.
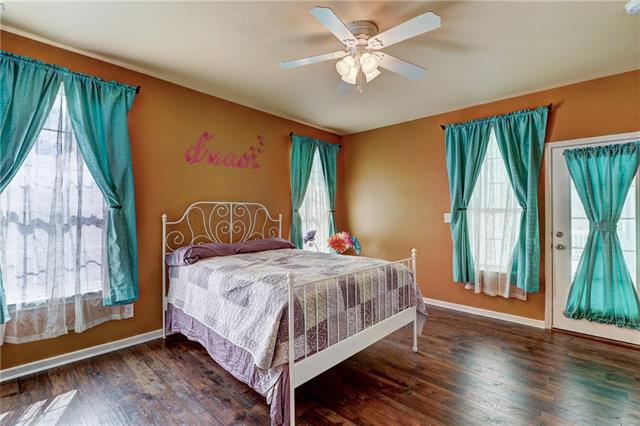
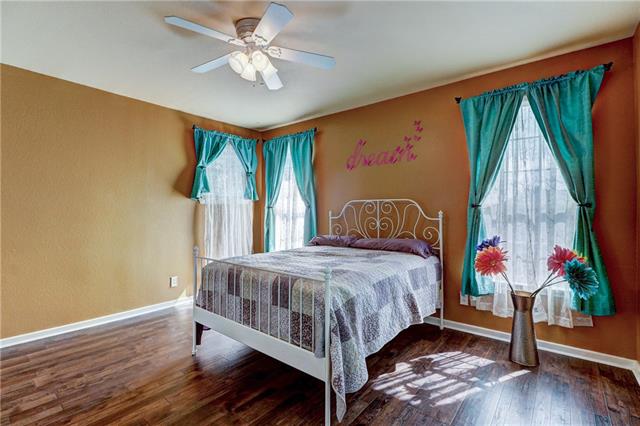
The Main Bedroom Before
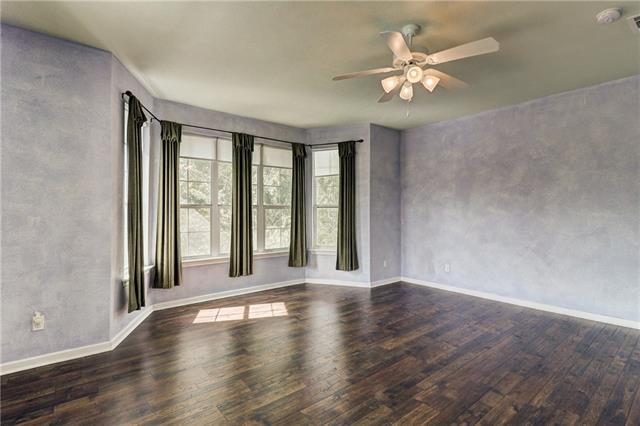
So this room was interesting. It had a lavender sponge paint on the walls with a light green ceiling. I loved all the windows though and I definitely could see potential here.
The dusty curtains and shades had to go. We took them off pretty much right away and went without window coverings until our custom faux wood blinds came in.

This picture shows the main bedroom hallway which was also painted another green color as well, and the ceiling in that hallway was also painted and I don't even remember what color that was. There were way too many colors in this house when we moved in.
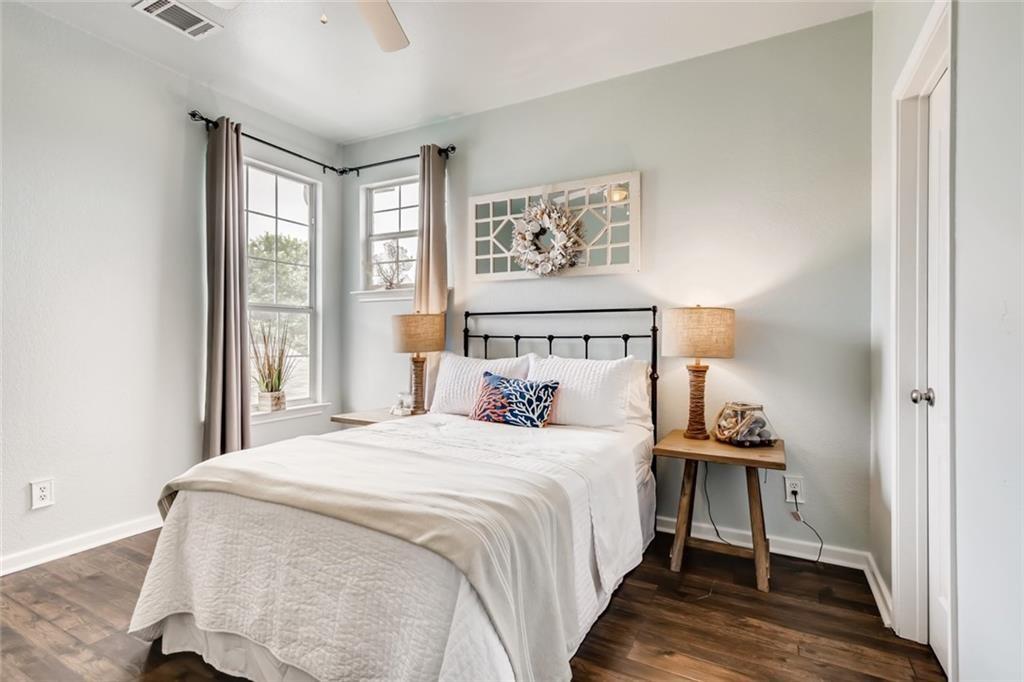
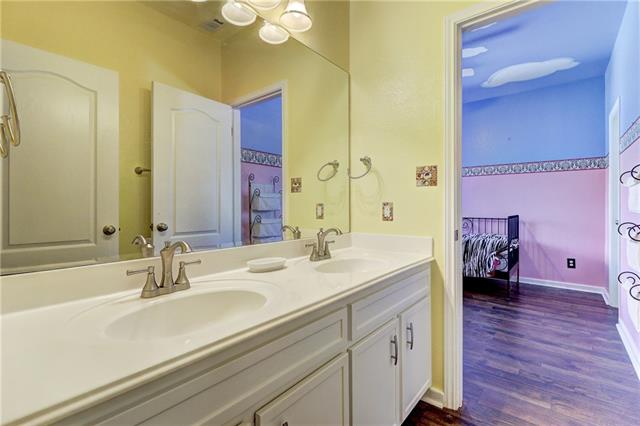
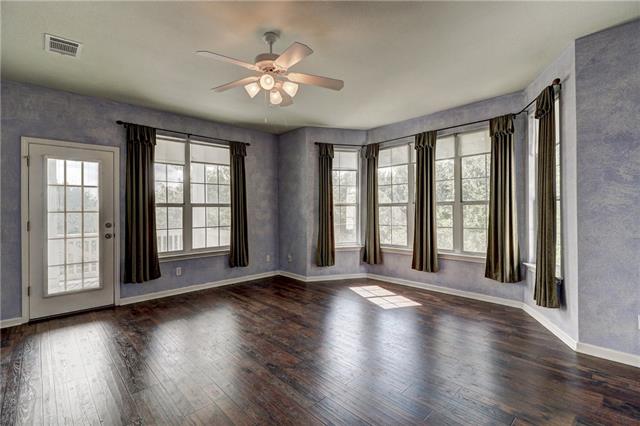
The Main Bedroom After

I LOVE this room. It's light, bright and airy. We painted the walls Repose Gray and the trim Decorator's White. We bought a new bedroom set when we moved in from North Carolina Furniture. The bedding on the bed was purchased from Home Depot and the throw pillows were purchased at Target.
The bench by the bay window was left by the previous home owners and was the traditional orange oak color of the 2000 era. Which means it sat in the garage for most of the time we were here but I knew that piece had potential. Since we loved the color we painted the staircase hand railing (Wrought Iron by Benjamin Moore) we also painted the bench the same color. I'm officially obsessed with Benjamin Moore's Wrought Iron paint color now!
The planter was also left here from the original owner, but it was black. We spray painted it gold and again, I'm obsessed! I also picked up a cute little rug that matches our bedding at Wayfair to complete the look of our sitting area.

The Main Bathroom Before
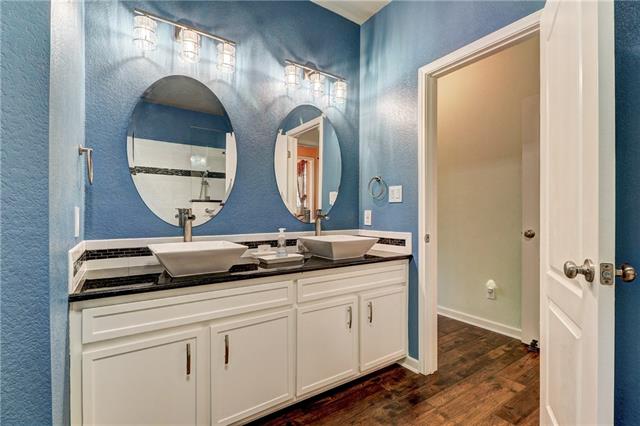
Luckily for us the main bathroom was already renovated when we moved in.
The color isn't terrible but in my opinion didn't show case the wonderful upgrades this bathroom had. Every time I walked into this bathroom all I could see was the bold blue paint color.

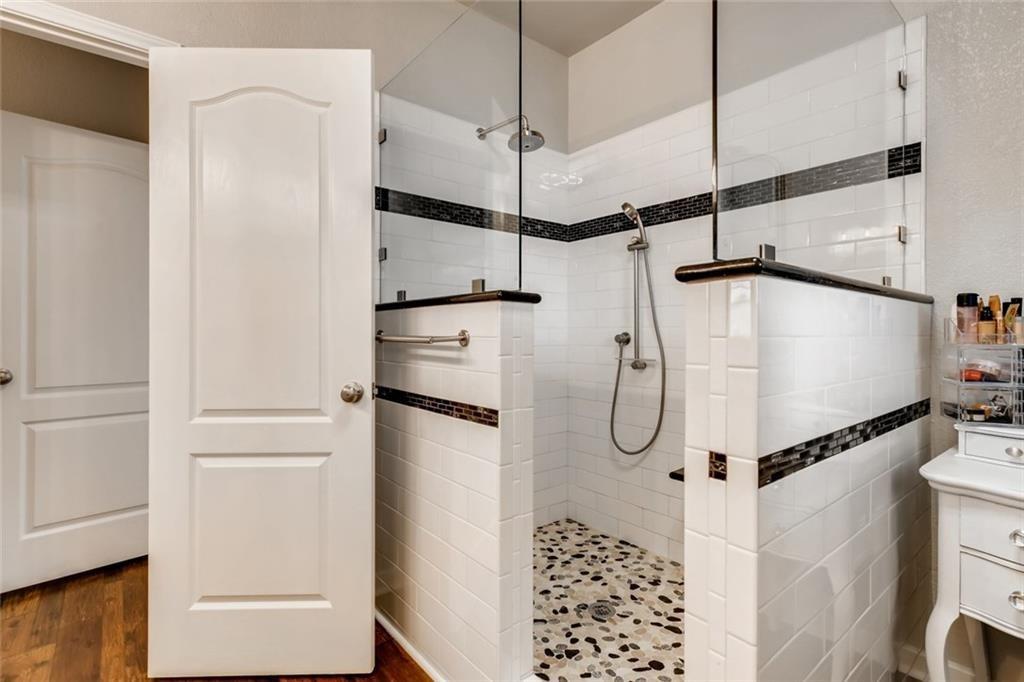
I love the large walk-in shower this house has! And the tile work is neutral enough to work with most colors and designs.
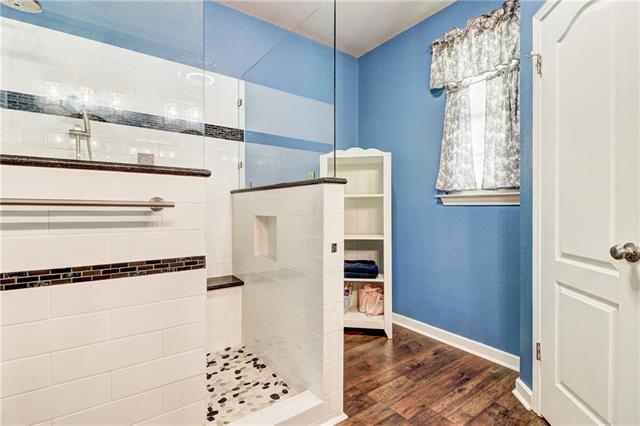
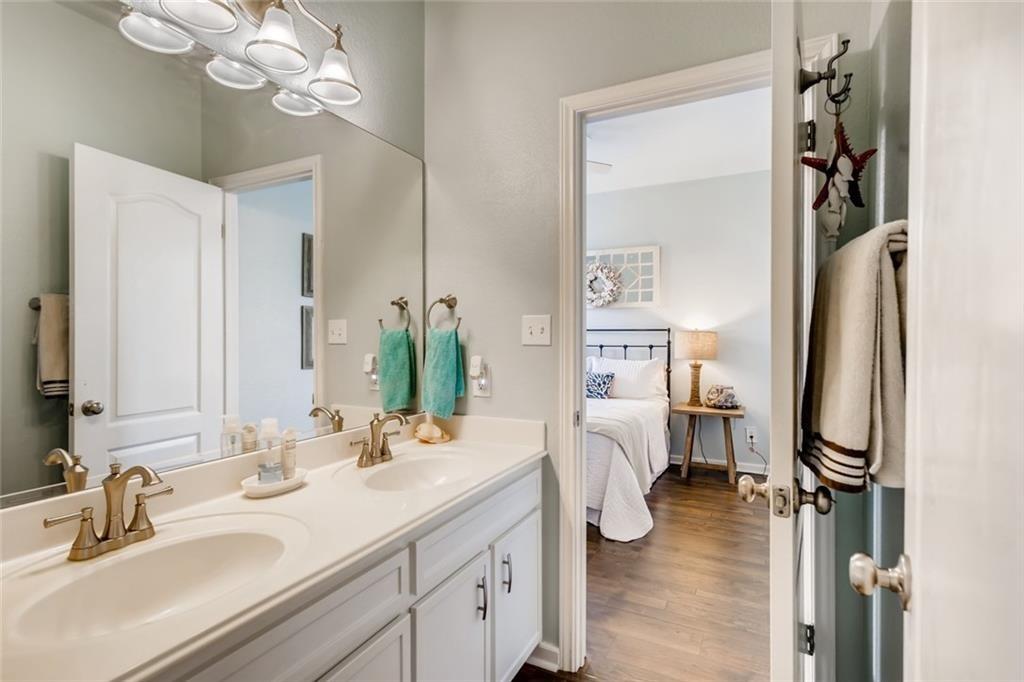
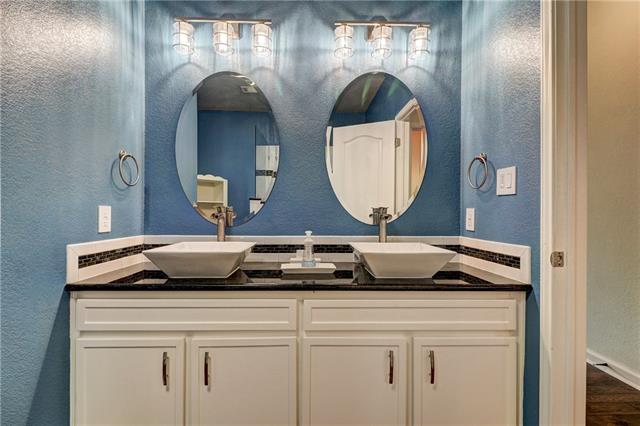
The Main Bathroom After
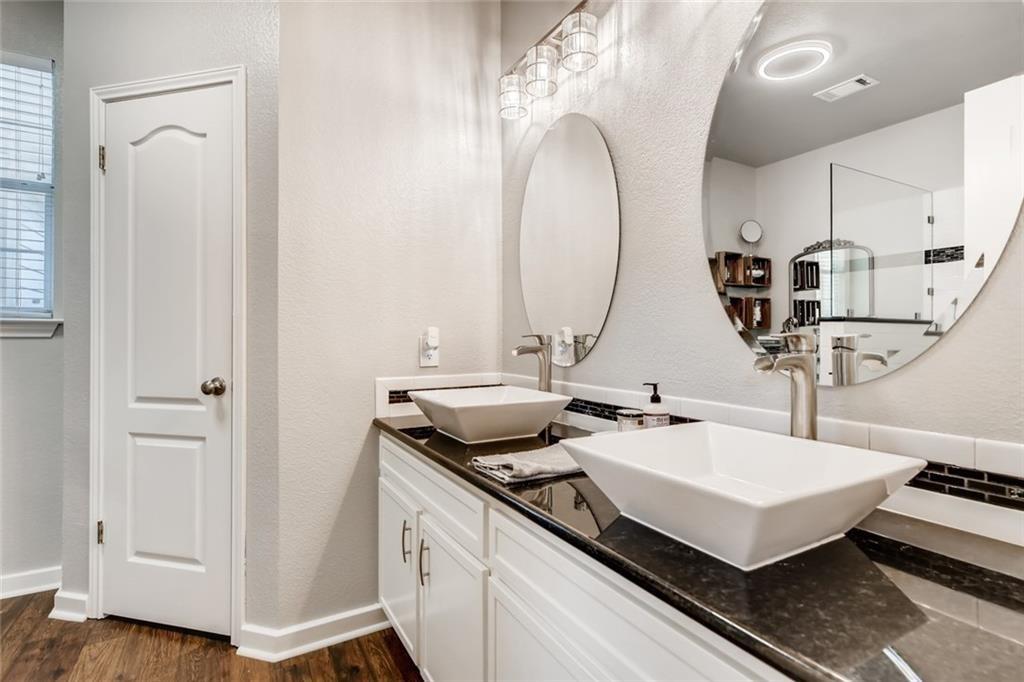
All this bathroom really needed was some paint! We took down the curtains (which I actually liked but they just didn't match) and put up faux wood blinds instead.
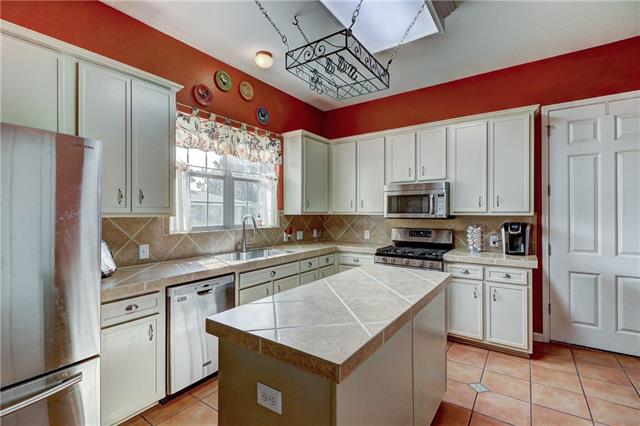
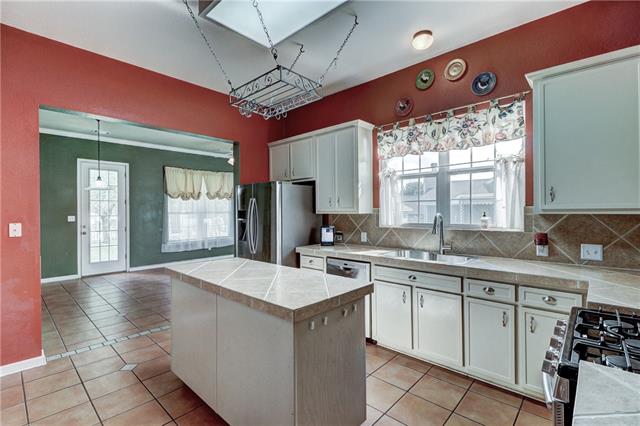
The Cake Chica's Lab A.K.A Kitchen Before

Well what can I say? From the rusty color on the walls, to the tile countertops, the beige cabinets and the oversized microwave that did NOT pass inspection. Yeah, we decided to the let professionals handle this renovation and hired a contractor. I don't have time for kitchen issues. I need it to be done and I need it to be done right!
Our kitchen renovation took about 3 weeks to complete and I was totally unprepared. Some things I would have done looking back:
- Set up a make shift kitchen in an easily accessible area in the house. The contractors had the kitchen shut off from the rest of the house. Which meant, we had to go outside to the back door in order to get to our refrigerator that they put in the dining area until the renovation was done.
- Purchased a countertop toaster oven for easy to cook meals.
- Bought paper plates, cups and utensils.
Eating out everyday was not that fun and also hard for me to go out for lunch while the contractors were working.
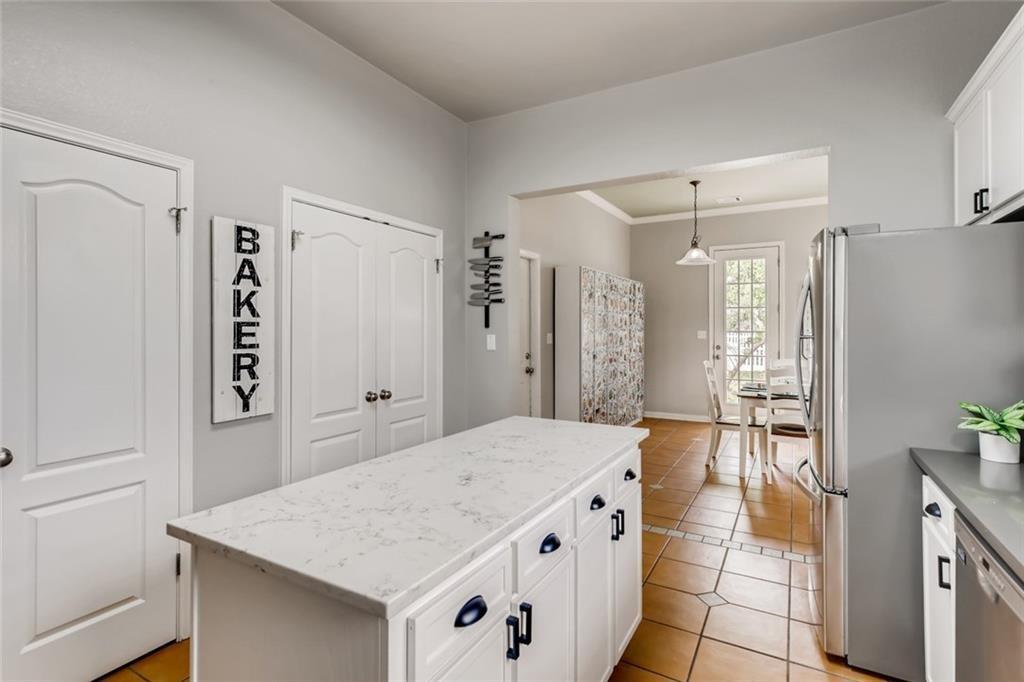
The Cake Chica's Lab A.K.A. Kitchen After
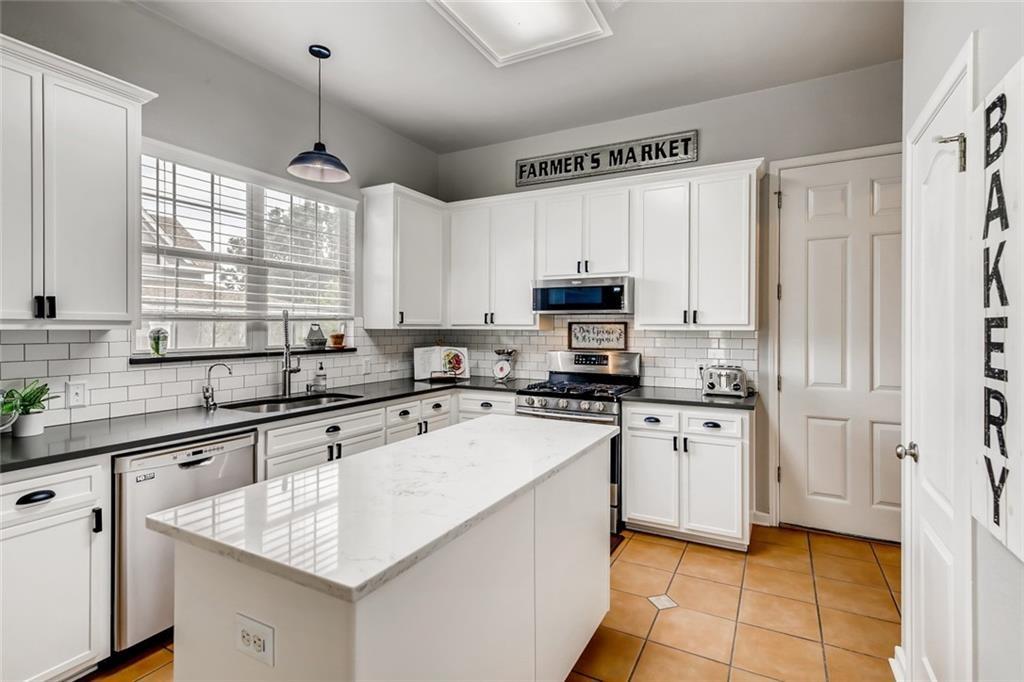
It was worth the wait! I chose to paint the cabinets Benjamin Moore's Decorator's White color matched by Sherwin Williams. I really couldn't decide on which counter I liked better, the dark gray quartz or the Carrara white, so I chose both!
I chose the Carrara white for the island because I wanted the option to take food pictures there and my food photography style leans more on the "light and bright" side. For the perimeter cabinets I chose the dark gray. And with me liking to keep things as neutral and as simple as possible I opted for a basic white subway tile with dark grout to bring out the color of the dark gray quartz countertops.
We chose again to paint the walls Repose Gray by Sherwin Williams and opted for dark hardware on the cabinets from Home Depot. Many cake batters were whipped up on this island.
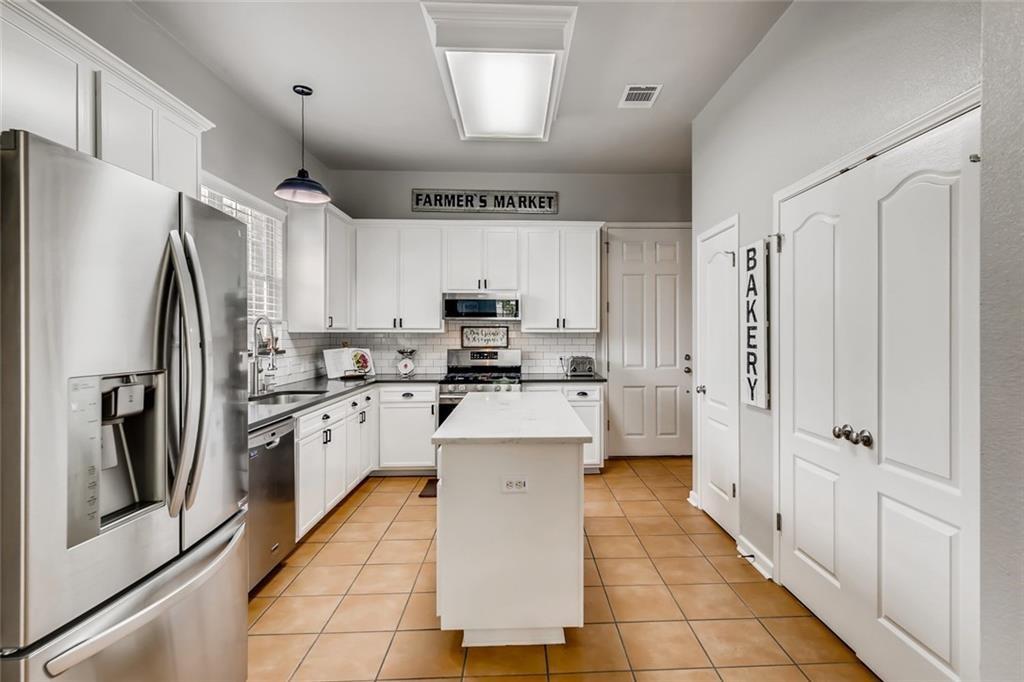
We also replaced the kitchen faucet, kitchen light fixture over the sink and installed a low profile microwave that now passes inspection! A couple of other items that were replaced during this renovation that you can't see was the garbage disposal and the water filtration system.
And I hated this floor when we moved in! However once I started painting the walls gray it really complimented the floor somehow. And when I went on the Sherwin Williams site to find what accent colors might go well with Repose Gray, they recommended a color called Coral Clay which is pretty close to the color of the floor tile, which I've actually grown to love.
The Dining Room Before

So originally I think this area is supposed to be a Den with another eating area. However that didn't work for us so I opted to make this area a formal dining space for my 10 seat dining table since it's located right off the kitchen.
Our next plan of action was to fix the lighting situation so that it would make more sense for a dining area but we just didn't get around to doing it.
The Dining Room After
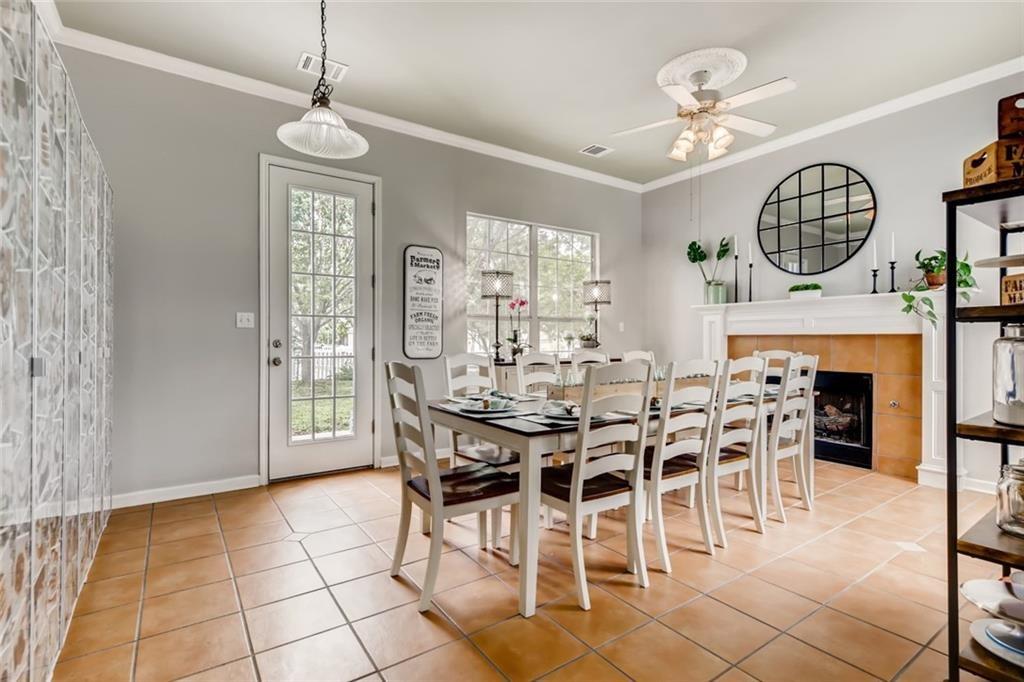
We brought in the Repose Gray paint again on the walls. And hey did you notice the ceiling is green? Originally, we were going to paint it but my table setting matches it. So we left it as is.
The round mirror is from Kirklands and the cool buffet lamps are from Wayfair but I don't think they are available anymore. And the 10 seat dining table we purchased from Ashley furniture years ago.
In Conclusion
As you can see we put a lot of work and a lot of paint into this house. We did so much painting the guy at Sherwin Williams put us on an account so we could save some money.
There were days I was so tired from painting but I kept telling myself that it will all be worth it in the end. I had to keep telling myself that or I would have never finished. So when our realtor told us he had a lot of people think our home was professionally staged I wanted to cry tears of happiness! It really WAS worth it in the end.
Now that our time here is coming to a close, I just wanted to document all the work we put in to this house to make it a home. And I'm happy to say our new home will be move in ready this time! Hahaha, I think we are done with major renovations and we are excited to have a new home that needs no renovations or even paint! Okay maybe an accent wall or two but that's it!
So if you liked this post and want to see more home decorating stuff let me know in the comments. I'd love to share more home decorating ideas of our new home with you.

Thanks for the memories Kyle, Texas! No I'm not crying, okay maybe a little 🙁

Leave a Reply