

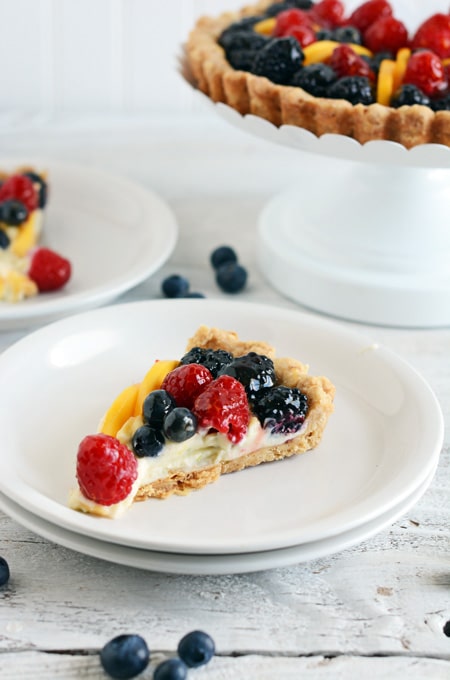
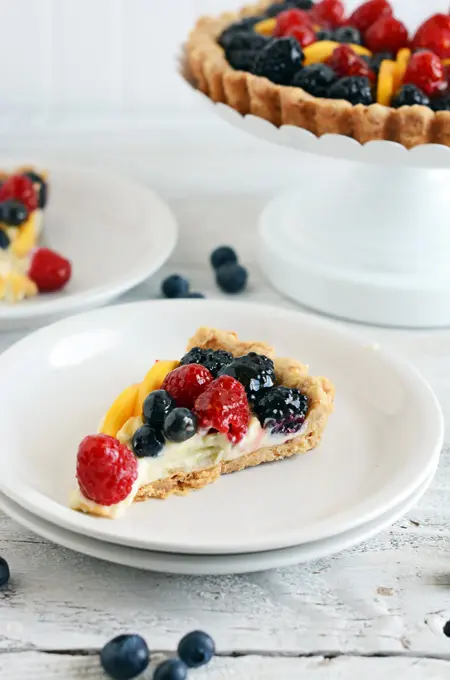
This was a fun recipe to make, and I learned a few things too! When I was little fruit tarts were my favorite dessert. I remember getting excited when my mom said we were going to La Madeline’s to eat because I knew I wanted to get a fruit tart from the bakery case. Then I would eat the fruit and filling and leave the crust. To me it was more of a dish that the yummy filling and topping came in, not meant to eat because it just didn’t taste all that great. But this Fruit Tart is different! The crust is like a dessert all its own. Made by browning the butter to give a warm nutty flavor and baking it until just browned. It could be it’s own cookie all by itself.

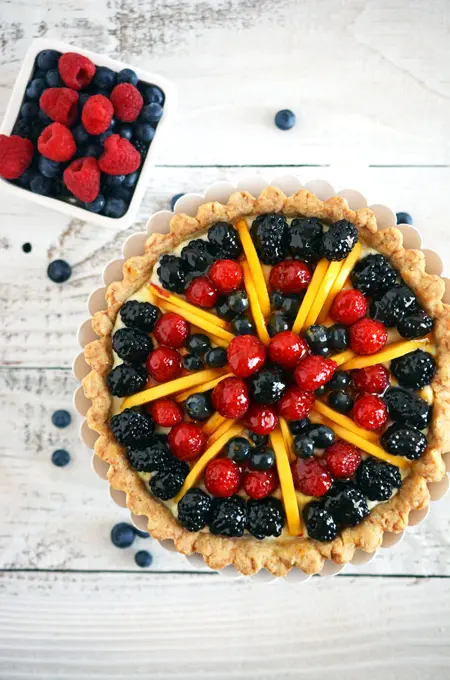
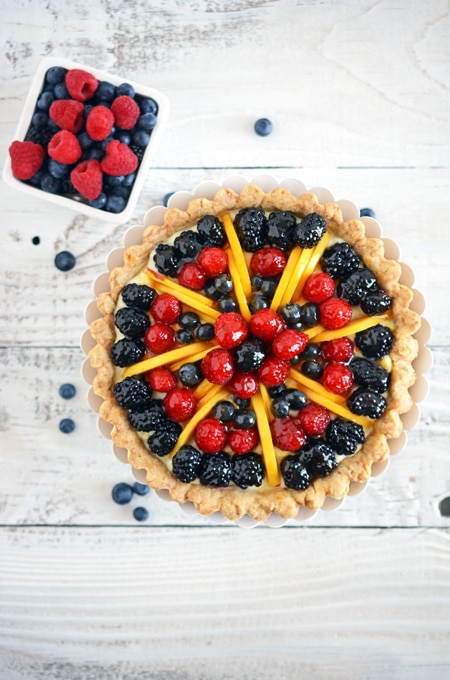
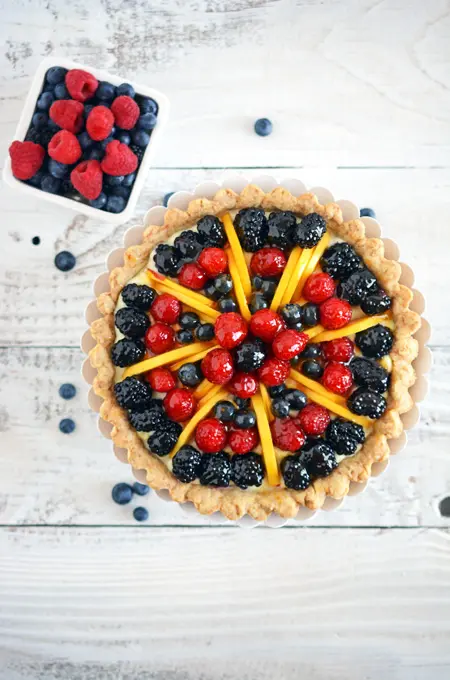
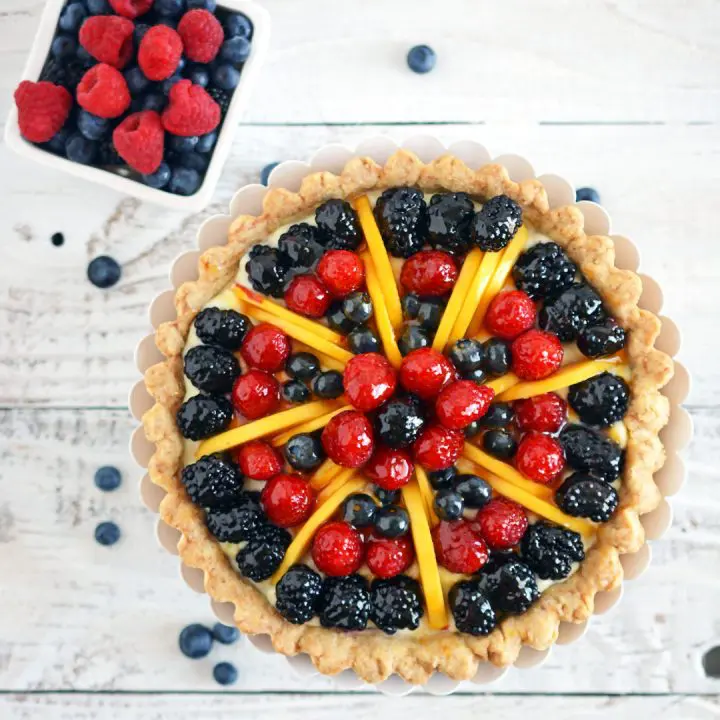
The pictures above show a clever way of decorating your fruit tart, by using the peaches as a slicing guide. A big thank you to the awesome people at Cook’s Illustrated for this neat and useful idea. Here are a few tips and tricks I learned while making this Fruit Tart:
- First things first, the crust. The first one was not up to my standards so I scrapped it and made another one. (It’s so easy it wasn’t a big issue having to remake it.) This time I used one of my 8-inch round cake pans with a piece of parchment paper on the bottom and gently pressed the dough into the tart pan. I found this helped spread the dough out evenly and made for a picture perfect crust!
- This one is VERY IMPORTANT. Use white chocolate baking chips for the filling, not white chocolate chips. To be sure you have white baking chips, look at the list of ingredients. If it lists cocoa butter on the ingredients list this is not what you want. If you use real white chocolate your filling will not set up properly and will be loose.
- Depending on the size of your peaches you may just need 2 or 3 slices for decoration.
- Use a light hand when dabbing on the glaze. If your glaze starts to harden, reheat in the microwave for 5 to 10 seconds to loosen it up.
- You want to be sure you have all your fruit topping prepped and ready to go once you pour the filling in the crust. Once the filling cools it will be too firm to hold the fruit topping properly so you want to be sure you decorate your tart while the filling is still warm.

Don’t let this Fruit Tart’s good looks fool you, this is incredibly easy to make. It only looks like you slaved all day in the kitchen for it. 🙂
If you try this one let me know in the comments below. You may also like: Peach Strawberry Shortcakes, Strawberry Shortcakes and Strawberry Shortcake. Follow me on social media: Facebook, Instagram, and Pinterest.
You May Also Like:
Mixed Berry Sponge Cake
Strawberry Shortcake
Peach Shortcakes
Adapted from Cook’s Illustrated

Fruit Tart
Fresh fruit tart set in a sugar cookie crust and filled with a no-bake white chocolate filling.
Ingredients
SPECIAL TOOLS
- 9-inch Tart Pan with removable bottom
- Baking sheet
- Wire cooling rack
CRUST
- 1 1/3 cups all-purpose flour
- ¼ cup sugar
- 1/8 teaspoon table salt
- 10 tablespoons unsalted butter
- 2 tablespoons water
FRUIT TART
- 2 ripe peaches
- 1/3 cup white baking chips (not white chocolate chips)
- ¼ cup heavy cream
- 1 teaspoon grated lime zest, plus juice
- Pinch of salt
- 6 ounces mascarpone cheese, at room temperature
- 20 ounces total of raspberries, blackberries, and blueberries
- 1/3 cup apricot preserves
Instructions
CRUST
- Adjust an oven rack to the center of the oven and heat oven to 350 degrees. In a bowl add the flour, sugar, and salt and whisk together to combine. In a small stainless steel saucepan, melt the butter over medium high heat, swirling occasionally. Continue to cook stirring and scrapping the bottom of the saucepan with a heatproof spatula, until the butter has browned and smells toasty, about 1 to 3 minutes. Turn off the heat and add the water. When the bubbling eases, transfer butter to the flour mixture and stir well to combine. Place the dough in a 9-inch tart pan with removable bottom and let dough sit until warm, about 10 minutes.
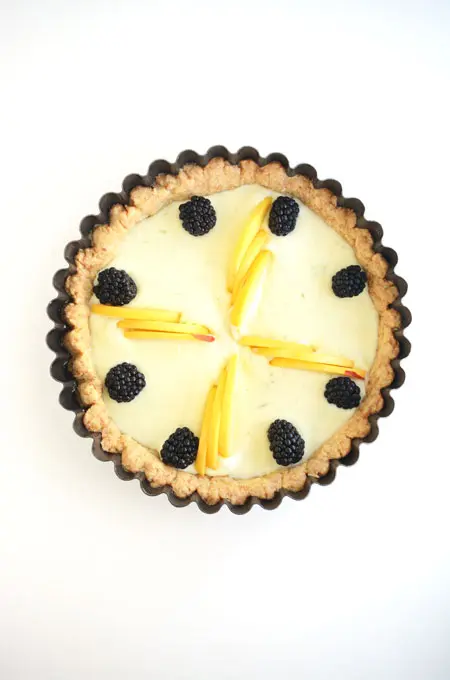
- With your hands, or a 9-inch round cake pan with parchment paper between the bottom of the pan and the dough, gently press and smooth the dough over the bottom and sides of the pan. Place pan on a wire rack set in a rimmed baking sheet and bake until crust is golden brown, about 25 to 30 minutes, rotating pan halfway through baking. Let the crust cool completely, for about 1 hour.
FILLING
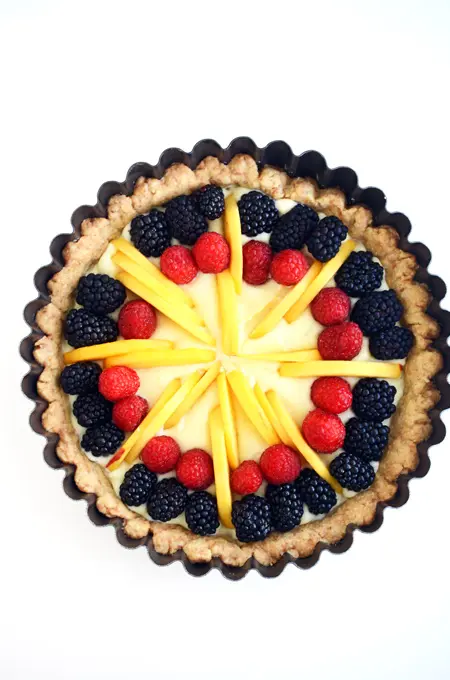
- Place a peach, stem side down on a cutting board. Place knife just to the side of the pit and cut down to remove 1 side of the peach. Repeat this process with the other side of the peach and cut off the remaining 2 sides. Place pieces cut side down and slice into ¼-inch thick slices. Repeat this process with the remaining peach. Chose the best 24 peach slices to decorate the tart.
- In a microwaveable bowl, microwave the baking chips, heavy cream, lime zest and salt, stirring in 10 second intervals until chips are melted, about 30 to 60 seconds. Add one-third of the mascarpone cheese and whisk to combine. Add in the remaining mascarpone cheese and whisk until smooth. Stir in 2 teaspoons lime juice. Transfer the filling to the baked tart shell and spread into an even layer.
- Space 8 blackberries around the outer edge of the tart. Starting from the center, and ending on the right side of each berry, (using the berries as a guide) arrange 8 sets of 2-3 slices of peach in the filling with rounded sides up. You will have to overlap the slices a bit. Arrange the remaining berries in an eye catching pattern between the peach slices covering as much of the filling as possible, keeping the fruit in an even layer.
- Microwave preserves and 1 teaspoon lime juice in a small bowl until it is a liquid consistency, about 20 to 30 seconds. Strain mixture through a fine mesh strainer. With a pastry brush, gently dab the mixture on top of the fruit avoiding the crust. Refrigerate tart for 30 minutes.
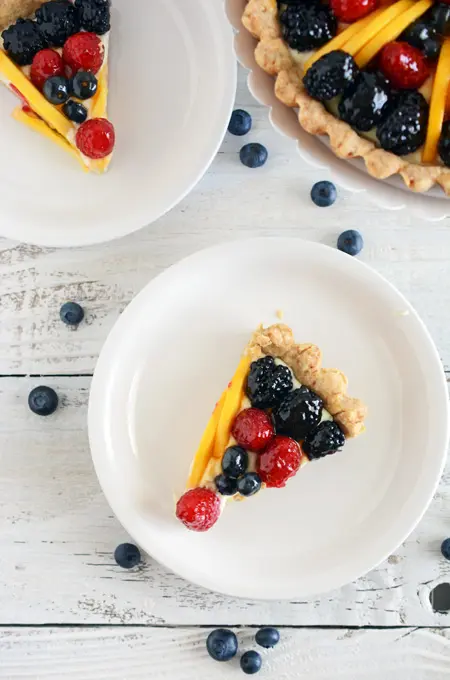
- Remove the outer metal ring from the tart pan and slide a thin metal spatula between the pan bottom to loosen the tart. Carefully slide tart onto a serving platter. Let tart sit at room temperature for about 15 minutes. Using the peaches as a guide, slice tart into wedges and serve.
Notes
Store: Tart can be refrigerated for up to 24 hours. If refrigerated for more than 1 hour, let set at room temperature before serving.
Make Ahead: Cooled crust can be wrapped loosely in plastic wrap and stored at room temperature for up to 24 hours.
Tip: Use a light hand when dabbing the glaze on. If the glaze starts to harden, reheat in the microwave for 5 to 10 seconds to loosen it up.
Nutrition Information:
Yield: 8 Serving Size: 1Amount Per Serving: Calories: 759Total Fat: 35gSaturated Fat: 20gTrans Fat: 0gUnsaturated Fat: 12gCholesterol: 83mgSodium: 541mgCarbohydrates: 108gFiber: 8gSugar: 43gProtein: 11g
*Nutrition information is an estimate and will vary.*
Rick
Monday 25th of December 2023
Great recipe. I've made this every Christmas since 2018, and in spite of the occasional mistake, it was always delicious. This year I forgot to check the ingredients before beginning and therefore did not have any kiwi or peach to use. However, strawberries and blackberries and raspberries and blue berries make a fine berry only tart. Love this recipe. I also did something similar with pears making a pear sauce to substitute for the mascarpone and chocolate and it was tremendously delightful. Good luck.
Mary
Wednesday 27th of December 2023
Thank you!
MQBowen
Sunday 14th of July 2019
Easy to make and delicious!