
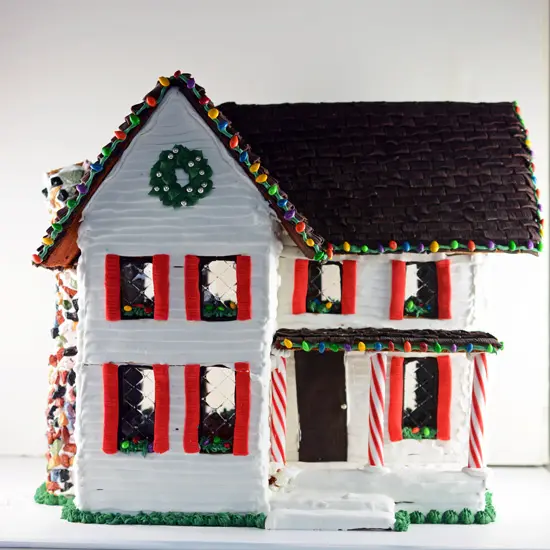
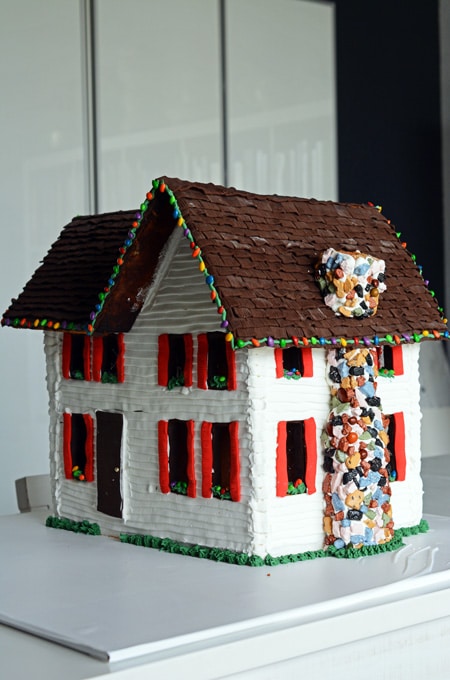
Gingerbread Farmhouse
I’m so excited to share my Gingerbread Farmhouse with you! This gingerbread house has been months in the making. But absolutely worth it in the end.

And I hope it’ll inspire you to create your own gingerbread house this year or in the future.

Check out the details on how it all came together and watch the video below.


Template
First things first, find a template. I found my template in the book The Gingerbread Architect. They’re many unique designs in this book that I highly recommend if you want to take your gingerbread house skills up a notch.
Luckily I still had the template all cut out and ready to go from the first time I did this gingerbread house. I had my husband draw up the dimensions given in the book and used some file folders to create a nice and sturdy template.
Then, I used those same ones this year, but went ahead and laminated them so they would be easy to clean and will hold up for the next time I want to make this Gingerbread Farmhouse.
Base
Another important tip is to find a sturdy base for a house this size. Use some plywood cut 2 foot by 2 foot.
Purchasing a full sized baking sheet if you don’t own one. It’ll be very helpful for creating a gingerbread house of this size. The back of this house is all one cookie piece and won’t fit on a half sized baking sheet.
Cookie Dough
Roll out the cookie dough on parchment paper, then once you cut out your cookie pieces, take the parchment paper and slide it on to the back side of the baking sheet. This way you don’t have to pick up the piece and distort it.
This gingerbread house took about 4 or 5 batches of the cookie dough recipe below. There was left over dough, but I think it’s always good to have a little extra left over, in case any pieces break. One of mine did!
Royal Icing
I made several batches of royal icing as well. I usually just made a half batch of icing at a time. The royal icing will only keep for so long. Just a few hours or so. But if you need to take a break for a couple of hours just cover the icing with a damp paper towel and this should keep it from drying out for a few hours.


To give it that “shiplap” look I used a piping bag fitted with a Wilton tip 48.

Trimming
We (my husband and I) did have to manipulate the cookie pieces a bit, but that seems to be typical when making a gingerbread house. Baking and the decor can sometimes get in the way of things fitting perfectly so just remember that. And know you may need to make some adjustments during the building process.
Decorating
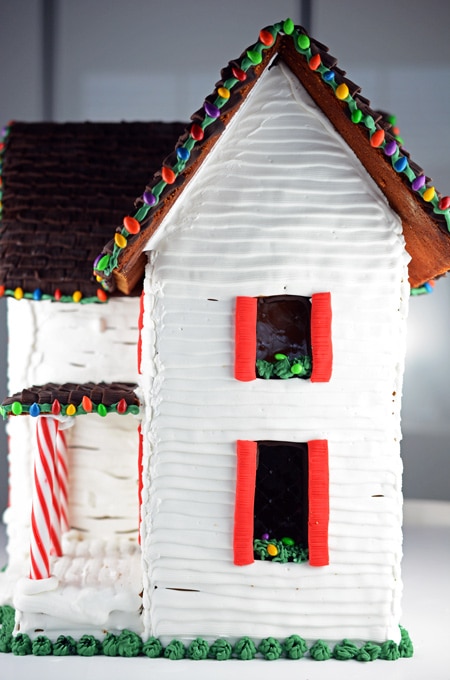
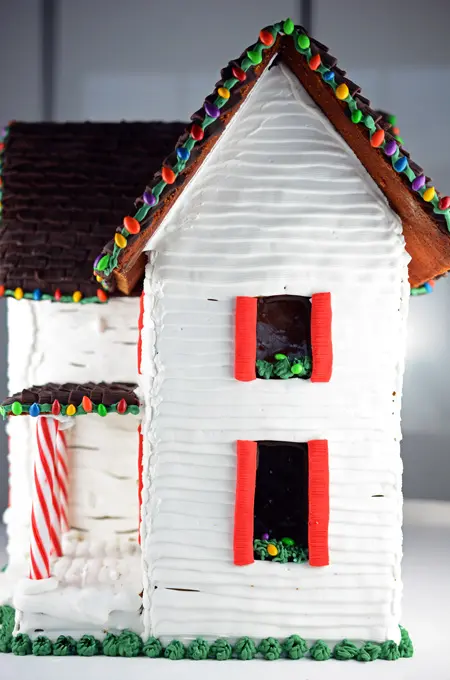
It’s also important to note that I decorated the outside pieces before putting the house together, it just feels easier that way.
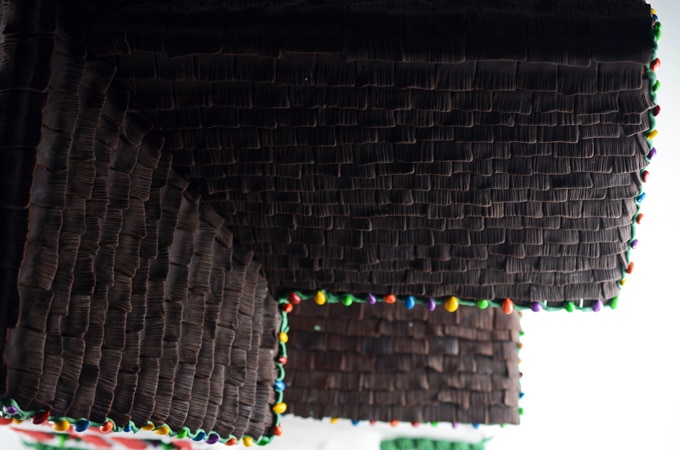

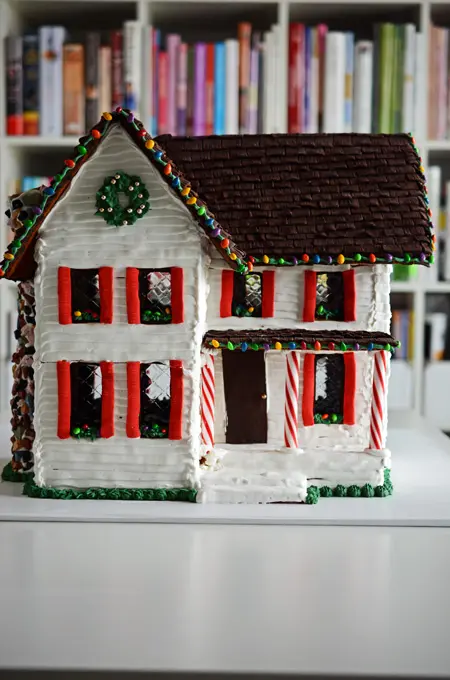
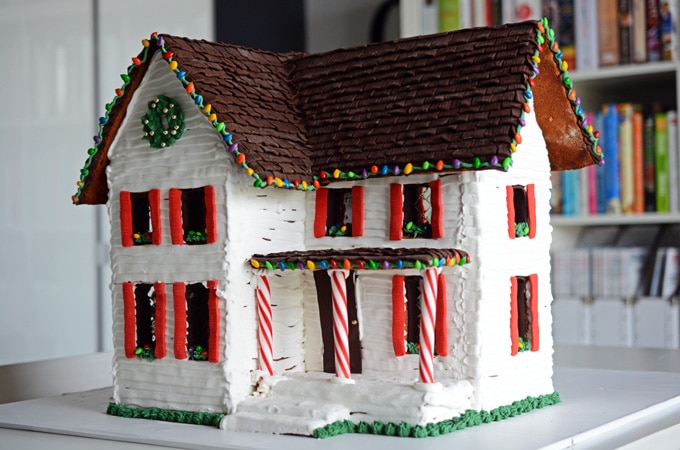
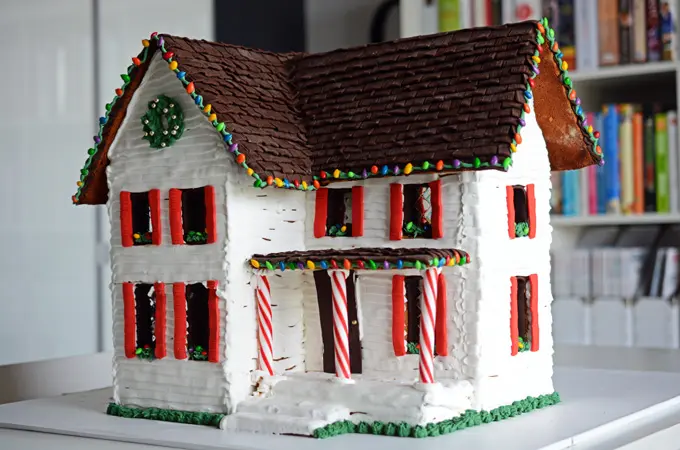
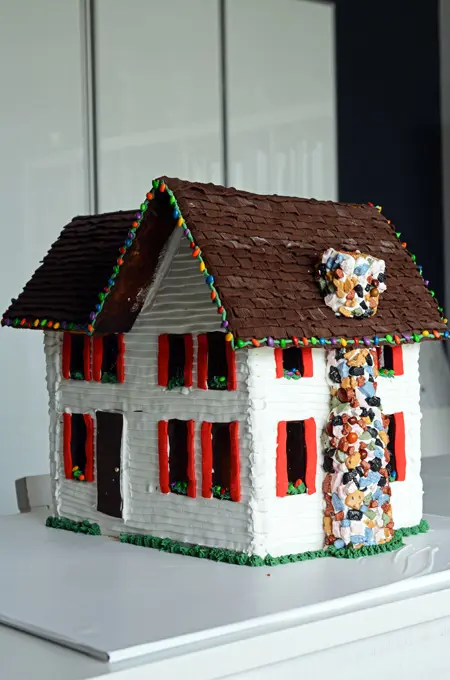
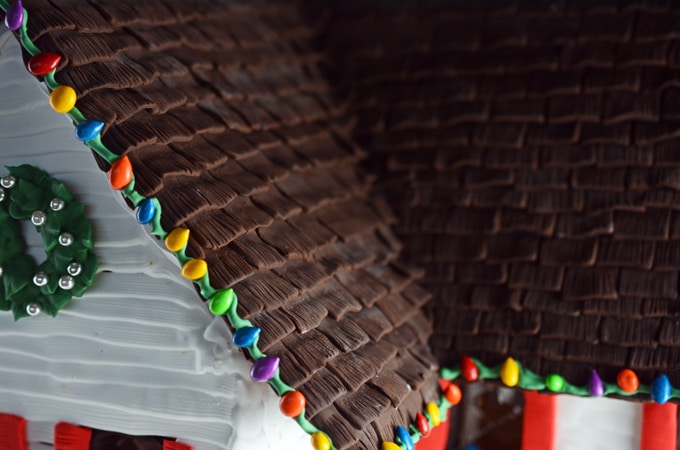
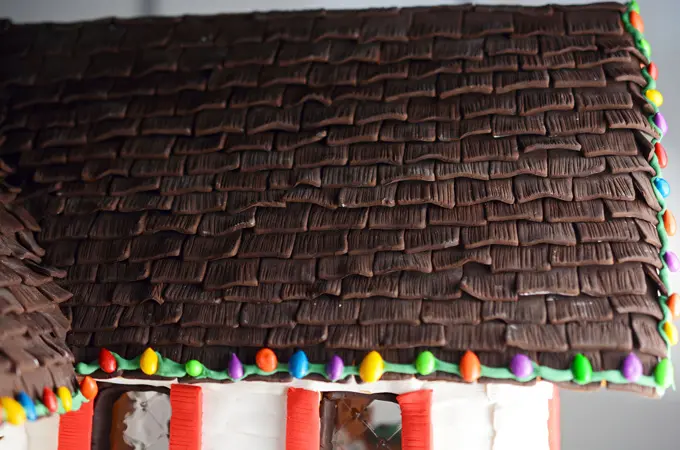
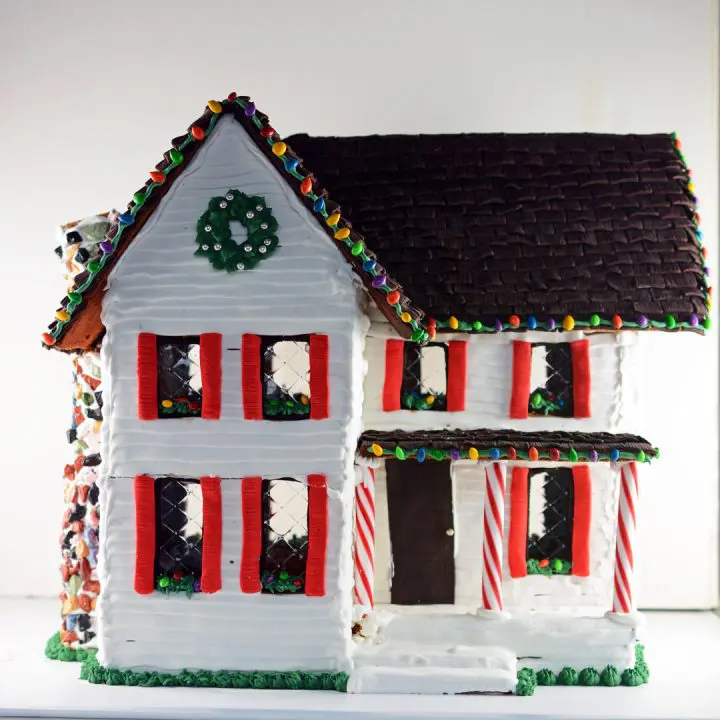
Oh this roof!!! It’s probably my favorite part but the most tedious and time consuming, but it’s worth it in the end. At one point I said maybe I should just use some shredded wheat cereal for this? But then I thought NO WAY! It’s totally worth the time spent.
For the record, this roof took about 16 hours to make, not including breaks. So just be prepared if you are planning to do the same. Better yet maybe find a helper and you can knock this out in half the time. I used Satin Ice Fondant in chocolate for the roof tiles, and used a small square gumpaste cutter to make the squares. I then used an Xacto knife
for the detail.

My Gingerbread House Inspiration
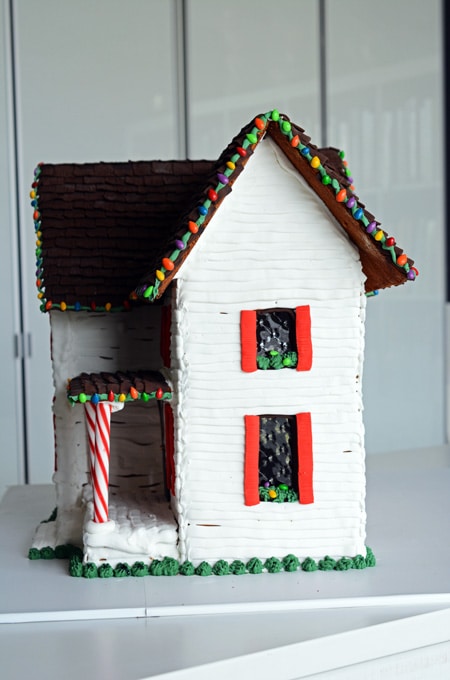
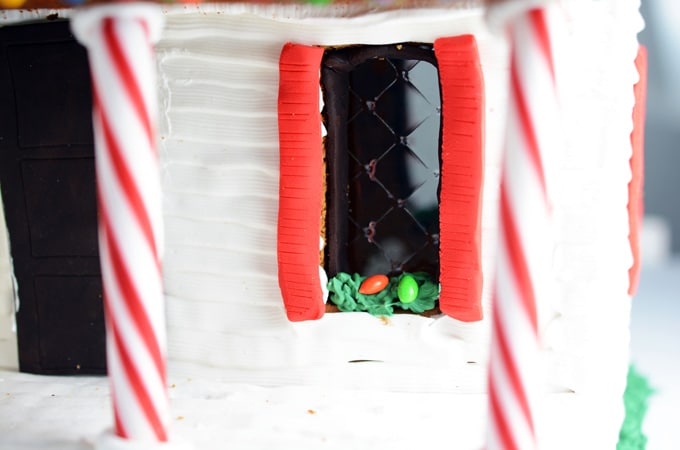
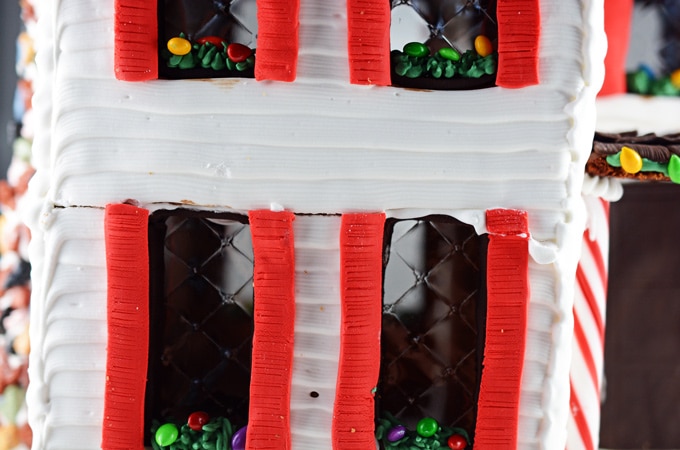
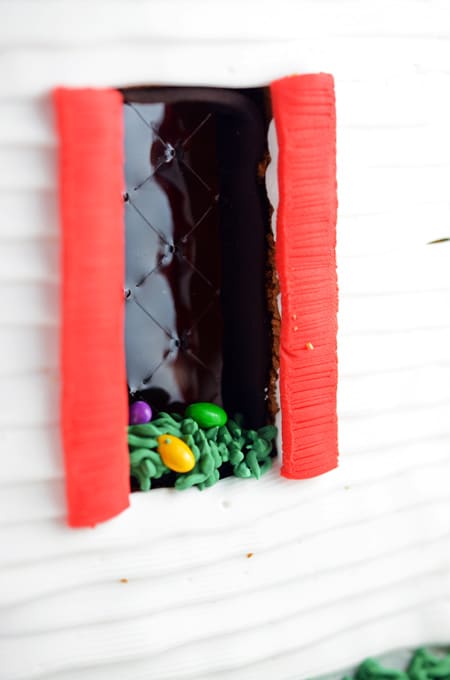
Here is a great idea that I saw from one of my favorite YouTubers Ann Reardon from How to Cook That in one of her gingerbread house videos. I loved how she lined the insides of her window seals, so I did the same! I think it gives it a nice finished look.
Another tip I took from Ann was how she cut the windows, but left them intact to bake with the cookie, then just a few minutes before the cookie was done, she took the cookie out and took out the window pieces. Then continued to bake the cookie until it was finished. This helps keep the windows nice and straight, instead of curved on the edges.
I used a Clay Extruder to make the shutters for the windows and then gave them a little detail with the Xacto knife. Then used a little water applied with a small paint brush to attach them.
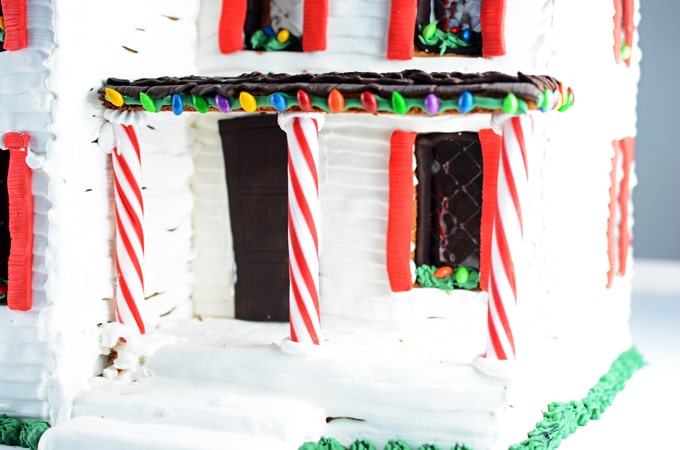

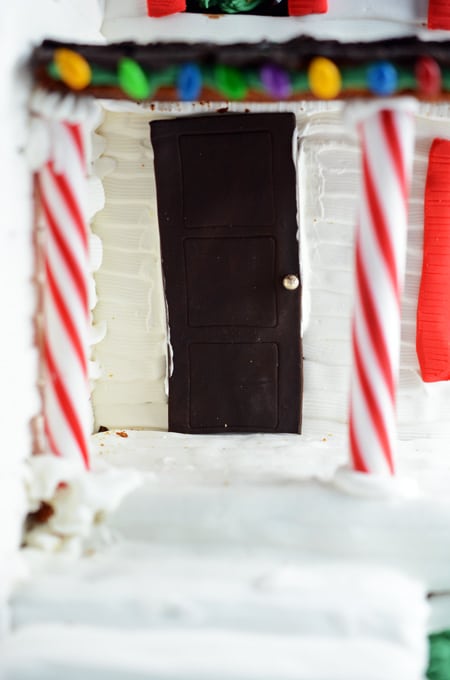
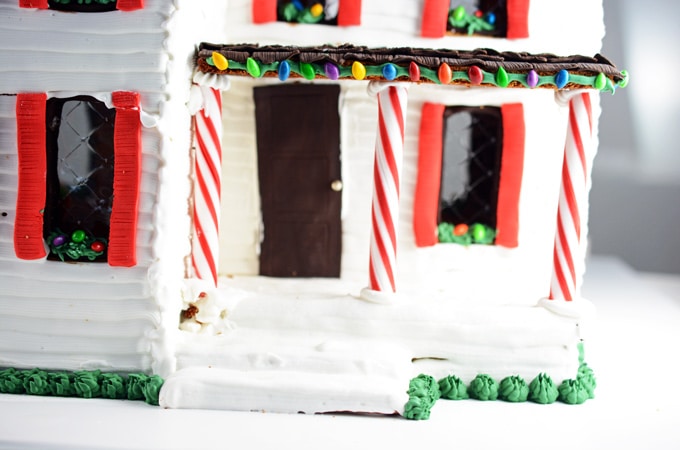
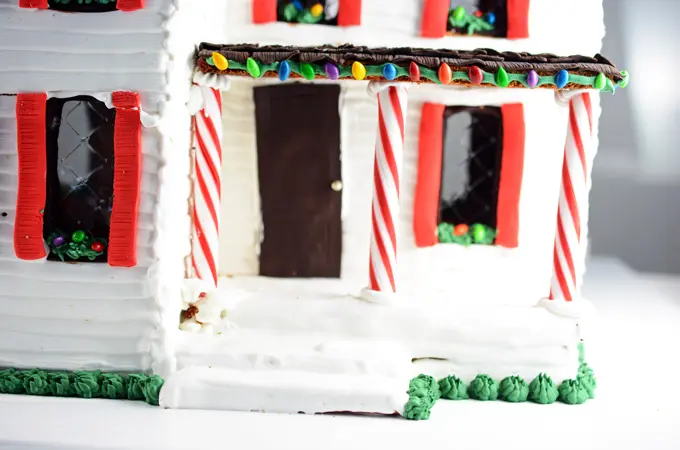
I used candy cane sticks to hold up the front porch roof. The Christmas lights were done by using green colored royal icing and chocolate covered sunflower seeds. A Wilton tip 5
was used for the light string.

Doors
For the front (and back) door I used the same chocolate Satin Ice I used for the roof tiles, and used a larger square gumpaste cutter to make the detail. Using the top end of my small paint brush I made an indentation for the door knob and used a little water to stick the door knob on. For the door knob I used silver dragees.

Breakage (it happens)
As I mentioned before I had a piece break, and this was the piece! Right in the front, but at least it only broke into two pieces and was an easy fix by using some icing to stick it back together. If you have any pieces break be sure to wait at least 24 hours before using, so the icing can have time to dry.
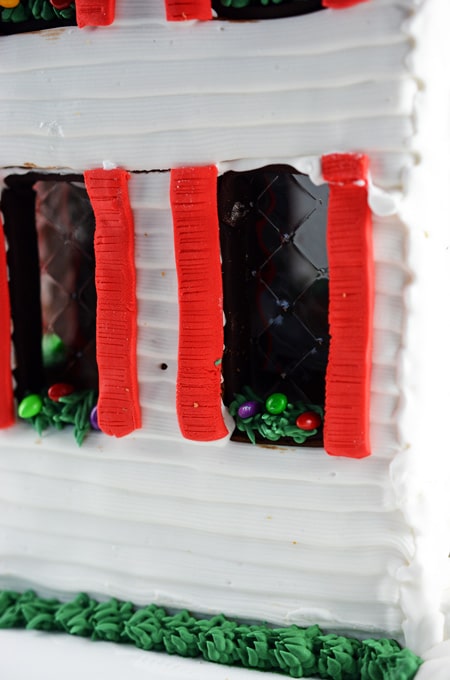
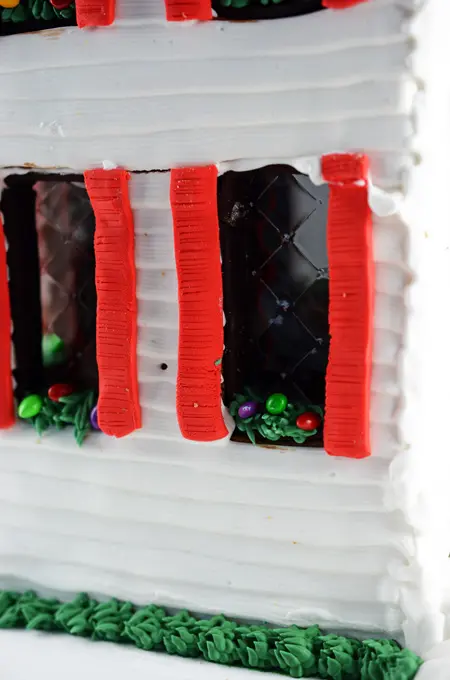
The first time I did this house I used some melted candy and isomalt for the windows but this time I wanted to use these gelatin sheets. I just cut them to size and used some royal icing to attach it to the walls.
Once the house was finally up and things were starting to come together, I decided to do a little greenery around the house to give it that finishing touch! I used a Wilton tip 233 for the greenery.

Roof
This roof! By far my favorite part if you hadn’t noticed. I could stare at it all day long. Probably because I know the labor of love that went into it!

You can add some ground up coconut or powdered sugar with some edible glitter to the top of the house to give it something extra.
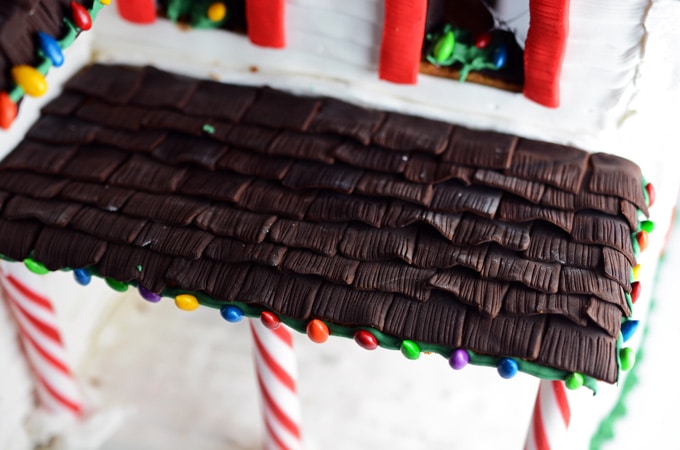

Front porch roof shot!
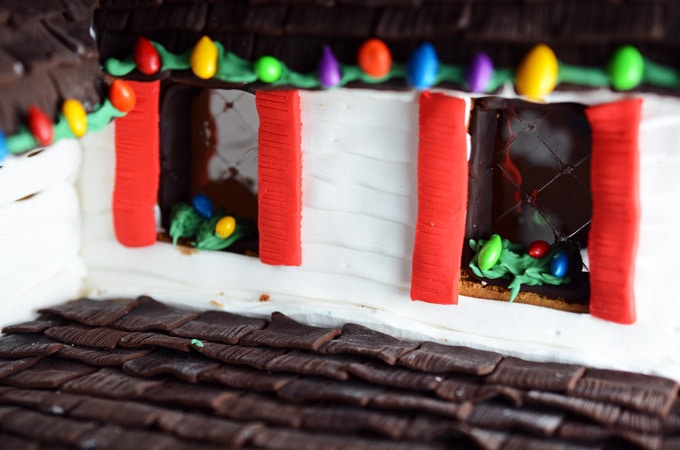
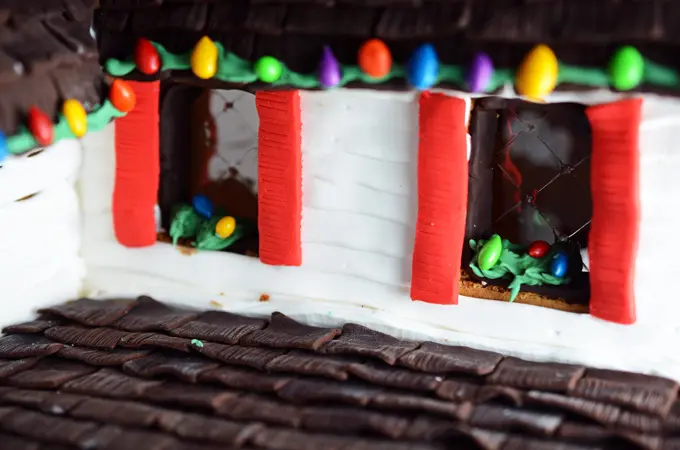
I had some left over green royal icing so I made little flower beds in the windows and sprinkled some chocolate covered sunflower seeds on top, A.K.A Christmas lights!
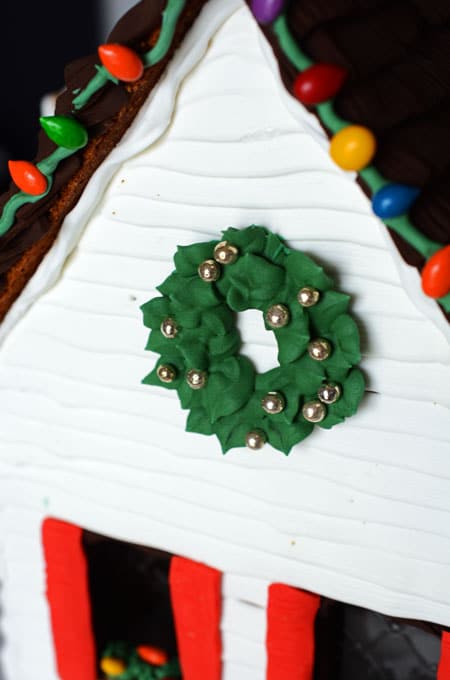

Christmas Wreath
My Christmas wreath! It’s so cute. I used a Wilton tip 67 and placed the silver dragees around it. Then let it dry for 24 hours before placing it on the house with some royal icing.
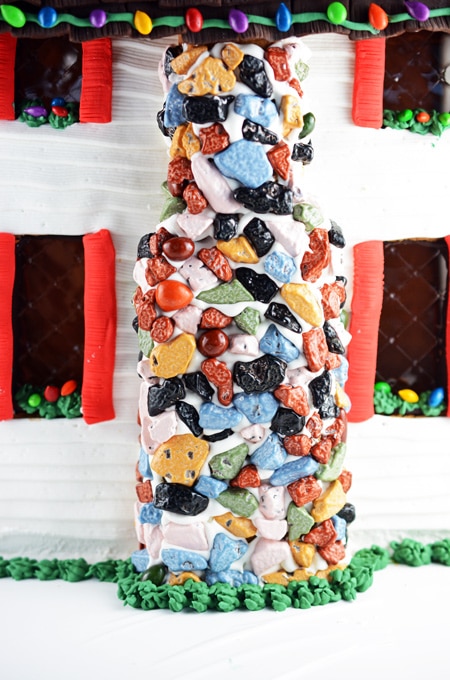
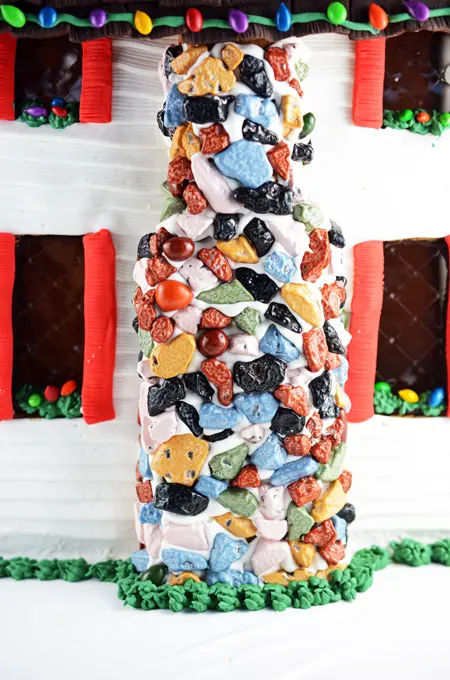
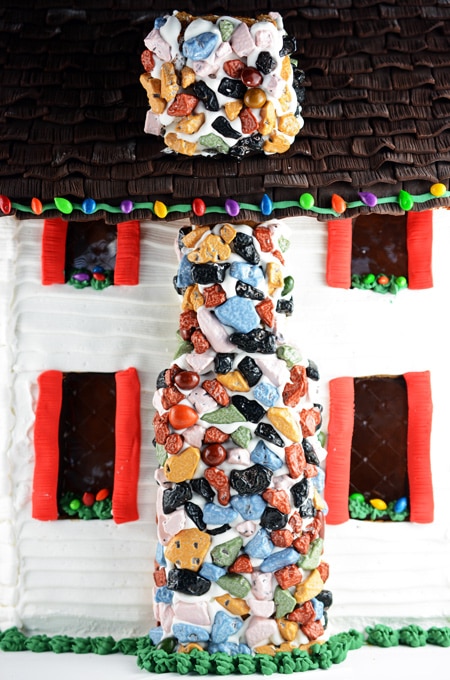
So the roof is my favorite part of this house, but the chimney decorating has to be the tastiest! I used chocolate rock candy, try not to eat them all.

The first time I did this house it was for a gingerbread house contest at my work so I went all out with it.
If you want to add more decorations around the board like I did the first time, check out some of these videos that helped me make the cute reindeer, the little fat Santa, and the pine trees!

I hope this has been an inspiring post. If you have any questions please don’t hesitate to ask. You can follow me on: Facebook, Instagram, and Pinterest.

Gingerbread Dough and Royal Icing
Homemade Gingerbread Farmhouse made with royal icing, fondant, and candy
Ingredients
DOUGH
- 1 cup vegetable shortening
- 1 cup granulated sugar
- 2 teaspoons baking powder
- 2 teaspoons ground ginger
- 1 teaspoon baking soda
- 1 teaspoon table salt
- 1 teaspoon ground cinnamon
- 1/2 teaspoon ground cloves
- 1 cup dark molasses (not light or blackstrap)
- 2 large eggs
- 2 tablespoons white vinegar
- 5 cups unbleached all-purpose flour
ROYAL ICING
- 3 tablespoons meringue powder
- 1/2 cup warm water
- 16 ounces (4 1/2 cups) powdered sugar
- 1 teaspoon vanilla extract
Instructions
DOUGH
- In the bowl of a large electric mixer fitted with the paddle attachment, combine the shortening and sugar on medium-high speed until well combined.
- Add the baking powder, ginger, baking soda, salt, cinnamon and cloves and mix until incorporated.
- Add the molasses, eggs and vinegar and beat until smooth, scraping down the sides of the bowl as necessary.
- On low speed, add the flour 1 cup at a time, mix until smooth. Scrape dough onto a sheet of plastic wrap and press into a rough square. Wrap tightly and refrigerate for at least 3 hours or up to 3 days. Dough can be frozen and thawed in the refrigerator.
- Heat oven to 375 degrees. Roll out the dough onto a sheet of parchment paper. Cut the dough using your templates. Place the parchment paper with cookie pieces on the back side of your baking sheet and bake cookie pieces for 15 to 20 minutes. You will need to adjust your baking time according to the size of your cookie pieces. Smaller pieces will be baked before 15 minutes.
- Remove cookie pieces from the oven and let cool on the pan for 5 minutes. Remove the parchment paper with the cookie pieces and let cool completely on the counter.
- Once the cookie pieces have cooled you can began to decorate and build your gingerbread house.
ROYAL ICING
- In the bowl of an electric mixer fitted with the whisk attachment, mix together the meringue power and warm water until soft peaks form.
- Add the powdered sugar and vanilla and beat until shiny and smooth and has increased in size, about 6 to 8 minutes. You may need to add a tablespoon or some of extra water to get the consistency you desire. Use the icing immediately or cover with a damp paper towel or the icing will begin to harden.
Did you make this recipe? I’d love to see it! Tag The Cake Chica on Instagram @thecakechica1 #thecakechica1
Lori
Friday 7th of August 2020
It must be so patient to finish it! I hope I could make it soon...to end thís year 2020 soon. OMG!
Callie
Tuesday 7th of July 2020
Omg.. I have to try this very soon!!
Susan Dubose
Thursday 11th of June 2020
We loved this cabin. The fireplace was so nice. We will definitely be coming back. Thank you so much for letting us enjoy this beautiful place.
Erika
Wednesday 4th of March 2020
Growing up on a farm, I am in love with your barn! Of course, graham cracker houses can be made for any event, love it!